- Joined
- Mar 23, 2010
- Messages
- 44 (0.01/day)
Hi guys, I'm 8-Bit Builder. I've been doing this for about 10 years now and just starting up my newest build. I build cases in the an old pixelated style as you will see shortly  .
.
I've been wanting to build a Metroid computer case for about 7 years now but plastic was always too expensive ($1 a cube) compared to .08 cents a cube of wood which is what all my previous PC mods are made out of. Once I found out how accessible 3D printers were, I jumped head first and picked up a Maker Select. After a few months of non-stop printing it dawned on me that I could make the Metroid computer case I've been thinking about for such a long time. Normally I spend about 200-250$ in wood/paint but 3D printing plastic is really cheap in comparison, about $80 in plastic. I'm also planning on having a really cool light sequence on the inside of the case to get the red effect of the in game Metroid. Being my first foray into a 3D printed computer I'm sure I'll run into issues but look forward to overcoming them. This will also be my first time with programmable LED's so it will be a learning experience on that front also!
Expectations:
A strong gaming pc
100s' of LEDs programmed inside for a light show
95% 3D printed
Components:
ASUS Strix X370-I mini ITX board


Asus Geforce GTX 1080 Turbo card

16 GB of ram
1TB SSD
Asus Tinkerboard with a few hundred LEDs programmed in a cool light show
And heres some photos of my past work:
Airship from Final Fantasy

Link from Zelda

And a 3D model I've printed, Calcifer from Howl's Moving Castle

Ok on to the build! This is what I'm building (modeled in 123Design/Tinkercad):
Metroid from ...Metroid!

The modeled case

My first idea of how the components will fit

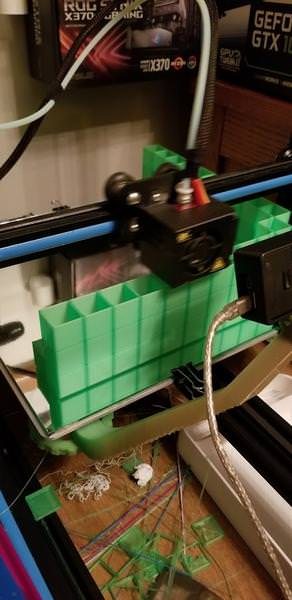
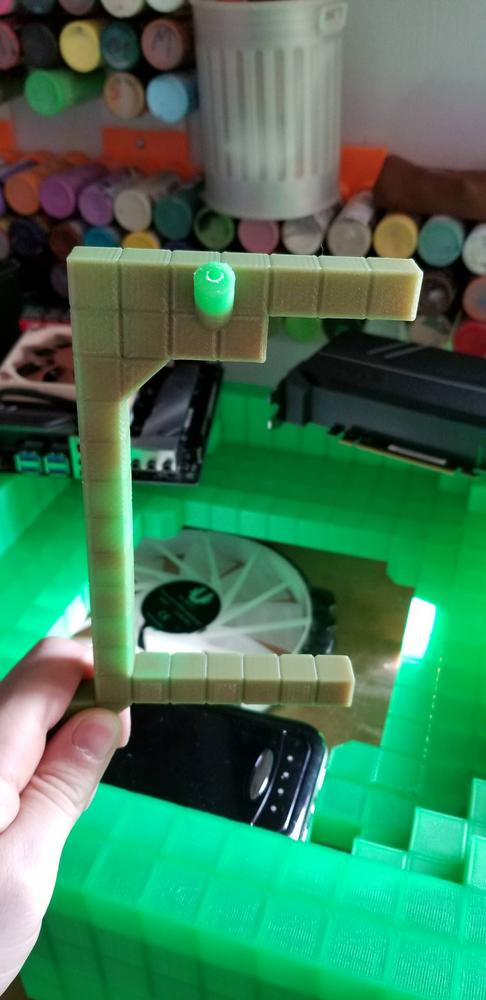
I started printing and doing test pieces to make sure I had it down pretty good and to test strength of the frame. Needless to say, it holds a LOT of weight (I weigh 185lbs)

I've got the printer going in earnest on the final design now. The printer will be going non-stop for about 2-3 weeks to get all the pieces done. I'll be back soon though with photos of attaching sections together with glue and 3D pen welding!
If you have any questions or ideas, feel free to ask
.I've been wanting to build a Metroid computer case for about 7 years now but plastic was always too expensive ($1 a cube) compared to .08 cents a cube of wood which is what all my previous PC mods are made out of. Once I found out how accessible 3D printers were, I jumped head first and picked up a Maker Select. After a few months of non-stop printing it dawned on me that I could make the Metroid computer case I've been thinking about for such a long time. Normally I spend about 200-250$ in wood/paint but 3D printing plastic is really cheap in comparison, about $80 in plastic. I'm also planning on having a really cool light sequence on the inside of the case to get the red effect of the in game Metroid. Being my first foray into a 3D printed computer I'm sure I'll run into issues but look forward to overcoming them. This will also be my first time with programmable LED's so it will be a learning experience on that front also!
Expectations:
A strong gaming pc
100s' of LEDs programmed inside for a light show
95% 3D printed
Components:
ASUS Strix X370-I mini ITX board
Asus Geforce GTX 1080 Turbo card
16 GB of ram
1TB SSD
Asus Tinkerboard with a few hundred LEDs programmed in a cool light show
And heres some photos of my past work:
Airship from Final Fantasy
Link from Zelda
And a 3D model I've printed, Calcifer from Howl's Moving Castle
Ok on to the build! This is what I'm building (modeled in 123Design/Tinkercad):
Metroid from ...Metroid!
The modeled case
My first idea of how the components will fit
I started printing and doing test pieces to make sure I had it down pretty good and to test strength of the frame. Needless to say, it holds a LOT of weight (I weigh 185lbs)
I've got the printer going in earnest on the final design now. The printer will be going non-stop for about 2-3 weeks to get all the pieces done. I'll be back soon though with photos of attaching sections together with glue and 3D pen welding!
If you have any questions or ideas, feel free to ask
Last edited: