Long post, but quick build I had to get done quickly and in time why waiting on parts for other builds, project titled tattoo flash.
First up a big thank you to the sponsors of the build.


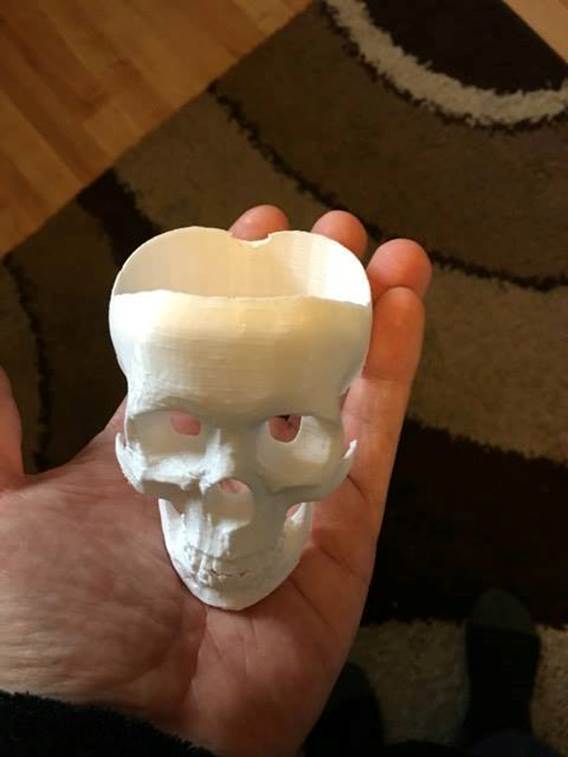
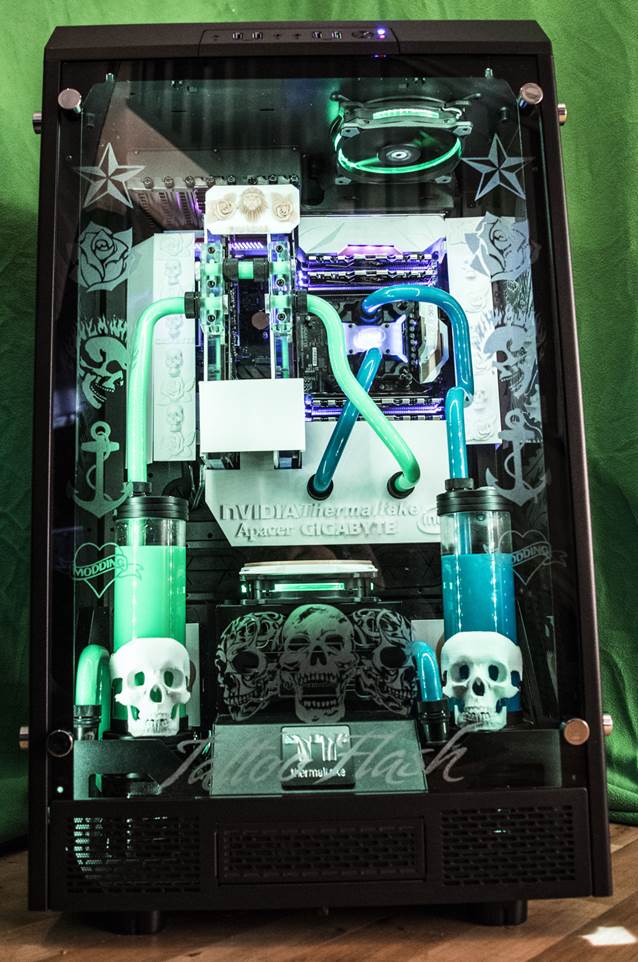
Simple object of the build was to get a tattoo flash like theme and have two separate loops, having access to the Dremel 3d40 3dprinter two was going to enable me to hide the wires as best as I could too, and as the case was the Thermaltake Tower 900 this was going to be a challenge I wanted.


Thermaltake also sent over the watercooling components and the PSU for me to get this build done.
Second up was the motherboard, I wanted to make sure this tied in to what I was trying to do so step up the gigabyte X99 ultra Gaming that will be used with the Intel 5960X.


The other items in the list were 2x nvidia GPU’s which I had laying around from a previous project so it was just the SSD, M2 and memory to add, Lucky for me Apacer stepped up with these.

Apacer sent me a very nice care package consisting of a Apacer M2 z280 and 2x AS340 SSD’s to cover the storage they also sent 4x 3000mhz DDR4 Panther gold sticks.
Anyway enough of the hardware let us just move straight onto the build and what I have done
First up a big thank you to the sponsors of the build.
Simple object of the build was to get a tattoo flash like theme and have two separate loops, having access to the Dremel 3d40 3dprinter two was going to enable me to hide the wires as best as I could too, and as the case was the Thermaltake Tower 900 this was going to be a challenge I wanted.
Thermaltake also sent over the watercooling components and the PSU for me to get this build done.
Second up was the motherboard, I wanted to make sure this tied in to what I was trying to do so step up the gigabyte X99 ultra Gaming that will be used with the Intel 5960X.
The other items in the list were 2x nvidia GPU’s which I had laying around from a previous project so it was just the SSD, M2 and memory to add, Lucky for me Apacer stepped up with these.
Apacer sent me a very nice care package consisting of a Apacer M2 z280 and 2x AS340 SSD’s to cover the storage they also sent 4x 3000mhz DDR4 Panther gold sticks.
Anyway enough of the hardware let us just move straight onto the build and what I have done