• Welcome to TechPowerUp Forums, Guest! Please check out our forum guidelines for info related to our community.
  • The forums have been upgraded with support for dark mode. By default it will follow the setting on your system/browser. You may override it by scrolling to the end of the page and clicking the gears icon.

The "POWER CELL" Custom Scratch Built Case.

Joined
Jun 22, 2015
Messages
75 (0.02/day)
Location
Canberra AUS
9J7lIDC.jpg


PC Build Specs:

Height up to 700mm.
Width: up to 400mm.
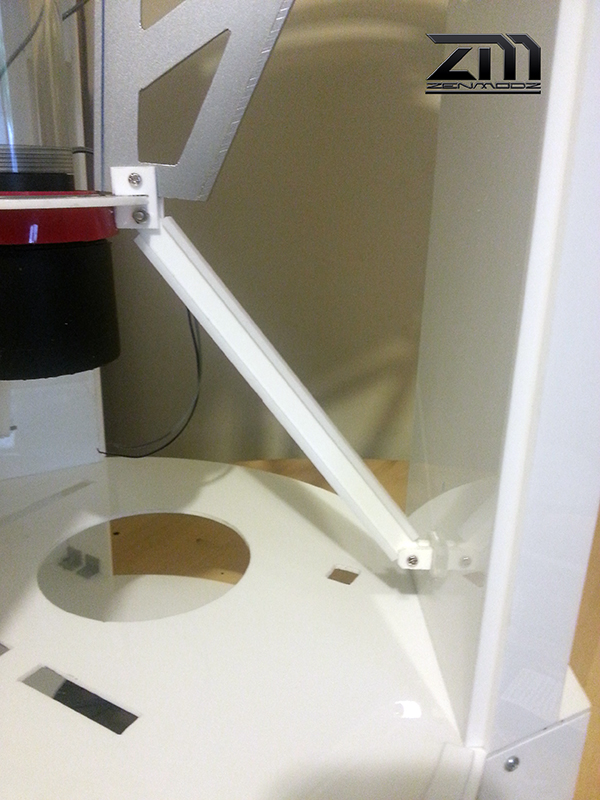
Case Shape: cylinder. One base, One top, 3 Pillars, 3 clear windows. Being build ATM.
Case Colour: Grayish/white, with some black & red.
MoBo: Asus H97I-PLUS Mini ITX LGA1150 Motherboard That will mounted to the bottom and the case.
GPU: ASUS TURBO GEFORCE GTX 960 OC Edition 2GB-GDDR5. Staying air cooled, This will be mounted to one of the 3 case pillars.
Running on a PCIe cable. The TURBO GTX 960 with the exhaust out the bottom of the case,
And the intake for the TURBO GTX 960 will come from the pillar it is mounted to.
CPU: 4690k
RAM: ?
PSU: Still needed, Will be mounted in the base.
Water Cooling, One custom 60mm x 400mm res. (3x 120 slim rads, CPU block, 1x Pump, fittings.) ( 6x90mm W 20x20mm H,D clear blocks running 9x5mm Round 500mm L tubing.
that will be on the out side of the case as part of the loop. being built ATM)
Lighting: Black Light, and some white LED's.
Fluid: Neon Green.
Loop fittings:


Playing catch up. this build have been in progress for about 5 weeks.

Hi My name Is Ken Byrnes I'm 46, I live in Canberra AUS. I'm only new to the Modding world of custom PC building. I have build 2 or 3 normal PC's over the years, But have only just got into making then stand out from the normal every day PC.

I work as a spray painter 5 days a week for a sign shop. I have always loved any and all kinds of art. I do all my own photo-shop work. I have also been a Pro game Texture artist and have a diploma in game design as well as being Pro Airbrush artist. But I no longer do a lot of that any more just don't have the time. I'm also into building cars well when I say building I'm starting to restore a 1970 VG valiant 2 door hardtop. That would be a 68 or 69 Dodge Dart in the USA.

You can find some of my art work here of what i have done in the past. http://zenator.wix.com/zenator-art


Like I was saying I'm new to modding. and would like to make it a full time job. I'm planing to buy a small CNC router to start making custom PC's as well as custom parts. But first I felt I needed to show what kind to PC's I can build.

Why did I start PC modding ? Mostly because I have all ways liked playing games and building PC's and with all my art skills, and now leaning how to use a CNC router at work, I think maybe I have found some way to bring out my art

and have some fun at the same time and turn it into my life.

You can also find my first ever PC case mod here, Fallout 4 case mod.

http://forums.overcl...d.php?t=1149976

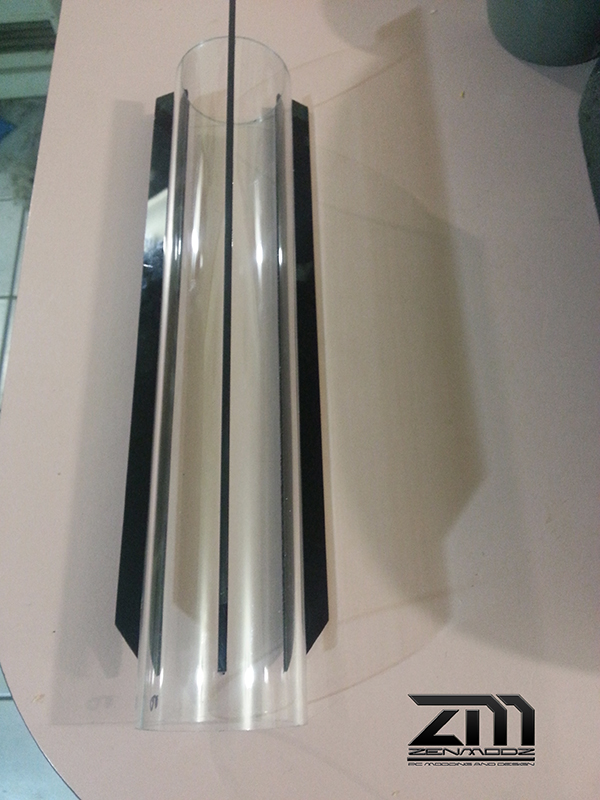
To start off with I'm doing the out side water blocks/res there will be 6 in all three at the top and three at the bottom. All 6 will be part of the cooling loop.

They will be fitted to the out side of the case, The three on top will be linked the one's on the bottom. So one top one will link to one bottom one, with 3x 5mm clear tubes and so on. on the back of each block will be one fitting that go's to a stand 1/2 mantel bent loop. back to one of the other blocks and keeps going. Lets just call the outer blocks (Loop rails.)

So below I have started a quick step by step.
for the blocks, after ill be adding the 3x 5mm tubes to the 2x blocks to make one (Loop Rail.) and this will be done 3 times.

NvcSAfu.jpg

BtC7nqF.jpg

8dgv1Qw.jpg

vs7dRSf.jpg


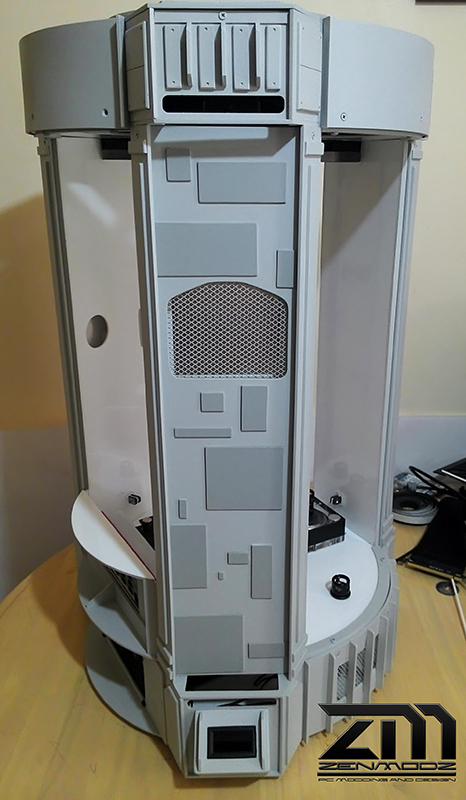
I have been going is working on the Motherboard armor and the back plate IO shield that will lock onto the Motherboard armor, Still need to make a hole for the CPU. but still not sure what CPU block will be used.


H4lWRm7.jpg

oEiGobF.jpg

ALm4Biw.jpg

UNrGAwJ.jpg

x1tYwps.jpg


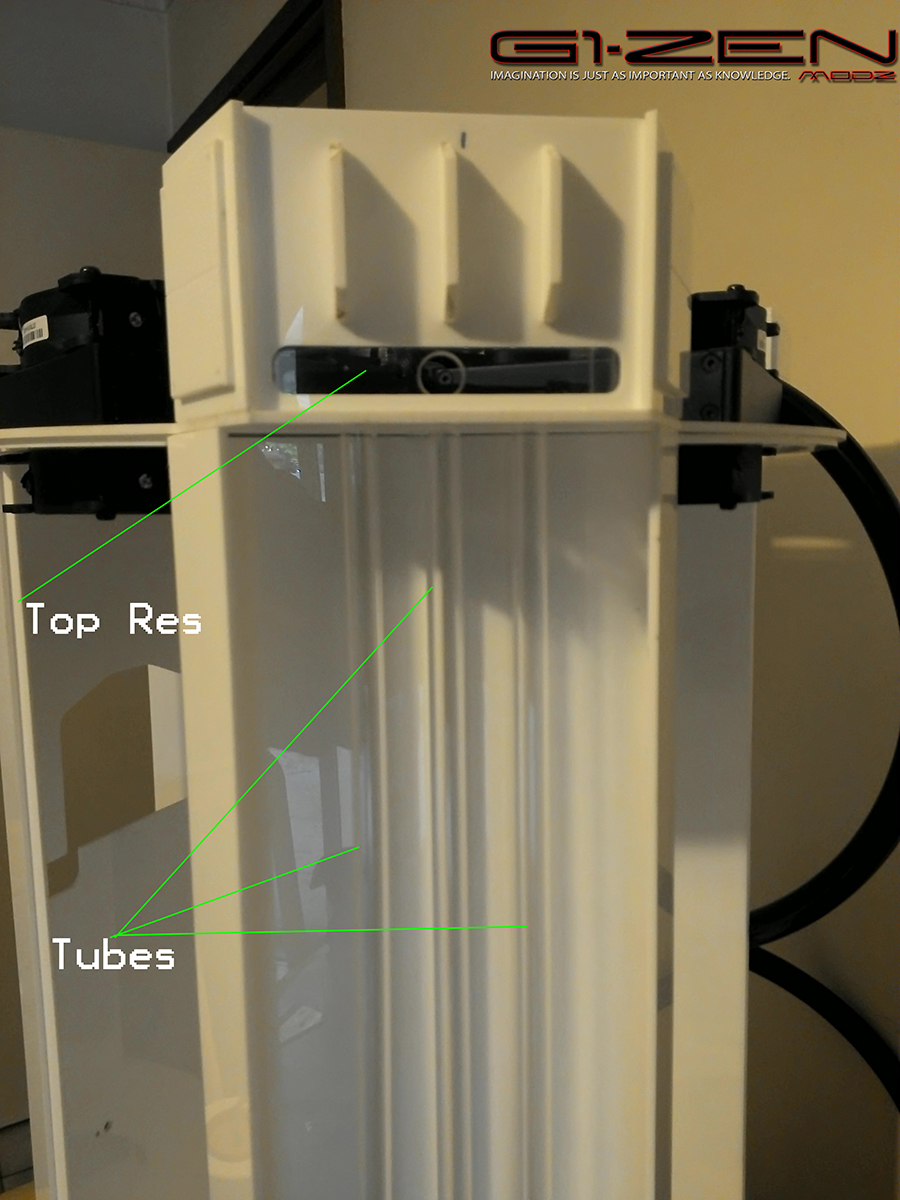
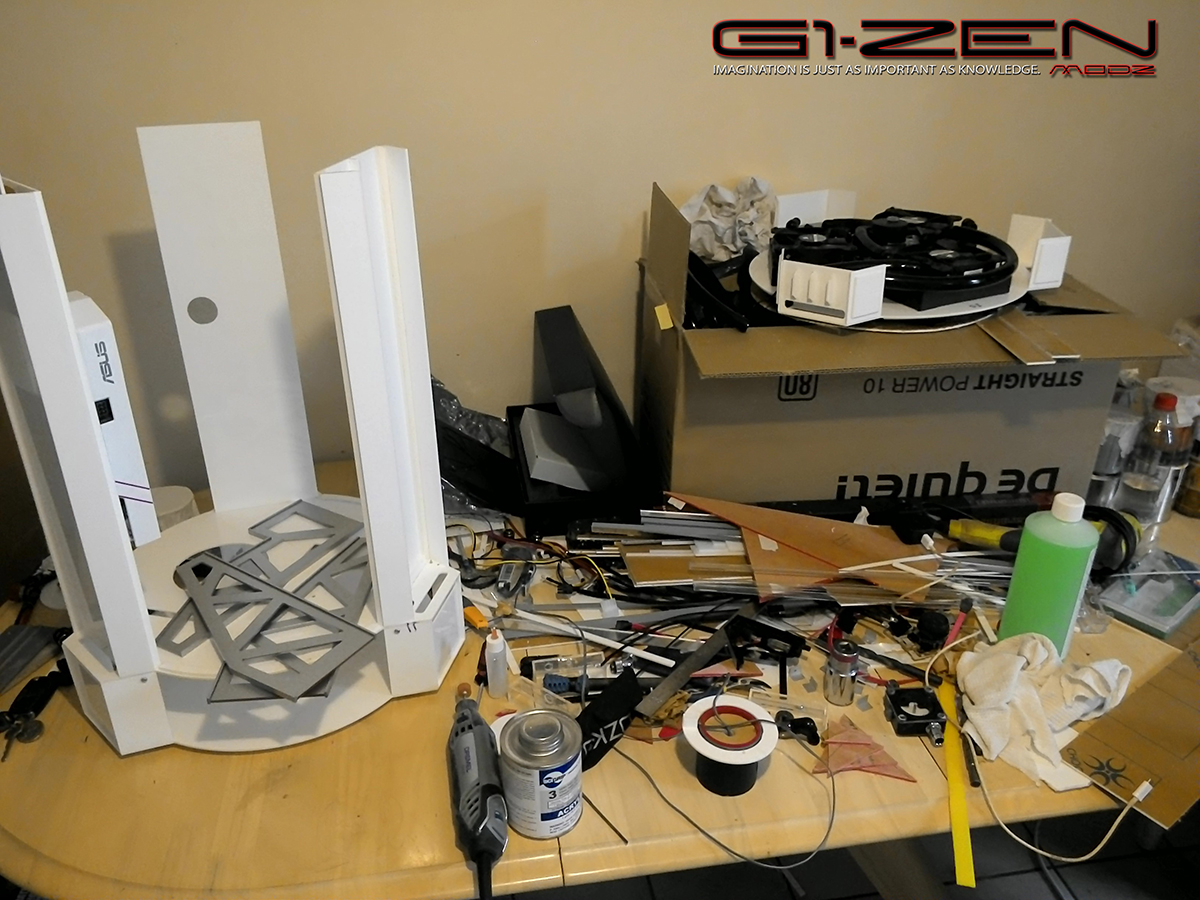
Center res mount. So far I have made the casing, added some blue LED's, put some steel mesh around it. Still need to add a small electric motor to turn the black cover at the bottom. to create a rotation of light in side the case. Once that is done i will starting working on the rest of the res mount. And then add the rest of the trimmings.

More Soon. :)
 
Last edited:
LEAfDMH.jpg

Synl8IV.jpg

KCyZt2N.jpg


Here the CNC parts are now done, And are now being put together.

Along with some of the hardware that will now be test fitted to the case.

Then all the side pillars cut to size and will be added for the height, The Pillars will be box like to hide all the things you gust don't want to be seen running from the top of the case to the bottom. MOBO tray has been made as well but still needs to be vented on the back.

eueKSfj.jpg

ceWCMRS.jpg

Ycm8nqa.jpg

xIrULoY.jpg


Rad's & all 6 fans are fitted as well as the Res, It's now hanging from the top as well.
n3ar1M3.jpg

x89v9xV.jpg

n3jN3nh.jpg

XgXgGN9.jpg

aWvimPf.jpg

zyQaTGV.jpg

OR9iG5e.jpg


I have been working on the base and the pillars one of the pillars will hold the GPU, The GPU will take air in from the outside of the pillar as well as the inside.

Ive cut out and mounted the GPU and all is good. Still making the Pillars stronger by making them two layers thick in side the two layers will be a 20mm space to run wires and such to the top and back.

MOBO and Pump are new in there places as well, Once all the hardware is fitted, and the case is complete all the hardware will be removed again so I can start painting the case. inside & out.

Here it is so far. Yep its talllllllllll: And might I say Different. (H-700mm )

x98zkQt.jpg

fIkQMzG.jpg


Outer Loop tubing.
W5l88Il.jpg

nMQzc6c.jpg


GPU from the out side of the case, will have mesh over the face. and a filter that slides in from the side.
wm5DQ8e.jpg


Inside the case,
CXg9aFi.jpg

M30HpN7.jpg


I have made 3 mounts to hold the center Res Light, And to strengthen up the case a bit more. One of then needed to be change to work with the GPU space.

Shq3tb8.jpg

lmB8Zw4.jpg


My work shop or should I say my Wife's dining table.
dZzY7TF.jpg


The bottom of the case with PSU filter.
gbYTH6u.jpg

oxFLdIF.jpg


Today I fitted a flow indicator into one of the back pillars so it cans be seen from the inside of the case, I also added 2 micro switchers to the bottom front of the case, One switch has a green LED, and the other is blue, One switch will be for the power and the other will be the reset, the blue LED will be the HDD drive light, and the green will be the power light.
uHi0fg1.jpg

SAImWGM.jpg


The I-beam has been test fitted, here are some photo's of where they are going.
ONZiRgC.jpg

X7hobTZ.jpg

0f8yNsX.jpg


What do you think ?

Thanks for stopping by. :)

Cheers, Ken.
 
May I saw wow.

Nice work. Subbed for final. Very good job man :toast:
 
Sure doesn't look like you're new to modding! Very awesome :respect:
 
Looks like a hybrid of a Rostock 3D printer, a Nuclear reactor and a Porsche Carrera.
Awesome!!! Mi likez it :respect:
 
I admire your attention to detail and dedication in this project. Can't wait for the final result! 10/10
 
Hello again everyone, Just a small update I have made a dust filter for the GPU as well, That slides out for the side of the pillar for cleaning. And added the mesh. I have done more to the GPU mount. But will have some updates on the weekend.
I have also change the logo it needed redoing the old one was bugging the crap out of me, and the new logo can now be easily made on a CNC or laser cutter if need be.:)


Thank for stopping by. :thumbup:
 
Hello Again,

Still progressing on the Power Cell. I have been adding more details to the outer rims of the case, Still a lot more to do there. I have now also added the lower I-beam arms. As well as the outlet for the GPU. I will be doing all the side covers for the top and bottom base over the next week. Getting much closer to having it ready for paint.

DoO46YQ.jpg


UOxVu1k.jpg


lpMNmSe.jpg


j1ZZUvO.jpg


dKeLshL.jpg


PGf6Jhu.jpg


Thanks again for stopping by.
 
For some reason this popped in my head when I read the title. Super good looking build though! Interested to see the connection between the motherboard and video card.
 
For some reason this popped in my head when I read the title. Super good looking build though! Interested to see the connection between the motherboard and video card.

Thanks newtekie1, That's funny Advert. :laugh: I see where you are coming from with it.
 
Gorgeous!
 
Hello again time for a new update,

Below is the curving process I used to get the sides done, I placed the inside a thin sheet of alloy that will hold the curve that's needed and heat it up with a heat gun till it forms the same shape then let it cool. After this I have cut a window out and added mesh to it. Still work in progress.

oAPbZmo.jpg


p3TYYkr.jpg


Mdp94x4.jpg


mi4gAu5.jpg


pAmVDHV.jpg


I have also fitted a HX1000i PSU.

TeYnxtU.jpg


3poUc8g.jpg


Finished the front Start/reset.

IS7pev0.jpg


The MoBo armor cover is now done as well.

jrcMHv7.jpg

W1J1HnU.jpg

EaXprYg.jpg


Hear is the Colour theme I'm going to be doing on the out side of the case.

YtWnQsh.jpg


Thanks again for stopping by. :)
 
Hello again everyone.

Time again for some more photo's :)

The outside of the case is almost done. just need to make the side panels and add some more details to the top disk as well as the pillars and then paint it all. then wire it all up. And start on the inner loop.

wuiNDsN.jpg


TcDokqj.jpg


I have added a water temp gauge below as well as a mount to see it better. It could just be me and this was by no means what it had intended my son told me it looks a bit like a storm trooper face.I don't think so my self so ill let you decide on that one.
MXJ8ATN.jpg


Here I have added some black light LED's 5mm ones,

I have added some 3mm Black light LED's to the CPU block as well.

fPvQseL.jpg


I have also been working on a cover to the center res, that will let me hide some more black lights.
ajFoGRd.jpg


JxZxpSf.jpg


One big change is going to be the center res, I'm changing the it around to show it more as part of the loop.. And it has nothing to do with the fact that it will work better this way. with out adding a second res to the loop.

y18hhfc.jpg


Any ways this is where I'm up to at the moment. Hope you are all still as eager as I am to see it all completed.

As always thanks for stopping by. :D
 
Last edited:
Hello again.

Mid week update, My first ever I think.

I have been working on the GPU, making a way for the heat to be removed to the outside of the case. As well as making a way to to trap the heat from entering the inside of the case. and still have a way to connect a monitor to the GPU with out letting the heat in. So what I have done is make a cover that will do both, and then I will make one more to cover the monitor cable plug to hide it as well.

jQuBn0t.jpg


xDoDw90.jpg


I will also be making a cover to hide the PCI-e cable on the GPU.


So this is what will be going on behind the GPU to get the Hot air out. this will also stop the PCI-e cable from getting in the way as well. that will run from the top down into the bottom of the case and back up to the MoBo.

Then the pillar face cover will go back over the top. so non of it will be seen.

pu3hAgq.jpg

Also in the last photo. you can see just a small notch in the center that's where the hdmi will run into the bottom of the case and out the back near the IO port. did not think to say anything about it. as It was the quickest thing to fit. :P


Thanks for stopping by.
 
Last edited:
Hello again.


Today I painted the Cover for the GPU that I made. Now it looks like it belongs to the GPU cover.


All the gaps have been filled, then primed in a single pack.
XJGQvKu.jpg


I then painted it in a white acrylic single pack then sanded with 600 wet&dry paper.
I then added the red line. And then painted it in a 2 pack clear coat.


WYVlRxe.jpg


VtWNLll.jpg


yRx3CBJ.jpg


This photo is out of focus but not on the fan and light above. Nice and flat and Shiny.
F62wwv0.jpg


Thanks for stopping by.
 
Hello again,

Over the last day or so I have been putting the outside loop and blocks together,

LJEcjof.jpg


vJyXPYR.jpg


Binpmwl.jpg


I glued then from the inside & out.
And there are no leeks from any of the tubing, Happy days.


1In4itu.jpg


o2Uqxsw.jpg


AuaI2wU.jpg


E5xGuJk.jpg


Leek testing, and this one had one. I filled then all up with water. added a plug to one end, added some air pressure to the other end to make sure they will work.


uWJ1CaG.jpg


I modded the SSD as well I know its been done before but it still looks cool. and I have never tried it before so I just had to give it a go,

The PCB had to be flipped over for the ram to be seen. and I put some 1mm clear behind the window.

RtdINPX.jpg


sNWXoKm.jpg


ZXLbh7z.jpg


gePMRz4.jpg


Thanks again for stopping by.
 
Last edited:
Hello Again, The painting process is under way. Enjoy!


uKOPanF.jpg


jztSdkp.jpg


JhesFFc.jpg


kcgqasa.jpg


uGYyFUj.jpg


NOhDr7x.jpg


Thanks for stopping by. :)
 
Hello again,


Progress has been slow but I have fitting the rads a fans, GPU, Mobo, PSU, and are now there to stay. I have added the same shapes to the inside of the pillars that can be seen on the outside but the ones on the inside will glow white when lit with black light. and the white of the pillars wont.
Have to get more soft tube as well don't have enough to the bottom of the loop. Going to start the inside loop over the next week. And I'm still painting the case as I go.

In this photo on the right you will see the clear cover that will be going over the 3x3 loops that will be running up and down the outside of the case. A the ASUS logo that has been sprayed on all 3 sides.

b9nKEtc.jpg

2Cp5XQx.jpg


Here is a front shot of the clear cover.
tr5Rwbw.jpg

Yr9zkfM.jpg


Here you can see the tiles that will glow white under black light this is done on the inside of all 3 pillars and the bottom.
I6OUBOv.jpg

NCgrFkj.jpg


GPU is now all done PCI-e extender or riser is now fitted as well.

wpFOiGV.jpg

KpfW3lS.jpg

thDqSUq.jpg


Here I have made a cover to hide the PCI-e extender.
aeFtTpN.jpg

7fDVQlM.jpg

shLUhVd.jpg


I run the HDMI and Display feed out the back of the case, And can still removed, but for now will be staying for testing later.
gHrRCBC.jpg


Not a lot of work space here and the nest inside will need some work.
0EKdrtI.jpg


SSD is now fitted as well.
vU6GRFt.jpg

I will keep the updates coming as the painting starts to change the look. Most of the painting I have left will be done with the airbrush. and paintbrush.


Once again that's all for now, Thanks again for stopping by.

Cheers, Ken.
 
I absolutely love it so far, nice man :cool:
 
Back
Top