Hey, first post, here. I got kinda scammed on good old ebay, bought an Asus Maximus Hero XI "untested", I did asked for pics of the socket, it was flawless. I received it, looked it over and it was fine (had the cpu socket cover on).
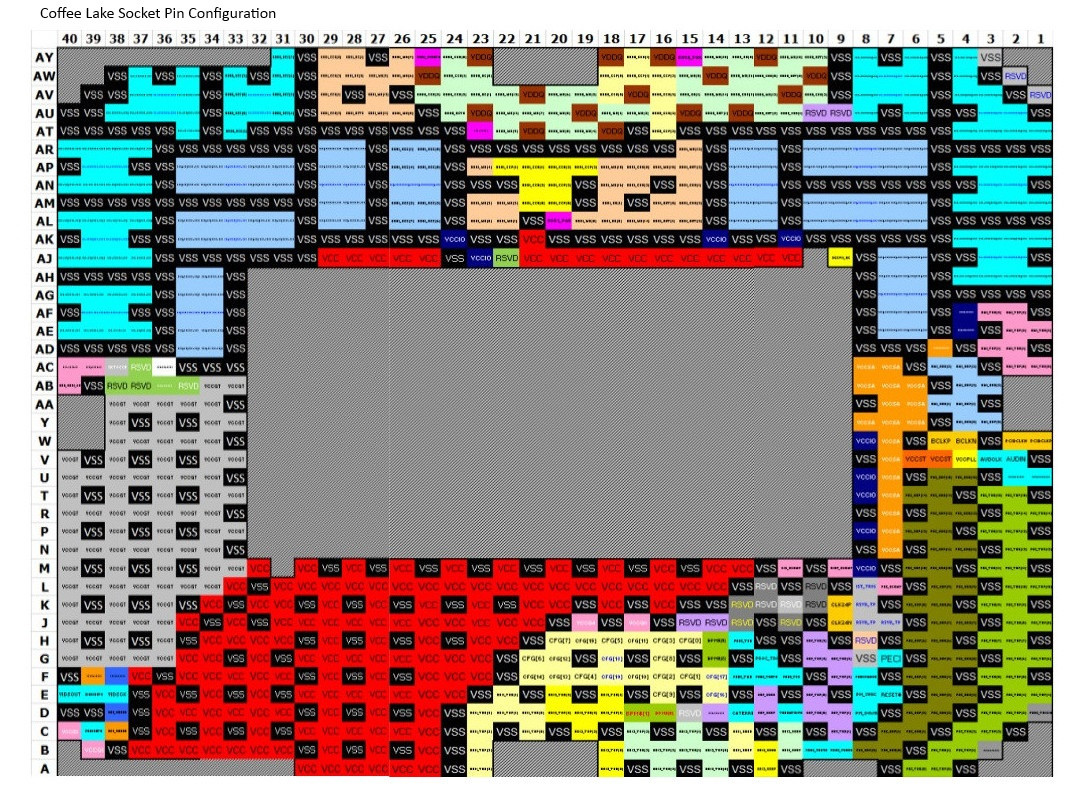
Now, like a month and a half prepared to start building, I take the socket cover to discover a terrifying view of several pins bent on different areas, I will attach pics, I was wondering if anyone has a layout of this socket to see what those pins do and if you think it's worth it to try and repair it and see if it boots.
What frightens me is that I only have an i7 8700K at hand to test, and I don't want this motherboard to fry my good working cpu.
I've been seeing youtube videos but they all have one or two pins in just one area, not several like my board.