EastCoasthandle
New Member
- Joined
- Apr 21, 2005
- Messages
- 6,885 (0.99/day)
| System Name | MY PC |
|---|---|
| Processor | E8400 @ 3.80Ghz > Q9650 3.60Ghz |
| Motherboard | Maximus Formula |
| Cooling | D5, 7/16" ID Tubing, Maze4 with Fuzion CPU WB |
| Memory | XMS 8500C5D @ 1066MHz |
| Video Card(s) | HD 2900 XT 858/900 to 4870 to 5870 (Keep Vreg area clean) |
| Storage | 2 |
| Display(s) | 24" |
| Case | P180 |
| Audio Device(s) | X-fi Plantinum |
| Power Supply | Silencer 750 |
| Software | XP Pro SP3 to Windows 7 |
| Benchmark Scores | This varies from one driver to another. |
Here is what I did to lap my IHS:
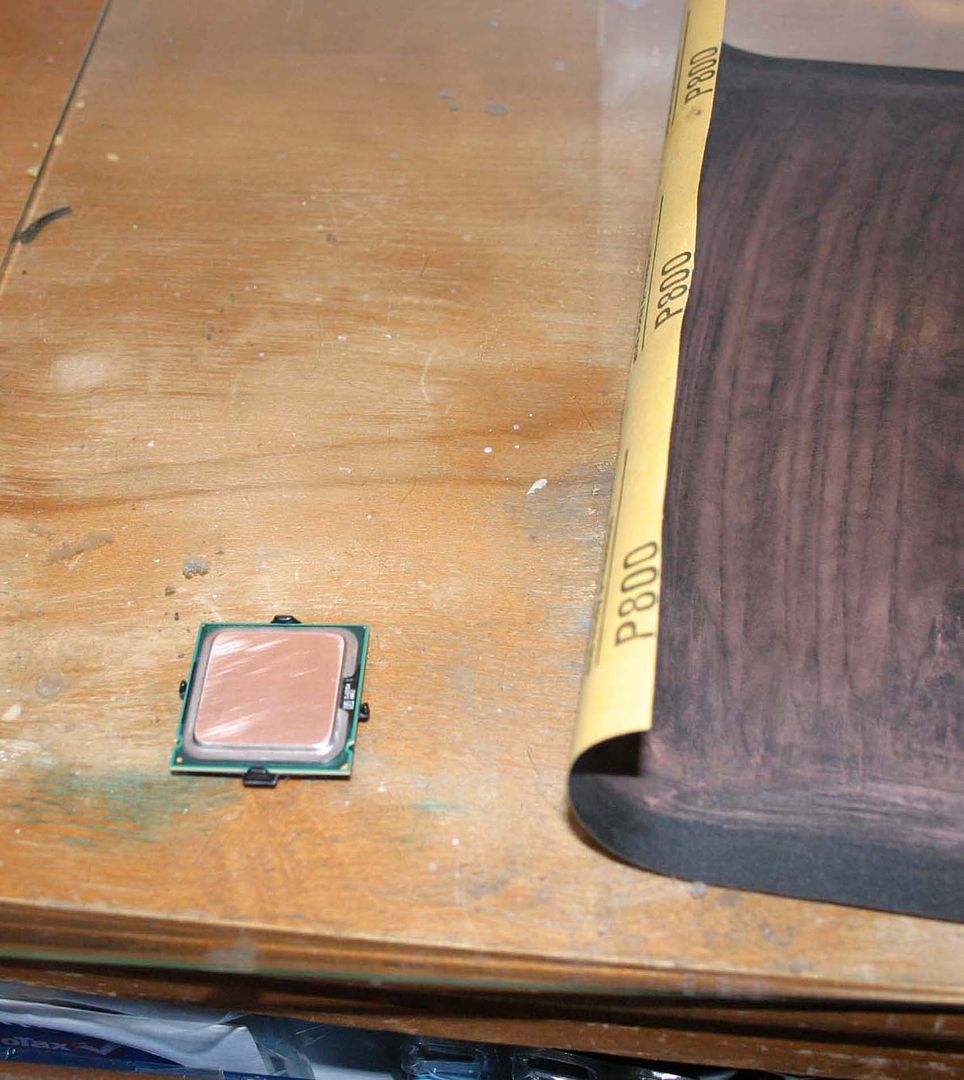
Step 1 Remove the Nickel layer and even out your surface area

Original CPU

Wet Lapped

I used 120 grit sandpaper (wet sand)
I started off with 120 grit sandpaper. Why? It allowed me to remove more IHS material in a shorter period of time. However, do to it's coarse nature I dipped the entire sandpaper in water (used the shower) and wiped off any access water. As the sandpaper became more dirty with IHS material I washed it again (I repeated this process throughout each grit of sandpaper). Just think of the 120 grit as a means to remove the tin layer and flatten your IHS true. Don't worry about shine or smoothness as the end results will leave a stretchy surface. I turn the IHS 90 degrees after 40 or so strokes on the sandpaper (take not I use a glass surface). Once I finished take note of how the surface of the IHS/HS looks and make a mental note and try to remove any imperfections. Clean the surface of loose debris from the IHS/HS and sandpaper. Side note: some believe that the more material you remove the better the heat drop. IMO, this depends on the situation, HS/WB used, pressured used, ambient temps, etc
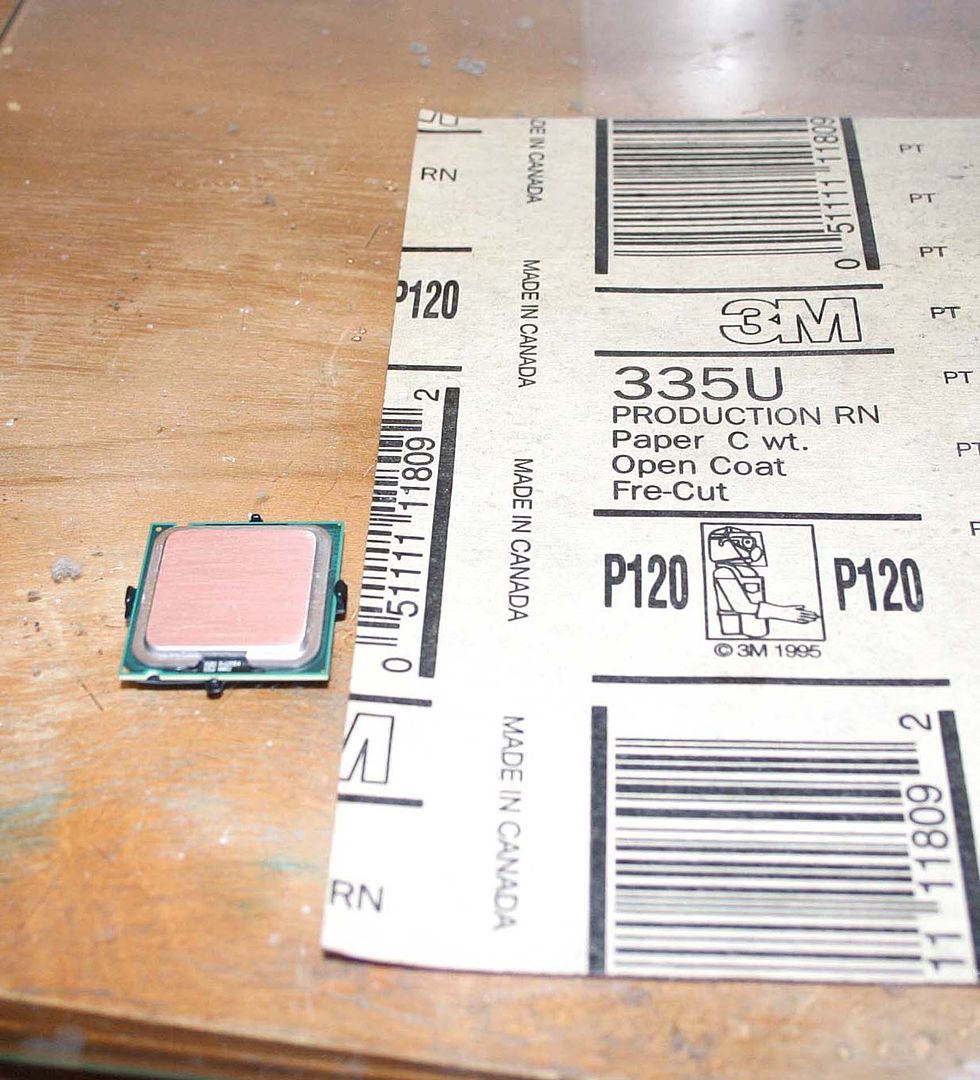
Step 2 Continue to even out your surface and remove marks from 120 grit.

400 grit
Again, I wet the entire 400 grit sandpaper. I use 400 grit to remove the markings from the 120 grit sandpaper. I want to keep the IHS true and even. I turn the IHS/HS 90 degrees (as needed) and smooth out the scratches made by the 120 grit. I didn't worry about a shine or a smooth surface, I concentrate on true (flat), even surface on the IHSt. This may take some time but, when I achieved a 400 grit scratches on the IHS (maintain a true, even surface) I proceeded to go to 800 grit. Take note of the 400 grit marks left behind and try to remove any imperfections. Clean the surface of the IHS of loose debris and clean the sandpaper with water and let dry.
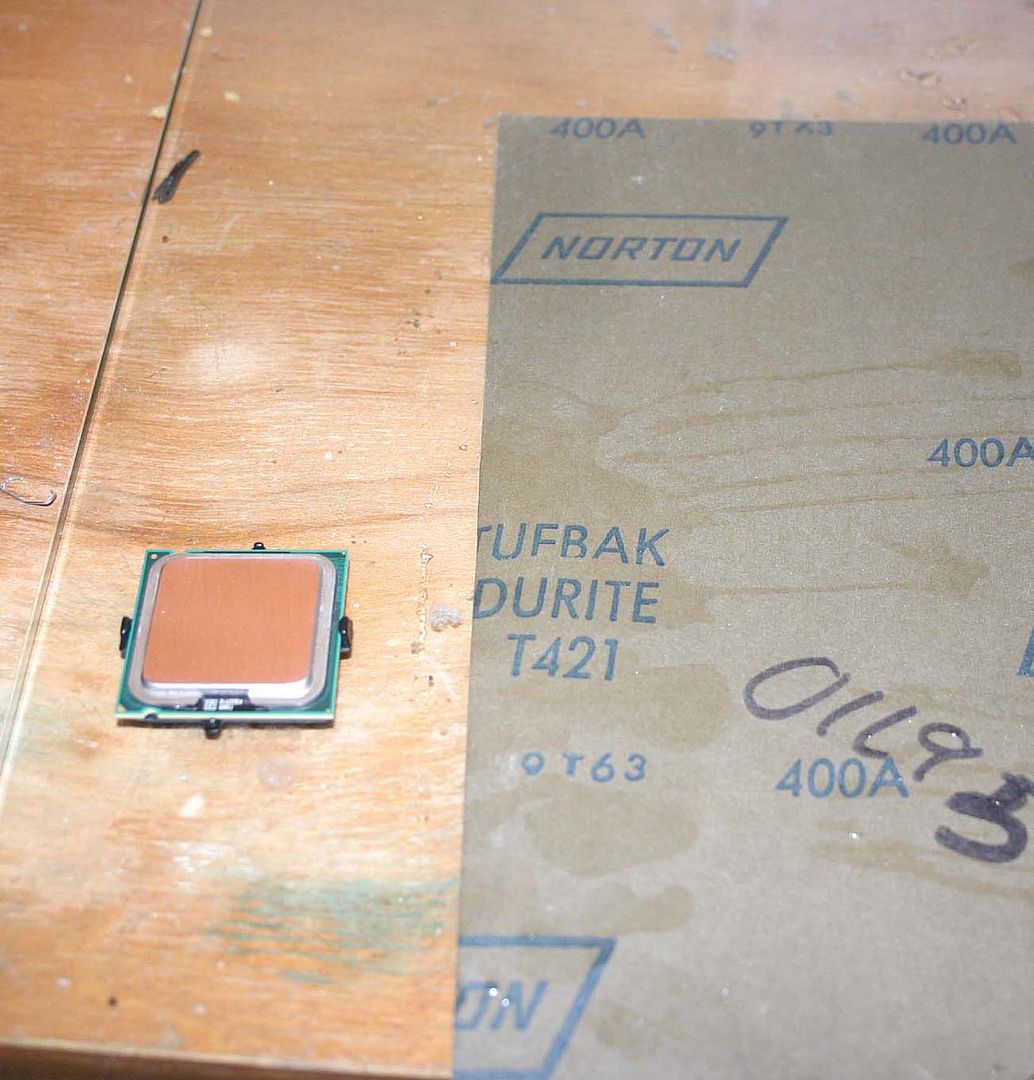
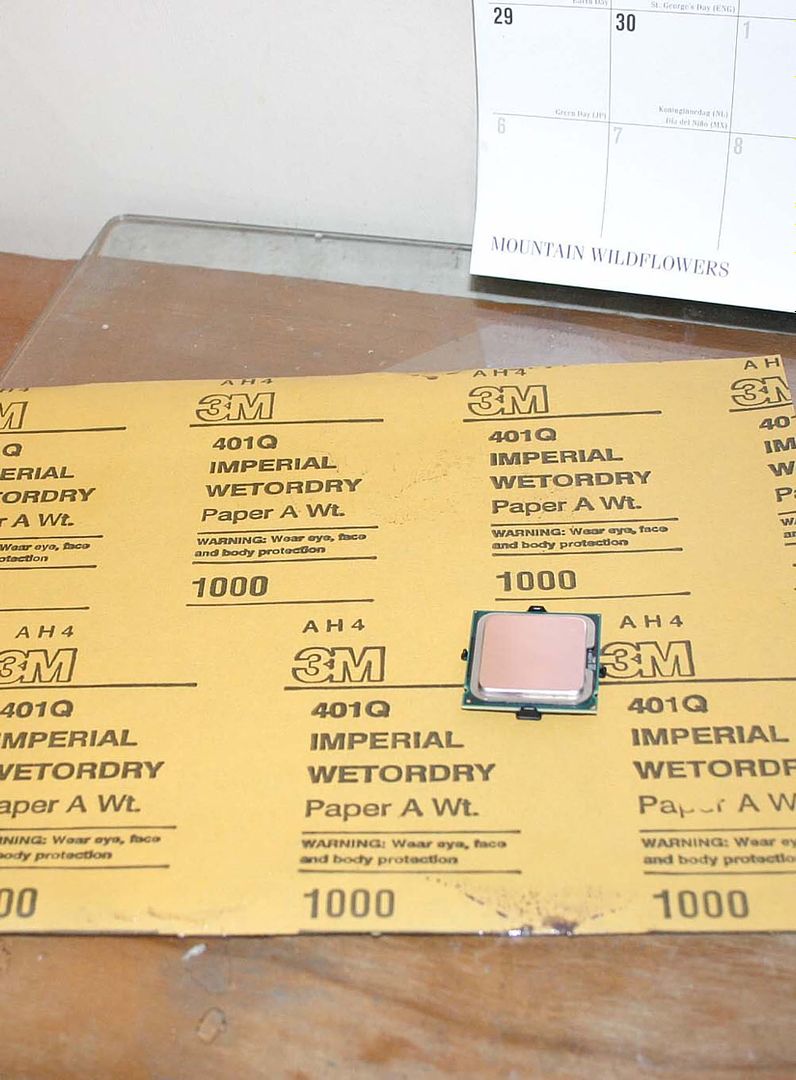
Step 3 smooth out your surface area

800 grit
I wet the 600 and 800 grit sandpaper and started work on removing the 400 grit markings of the IHS turning the IHS/HS 90 degrees and use the 600 grit on up to 800 grit for a flat, smooth surface. You will concentrate on keeping the surface of the IHS flat and smooth. Again, as you remove material you want to replace the 400 grit marks with 600 grit marks then 800 grit marks. Once you are finish with the 800 grit take note of how the surface looks. Take note of the 800 grit marks left behind and try to remove any imperfections. Clean the surface of IHS of loose debris, then clean the sandpaper and let dry.
Step 4 Tiddy up your lapping

1000 grit

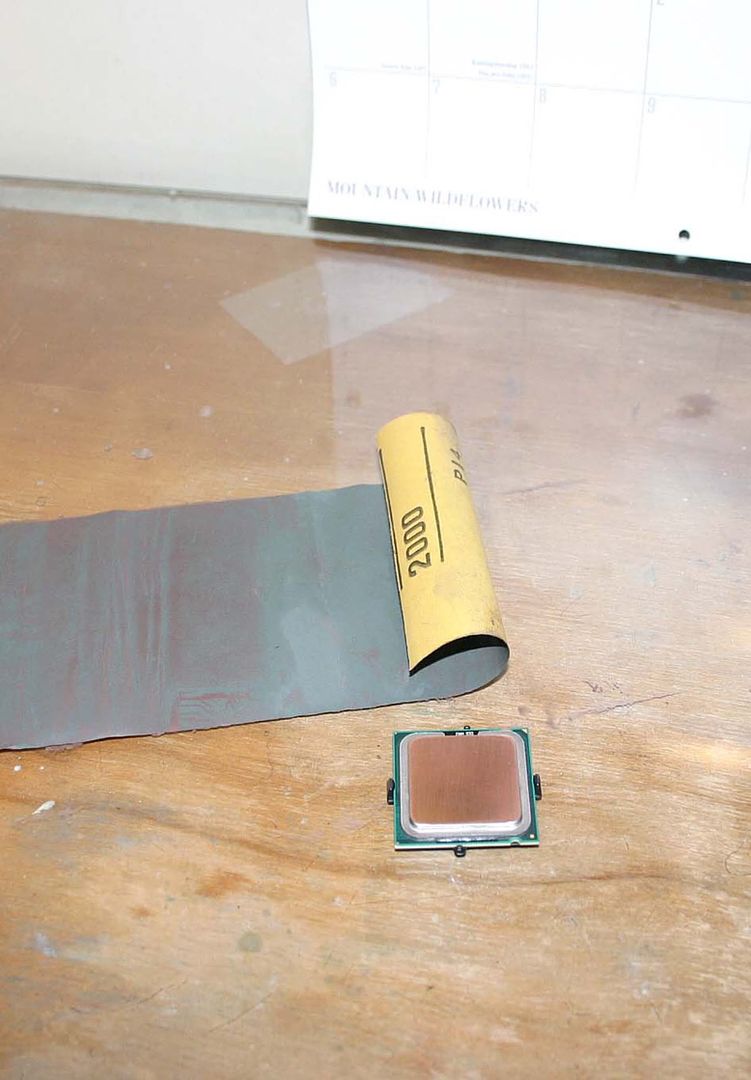
2000 grit
I wet the 1000 grit to 2000 grit (if you have it) sandpaper and concentrated on removing the scratches from the 800 grit and 1000 grit markings on the IHS, turning the IHS as needed. I didn't need to worry about removal of material at this point. However, I did want to make sure the IHS remained true. The surface area should be true by now and I want to keep it that way. All I want to do now is tiddy up my lapping from 120 grit to 600 grit by smoothing out the IHS surface area using 800 grit to 2000 grit as much as possible at this point. At 2000 grit you are looking for perfection, no stray marks or other imperfections in the IHS.


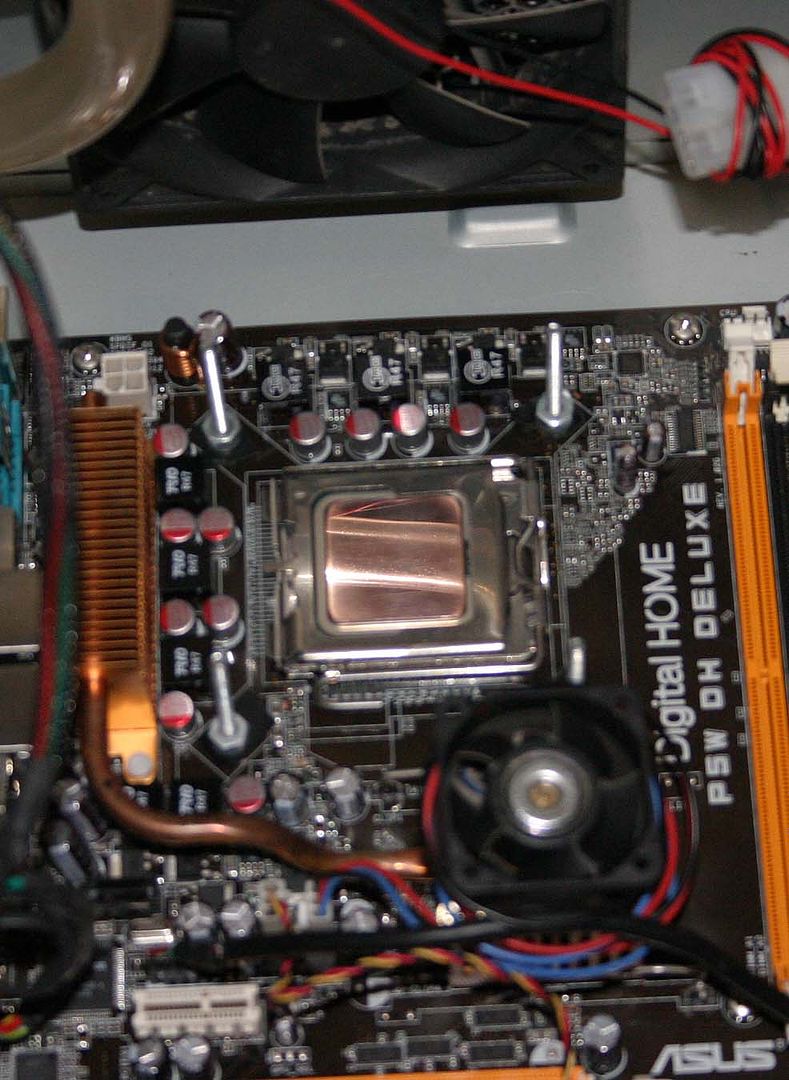
A little blurry but here is the final product.
Temp difference: will vary based on the contact between the IHS and heatsink. Furthermore, ambient temps inside the case and in the room will effect overall temps.
Side note:
It's been my experience that you get the best results when you wet sand.
It's also been my experience that using the crisscross method is a bit better
Each image is in thumbnail size. Click on the picture to enlarge it.
Disclaimer:
Results will vary. This thread is not intended to encourage anyone who has little to no experience in lHS lapping. You lap your IHS at your own risk!
Step 1 Remove the Nickel layer and even out your surface area
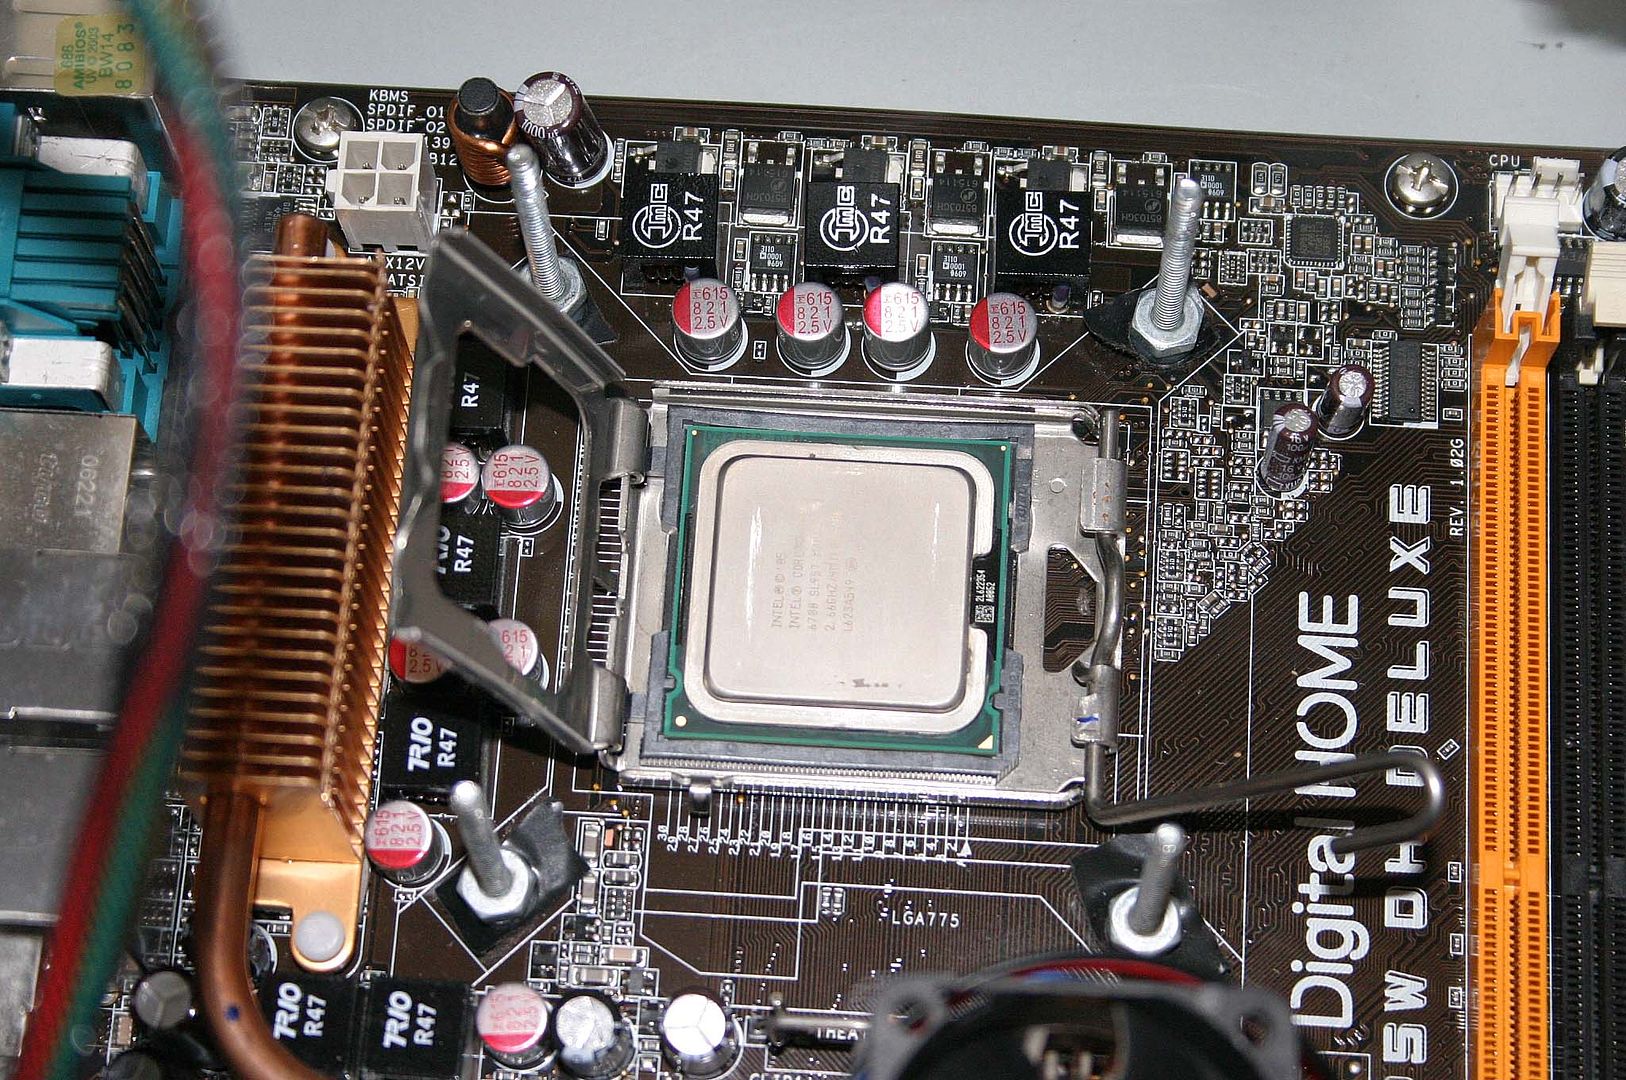
Original CPU
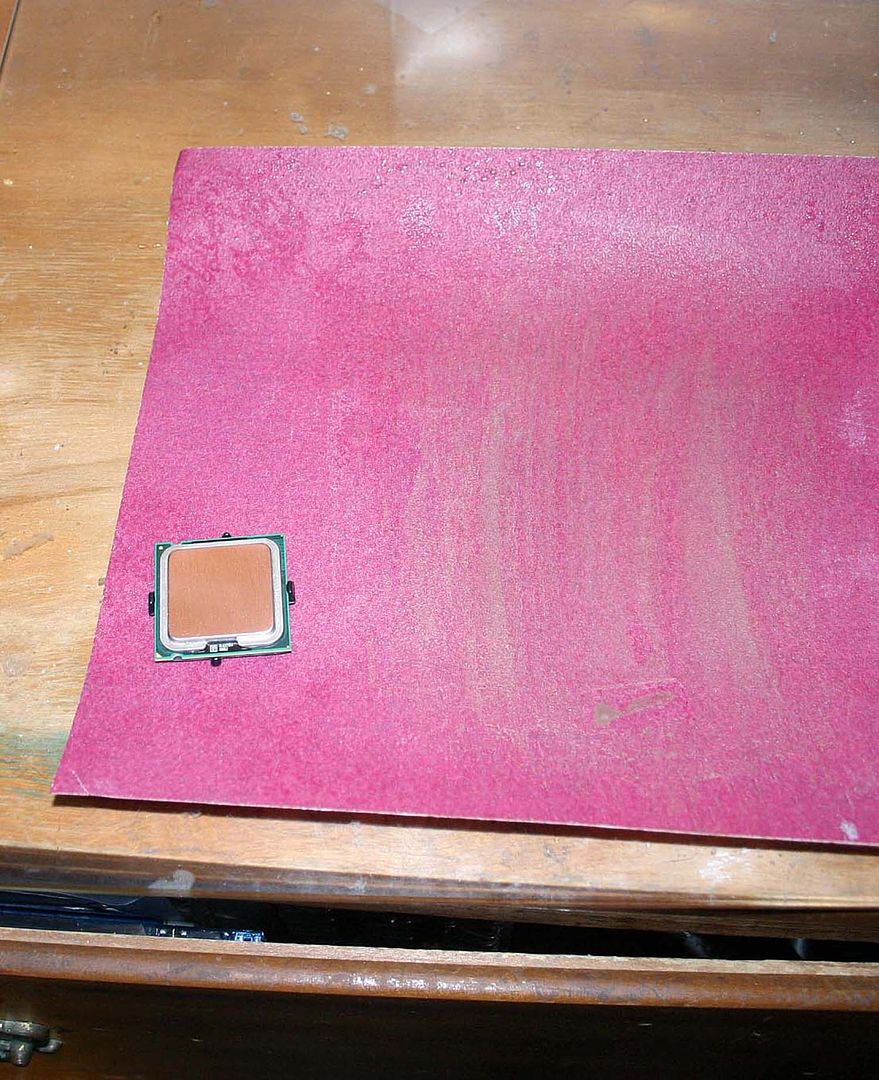
Wet Lapped
I used 120 grit sandpaper (wet sand)
I started off with 120 grit sandpaper. Why? It allowed me to remove more IHS material in a shorter period of time. However, do to it's coarse nature I dipped the entire sandpaper in water (used the shower) and wiped off any access water. As the sandpaper became more dirty with IHS material I washed it again (I repeated this process throughout each grit of sandpaper). Just think of the 120 grit as a means to remove the tin layer and flatten your IHS true. Don't worry about shine or smoothness as the end results will leave a stretchy surface. I turn the IHS 90 degrees after 40 or so strokes on the sandpaper (take not I use a glass surface). Once I finished take note of how the surface of the IHS/HS looks and make a mental note and try to remove any imperfections. Clean the surface of loose debris from the IHS/HS and sandpaper. Side note: some believe that the more material you remove the better the heat drop. IMO, this depends on the situation, HS/WB used, pressured used, ambient temps, etc
Step 2 Continue to even out your surface and remove marks from 120 grit.
400 grit
Again, I wet the entire 400 grit sandpaper. I use 400 grit to remove the markings from the 120 grit sandpaper. I want to keep the IHS true and even. I turn the IHS/HS 90 degrees (as needed) and smooth out the scratches made by the 120 grit. I didn't worry about a shine or a smooth surface, I concentrate on true (flat), even surface on the IHSt. This may take some time but, when I achieved a 400 grit scratches on the IHS (maintain a true, even surface) I proceeded to go to 800 grit. Take note of the 400 grit marks left behind and try to remove any imperfections. Clean the surface of the IHS of loose debris and clean the sandpaper with water and let dry.
Step 3 smooth out your surface area
800 grit
I wet the 600 and 800 grit sandpaper and started work on removing the 400 grit markings of the IHS turning the IHS/HS 90 degrees and use the 600 grit on up to 800 grit for a flat, smooth surface. You will concentrate on keeping the surface of the IHS flat and smooth. Again, as you remove material you want to replace the 400 grit marks with 600 grit marks then 800 grit marks. Once you are finish with the 800 grit take note of how the surface looks. Take note of the 800 grit marks left behind and try to remove any imperfections. Clean the surface of IHS of loose debris, then clean the sandpaper and let dry.
Step 4 Tiddy up your lapping
1000 grit
2000 grit
I wet the 1000 grit to 2000 grit (if you have it) sandpaper and concentrated on removing the scratches from the 800 grit and 1000 grit markings on the IHS, turning the IHS as needed. I didn't need to worry about removal of material at this point. However, I did want to make sure the IHS remained true. The surface area should be true by now and I want to keep it that way. All I want to do now is tiddy up my lapping from 120 grit to 600 grit by smoothing out the IHS surface area using 800 grit to 2000 grit as much as possible at this point. At 2000 grit you are looking for perfection, no stray marks or other imperfections in the IHS.

A little blurry but here is the final product.
Temp difference: will vary based on the contact between the IHS and heatsink. Furthermore, ambient temps inside the case and in the room will effect overall temps.
Side note:
It's been my experience that you get the best results when you wet sand.
It's also been my experience that using the crisscross method is a bit better
Each image is in thumbnail size. Click on the picture to enlarge it.
Disclaimer:
Results will vary. This thread is not intended to encourage anyone who has little to no experience in lHS lapping. You lap your IHS at your own risk!
Last edited:

 PLease post before and after temps or just temps of it now, its its low your fine. If not your cooler or ac5 is fu*ked up, IE leveled wrong. PLease let us know!

