• Welcome to TechPowerUp Forums, Guest! Please check out our forum guidelines for info related to our community.

Mac G5 Mod arg-ist

Joined
Aug 4, 2014
Messages
115 (0.03/day)
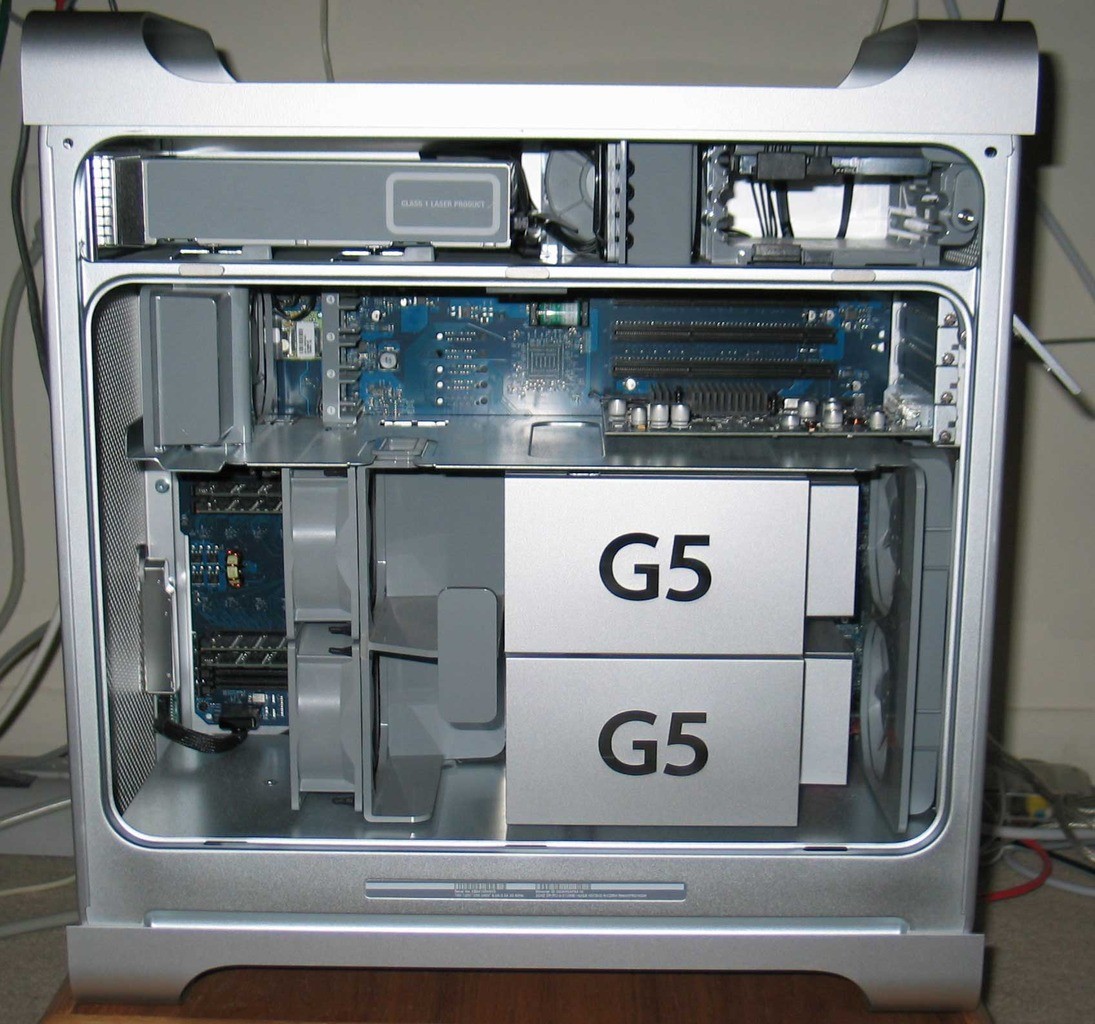
This time my case to mod is a classic. Powermac G5. One of the most popular and ,one of the most modded beauttiful case ever made. As robustness , ı can say it is a PANZER.


CQZBKh.png


hddOUM.jpg


someone showed his love like ...


4V0u0o.jpg


Some prefer to use such

ctQabI.jpg


Powermac G5 is one oft most modded case. but most of them, changed outlook of the case


My goals for this Project were to preserve the look of the case at outside ;and fit my PC s hardware including a full ATX MB. And watercooling.


sdAx0i.jpg


SLCb7n.jpg


NiWcVa.jpg


I will to mod at two stages

First the mod on the case and and convert it for an ATX (BTX) MB …

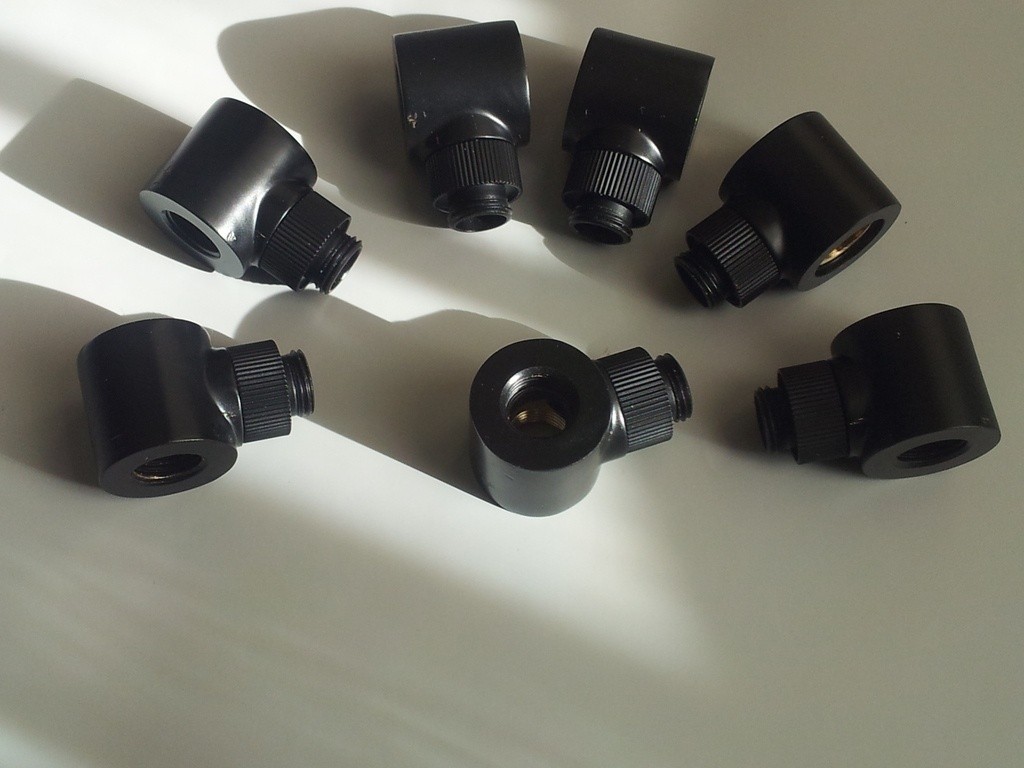
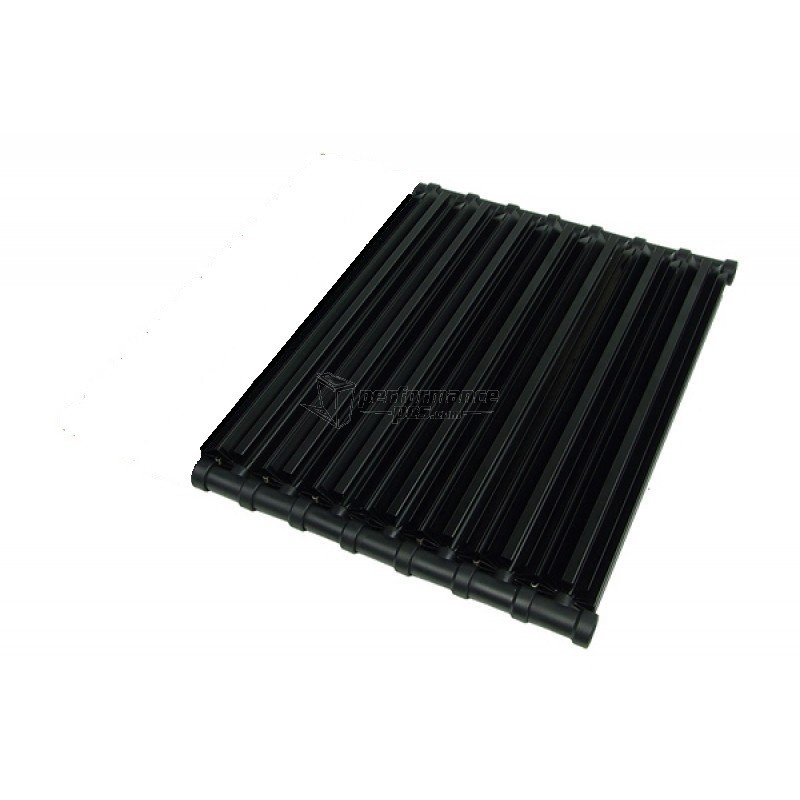
Thenn as second mod to this case... for Watercooling… with acrylic tubing and alphacool capecora passive rads 642+142= 742


FPnC6k.jpg


To use an ATX mainboard at this case, the back panel must be changed.

İf we wannt to adapt the case to new motherboard. We must change


QPYq0j.jpg


At the back panel, the fans must be moved off center, to make a new I/O. and a larger room
for 7 slots


There are a lot of mods, one of them is ,

to make a half mask as Ben Katz did.

Link: http://build-its.blogspot.com.tr/2011/04/how-to-fit-your-pc-in-power-mac-g5-case.html


tiyOKt.jpg


and mount them to thecase


8nxeGo.jpg


Or we can use a MB tray with backpanel as gibsonc did.

Link : http://www.insanelymac.com/forum/topic/281165-powermac-g5-case-mod/


TJrRuw.jpg


And cut the case, to make a space


Oz3RAq.jpg


And mount it

kcxDsc.jpg


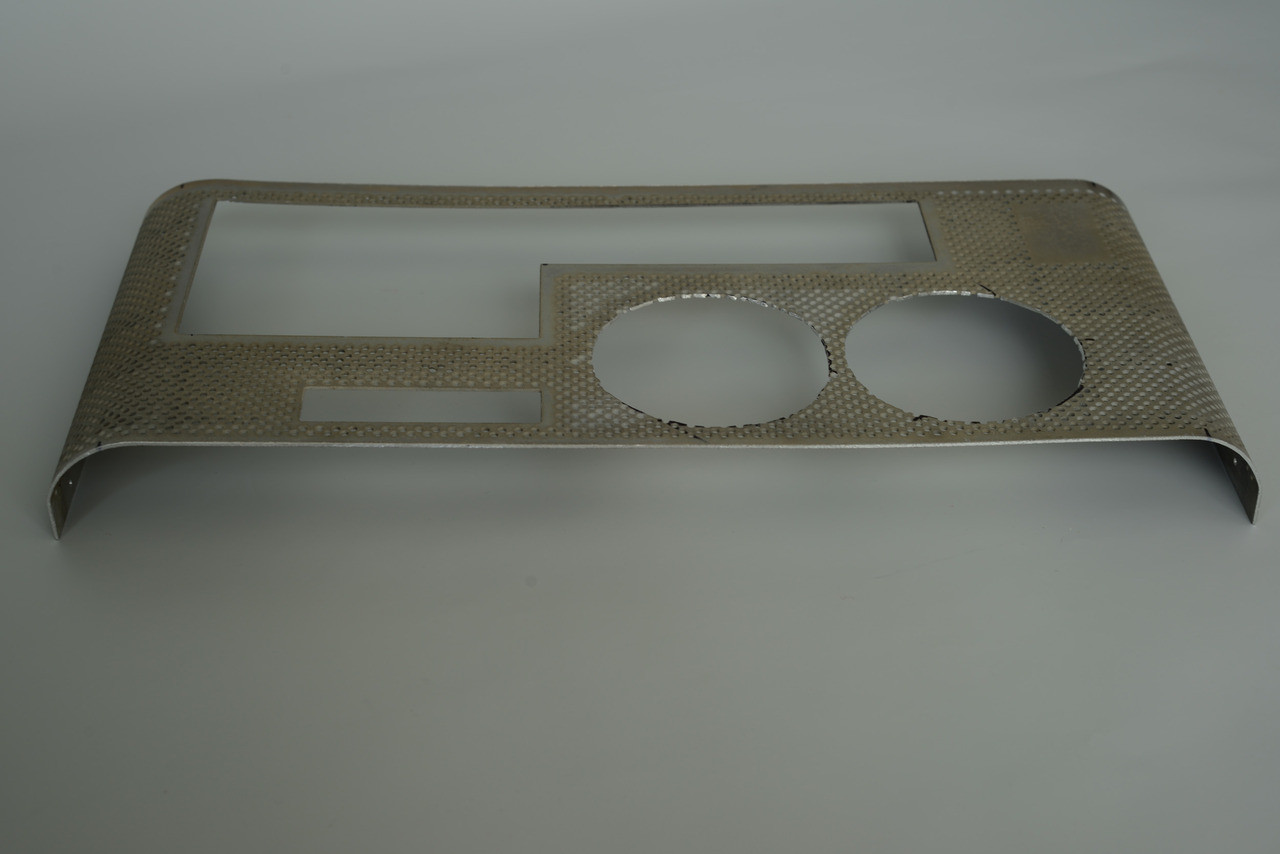
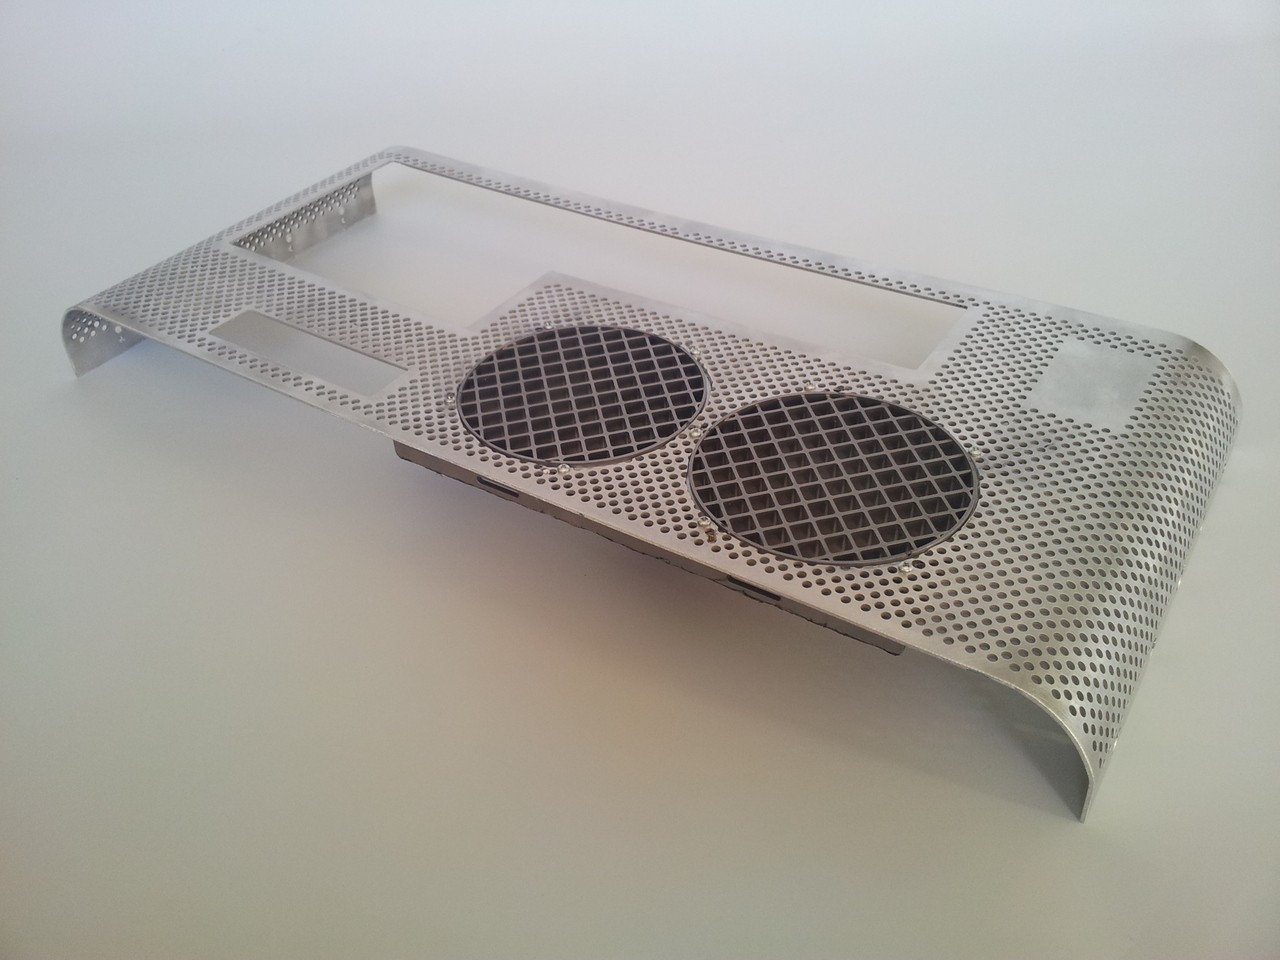
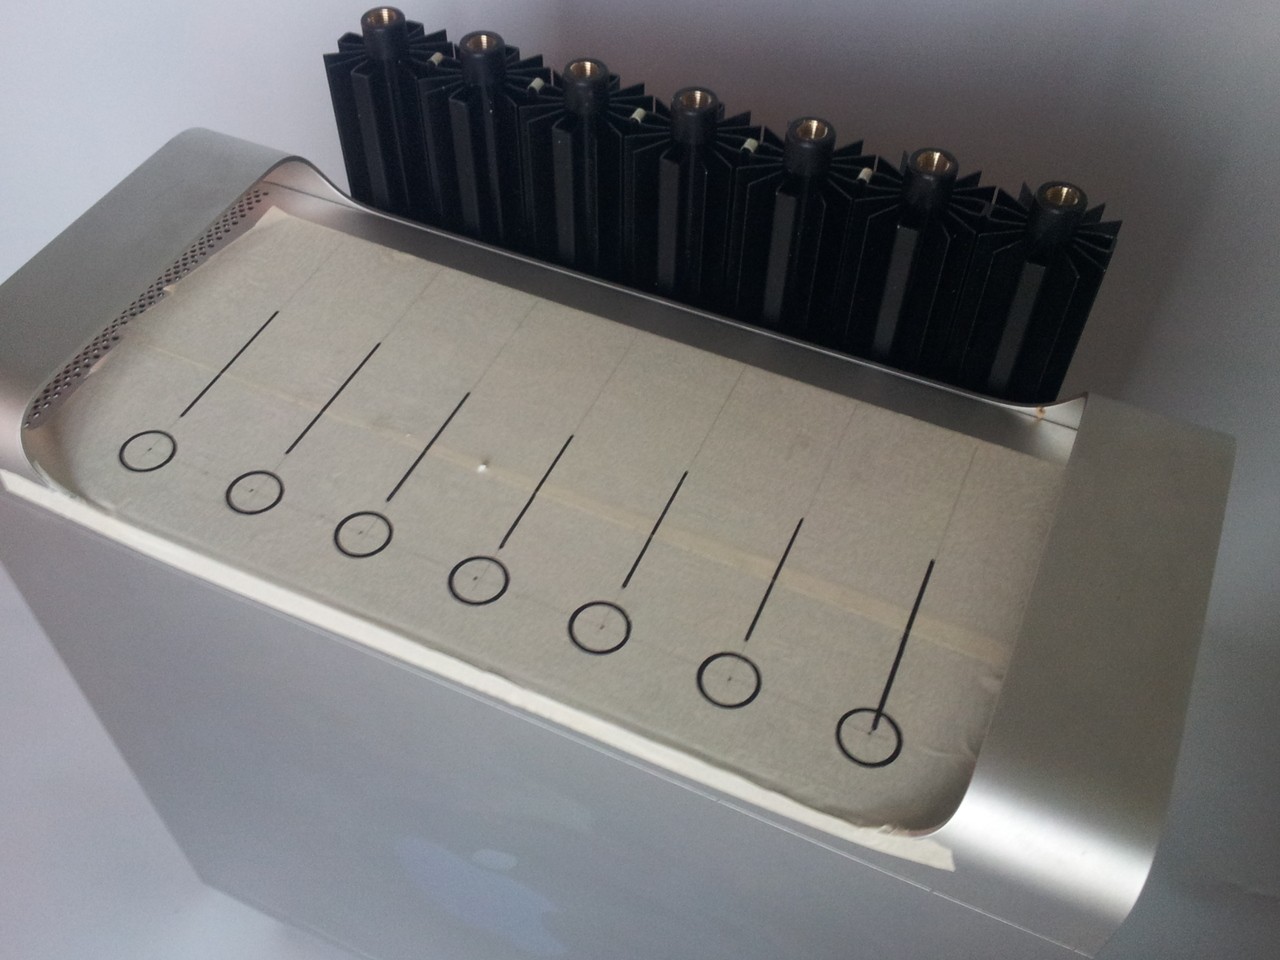
But I wannt to make a new back panel complett. With new fan holes , I/O and slots.
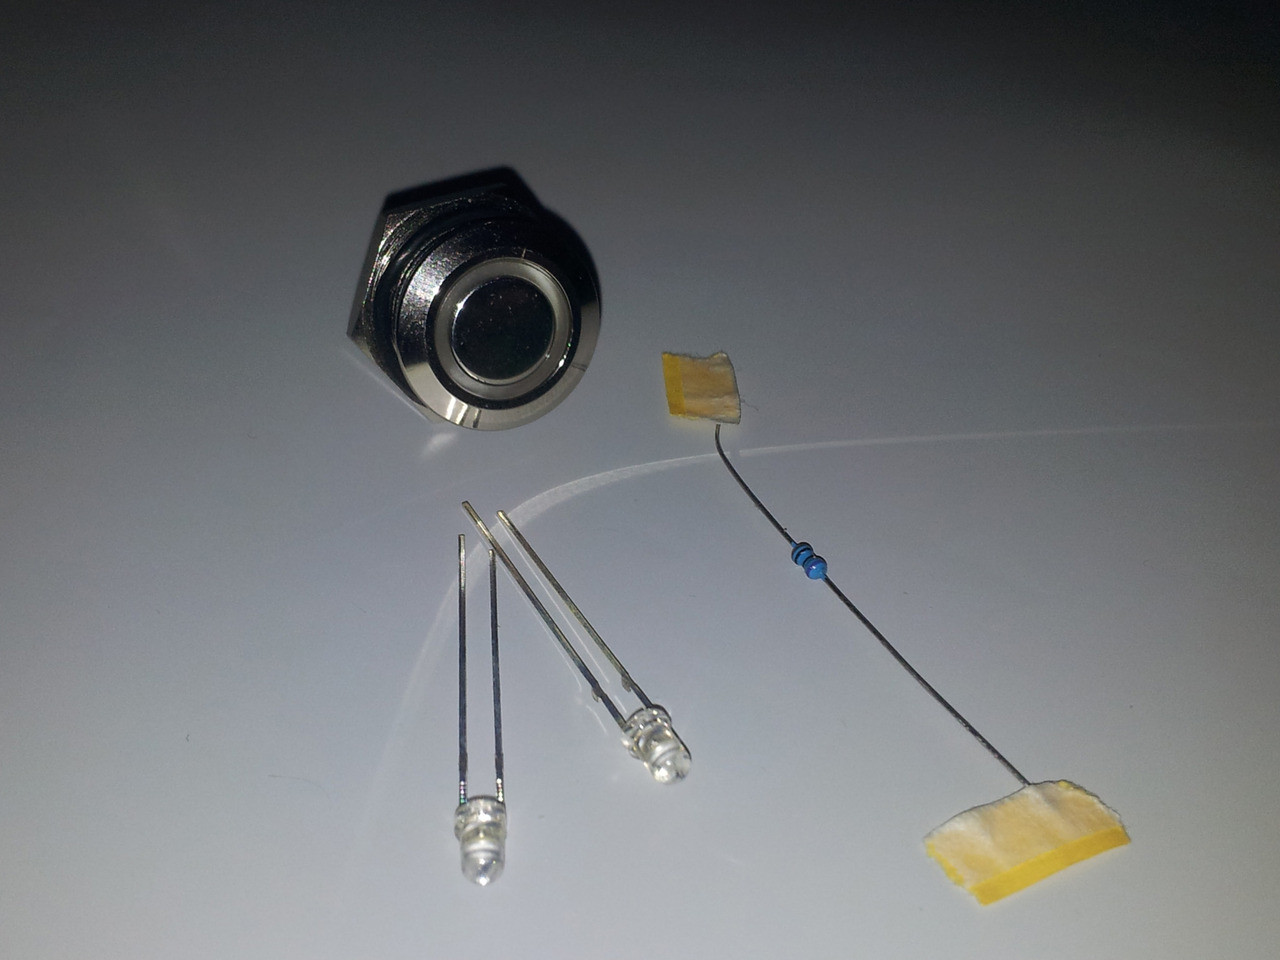
I wannt to use the original fangrill as well.


qAUTr4.jpg


vSYMgo.jpg


Drawn at corel... but ı musst make nearly 3000 circles with 3mm Radius..


3yu53I.jpg


And sent to water jet for cutting….


OTHER WORKLOGS


PLAYDOH SILVERSTONE TJ07 (Acrylic pipe and midplate)
http://www.techpowerup.com/forums/threads/playdoh-silverstone-tj07-acrylic-tubing.206894/


TRANSFORMER CASE COMPLETED
http://www.techpowerup.com/forums/threads/transformer.204111/


Jumbo case- custom build- COMPLETED
http://www.techpowerup.com/forums/threads/jumbo-case-custom-build.205943/


4 way HDD switcher. COMPLETED
http://www.techpowerup.com/forums/threads/4-way-hdd-switcher.203795/


Grapich Equaliser display COMPLETED
http://www.techpowerup.com/forums/threads/graphic-equaliser-display.203871/


900 D MMT CASE COMPLETED
http://www.techpowerup.com/forums/threads/900-d-mmt-case.204028/


12 Angry Men 900 D Case COMPLETED
http://www.techpowerup.com/forums/threads/12-angry-men-900-d-case.203915/
 
Last edited:
update 2 30.11.2014

İnside of the original case
To start, ı completely emtied out the case, including the latching mechanism that holds the front side panel on;


UMJ6GY.jpg


rFlKuo.png


but be carefull , we must use latching mechanism.


o7gu6N.jpg


The new backpanel came from waterjet ,
And this the new raw plate for backpanel that came from waterjet cutting


ZAIh7r.jpg


and and new backpanel bended.


EmBBl3.jpg


K7oNEs.jpg


uQnlrV.jpg


Locations were determined to be cut in the old panel


ODq6ju.jpg


P7cZKC.jpg


marked places emptied with dremel.


evOKEe.jpg


FyjXhc.jpg


Bended backplate temporarily mounted to the case


wGRWpB.jpg
 
To mount MB tray ı bonded 3 piece 10x20mm aluminum profiles with Dewcon SF plastic steell.(epoxi)


v7TUF0.jpg


5VAajJ.jpg


MB tray (in 2 piece) mounted with standoffs.(they must be sanded, and painted)


YKx8Ql.jpg


nIUImj.jpg


I must make a place for PSU . to mount the PSU ı made a tray .


tRr0k1.jpg


And mounted psu with this tray to the case


qI33ik.jpg


I made a duct from plexi for exhaust of PSU.


SnBsLU.jpg


Mounted duct to PSU


f03RNJ.jpg


And mounted the psu with exhaust duct to his place with PSU tray


zruzkO.jpg


This photograph is with a Corsair AX1200 photographed. İt is 200 mm long.

uVC5dJ.jpg


Therefore if ı have a problem with MB , then ı can use an Corsair AX860i . It is 160 mm long…

40 mm shorter, not to have a problem with MB and slots.


MB tray painted alu and mounted

dEUcPE.jpg
 
UPDATE 11.12.2014


Original fangril mounted (from inside)


MkLY7e.jpg


Backpanel with mounted grills (I must find 2.2 mm phillips self tapping screws fort he grill


dcNXPP.jpg


vEWDr6.jpg


The back panel brushed with 3M Abrasive Brush


7gqzAh.jpg


The new backpanel with I/0 slots and fan grils mounted to the case


0w9jgH.jpg


the latching mechanism that holds the front side panel is mounted again.


NushGe.jpg


And the side window mounted with latching mechanism.
Case with closed sidewindow

L8FdKD.jpg


I must add an white vandal buton becouse the led of original Vandals is defect ,and two leds for ON/OF and HDD.

P1jA8t.jpg


Made 3 holes 3mm and 16 mm diameter.


dTqqYR.jpg


Mounted the 16mm Vandal

RYLCqx.jpg


And 3mm leds


Z4eBad.jpg


q5DiDH.jpg
 
UPDATE 16.12.2014


The slots painted with a alu spray.


IvJH69.jpg


2nmGgk.jpg


Through the case...

WKAj0e.jpg


The case before modding

zz3Bo2.jpg


And the new case with new backpanel

CkBy42.jpg


And final pictures from the new Mac G5 ATX (BTX)


AdfS8R.jpg


jLU7ku.jpg


SvdnOl.jpg


Yjoua5.jpg


mQv5zP.jpg


Y1VVbO.jpg


To compare.. Original Mac G5 and the new ATX compiant Mac G5- ATX


tCvwoC.jpg


Next update is a different modified passive Watercooling, with a Cape CORA 742
 
Last edited:
UPDATE 19.12.2014

I want to built a watercooling system, for my modified MAC G5 ATX

jLU7ku.jpg


And cool CPU+MB+Videocard. And use a PASSİVE RADIATOR.(no more fans to cool)

One loop but in two parts.as

3XHF142 rad >CPU> MB> 4X HF 142 rad>EVGA 680 Classified> REZ. >POMP


I want to see the case like this

oVGRiN.jpg


Using a passive radiator , alphacool cape cora 7x142 mounted at rear sidewindow.


FPnC6k.jpg


tXE3rq.jpg


This radiators normally operate parallel .Like this

TKwIOR.jpg


But ı want to use it as serial .Like this

VKPaKI.jpg


Therfore ı must mod T-plug connectors of cape cora.. on the bottom.and block one side to to prevent fluid flow.

97eEuX.jpg


5zfT1x.jpg
 
Last edited:
good job on the back panel
 
UPDATE 20.12.2014

And make special fittings (adapters) for connection on the top between cape cora and EK-CSQ ADAPTER 90


yG6QpN.jpg


using 7 piece bended 16 mm OD clear acrylic pipes, to see color of fluid.

12mm acrylic pipe looks out very skinny to me…


MDVQ6e.jpg


I could use 16mm OD Copper pipes too… like this…in my 800D case..


cVS2j7.jpg


link


but ı want to edd a little color to the case…


I planned to use EK-CSQ ADAPTER 90 BLACK


1P06t0.jpg


EK-HDC Fittings 16mm G1/4-black(is the best rigid fitting for 16mm acrylic)


tHg69r.jpg


and bıtspower case through hole fittings-black


su2G0j.jpg
 
Last edited:
Looking awesome! :D
 
UPDATE 20.12.2014


I had planne to use EK-CSQ 90 adapters,

But ı will change EK-CSQ ADAPTER 90 Black ,with Monsoon Light Port 90 Rotary Angle Adapter ¾ Black


hMaawl.jpg


and ı will illuminate the pipes from inline with Monsoon LED Stop Fitting Black(without monsoon comp. Fitting)


8zzbym.jpg


to get the illuminated efect with 16mm thick acrylic pipes like this


1eOIvO.jpg


At last ı would like to see my MAC G5 case like this…with fluid color in bended acrylic pipes


WOTXEU.jpg
 
UPDATE 02.01.2015


Finally arrived radiators. We can continue to work.

aQm9CR.jpg


I mounted every cooling moduls(Cape Cora 142) with self-tapping screws on two metal bars 20X5X400mm.


w5cR2q.jpg


3Emy1P.jpg


Every moduls are mounted with two self tapping screws to both metal bars

75rptu.jpg


45 degree beveled ends of metal bars

V2ifPc.jpg


And they are complet mounted with two metal bars to the back side window

VVRxWb.jpg


And case with mounted cape cora 742

wm4v2y.jpg


0VUiLd.jpg


6JiyWz.jpg


B9Mnip.jpg
 
Last edited:
UPDATE 09.01.2015


To mount Acrylic-tube compresssion fittings at the top of the rads , ı will to use special fittings , instead of T-plug connectors of cape cora..


97eEuX.jpg


I made special fittings for connection on the top.


yG6QpN.jpg


Milling and drilling with lathe


mhMbRR.jpg


And the fitting from brass


sA8jPb.jpg


all fittings ready


NMSjKQ.jpg


Fitting with mounted 3x Orings


riha2G.jpg


mounted to Cape cora for testing


jEp2IZ.jpg


lead soldiers are waiting to be painted


LZT9nC.jpg


Painted mat black and mouted to the CAPE CORA..


UAb0X0.jpg


fT5UXb.jpg


URL]]
 
Last edited:
Ooh passive water cooling, looking great :toast:
 
I had a g5 case I had been planning on doing exactly this with.. however I moved earlier in the year and couldn't bring everything. now i'm depressed :( nice work man )
 
Epic Work... i stil have my case... but not so much ideas...maybe someday!
Regards,
 
This is totally awesome. Really neat idea, and you can tell a lot of time has been put into it.
 
outstanding work, for both cases !

cVS2j7.jpg


mQv5zP.jpg


So there's still some custom cut to do on the front panel for the PSU plug, isn't it ?
 
I laughed reading this...at myself !

I tried fitting a h61 m combo hackintosh into a G 5 case a few years ago

All ive got left is scar tissue and 2 side panels !!!

All credit to you its a beautiful job.

The backplate alone screwed my head right up
 
outstanding work, for both cases !

So there's still some custom cut to do on the front panel for the PSU plug, isn't it ?


Thanks CAPSLOCKSTUCK

I don t want to make cuts on front panel. I shall make PSU plug at Back Side Window direct in to the exhaust duct of PSU.
 
updated 11.01.2015

I want to use Cape Cora as serial .Like this

VKPaKI.jpg


Therfore ı must mod T-plug connectors of cape cora.. on the bottom.and block one side to to prevent fluid flow.

5zfT1x.jpg


xNaxnA.jpg


I made special stop fittings from delrin

8glmn4.jpg


and prevented flow of the fluid.

iP7d74.jpg


this is the loop of Watercooling, with serial working Cape Cora..

8Ffibb.jpg
 
update 14.01.2015


Order arrived and the fittings for acrylic tubing are ready.


Monsoon Light Port 90 Rotary Angle Fittings

pUwvqD.jpg


Monsoon Light Port 90 Rotary Angle Fittings with mounted Monsoon Premium G1/4 Led Plug

tOa2HK.jpg


Bitspower Case Top Water Fill/ Trough Hole Fittings to pass trough the case

gCJhb6.jpg


EK-HDC Fittings 16mm G1/4 FOR Acrylic tubing

JxisX6.jpg


Bitspower G1/4 Rotary 90 Adapters

Aksobm.jpg


and some special fittings of Cape Cora

GwEkiT.jpg
 
update 17.01.2015

To mount Bitspower Case Top Water Fill and through hole fittings


7G2l70.jpg


Pre drilled


uFP42U.jpg


And extended to 20 mm in diameter with step drill


nkh9VQ.jpg


ZnSRFT.jpg


Case through hole fittings mounted to control


G7Fcgf.jpg


6ZIQa0.jpg


YDqAOo.jpg


Case top water fill for reservoir mounted


zOJZII.jpg


EK-HDC Fittings 16mm G1/4 mounted to Bitspower through hole fittings.


yYVYBd.jpg
 
Back
Top