MaTo
New Member
- Joined
- Oct 13, 2016
- Messages
- 1 (0.00/day)
Finally I got the time to make a log about this build.
This is a build I did with huge support from MSI Nordic. Without them, this build would never had been a reality.

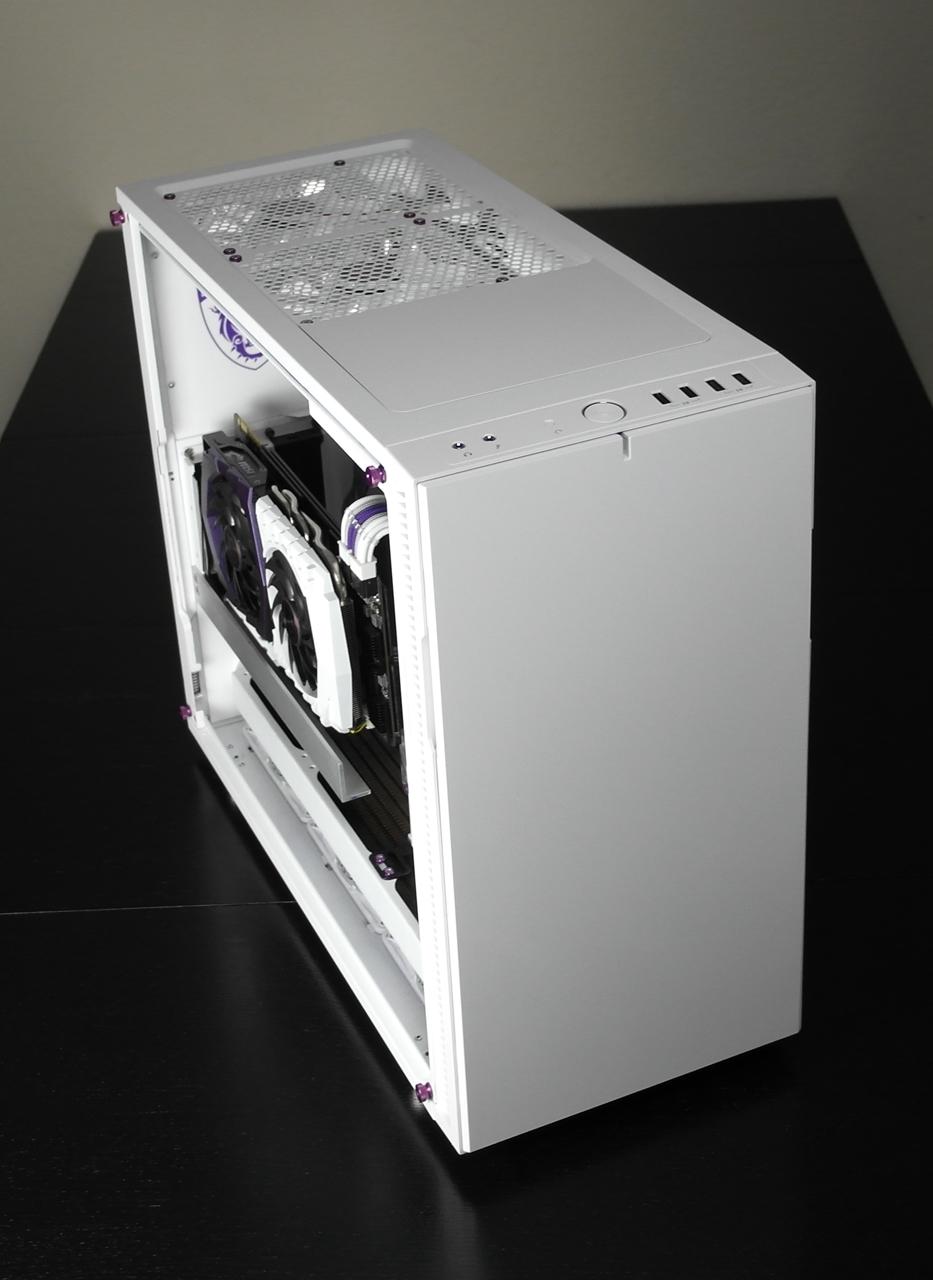
My plan from the start was to make a very unique Define R5 build, something different, something that had hopefully never been seen before.
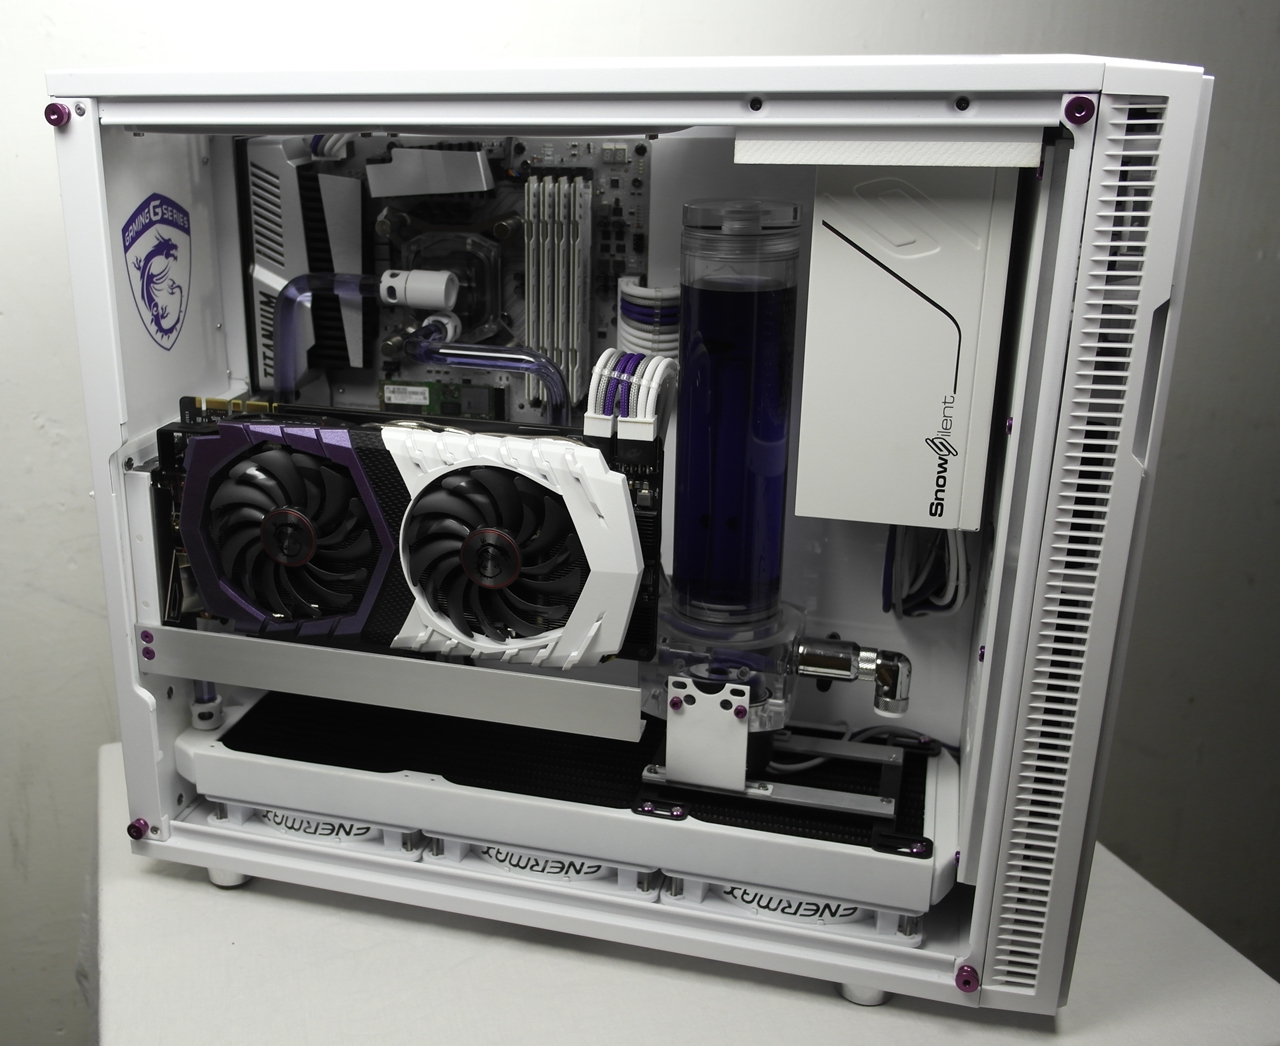
Therefore I began looking at the case to figure out, in what way I could change the layout of the case completely. I then got the idea of moving the PSU to the front top of the case, which gave me the oppotunity to fit a 420mm radiator in the bottom of the case.
Afterwards I got the idea to rotate the graphics card 90° so that the cooler will be facing the window.
Regarding the window, I was not happy with the little window that the R5 provides. I therefore decided to go with a full plexi sidepanel made of 5mm thick acrylic.
Those were the basic ideas before actually started the build.
The specifications for the build are following.
Hardware:
MSI Z170A MPower Titanium
Intel i5 – 6600K
MSI GTX1080 GamingX 8G
Crucial Ballistix Sport LT White 2400MHz 4x4Gb
Intel 600p M.2 128Gb
Seasonic Silent Snow 750W
Fractal Define R5
Watercooling:
Alphacool VPP655 – PWM
Alphacool Eisbecher D5 250mm Plexi
Alphacool NexXxoS ST30 420mm
Alphacool Eisrohr 13/10mm PETG
Alphacool Ultra Pure Water
Mayhems Dye Purple
Monsoon Hardline fittings
Watercool HEATKILLER IV Pro
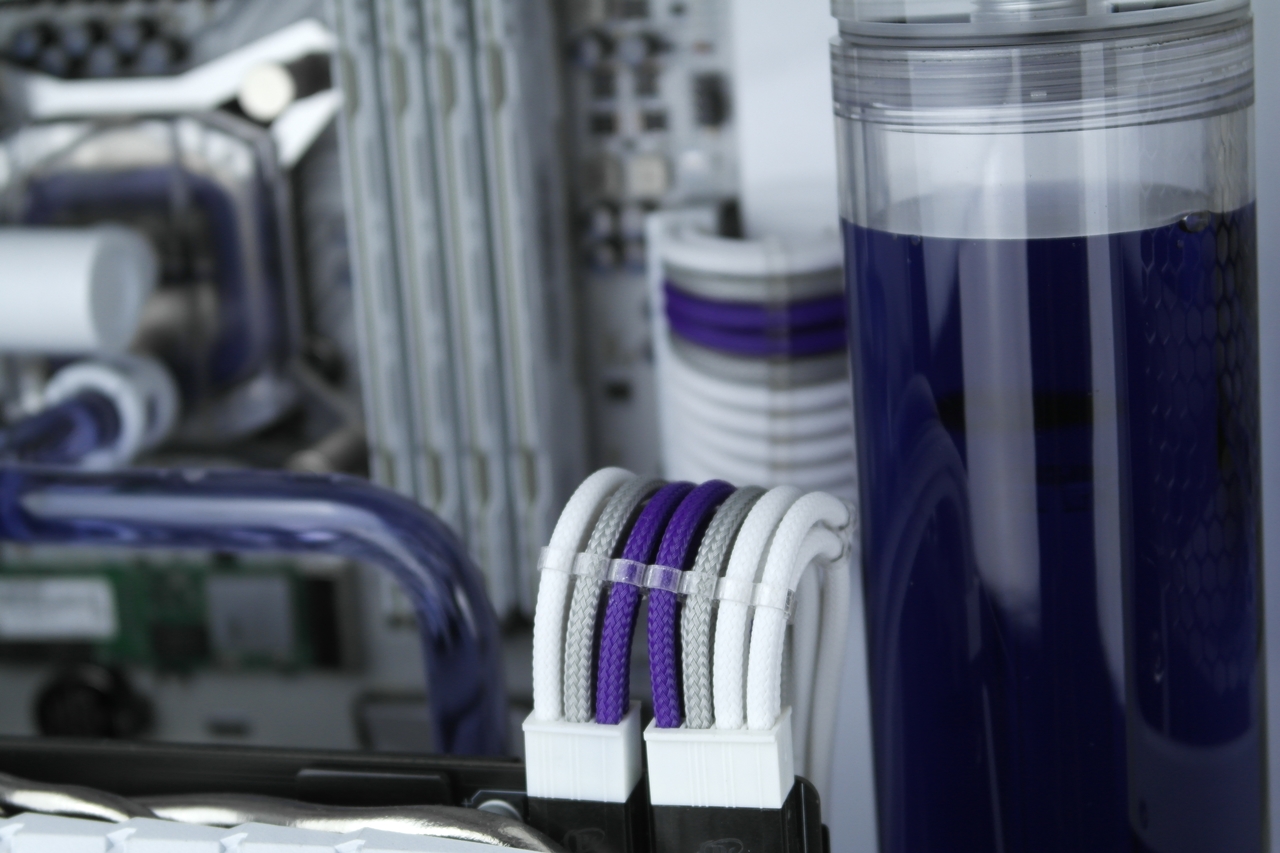
I have a ”softspot” for custom cables. Therefore are all the cables and sleeving made by myself.
Making this build was a very stressfull process for me. I had a very tight time schedule, so not very much time to do a whole lot of modding. But I managed to pull it off and have the build ready for DreamHack Winter.
I really hope that all of you like the build. Please let me know what you think of this build/mod.
Looking forward to hearing your opinions.
First some pictures of the hardware.


Then a little work in progress shots of the cables.


And finally, the build it self.")


This is a build I did with huge support from MSI Nordic. Without them, this build would never had been a reality.
My plan from the start was to make a very unique Define R5 build, something different, something that had hopefully never been seen before.
Therefore I began looking at the case to figure out, in what way I could change the layout of the case completely. I then got the idea of moving the PSU to the front top of the case, which gave me the oppotunity to fit a 420mm radiator in the bottom of the case.
Afterwards I got the idea to rotate the graphics card 90° so that the cooler will be facing the window.
Regarding the window, I was not happy with the little window that the R5 provides. I therefore decided to go with a full plexi sidepanel made of 5mm thick acrylic.
Those were the basic ideas before actually started the build.
The specifications for the build are following.
Hardware:
MSI Z170A MPower Titanium
Intel i5 – 6600K
MSI GTX1080 GamingX 8G
Crucial Ballistix Sport LT White 2400MHz 4x4Gb
Intel 600p M.2 128Gb
Seasonic Silent Snow 750W
Fractal Define R5
Watercooling:
Alphacool VPP655 – PWM
Alphacool Eisbecher D5 250mm Plexi
Alphacool NexXxoS ST30 420mm
Alphacool Eisrohr 13/10mm PETG
Alphacool Ultra Pure Water
Mayhems Dye Purple
Monsoon Hardline fittings
Watercool HEATKILLER IV Pro
I have a ”softspot” for custom cables. Therefore are all the cables and sleeving made by myself.
Making this build was a very stressfull process for me. I had a very tight time schedule, so not very much time to do a whole lot of modding. But I managed to pull it off and have the build ready for DreamHack Winter.
I really hope that all of you like the build. Please let me know what you think of this build/mod.
Looking forward to hearing your opinions.
First some pictures of the hardware.
Then a little work in progress shots of the cables.
And finally, the build it self.