- Joined
- Jul 20, 2014
- Messages
- 146 (0.04/day)
| System Name | Imfaceroll Desk |
|---|---|
| Processor | i7 4960x |
| Motherboard | Asus rampage IV black |
| Cooling | Watercooling |
| Memory | 64gb Corsair dominator platinum |
| Video Card(s) | 4 gtx 780ti's |
| Storage | 7tb western digital HDD storage |
| Case | Custom desk mod |
| Audio Device(s) | Asus xonar essence one external sound card DAC |
| Power Supply | 2 corsair gold RM series 1000w PSU's |
| Software | windows 8.1 64bit |
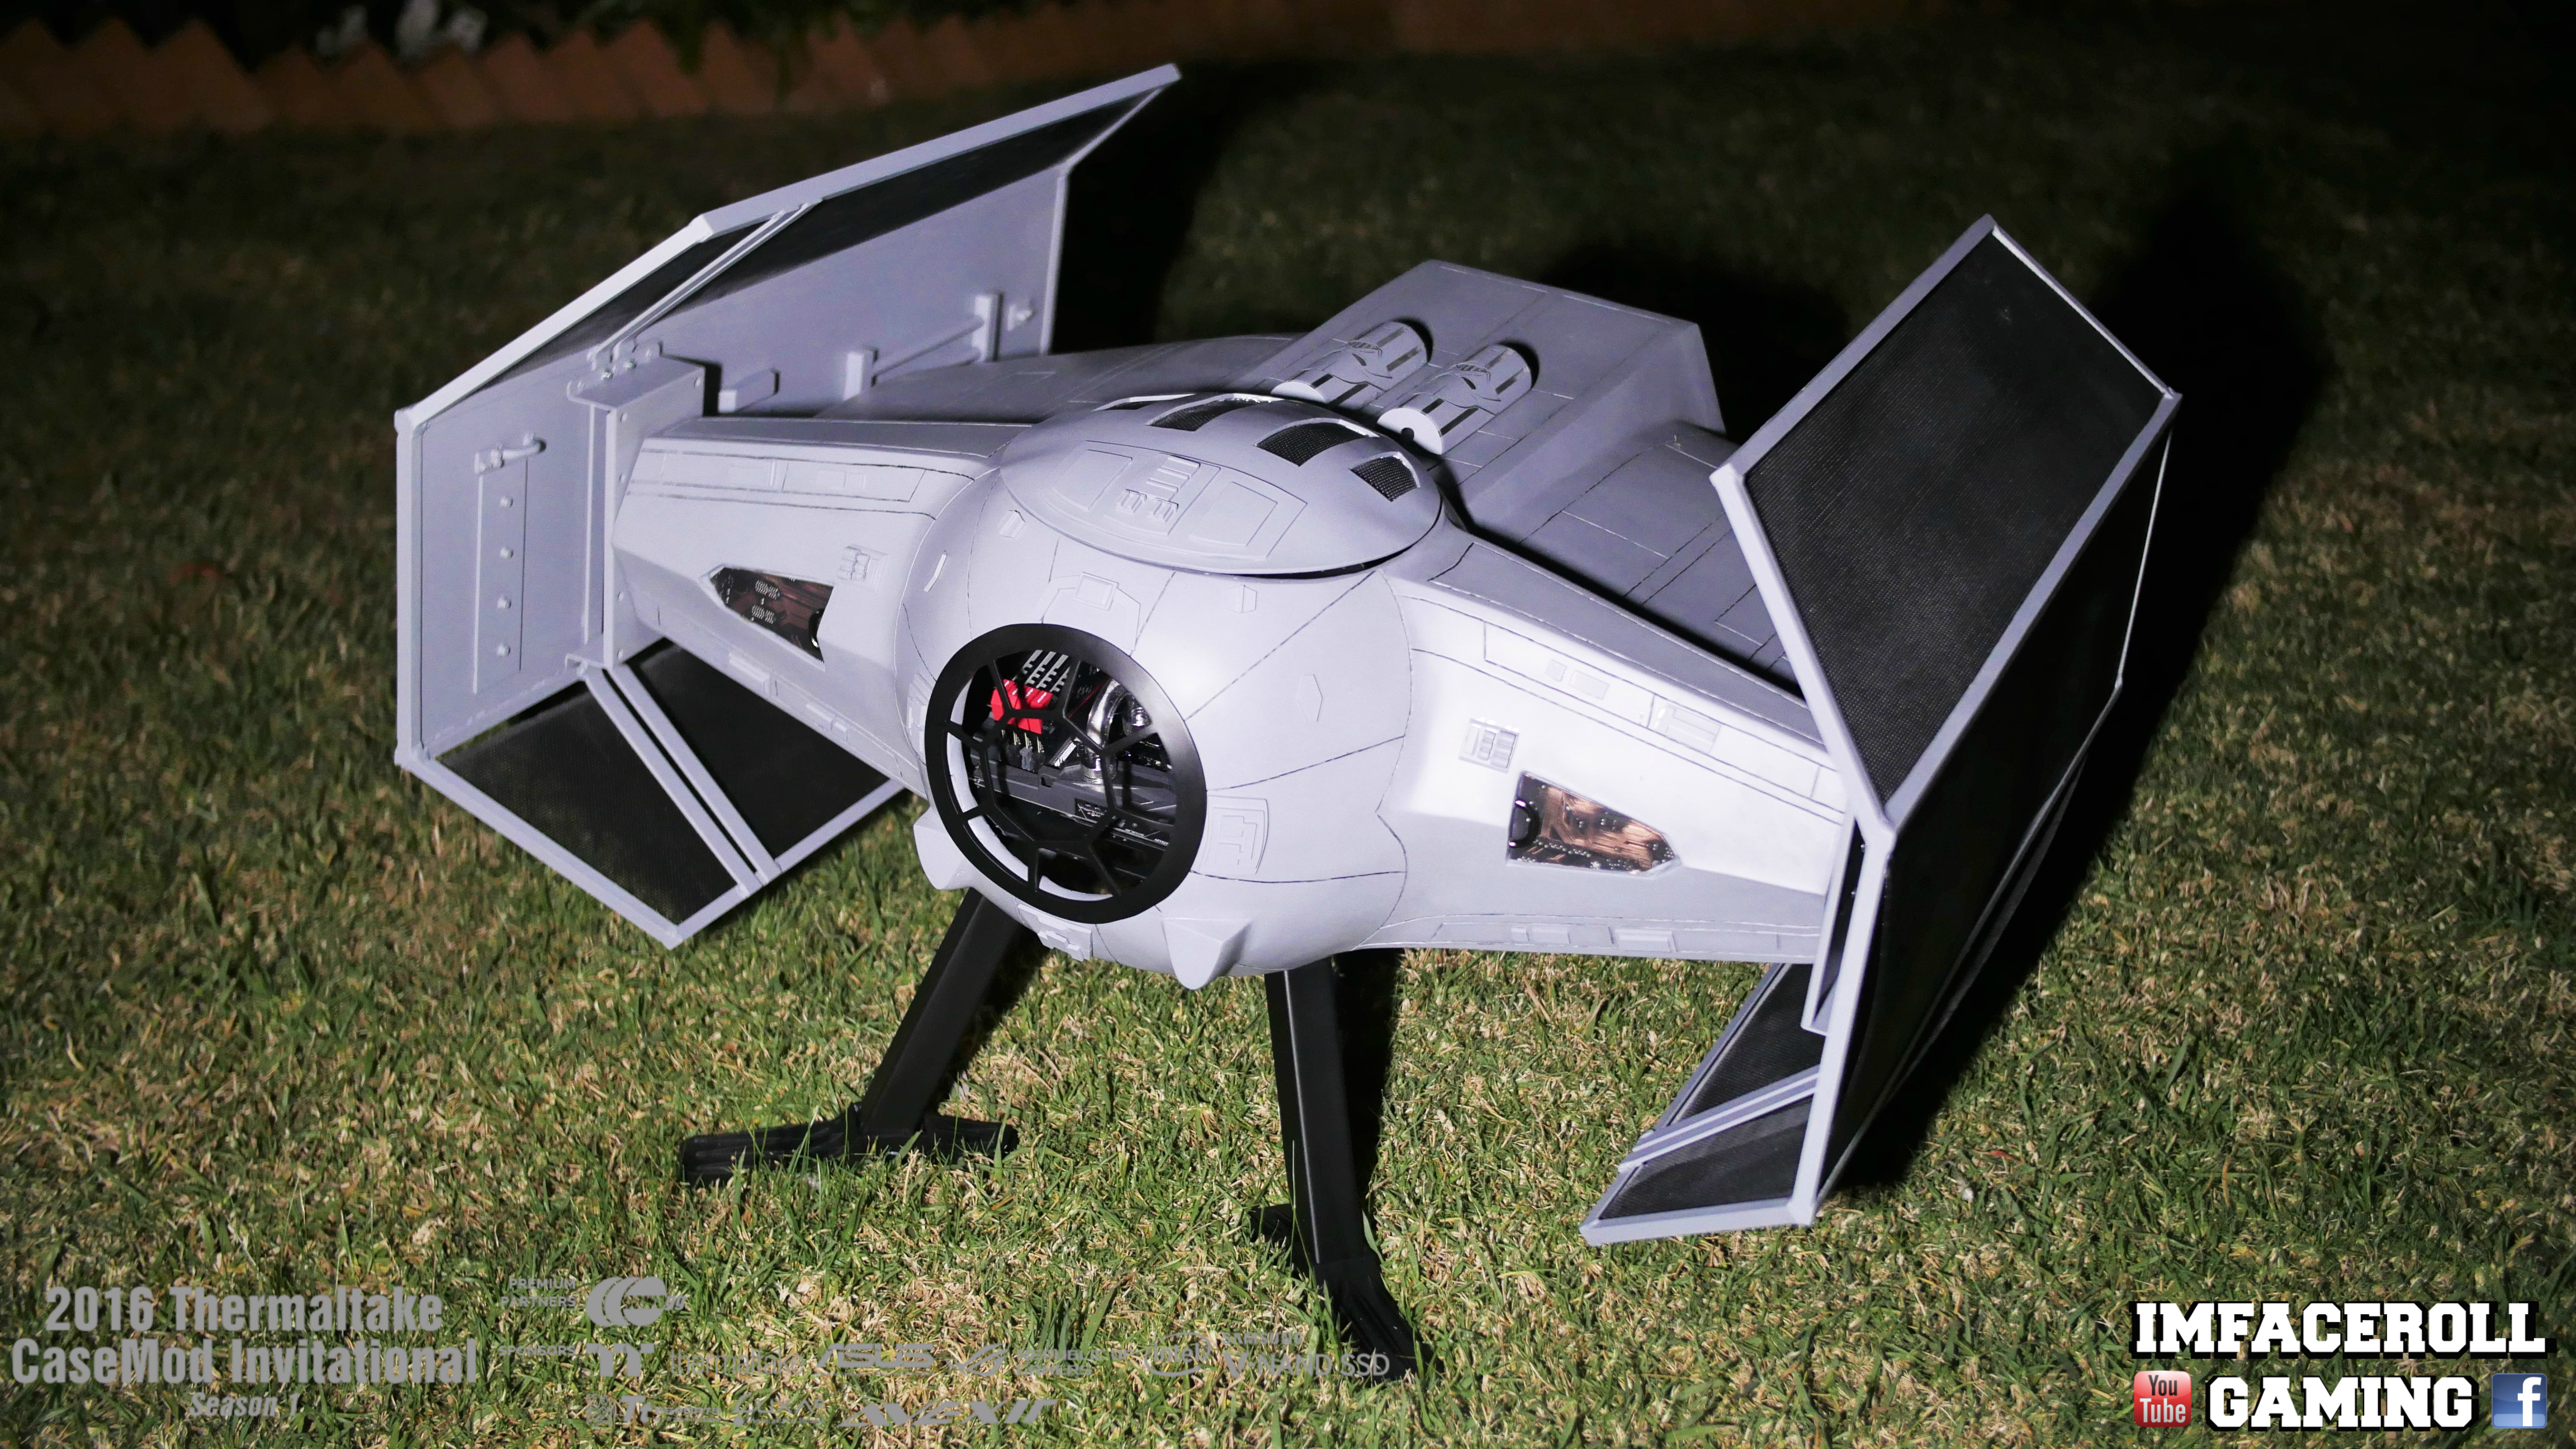
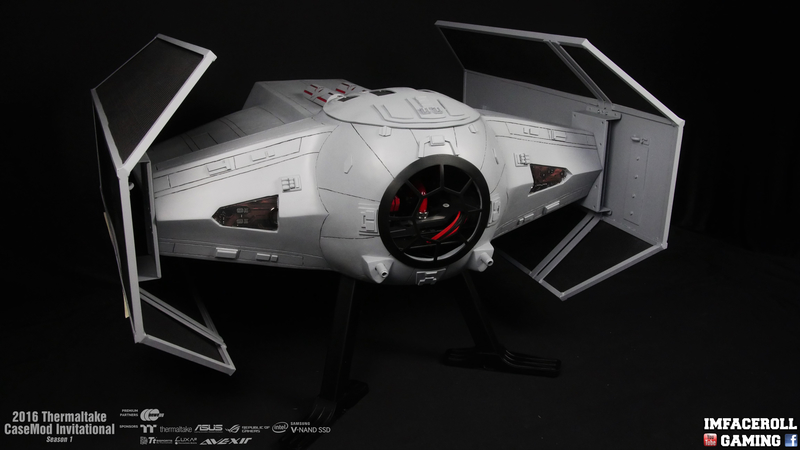
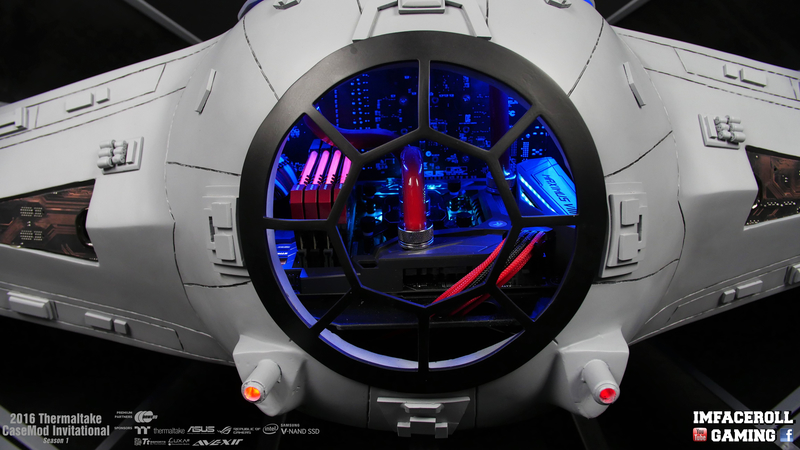
Lots of progress here guys! Some custom reservoirs, starting the details of the build, priming the build and working on the wings.
To kick things off, i measured up the mesh and used some painters tape to mark my cuts out for the wings


This is only one layer of mesh, there will be one layer on the inside and on the outside


Welded some legs to the steel rods inside the ball. The core P5 feet are made from steel so then have been welded to the legs and the plastic core p5 feet slide right over them

Starting to put a couple layers of prime on


Had an old reservoir so i decided to create two of my own custom reservoirs out of it. Removed the threaded part, sanded it down, and cut the tube in half.


I then cut out a bottom section for the two halves.

Time to Tap a G1/4 threading through the acrylic panels.


And now for the end caps, I also put a threaded hole in the end caps for an easy fill port.


Time to mend it all together and clean it up


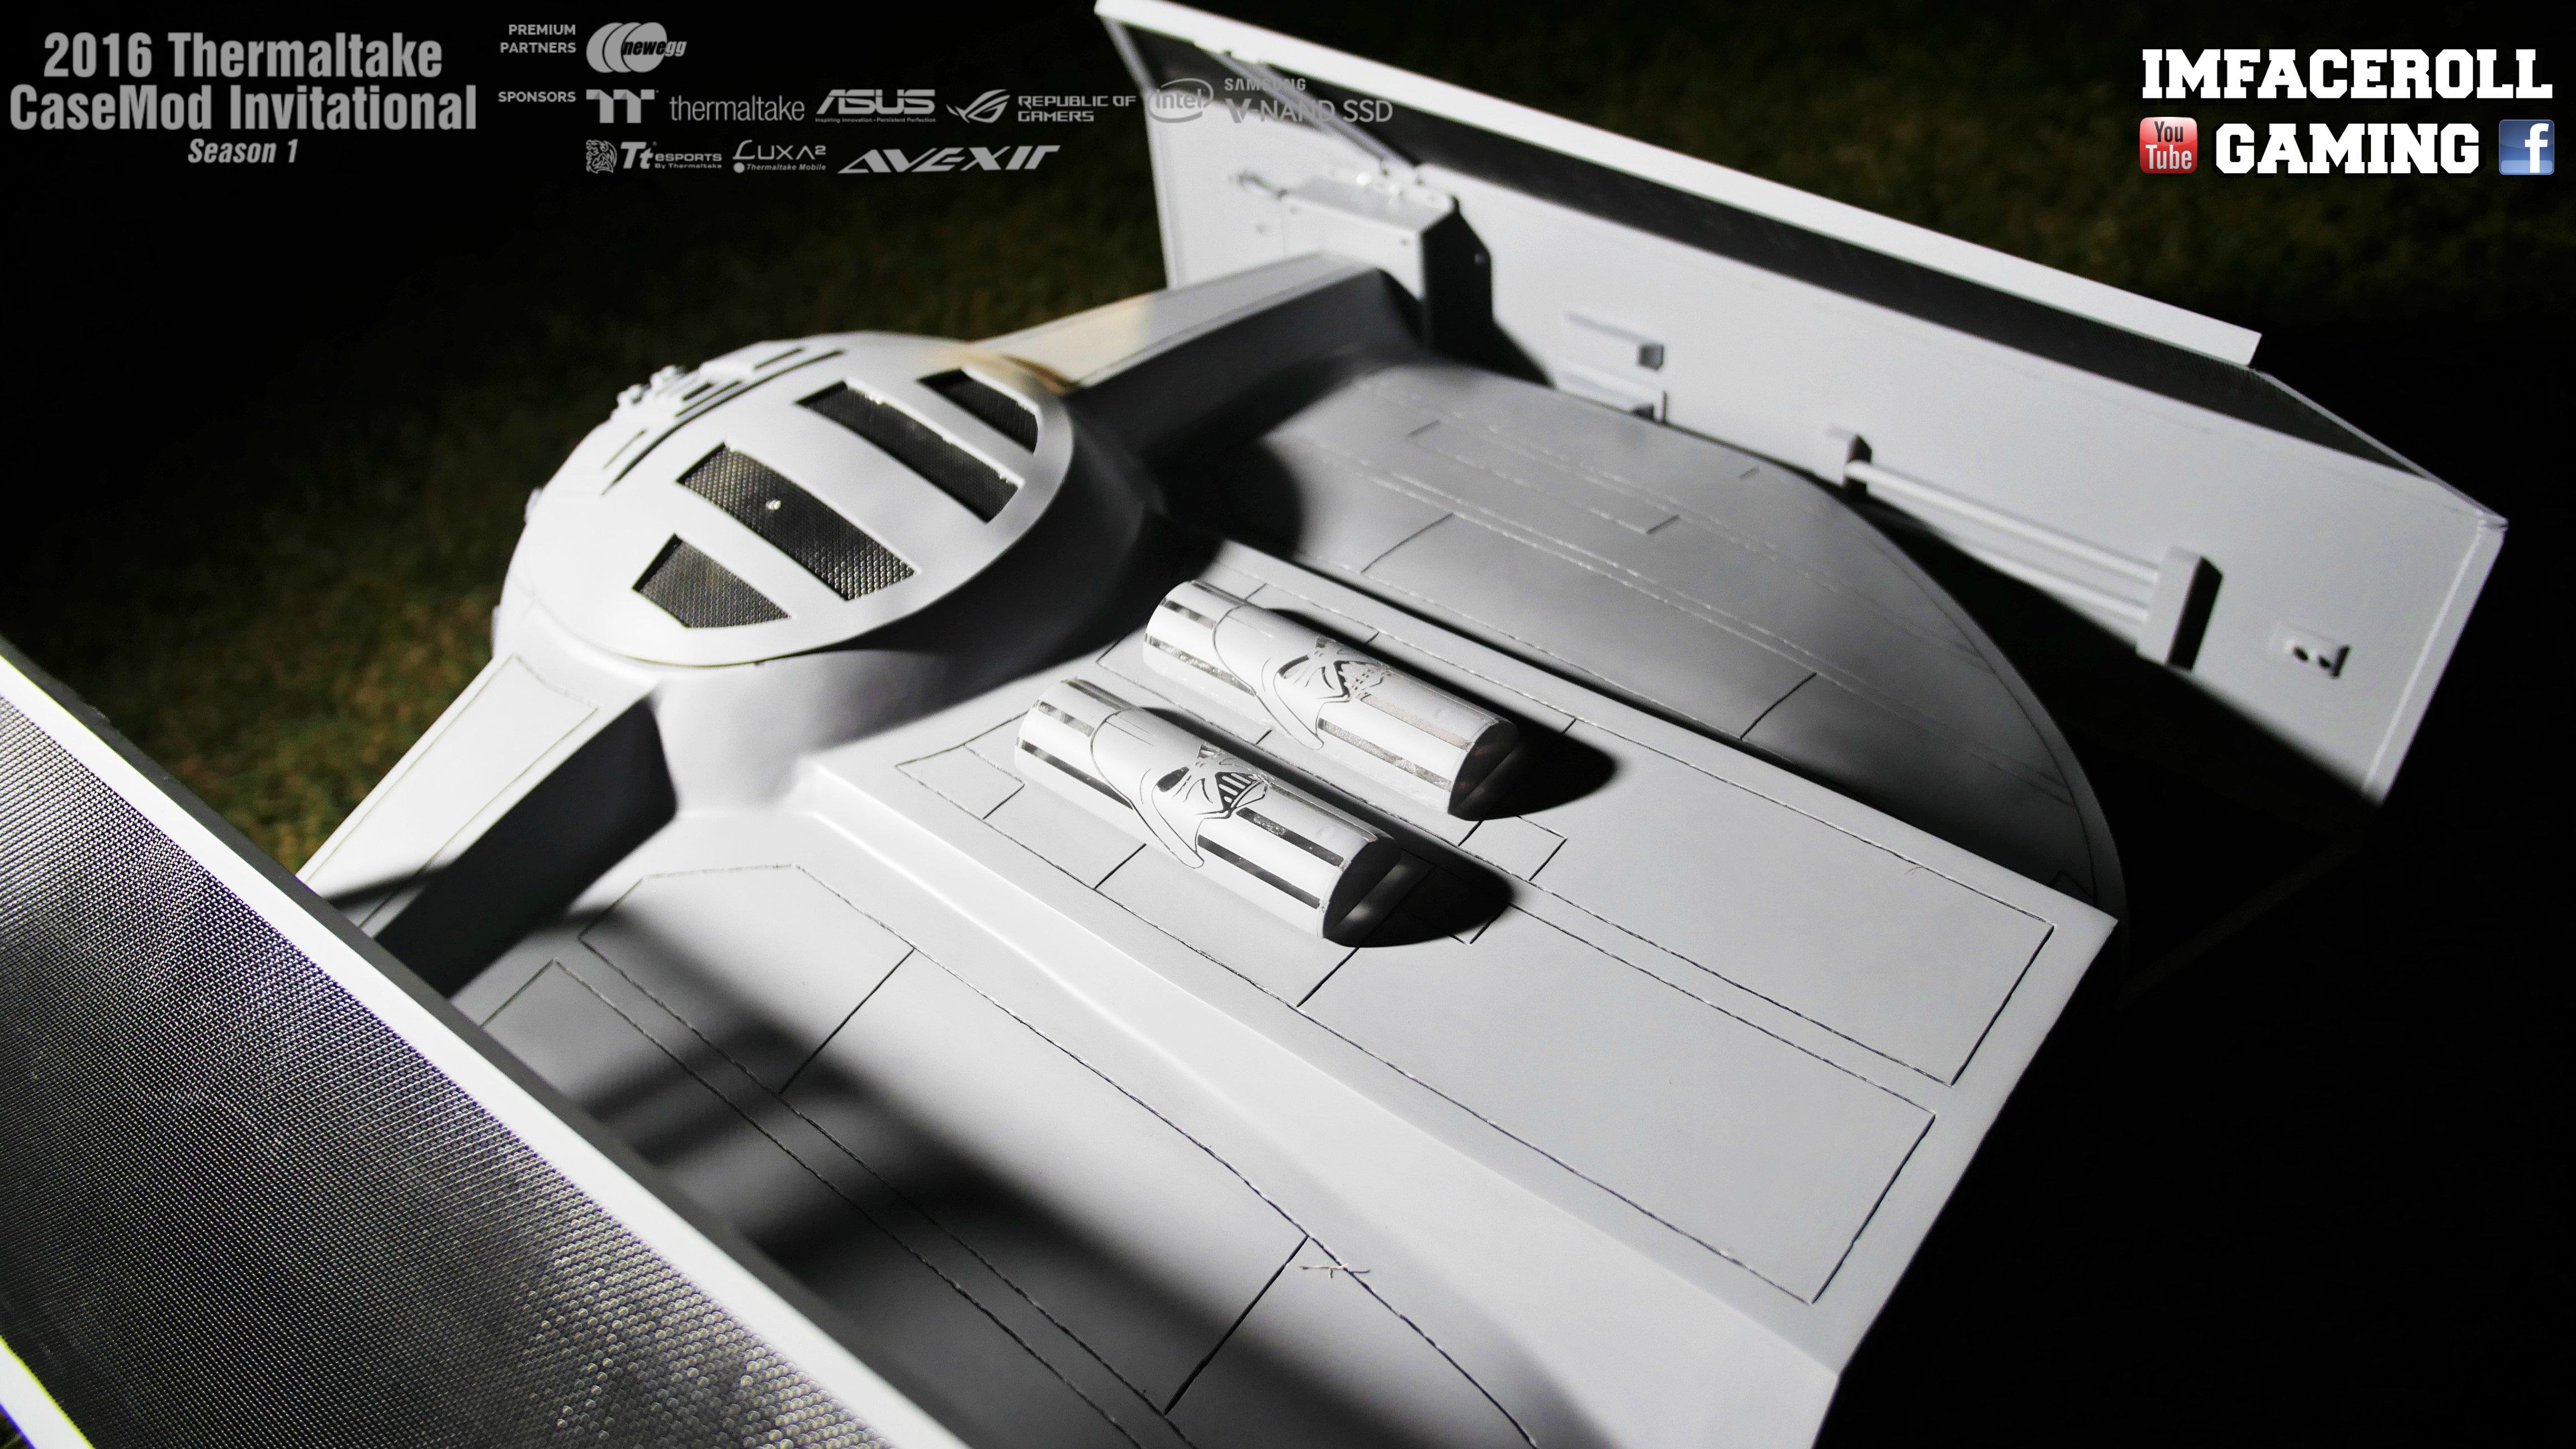
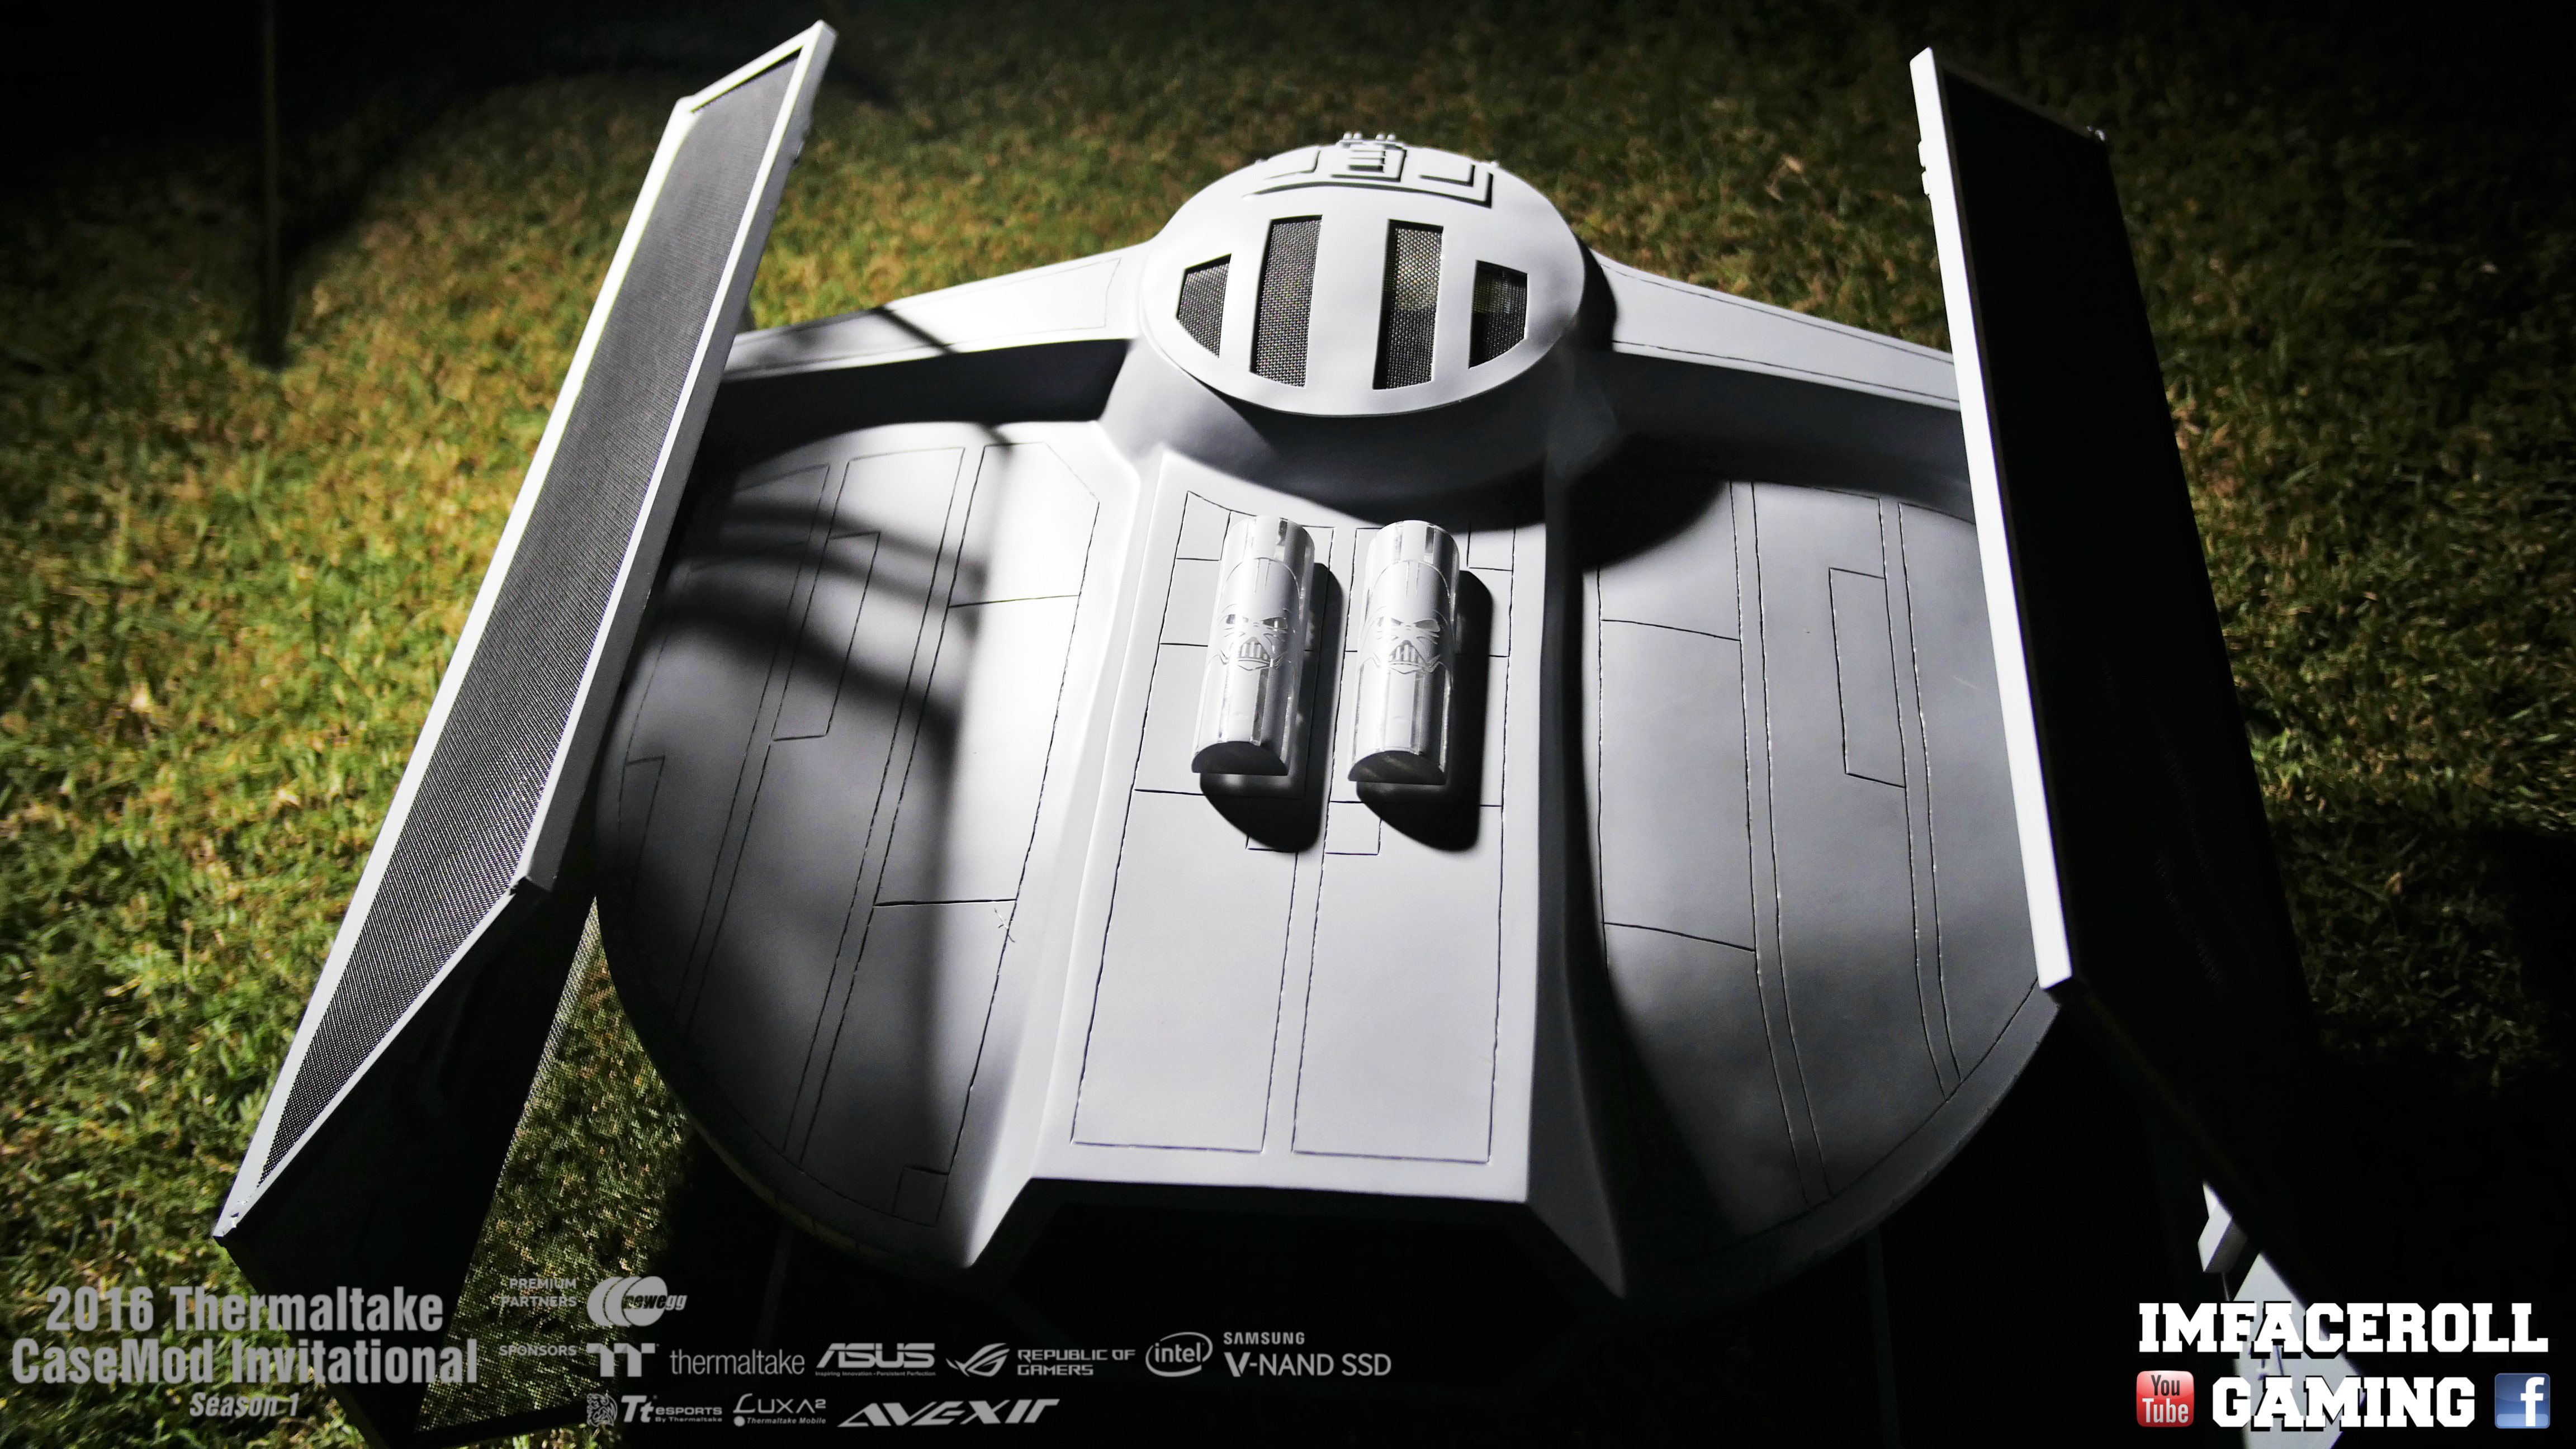
Now what would a TIE Advanced be without Darth Vader himself? So I decided to vinyl our reservoirs


The vinyl will be getting peeled off later on. Time to prime the reservoirs!


A really old dead motherboard comes in handy for some detail parts, I have sourced all kinds of junk from the shed to use for details.

As you can see, by sanding the motherboard a tad, it reviles the copper circuit inside, i think its a nice touch to that inside area, also got some small pipes to add in.


Printed out an image of a TIE Advanced to i can circle the detail bits i have complete as i progress through.


Working on some of the ball detail so i need to get that curved shape into the detail so it sits flush with the ball.


Lots of hours later and we have some details all glued and ready to go. I used a few old capacitors/caps for some of the details.

Time to work on the top section of the ball. Measured out where i want my cuts to go.


Some more details heated up and formed into the dome shape, that mould i kept really comes in handy.

A bit of acrylic cement and this becomes a permanent fixture =)


The glue marks will not matter as this will all be painted =)


Added a couple more details so fill in the empty gaps.

And taped some mesh down to show you guys what i want to do tomorrow.


This mesh will be glued in place with a strong adhesive.
I hope you all enjoyed the progress.
To kick things off, i measured up the mesh and used some painters tape to mark my cuts out for the wings
This is only one layer of mesh, there will be one layer on the inside and on the outside
Welded some legs to the steel rods inside the ball. The core P5 feet are made from steel so then have been welded to the legs and the plastic core p5 feet slide right over them
Starting to put a couple layers of prime on
Had an old reservoir so i decided to create two of my own custom reservoirs out of it. Removed the threaded part, sanded it down, and cut the tube in half.
I then cut out a bottom section for the two halves.
Time to Tap a G1/4 threading through the acrylic panels.
And now for the end caps, I also put a threaded hole in the end caps for an easy fill port.
Time to mend it all together and clean it up
Now what would a TIE Advanced be without Darth Vader himself? So I decided to vinyl our reservoirs
The vinyl will be getting peeled off later on. Time to prime the reservoirs!
A really old dead motherboard comes in handy for some detail parts, I have sourced all kinds of junk from the shed to use for details.
As you can see, by sanding the motherboard a tad, it reviles the copper circuit inside, i think its a nice touch to that inside area, also got some small pipes to add in.
Printed out an image of a TIE Advanced to i can circle the detail bits i have complete as i progress through.
Working on some of the ball detail so i need to get that curved shape into the detail so it sits flush with the ball.
Lots of hours later and we have some details all glued and ready to go. I used a few old capacitors/caps for some of the details.
Time to work on the top section of the ball. Measured out where i want my cuts to go.
Some more details heated up and formed into the dome shape, that mould i kept really comes in handy.
A bit of acrylic cement and this becomes a permanent fixture =)
The glue marks will not matter as this will all be painted =)
Added a couple more details so fill in the empty gaps.
And taped some mesh down to show you guys what i want to do tomorrow.
This mesh will be glued in place with a strong adhesive.
I hope you all enjoyed the progress.


") But this has turned into something brilliant. The last time i was excited like this for an update was from MKMods.
But this has turned into something brilliant. The last time i was excited like this for an update was from MKMods.