• Welcome to TechPowerUp Forums, Guest! Please check out our forum guidelines for info related to our community.

[Workblog] Project Reversed Gaming Build by JejeLaPelle

Joined
Oct 4, 2016
Messages
64 (0.02/day)
Hello!

Thanks for following! I do my best!

Here is the milling of the new acrylic piece !

I would like to say that, the things i'm showing, are NOT AT ALL a tutorial, it's how i did, don't do that at home (for those who have a milling machine at home....)

First, i used a wooden plate, to not hit the table with the drill, i fixed the whole thing VERY CAREFULLY!


Seems i'm ready... the beast too!


Second step, make the exterior pass :


So you have a smooth surface, and the right size!

Then you make the 12mm holes, for G1/4 :


The coolant pass now, with a 10mm drills :


I'm using air to remove the chips!
Those pass are 10mm depth, but you don't do the 10mm in one time, here, i took 2mm by 2mm.
And to finish, the seal's groove.


After that i do holes for the screws...
And after some cuts in the aluminium, and a nice bend, you have :


Hope you like!

Next week, pictures of the case building!
 
Joined
Oct 4, 2016
Messages
64 (0.02/day)
Hello,

Just a small update to post some pictures of the squeleton of the case.

Photos are really bad... sorry for that...


Even if it's ugly (i mean the photo quality), we can see the adaptator plate i've made for the DUAL DDC (to fit a 120mm fan), the brand's name, well placed in front of the acrylic plate.

You can also noticed the space beetween the two aluminium plate for cable management.

Late this week i'll show you the graphic card with the WB and the original backplate. I removed the leds from the stock cooler and i know how to fix them the block.
I'll also show you my PSU box, almost finished... It has been long, because of the color choice, but now, i've got it! And it's not black, neither white....
 
Joined
Oct 4, 2016
Messages
64 (0.02/day)
Hello!

Here is the work on the graphic card!

This is the LED system from the original rad of the GPU :


Asus did a nice thing, because you only have two leds illuminating the rad, light is transmit by a kind of plastic tube.
I had to add lenght to the led cables, i also sleeved it, and here it is, under the block :


(so now, we can see the Asus logo on the chipset!)

I added a small plastic plate (painted in black) to maintain the led and hide a bit.


The other siden with original backplate, i only drilled some holes and used new screws (this BTR are not the definitive screws).


Now my PSU box!


I'm really happy with this color, because it takes well light and color as you can see on this picture :


So for RGB i think it will be perfect!
This grey (instead of black or white) choice was made mainly while seing the project CrystaliZed 570x by Daniel "twister" Bolognesi (if you don't know this mod, google it... so awesome!). I've just adapt the color for a nice match with black and white.

So what's next? Boring things for you mainly! I will have to do some holes for the lasts things (some cosmetics, some for the I/O panel, fix the reservoir ect...). Sand a lot and paint...
Interesting things will be :
-placement of feet and the lower plate (yes there is an other layer of aluminium!
-doing the I/O panel
-doing the last acrylic part (the top one)

When all of this will be done, it will be the best part! Tubing and testing!
 
Last edited:
Joined
Oct 4, 2016
Messages
64 (0.02/day)
Hello!

This week was very intensive, i'll show you some of the things i've done!

First, i put the Lightning Node and the Fan led controller on a plate. This will be placed in the space for cable management :


I also fixed the reservoir to the main case panel :


You can see the little aluminium plate beetween the two part of the res, this will be to align.

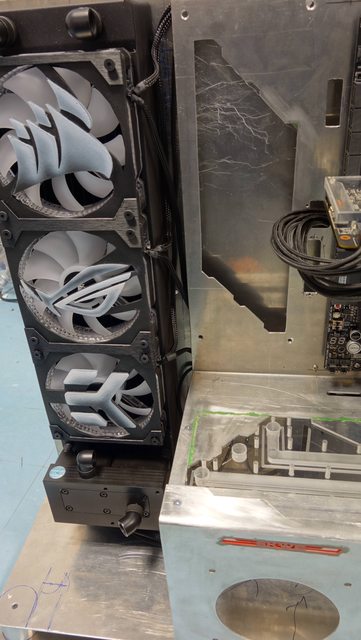
You can see the purge valve (hole will be done under the valve to allow purging without moving it), and also the rad, with new M4 threads, small aluminium plate with black aluminium covering beetween fans.
And maybe also... the feet of the case (BTW there will be another aluminium plate under...)

In the back there is a kind of ... something... which look a bit like that, but less bended :


I will fix the RGB leds strips on those things, and the blocks with the hole will allow me to put them on spacer.

Last thing, i worked on the I/O panel.
I made an acrylic part, with holes for USB and On/Off


Add a bit more of aluminium :


And i tried how it will look with RGB lightning :


Quite happy!

Next week, i will do my last acrylic piece, do more holes, more sanding, some 3d printing (the seals mainly) and sleeve (got fan to sleeve, and pump).

See you, thanks for reading!
 
Joined
Oct 4, 2016
Messages
64 (0.02/day)
Hello,

Thanks Blobster! Yes, it's long, i see the light at the end of the tunnel!

Another good week, i moved forward more than i was expected!

I did my last piece of acrylic for the top, the back panel, and i'm currently working on the last part : the side panel.

I also sleeved pumps and fans, but here is the result of my work :


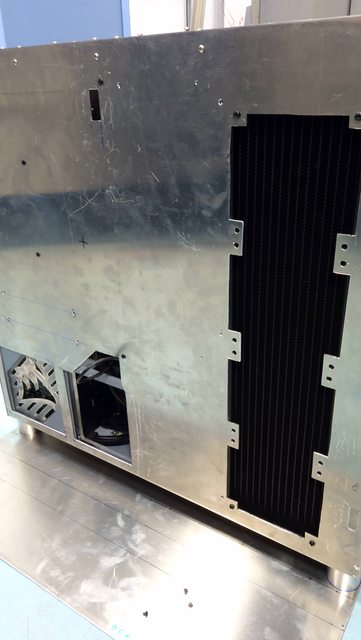
Back side now, the open space in the PSU box, where you can see cables, will be closed, it's just far easier to cable management like that!


Few words on the side panel i'm doing. It will be made of three parts, two aluminium, one acrylic. one aluminium for the bottom, bended, the other one to hide the rad and some of the screws. The remaning place will be covered by acrylic.

To fix the differents plates, i've done some spacers with a lathe :


Next week, i finish few things, try to print seals, and i'll be close to bend some tubes!

Hope you liked, thanks for reading!
 
Last edited:
Joined
Oct 4, 2016
Messages
64 (0.02/day)
Hello,

On another forum, someone told me i do not show you the 3D printed seals (in filaflex) so here it is :


it looks a bit white, and it is really like that, but once it is in position and compressed, it's near to be transparent!

So i'm testing all the acrylic part, looking for leaks...

Here is my reservoir, without leak! (i only have one little leak, i have to wait a bit to retest, it should be OK)


So it seems that early next week, i will be able to begin tubbing!

Bye!
 
Joined
Oct 4, 2016
Messages
64 (0.02/day)
Hello,

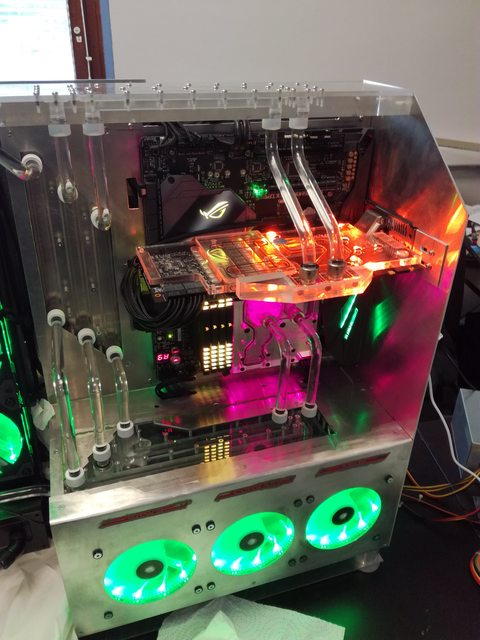
Here is the pictures of the tubbing, done, but i'll change a lot of them, i'm not happy with the result, most of the tubes have small imperfections.


I've also modified one of the 1080ti Strix to put it just above the motherboard I/O panel (in exhaust) :


Leak test this week.
 
Joined
Oct 4, 2016
Messages
64 (0.02/day)
OMG OMG OMG


Just one of the led strip is placed (the front one), the other need to be glue.
I'm really happy with the lightning of Strix! This is something easy to do, and it's really nice looking!

No leak (well... a really small one... but i will tight a bit more the screw and it will be fine)

Sorry for the bad pictures, was too excited!!
 
Joined
Oct 4, 2016
Messages
64 (0.02/day)
Hello!

Sanding and painting done!

I'm building the case again, but this time with all lightning, and with good cable management.


You can see the case color better on this one :


Nah, i'm kidding, you'll see that later!

For cable management i'll use tie and those things :


During this week i printed guide for bending tubes :


But it is not working well, i need to change a bit the design.

After that, i did new logo batch :


You can see Primochill logo, maybe maybe... (And yes there is Asus, even if they don't answer me YET...)
The case will be fully build this week, i'll need coolant to continue. But we are close to the end!
 
Joined
Oct 4, 2016
Messages
64 (0.02/day)
Some photos of the mod right now.


Liquid will be ordered soon, and i'll print two more things and i'll paint it.
 
Joined
Oct 4, 2016
Messages
64 (0.02/day)
My video is not good, but keep in mind it's my first video editing. Please be kind!


And some pictures


And the shame one

Small leak...
BIt's not fleeing anymore, so...

 
Joined
Oct 4, 2016
Messages
64 (0.02/day)
Somes pictures i took this week end, beetween my games of test for my new 4K monitor...


I will have to take better pictures soon, with differents kind of lightning.

But the system work really fine, got nice temps (35°C GPU under load, 50°C CPU under load, idle it's 24°C for GPU and 26°C for CPU) with no noise (pumps and fans around 30%), and it gives 60fps in 4K ultra settings in BF1.
 
Joined
Oct 4, 2016
Messages
64 (0.02/day)
Hello everyone!

Here is the post with the finals picts, but first, i'll show you some little things!

First, those two printed plates :


I thought putting it under the mother board. But it will be too much...

Then, the back of the mod :


One of the panel is not screwed one the photo. It is now!
I add to the SSD a plate with covering and a 3d printed logo of Corsair.

Now, what you are looking for i think :

Unicorn one :


Red one :


Blue one :


White one :


Pink one :


Purple/yellow :


Christmas one :


(AT-AT is because i'm going to watch Star Wars in 2 hours!)

And the final one is my choice for everyday, blue/orange :


And the reservoir, without and with lightning :


The lightning effect here is not as expected, the channel acrylic plates are way better for lightning effects.

And now off :


I hope you liked it.

The workblog will be finished soon, after a big update of the first post. I should do it before the next two weeks.

Bye!
 
Joined
Oct 4, 2016
Messages
64 (0.02/day)
Hello there...

After two weeks.... And three months... Here is the end of this project.

There is a good reason for this delay... Asus ROG France

In early december, they told me that they had an answer for my sponsoring request, but they had to wait mid/late january to have budget. So i wait, if they were supporting, i would have to change a lot of things in workblog.

And i wait, and again. No answer, except "we have a lot of request, be patient".

This not a big deal, the mod is really working well, and Asus stuff is incredible, but Asus ROG France are not efficient at all, com service is ridiculous compared to german/british one.

Some numbers now.

I took 6 months to achieve it
It's about 450 hours of work (not the conception, only realisation)
The tower weight about 30kg
It's now working since 4 months, very well
It delivers easily 60fps on a 4K monitor (in Battlefront 2, all graphics options activated) and is really quiet

So again, thanks for following

A big thanks to EKWB, Atila (from EKWB), CORSAIR, Silvin (my mate who learn me how to mill my acrylic, help me with 3D printing ect....), my wife (because she did not killed me for building this PC while she was awaiting our child).

I'll be back soon with a small project called Symbiose (HTPC in a In Win Chopin case) bye!
 
Top