 3
3
Antec ISK 600M Review
Assembly & Finished Looks »A Closer Look - Inside

To access the interior, you will have to remove three thumbscrews, which will allow you to take the ISK 600M's entire cover off. Doing so will reveal that the tray in the front holds both the slimline ODD and two additional 2.5" drives. Just like in the smaller chassis, the tray is lined with foam pads to ensure that it stays in place without passing on any vibrations.


There are openings on both sides, so you can easily reach everything should the need arise. Every edge is folded, which allows you to reach into the chassis without having to worry about incidental cuts.


You may install two 120 mm fans on the CPU's side, which will also make liquid-cooling solutions of up to 120 mm or 240 mm in size possible. To install two fans or a large radiator, you will have to remove a metal piece that holds the top SSD and ODD tray. While it is great to have such an option, it is unclear as to why Antec did not simply move the mountings for these fans ever so slightly to allow for both expandability and cooling.


Taking a closer look at the ISK 600M's lower compartment, the PSU bay is beautifully lined with foam, so you really won't have to worry about any vibrations passing onto in this area of the chassis. 3.5'' hard-drive mounting possibilities are simple, but functional, only requiring two screws to secure properly. As I noted before, you may also install two 2.5" drives onto the floor.


Unlike the ISK 600, the lager M variant features a single 140 mm intake fan. This will result in a great improvement to internal cooling - even if the fan has to draw air in through the side vents. You may also remove the front and replace the fan there with two 120 mm units instead. Taking a look at the rear, everything is were we expected it to be. Each expansion slots is protected by an individual cover and a traditional screw. Interestingly enough, the sample we got was actually really dusty inside, which is unusual for a brand-new enclosure.
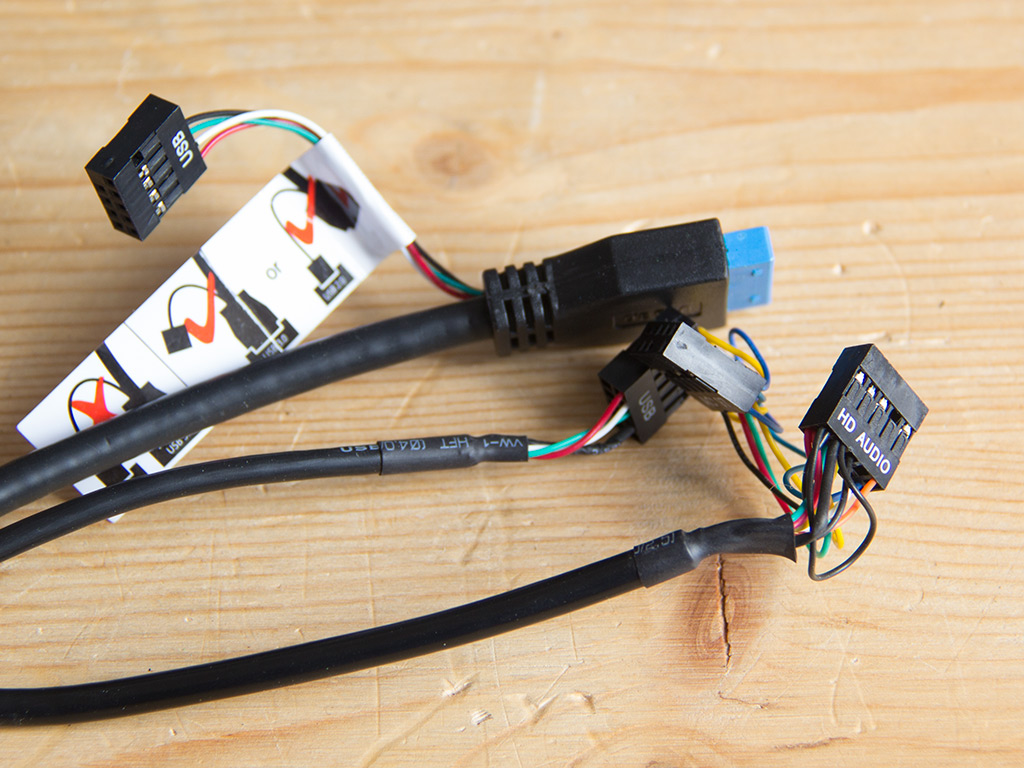


Before we dive into the assembly process, let us take a quick look at the other cables. First off, there are the I/O leads. The USB 3.0 plug that only connects to the single connector in the front actually does come with a full 3.0 and 2.0 header. There is absolutely no reason for Antec not to offer two USB 3.0 ports instead of this mixture in generations since the proper cable to use either variant is there. One of these cables would have even been obsolete had Antec only included two modern USB plugs instead. Every cable - Power, Reset, and LED - is pretty standard; that is, with the exception of the power LED cable. Here, Antec employed a fully sized Molex plug since their lighting element draws a lot of power and would otherwise cease working while plugged straight into the motherboard's header. Both fans come with their signature high/low switch, firmly attached to each.
May 15th, 2024 02:12 EDT
change timezone
Latest GPU Drivers
New Forum Posts
- AM5 boot times improve RADICALLY with memory context restore enabled (54)
- 2024 and STILL no dark mode? (49)
- Immortals of Aveum deserves a second chance, the new free demo has convinced me. (22)
- Is it normal to hear this sound coming from the psu? (9)
- Windows 10 General Discussion (5)
- Prochot 95c turning red even though temperatures are not even close at around 50-65C? (0)
- What are you playing? (20652)
- not impressed - nvme vs ssd (129)
- Air makes its way from the reservoir into the radiator. (76)
- Post your Cinebench 2024 score (459)
Popular Reviews
- Homeworld 3 Performance Benchmark Review - 35 GPUs Tested
- Enermax REVOLUTION D.F. X 1200 W Review
- ZMF Caldera Closed Planar Magnetic Headphones Review
- Upcoming Hardware Launches 2023 (Updated Feb 2024)
- Corsair MP700 Pro SE 4 TB Review
- AMD Ryzen 7 7800X3D Review - The Best Gaming CPU
- ThundeRobot ML903 NearLink Review
- Bykski CPU-XPR-C-I CPU Water Block Review - Amazing Value!
- ASUS Radeon RX 7900 GRE TUF OC Review
- CHERRY XTRFY M64 Pro Review
Controversial News Posts
- Intel Statement on Stability Issues: "Motherboard Makers to Blame" (266)
- AMD to Redesign Ray Tracing Hardware on RDNA 4 (227)
- Windows 11 Now Officially Adware as Microsoft Embeds Ads in the Start Menu (172)
- NVIDIA to Only Launch the Flagship GeForce RTX 5090 in 2024, Rest of the Series in 2025 (152)
- AMD Hits Highest-Ever x86 CPU Market Share in Q1 2024 Across Desktop and Server (132)
- Sony PlayStation 5 Pro Specifications Confirmed, Console Arrives Before Holidays (119)
- AMD's RDNA 4 GPUs Could Stick with 18 Gbps GDDR6 Memory (114)
- AMD RDNA 5 a "Clean Sheet" Graphics Architecture, RDNA 4 Merely Corrects a Bug Over RDNA 3 (108)