 13
13
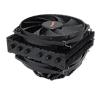
be quiet! Dark Rock TF Review
Finished Looks »Installation


When installing the be quiet! Dark Rock TF, start by positioning the backplate on the motherboard and dropping the four backplate screws through their holes. Once done, use the black plastic C-clips to hold the screws in place, before screwing the threaded posts onto the backplate screws. This will create the platform the mounting arms will anchor to.


After applying some thermal paste, prepare the heatsink for mounting by attaching the proper mounting arms to its base. Now, place the cooler on top of the CPU by lining up the four posts and the four holes on the mounting arms. With that done, place the nuts on top of their mounting arms and turn them a few times. The last steps would be to use the included wrench to hold them in place properly, before using a screwdriver from behind to tighten them up. If this all sounds fiddly, well, it is.

All that's left is to attach the fans to the heatsink before plugging them into the motherboard's fan headers.
The installation procedure for the Dark Rock TF leaves a lot to be desired. I would rate the process a 7 on a scale of 1 (hardest) to 10 (easiest). While not hard by any means with the motherboard outside of a case, it will prove a bit more painful when a system is already built. Needless to say, be quiet! really needs to come up with a better mounting system as this is one area where they are being left behind by the competition.
Jun 1st, 2024 05:51 EDT
change timezone
Latest GPU Drivers
New Forum Posts
- Where are the drives supposed to go? (39)
- what are these partitions and can they be removed? (4)
- FX AMD Radeon RX 580 2048SP BIOS ROM required ?? Please help me (11)
- Z890/X870 feature dreamlist (23)
- Gigabyte am5 motherboard ddr5 not posting when rebooting (46)
- What's your latest tech purchase? (20707)
- How do you get games for PC? (0)
- Core counting (48)
- HDD pauses at every command (15)
- V Rising Lycanthropy Club (7)
Popular Reviews
- ID-Cooling FX360 PRO Review - Shots Fired @ Arctic
- SilverStone KL07E Review
- NuPhy Air96 V2 Low Profile Wireless Mechanical Keyboard Review
- Senua’s Saga: Hellblade II: DLSS vs. FSR vs. XeSS Comparison Review
- Upcoming Hardware Launches 2024 (Updated May 2024)
- Montech Titan Gold 1000 W Review
- Waizowl OGM Cloud Review
- Elysian Acoustic Labs Pilgrim In-Ear Monitors Review
- Ghost of Tsushima Performance Benchmark Review - 35 GPUs Tested
- Senua's Saga: Hellblade II Performance Benchmark Review
Controversial News Posts
- AMD to Redesign Ray Tracing Hardware on RDNA 4 (227)
- NVIDIA to Only Launch the Flagship GeForce RTX 5090 in 2024, Rest of the Series in 2025 (154)
- AMD Hits Highest-Ever x86 CPU Market Share in Q1 2024 Across Desktop and Server (140)
- AMD RDNA 5 a "Clean Sheet" Graphics Architecture, RDNA 4 Merely Corrects a Bug Over RDNA 3 (139)
- NVIDIA RTX 5090 "Blackwell" Founders Edition to Implement the "RTX 4090 Ti" Cinderblock Design (115)
- Core Configurations of Intel Core Ultra 200 "Arrow Lake-S" Desktop Processors Surface (101)
- Biden Administration to Revive Trump-Era Tariffs on China-made GPUs and Motherboards (95)
- NVIDIA Testing GeForce RTX 50 Series "Blackwell" GPU Designs Ranging from 250 W to 600 W (84)