 10
10
Cooler Master Storm Sniper Review
Value & Conclusion »Assembly

Installing the mainboard is done the traditional way, with the use of mainboard spacers and screws. As you can see there is plenty of working space within the chassis, so the lack of a removable mainboard tray - a feature usually found in chases of a similar price range - can easily be excused. The mediocre holding mechanism for the expansion cards is ok, but will not manage to hold large and long graphic cards. Considering the Sniper is a gaming chassis, I am a bit dissapointed to see such a system in place.

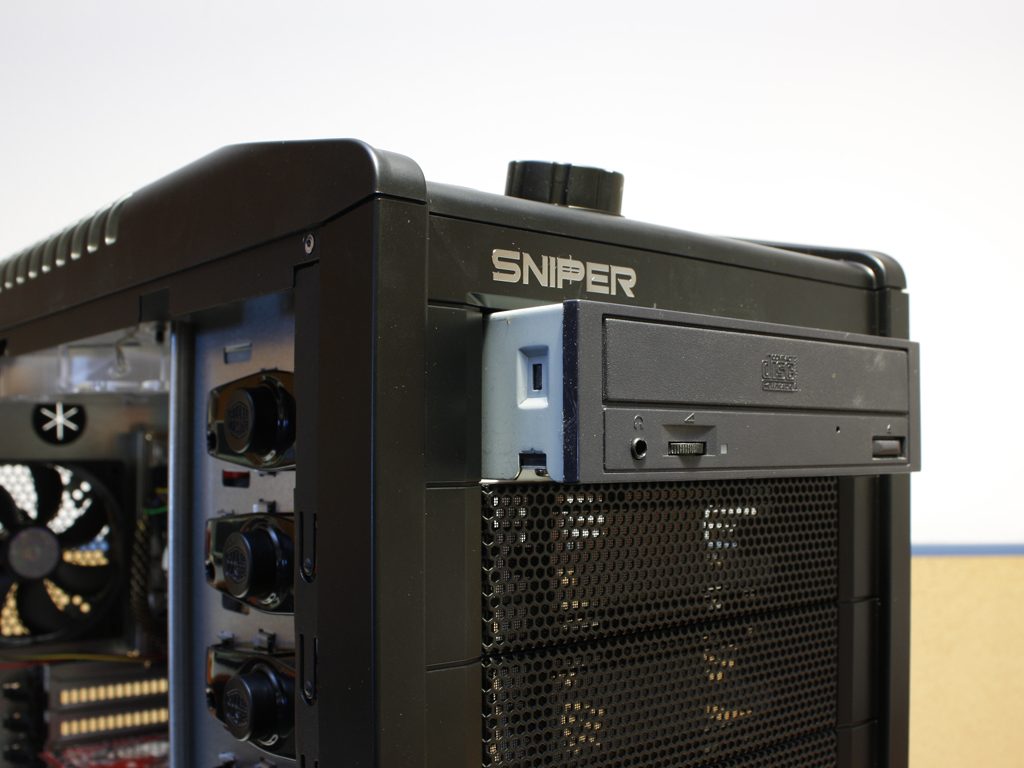

Installing an optical drive is easily done without the absolute need of screws. The front covers feature a clipping system, thus making their removal very easy. Then, simply slide the drive in and push the locking button to hold it in place. The drive does not budge, but can still be wiggled around a bit. To reduce any vibration and to further secure the drive, I would suggest using at least a single screw after locking it in the desired position.
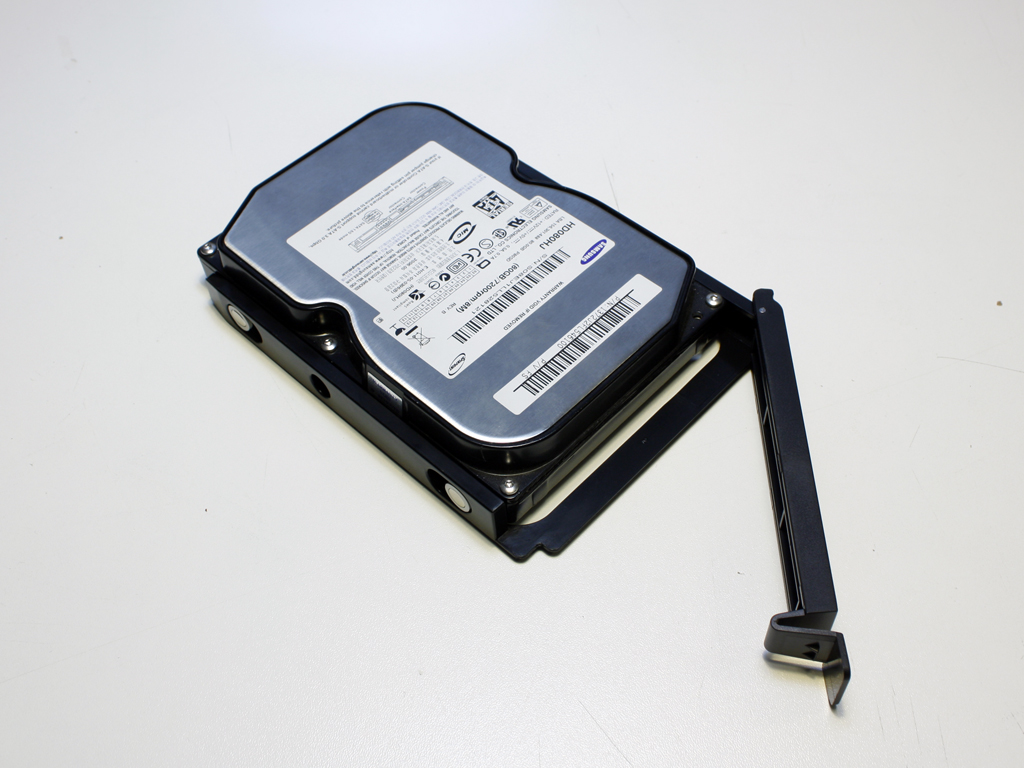

The system for the hard drives does not require any screws either. Simply bent the tray "over" the drive and slide it into place. Use the plastic locking mechanism to hold it in place. This should be sufficient even when you take the computer on the road to a LAN party, but you still have the option to use a single screw to hold the tray itself in place.

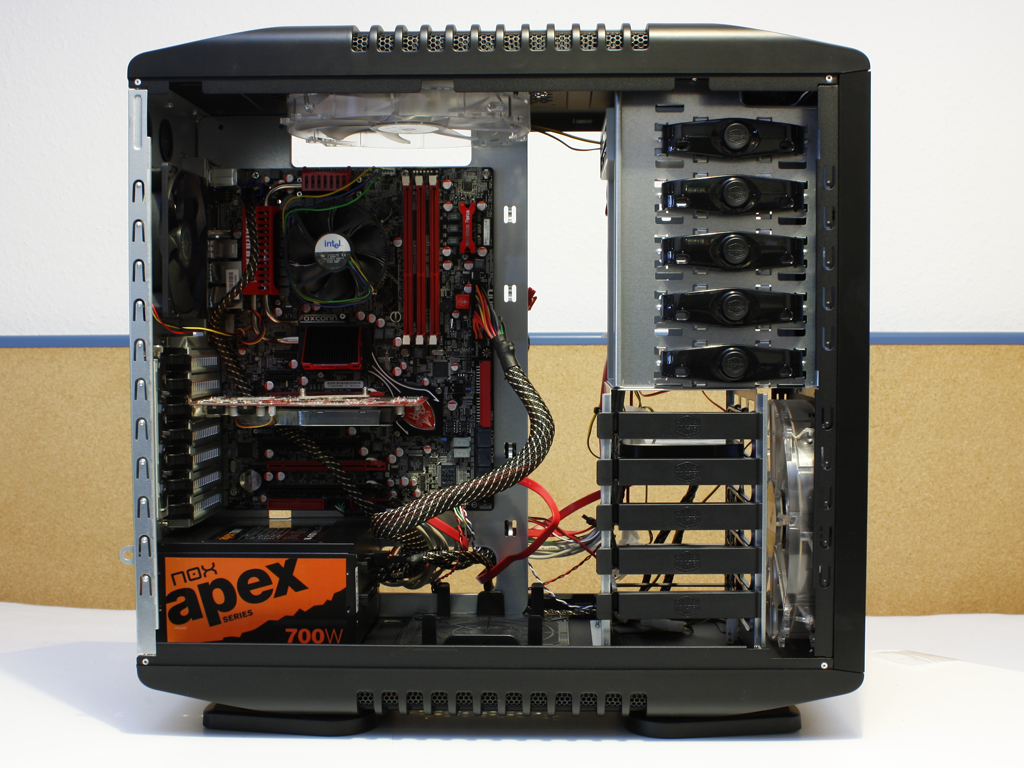
There is not a lot to be said about the installation of the power supply. Just secure it in place with the traditional screws. There is still some room for larger units, without covering the bottom fan area, but any high quality 1kW or above PSU will cover that area partially as well. After having everything installed, there is still a bit of space left to work with. It may not be as much as in the Cosmos or HAF 932, but the Sniper is a bit smaller as well.

This image is for all those who wonder about cable mangement. The Sniper has plenty of possibilities to use the supplied zip ties to tie any loose cables on the rear of the board. Due to the extruded side panels you actually have a whole bunch of extra space behind the tray. This is great as you can even hide unused PSU cables in this area.
Finished Looks
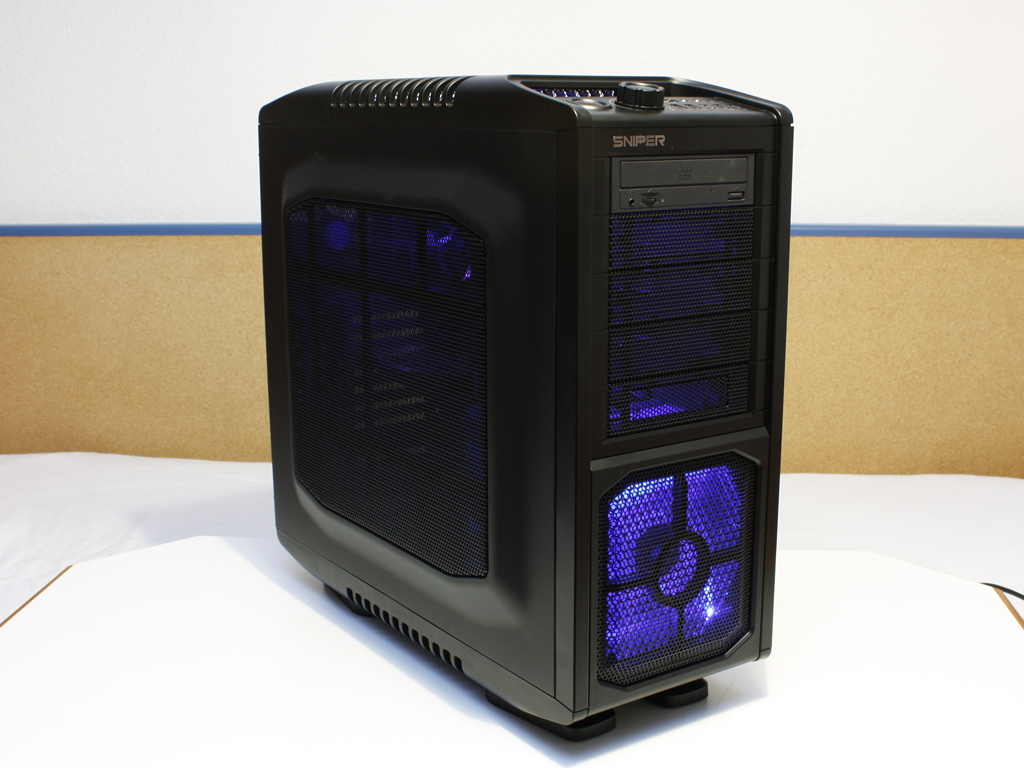
Turning the finished unit on for the first time, I was glad to hear that the large 200 mm fans are not loud at all. It seems that only the slightly larger 230 mm units tend to be a bit on the noisier side. When turning the connected fans down with the dial on the top, the case becomes very silent. The lack of noise level at this setting can be compared to the legendary silence of modern Lian-Li cases, which is excellent.


The lighting aspects, which can be turned off with the push of a button on the speed dial, are well placed and do not seem overwelming in the overall design. Their light is evenly distributed and the intensity is strong enough to give you a nice view of all the parts within the Sniper.

Even after dimming the lights in the room and taking an image without a flash, the fans' lighting is well balanced. The one design aspect which I did not like, is the lack of that support beam under the mesh side panel. It becomes very apparent with the light of the LED fans.
May 3rd, 2024 09:04 EDT
change timezone
Latest GPU Drivers
New Forum Posts
- Arctic MX-6 shelf life is just a couple months? (80)
- Ryzen Owners Zen Garden (7290)
- What's your latest tech purchase? (20416)
- Microsoft Did It Again! Beware Of Bugged Update KB5034441 (183)
- fastest usb cable /transfer (5)
- Does not show part of the data RTX 4070 VENTUS 3X E 12G OC (2)
- Free Games Thread (3772)
- Your PC ATM (34541)
- PNY 4070 Ti Super XLR8 (0)
- Rare GPUs / Unreleased GPUs (1879)
Popular Reviews
- HYTE THICC Q60 240 mm AIO Review
- ASRock NUC BOX-155H (Intel Core Ultra 7 155H) Review
- Montech Sky Two GX Review
- Meze Audio LIRIC 2nd Generation Closed-Back Headphones Review
- Ugreen NASync DXP4800 Plus Review
- Upcoming Hardware Launches 2023 (Updated Feb 2024)
- Team Group T-Force Vulcan ECO DDR5-6000 32 GB CL38 Review
- MOONDROP x Crinacle DUSK In-Ear Monitors Review - The Last 5%
- AMD Ryzen 7 7800X3D Review - The Best Gaming CPU
- Logitech G Pro X Superlight 2 Review - Updated with 4000 Hz Tested
Controversial News Posts
- Intel Statement on Stability Issues: "Motherboard Makers to Blame" (232)
- Windows 11 Now Officially Adware as Microsoft Embeds Ads in the Start Menu (167)
- Sony PlayStation 5 Pro Specifications Confirmed, Console Arrives Before Holidays (117)
- AMD's RDNA 4 GPUs Could Stick with 18 Gbps GDDR6 Memory (114)
- NVIDIA Points Intel Raptor Lake CPU Users to Get Help from Intel Amid System Instability Issues (106)
- AMD "Strix Halo" Zen 5 Mobile Processor Pictured: Chiplet-based, Uses 256-bit LPDDR5X (103)
- AMD Ryzen 9 7900X3D Now at a Mouth-watering $329 (103)
- TechPowerUp Hiring: Reviewers Wanted for Motherboards, Laptops, Gaming Handhelds and Prebuilt Desktops (93)