 12
12
Corsair Carbide 200R Review
Assembly & Finished Looks »A Closer Look - Inside


To gain access to the interior of the chassis, simply remove the pair of thumb screws holding each of them in place. Taking a quick look at the layout, everything seems to be where it is supposed to be, but Corsair has, as we will see in a second, taken a new approach with the hard drive bays in the Carbide 200R. Turning the case around, there is a large opening below the CPU area of the motherboard to allow for easy access to the back of coolers, and various smaller openings help with cable management. Interestingly enough, Corsair has chosen not to use rubber grommets with these. You will get about 15 mm of space across the motherboard tray, but you will, thanks to an L-shaped trench, have up to 25 mm to route cables properly.

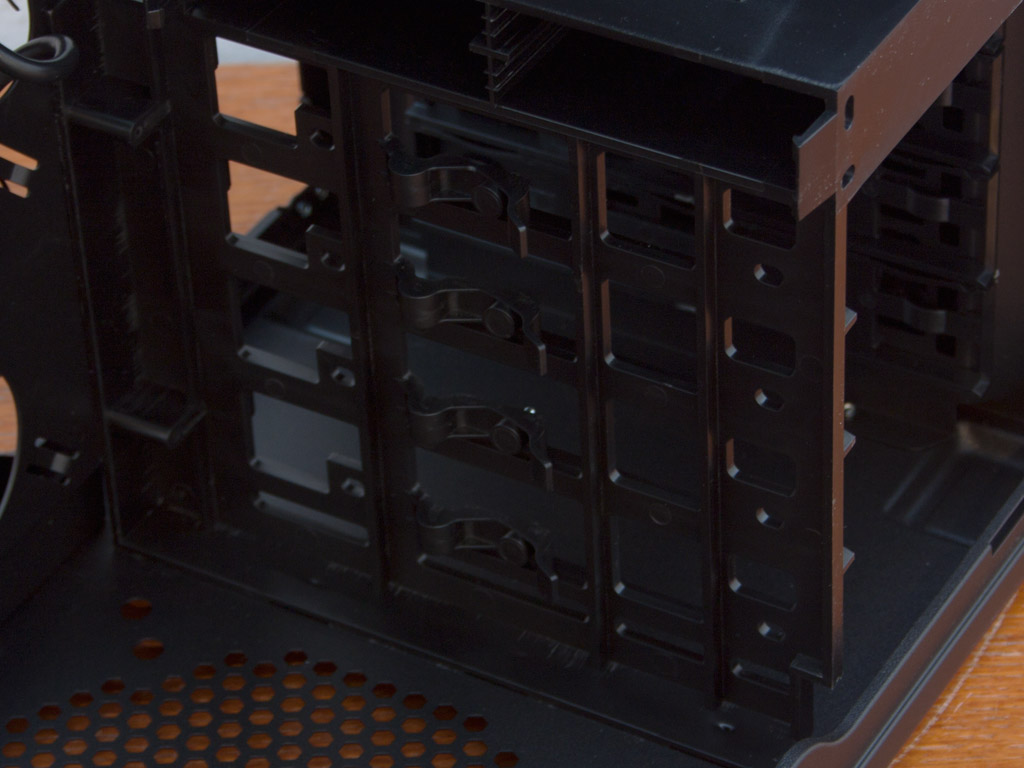
The hard drive cache is a new contraption that I have not seen before. It is completely made of plastic and can hold up to four 3.5" units. These are secured with a metal pin that rests on a flexible plastic part. This means that you do not need any additional parts or tools to install such a storage device. Above that, also belonging to the plastic part, is a uniquely shaped bay for up to four 2.5" drives. These units are secured with screws, but they may be pushed in quite easily.


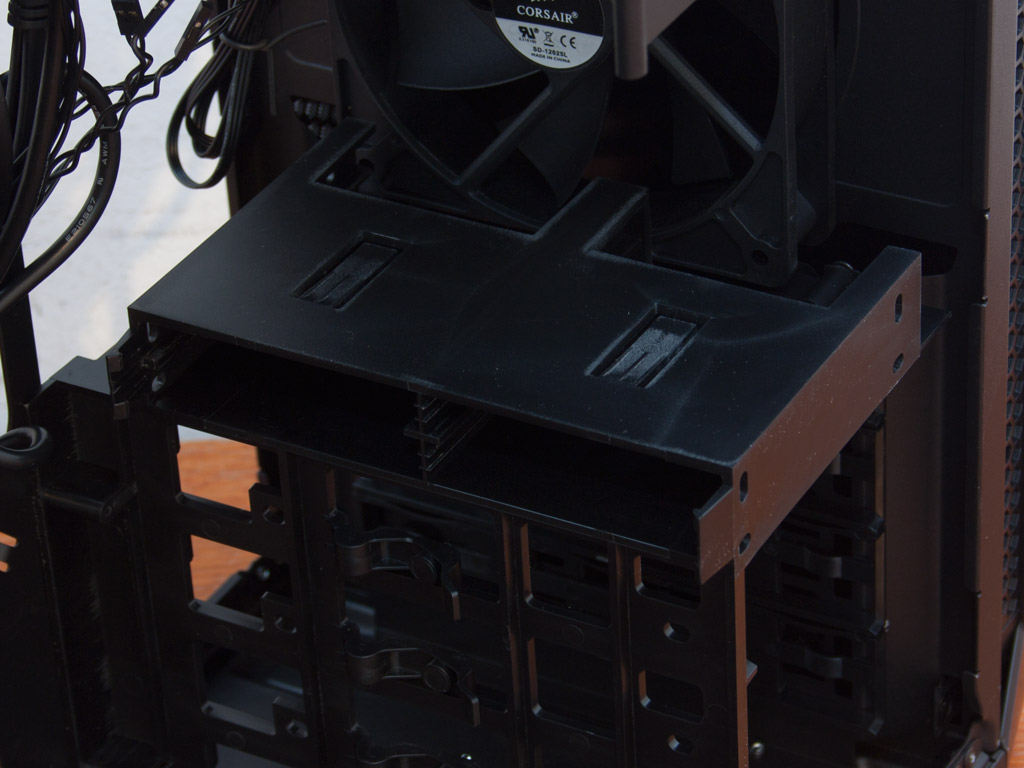
Above the drive bays is an empty space with the clearly visible fan. It lines up with the first and second PCIe slots of the motherboard, so you can rest assured that these will get fresh air once the system has been turned on. All the way up top are three 5.25" bays. Each features a metal clip utilizing tension, which forces the pins to stay in place. Once again, no tools or screws are needed.


Turning our focus to the rear of the case, the bottom PSU bay looks quite ordinary. There are little extrusions on which the unit is to rest, but these are not lined with any foam, or anything alike to foam. Above that are the seven motherboard expansion slots. Each one is protected by an individual cover held in place with a thumb screw. Another 120 mm fan in the top rear pushes hot air out of the case, and it is powered through a 3-pin fan header.


The two air vents in the top of the case are placed in such a way as to leave enough space for you to install two 140 mm units or a thin 240 mm radiator. On the floor of the case is another such opening for a single 120 or 140 mm unit. There is no dust filter here though, so dirt can enter here freely as well.
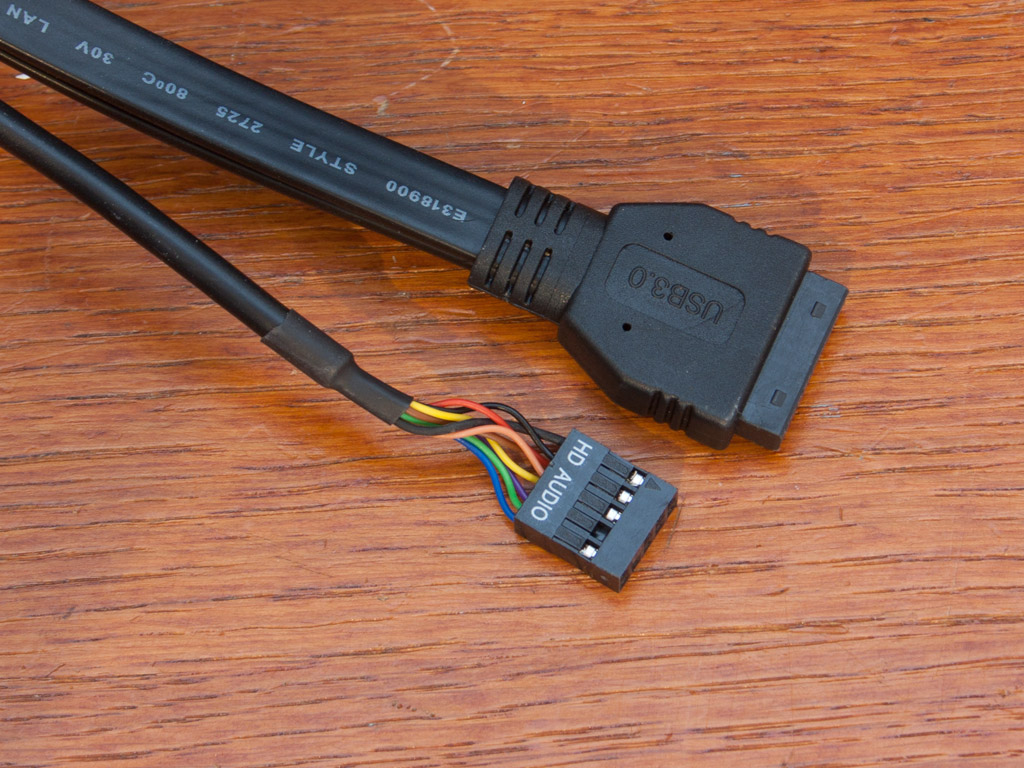

All the cables within the Carbide 200R - including those of the fans - are sleeved black to go with the overall look of the case. All of the cables are of the standard variety, and a 20-pin USB 3.0 has been included. There is no adapter to use on a 9-pin USB 2.0 header though, so you have to make sure your board has the modern connector, or you can buy the necessary cable. You will, otherwise, be left with no front USB I/O.
May 3rd, 2024 11:42 EDT
change timezone
Latest GPU Drivers
New Forum Posts
- Arctic MX-6 shelf life is just a couple months? (83)
- Need advice for UPS that will be use only for bios updates (1)
- Share your AIDA 64 cache and memory benchmark here (2927)
- Old high quality PSU, or semi-old mid-quality PSU? (52)
- ASRock Deskmini Owner's Club (30)
- Which PSU to take? (48)
- Why does my PC shut down even though it's connected to a UPS? (76)
- TPU's Nostalgic Hardware Club (18494)
- Is this Sapphire PULSE RX 5600 XT legit or fake? (32)
- My Laptop is having issues with PL2 and EDP OTHER (1)
Popular Reviews
- HYTE THICC Q60 240 mm AIO Review
- ASRock NUC BOX-155H (Intel Core Ultra 7 155H) Review
- Meze Audio LIRIC 2nd Generation Closed-Back Headphones Review
- Montech Sky Two GX Review
- Ugreen NASync DXP4800 Plus Review
- Upcoming Hardware Launches 2023 (Updated Feb 2024)
- Team Group T-Force Vulcan ECO DDR5-6000 32 GB CL38 Review
- MOONDROP x Crinacle DUSK In-Ear Monitors Review - The Last 5%
- AMD Ryzen 7 7800X3D Review - The Best Gaming CPU
- Logitech G Pro X Superlight 2 Review - Updated with 4000 Hz Tested
Controversial News Posts
- Intel Statement on Stability Issues: "Motherboard Makers to Blame" (233)
- Windows 11 Now Officially Adware as Microsoft Embeds Ads in the Start Menu (167)
- Sony PlayStation 5 Pro Specifications Confirmed, Console Arrives Before Holidays (117)
- AMD's RDNA 4 GPUs Could Stick with 18 Gbps GDDR6 Memory (114)
- NVIDIA Points Intel Raptor Lake CPU Users to Get Help from Intel Amid System Instability Issues (106)
- AMD to Redesign Ray Tracing Hardware on RDNA 4 (104)
- AMD "Strix Halo" Zen 5 Mobile Processor Pictured: Chiplet-based, Uses 256-bit LPDDR5X (103)
- AMD Ryzen 9 7900X3D Now at a Mouth-watering $329 (103)