 13
13
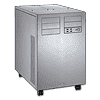
Lian Li PC-D8000 Review
Assembly & Finished Looks »A Closer Look - Inside


To gain access to the interior, simply remove the thumbscrews holding each panel in place. Taking a look at the insides, there are not a lot of unique extras. The only apparent signature items of Lian Li engineering are the screw-less locks for the optical bays. There are no hot-swap PCBs or screw-less locks for the motherboard expansion slots. You do, however, get their unique expansion slot lock/support structure. There is very little room behind the motherboard tray to route cables, so you will be hard pressed to keep things clean and tidy. With only two openings for cable routing, you are also forced to run most of the leads inside the case.


Lian Li has a solid divider running down the center of the chassis, with two openings for 140 mm fans and the aforementioned cutouts for the expansion-slot support locks. You may also remove this part if you have no need for it. There are also four possible placements for the black cable holder or "cable snake", as I call it. It normally does not come pre-attached, but was already pre-installed in our sample. The "cable snake" should at least aid in keeping unwanted PSU cables out of the way nicely.


The entire front is taken up by 3.5" hard-drive and 5.25" drive bays. The sides of the chassis each come with a long cage for up to ten hard drives. You could then easily stuff a whooping twenty 3.5" drives into the PC-D8000. Each cage comes with three 120 mm fan-mounting possibilities, which line up perfectly with their respective side panel opening, allowing you to keep the drives cool during operation.


The six external 5.25" bays on top are divided up equally between the two cages. Interestingly enough, only two of the six come equipped with Lian Li's tool-less locking mechanism. A single 5.25" to 2.5" adapter is also pre-installed into one of the bays, allowing for up to two SSDs to be placed within the PC-D8000.


Turning our focus toward the rear, both PSU bays are once again identical, with foam-equipped rails on which each unit can rest. The exterior frame allows you to install these units with the fan facing up or down. One can also easily slide them in or out through the rear, which should make upgrading or replacing them easier, especially if you use fully modular units. Above that are the three fan-placement possibilities on the left and the motherboard tray on the right of the central divider.


Pulling the tray out of the chassis is quite easy after you have removed the thumbscrews holding it in place. There are eleven motherboard-expansion slots. Each slot is protected by individual covers which are held in place by thumbscrews. Above that are two openings to route water-cooling out the back of the chassis, and there is another opening to place a fan here. While this is a big, gaping hole, the chassis does comes with a fan grill for it, but you will not be able to install this grill unless you actually install a fan there.


All the cables are of the standard variety, but most of them are also sleeved in black. As there are four USB 3.0 connectors in the front panel, you get two full headers. One can, thanks to the included adapter, be used for USB 2.0 connectivity.
May 5th, 2024 04:47 EDT
change timezone
Latest GPU Drivers
New Forum Posts
- AI Benchmark Alpha version 0.1.2 (2)
- Post your Speedometer 3.0 Score (38)
- Only some humans can see refresh rates faster than others, I am one of those humans. (114)
- What's your latest tech purchase? (20439)
- Is updating BIOS to beta versions a good idea if you have the most recent version installed but still face issues? (4)
- Strange system crashes out of nowhere, help (25)
- My Laptop is having issues with PL2 and EDP OTHER (10)
- Alphacool CORE 1 CPU block - bulging with danger of splitting? (95)
- Apparently Valve is giving refunds on Helldivers 2 regardless of hour count. Details inside. (37)
- PNY RTX 4070 Ti XLR8 OC - New worse BIOS/version? (107)
Popular Reviews
- Finalmouse UltralightX Review
- Meze Audio LIRIC 2nd Generation Closed-Back Headphones Review
- ASRock NUC BOX-155H (Intel Core Ultra 7 155H) Review
- Montech Sky Two GX Review
- Cougar Hotrod Royal Gaming Chair Review
- Upcoming Hardware Launches 2023 (Updated Feb 2024)
- Alienware Pro Wireless Gaming Keyboard Review
- HYTE THICC Q60 240 mm AIO Review
- AMD Ryzen 7 7800X3D Review - The Best Gaming CPU
- Logitech G Pro X Superlight 2 Review - Updated with 4000 Hz Tested
Controversial News Posts
- Intel Statement on Stability Issues: "Motherboard Makers to Blame" (240)
- Windows 11 Now Officially Adware as Microsoft Embeds Ads in the Start Menu (167)
- AMD to Redesign Ray Tracing Hardware on RDNA 4 (135)
- Sony PlayStation 5 Pro Specifications Confirmed, Console Arrives Before Holidays (117)
- AMD's RDNA 4 GPUs Could Stick with 18 Gbps GDDR6 Memory (114)
- NVIDIA Points Intel Raptor Lake CPU Users to Get Help from Intel Amid System Instability Issues (106)
- AMD Ryzen 9 7900X3D Now at a Mouth-watering $329 (104)
- AMD "Strix Halo" Zen 5 Mobile Processor Pictured: Chiplet-based, Uses 256-bit LPDDR5X (103)