 34
34
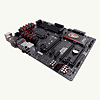
MSI Next-Gen GAMING 5 Preview Review
Conclusion »The Board - A Closer Look
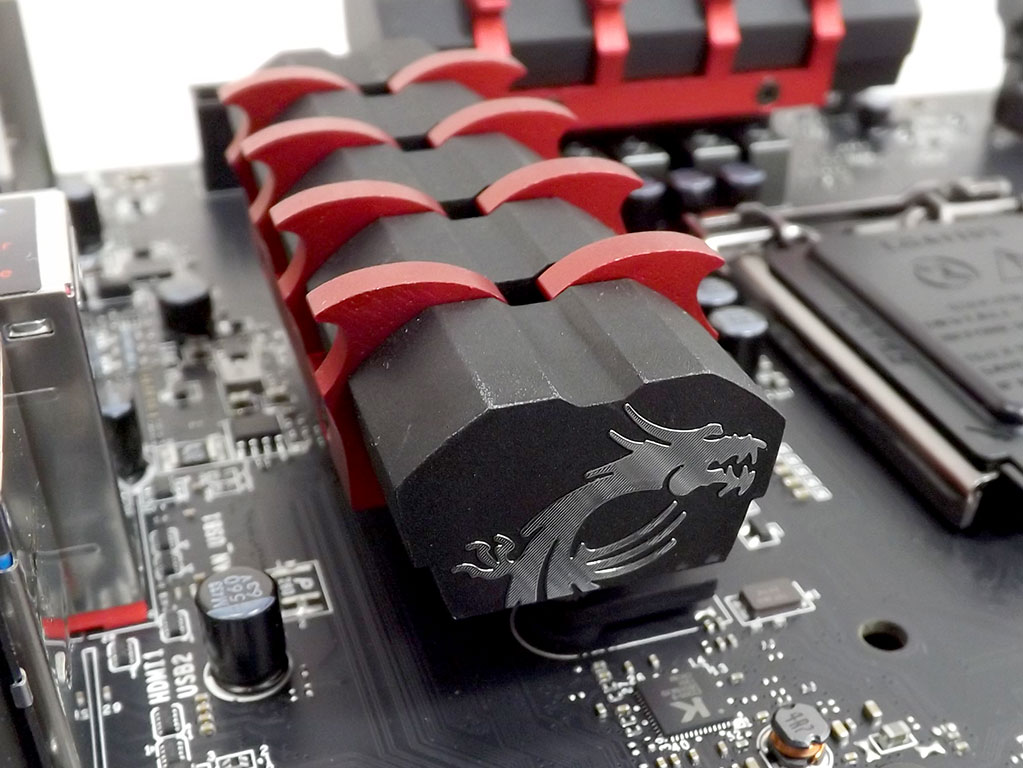
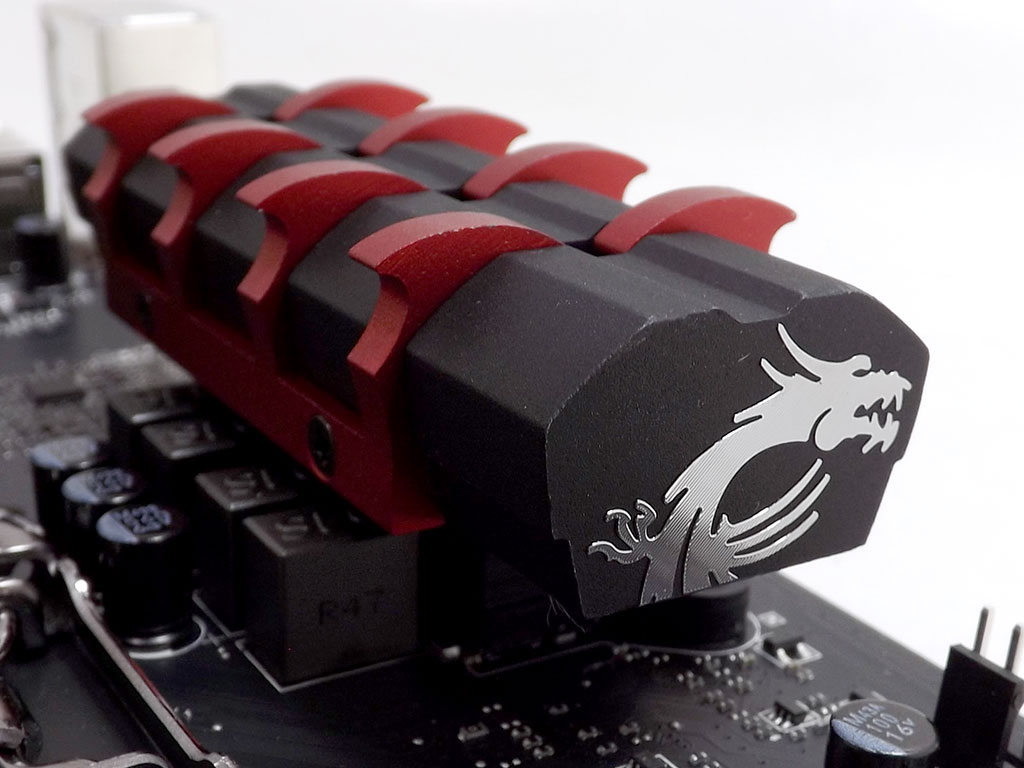
Along with all the other changes the MSI Next-Gen GAMING 5 introduces, the heatsink design has obviously changed as well, and as I mentioned earlier, the heatsinks are now designed to look like dragon claws instead of the dragon heads that were featured in first- and second-gen MSI GAMING heatsinks. MSI's now-familiar silver red dragon is found on both ends of these VRM heatsinks.
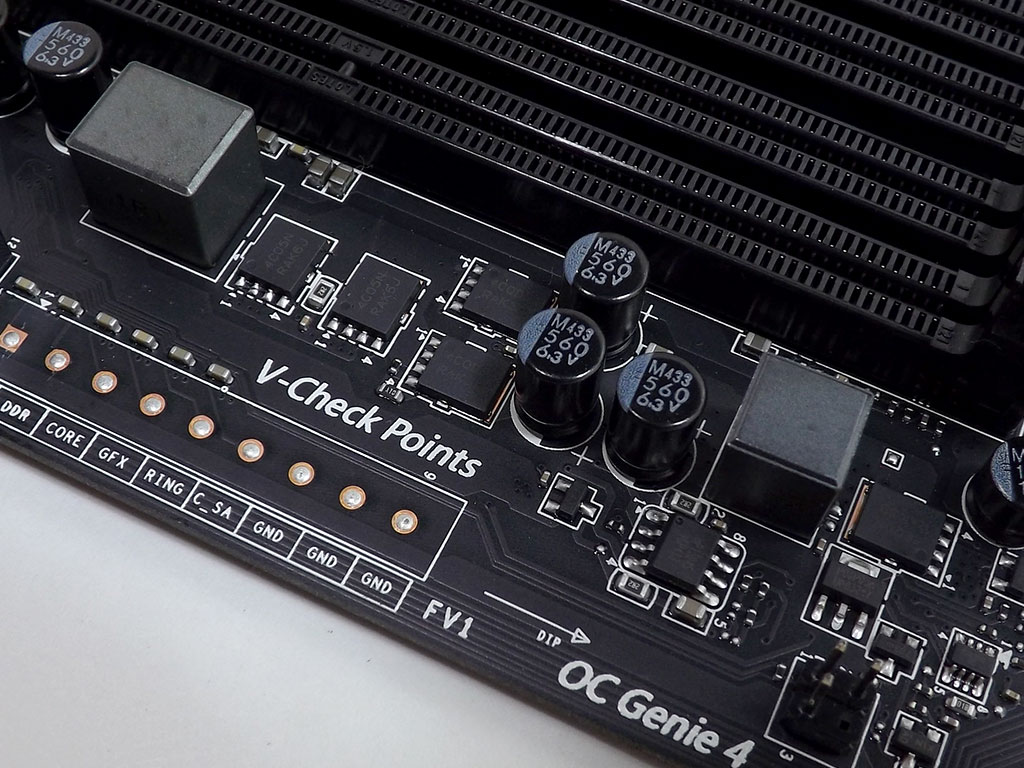
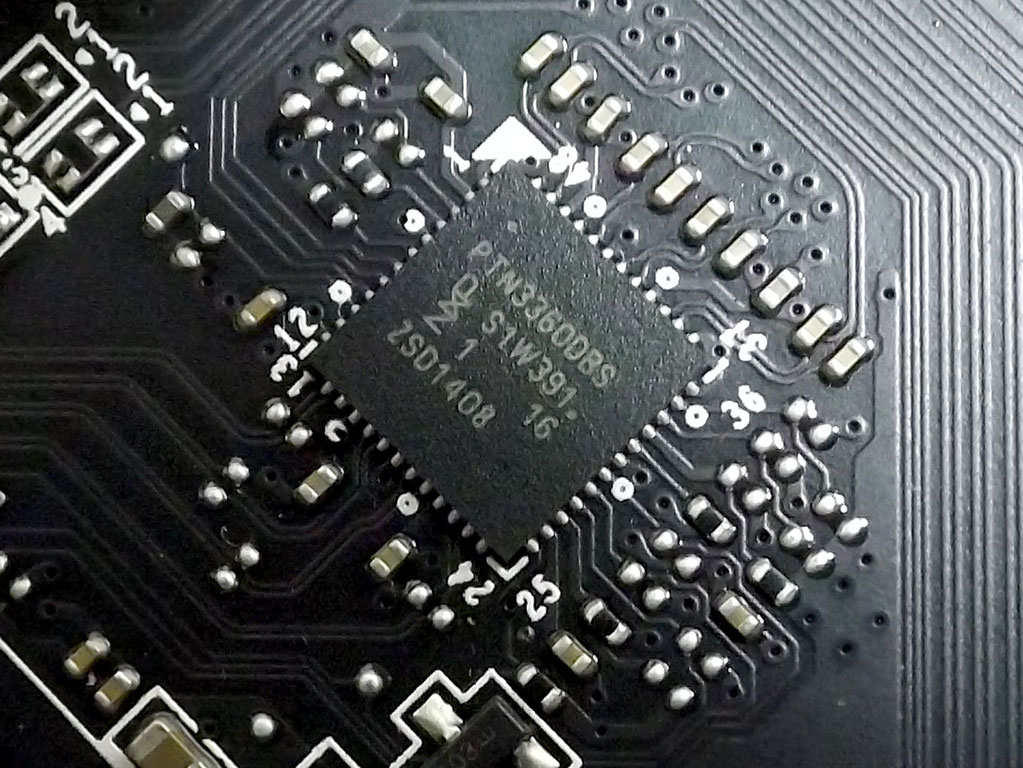
Between the two VRM coolers sits the VRM controller, a UPI Semiconductor product that controls the 8-phase VRM design. The DIMM VRM is a dual-phase part that is ready to provide all the power you need to push your DIMMs to the limit.
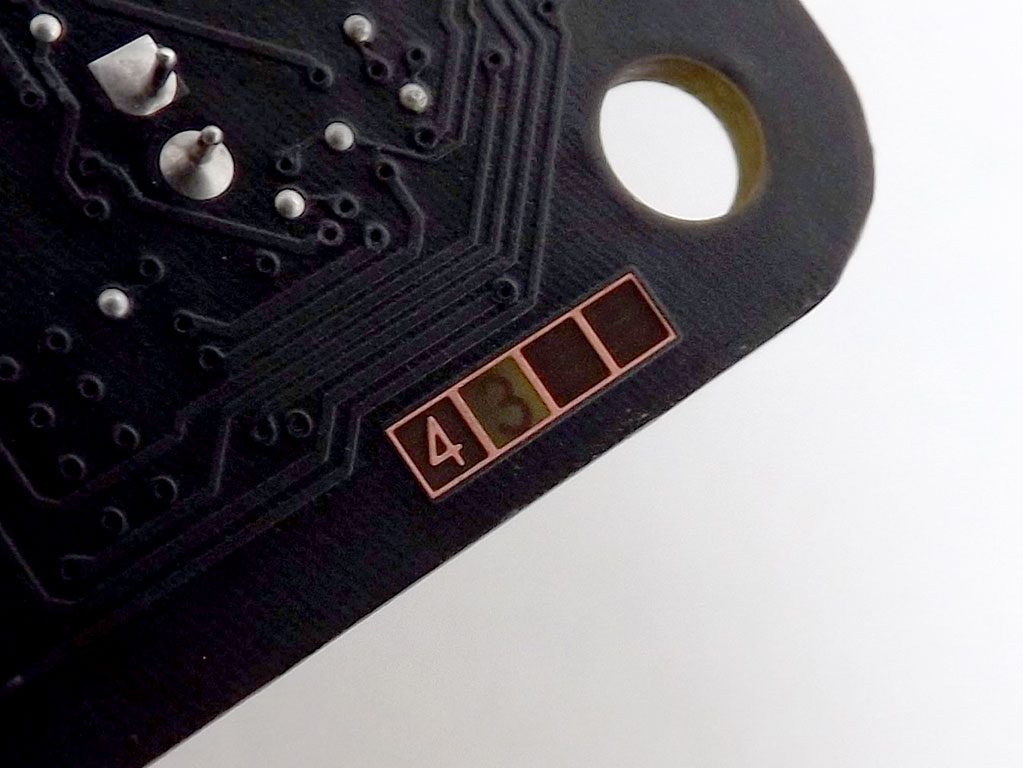
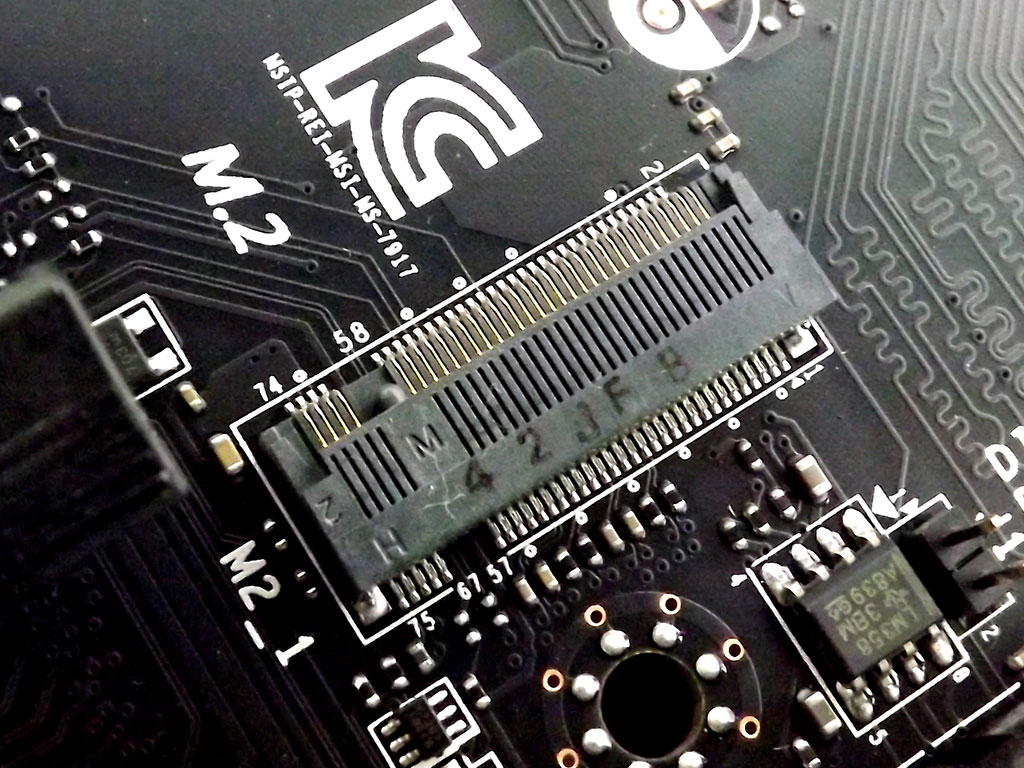
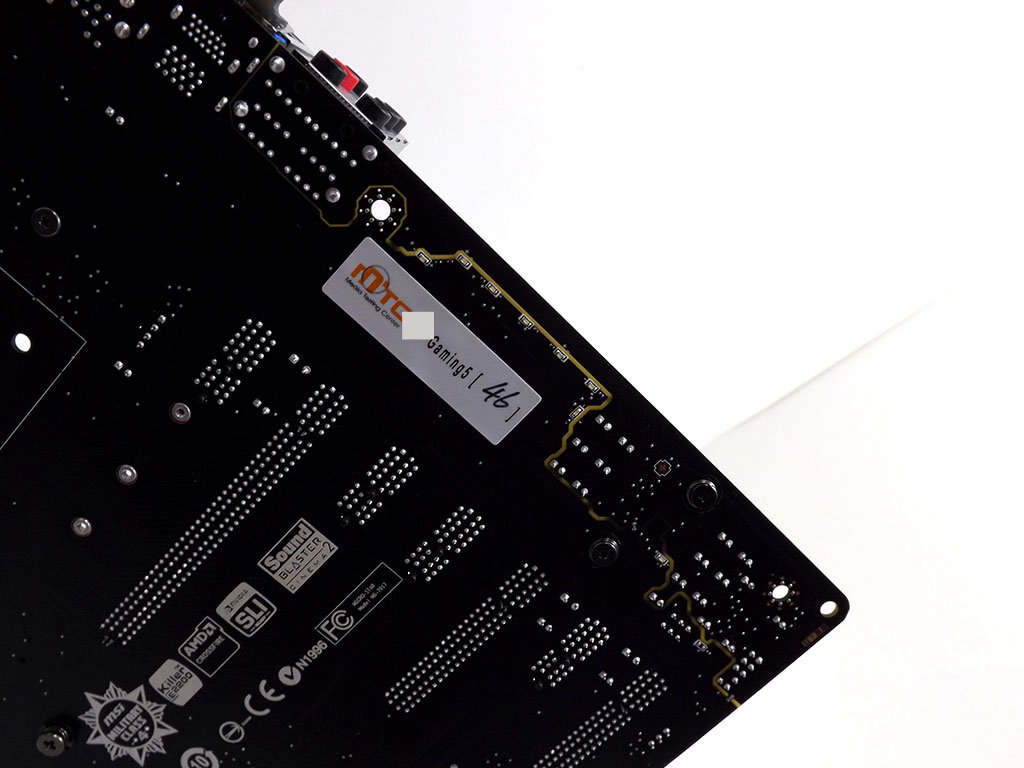
One of the most impressive things to me is that all of this is offered on a PCB that is just four layers thick, which a small box on the board's bottom edge shows by clearly laying the layers bare. The fabled M.2 SATA slot makes an appearance as well, although using it does disable a couple internal SATA ports.
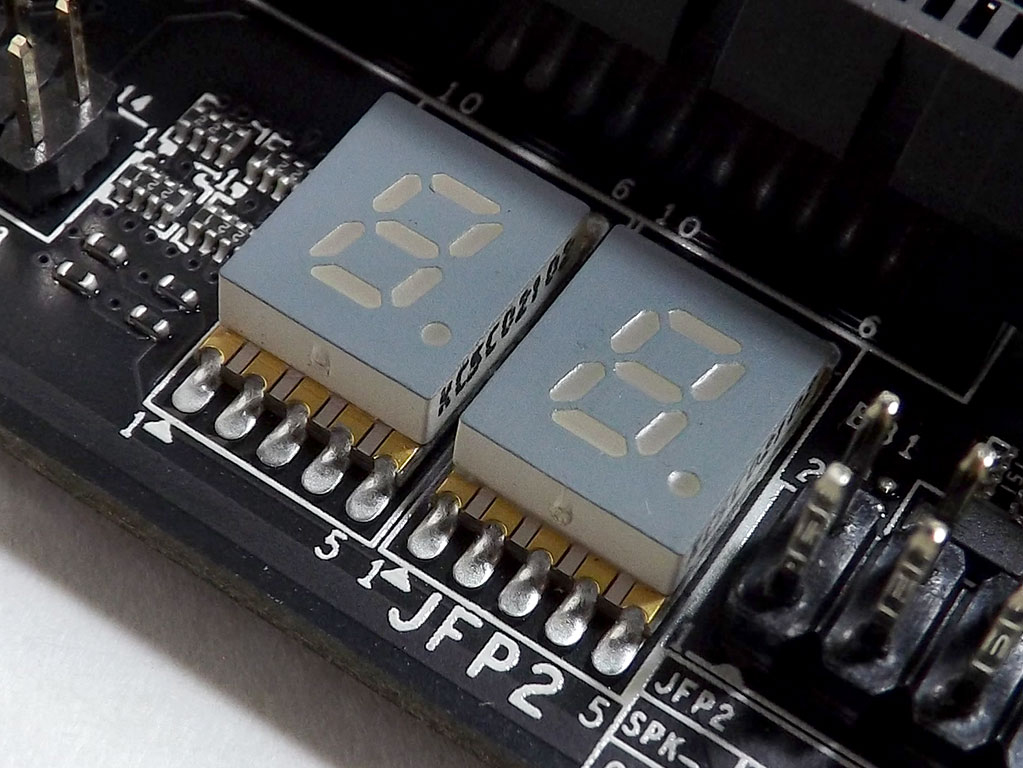
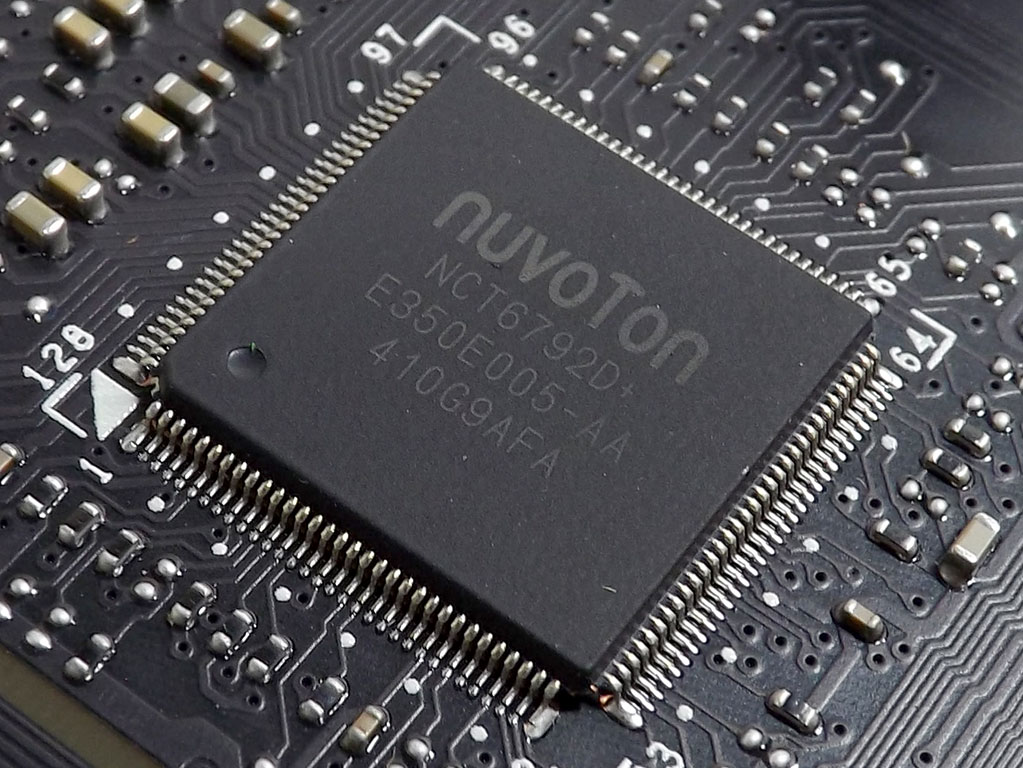
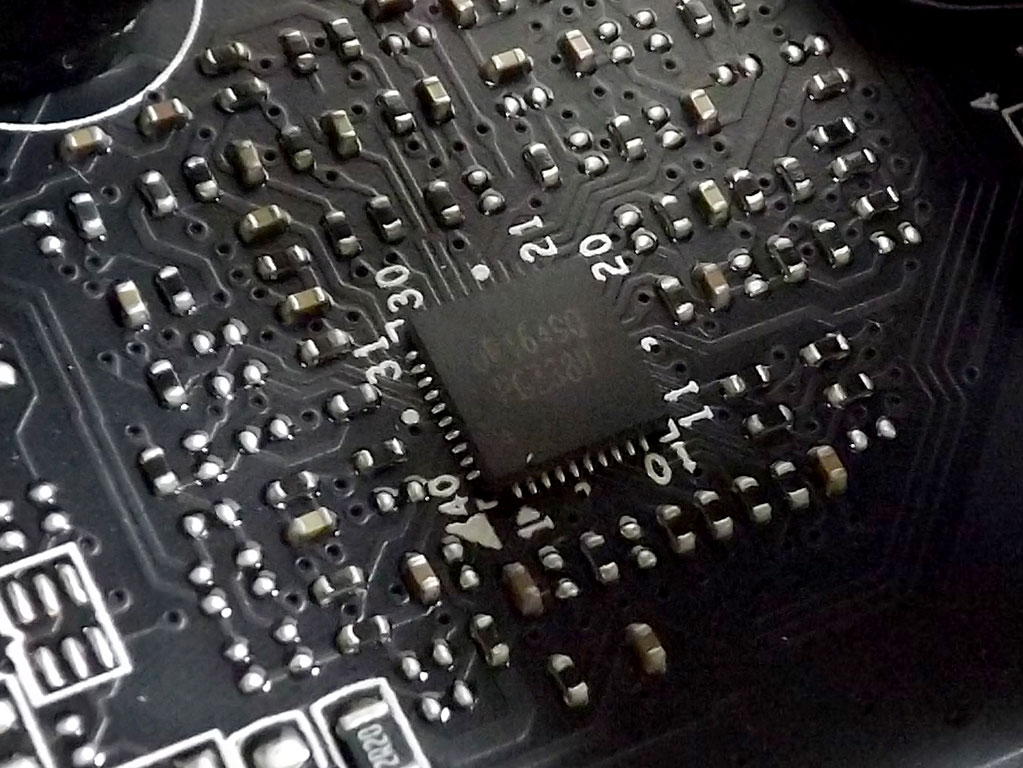
On the board's bottom edge is a dual-digit POST display that displays error codes during the POST process, but it switches over to show CPU temperatures once POST is complete. The data to do so is provided by the Nuvoton NCT6792D Super I/O chip that is also responsible for this board's excellent fan controls and its onboard PS/2 port.
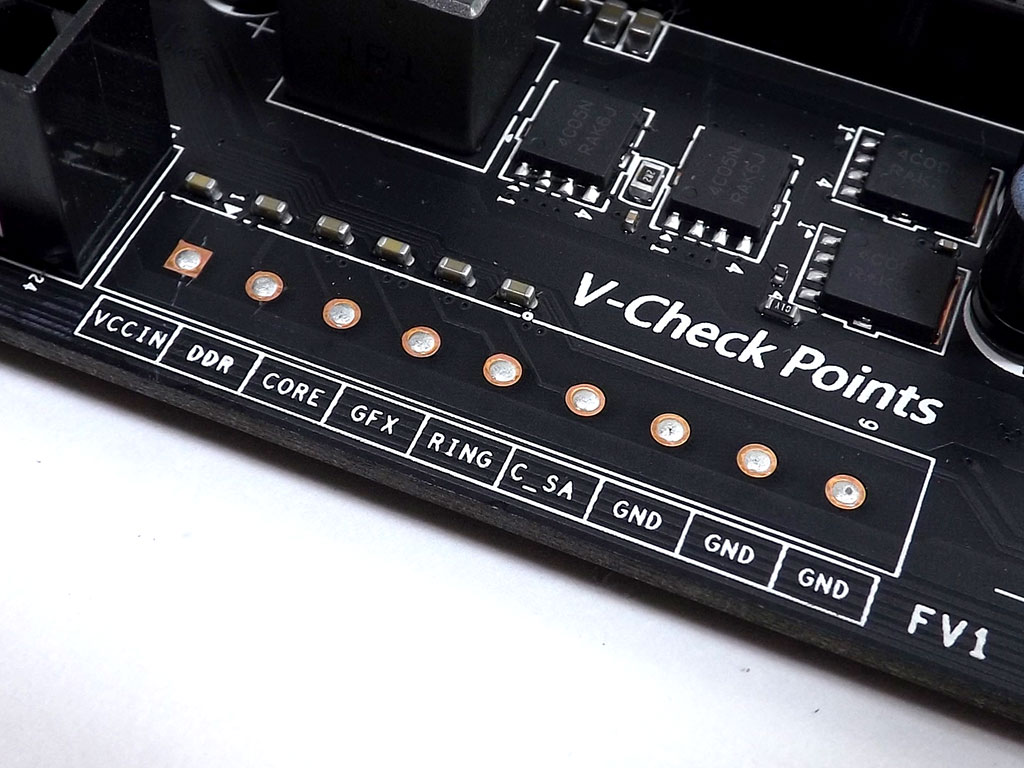
There are two points you can use to measure voltages on the Next-Gen MSI GAMING 5; one set is right by the board's socket and the other set is near the board's right edge. I do not recommend using the points near the socket unless you are an advanced user. They are not labeled, so using them without exactly knowing what you are doing could potentially cause some damage.
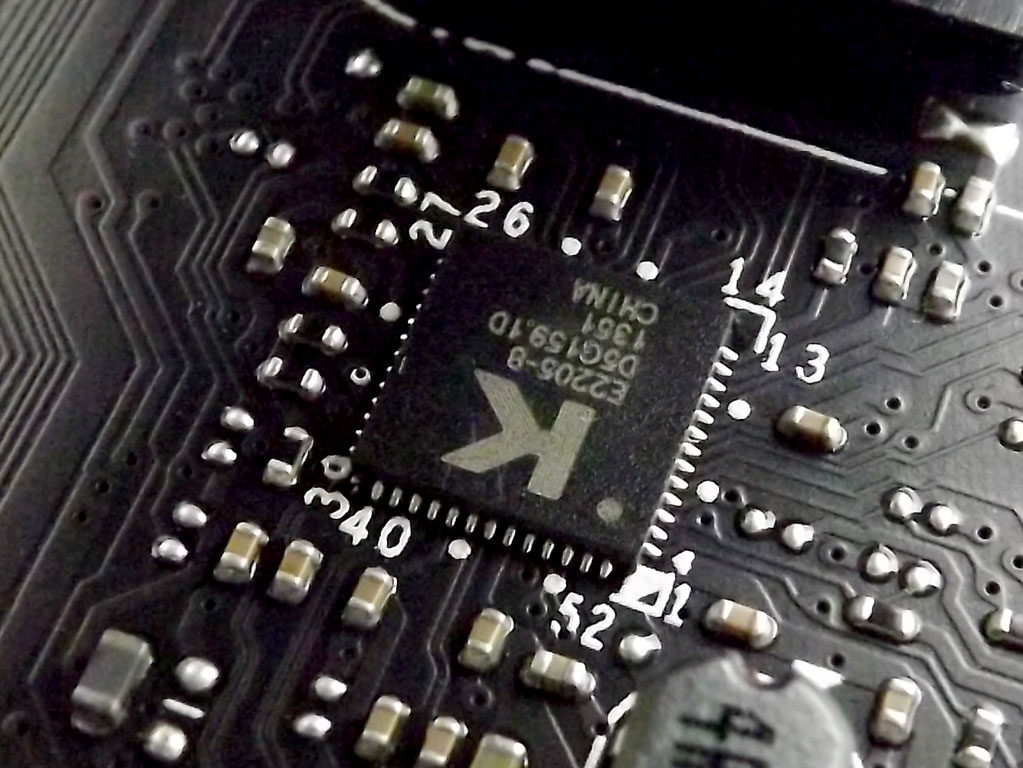
I located the onboard KIllerNic E2205 LAN controller under the left-most VRM cooler. The only other add-on controller I could find was the NXP TMDS unit that shifts the video signal from your installed CPU into HDMI formats.
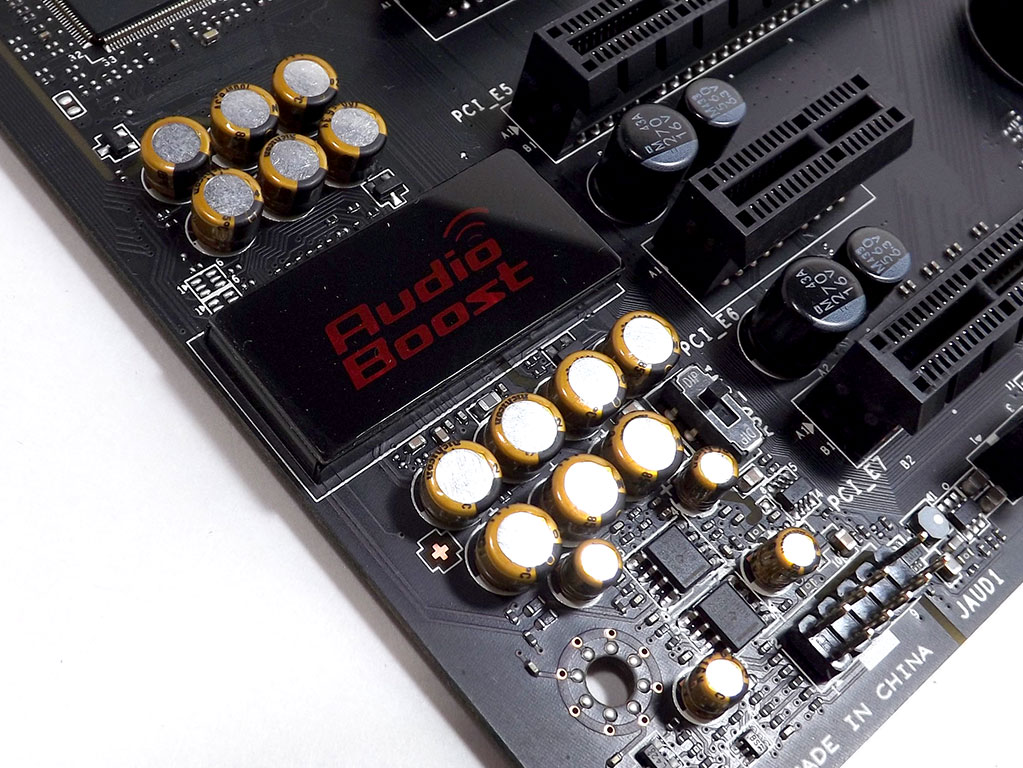
That just leaves us with the audio, and I purposefully left that for last since there is quite a bit of engineering here that might not be immediately obvious.
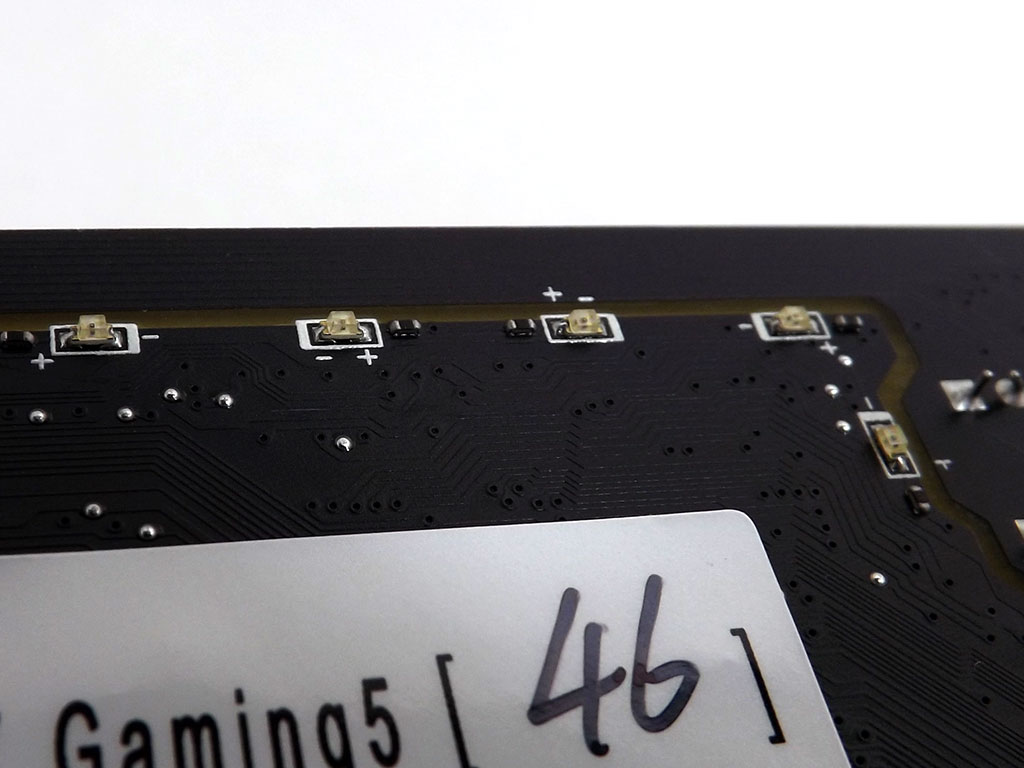
Like past MSI GAMING products, the audio portion of the PCB is completely isolated from the rest of the board, and the line of isolation is highlighted by a bunch of red LEDs that light up when the board is powered on.
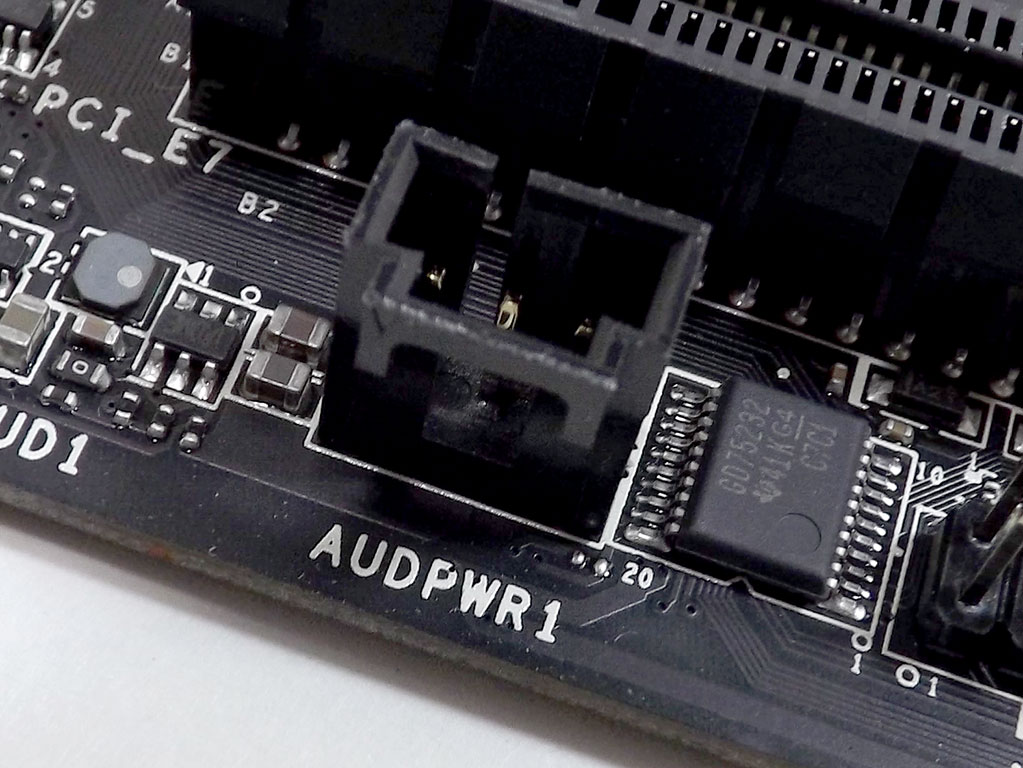
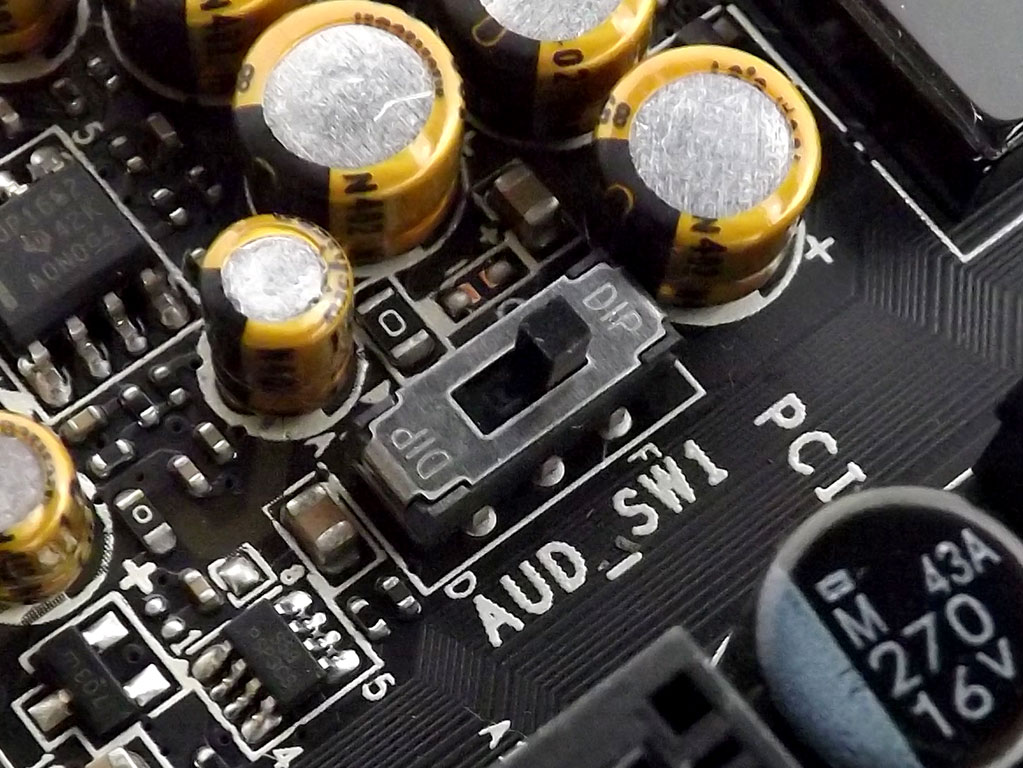
There is also the Audio Boost functionality that includes the plug shown above. Located on the board's bottom edge, it mates with the MOLEX cable I showed earlier. Actually enabling that power plug, however, requires a bit of electrical diversion, which the switch next to the audio section's capacitors, shown above, achieves. Flip the switch and rather than using power that is delivered via the 24-pin power plug, audio power is then sourced through the Audio Boost plug. This not only allows for more power to push high-end headphones and such, but also further isolates the electrical side of the MSI GAMING 5's audio circuit. I will have to do some testing to see if it really makes a difference, although I suspect its impact to be significant.
Apr 30th, 2024 23:19 EDT
change timezone
Latest GPU Drivers
New Forum Posts
- Brother bought a house, found some old PC hardware.. (11)
- Arctic MX-6 shelf life is just a couple months? (48)
- The Official Thermal Interface Material thread (1117)
- RX580 2048SP 8GB Mllse (1)
- RTX 4090? (33)
- Is it better for zero RPM PSUs to place the fan on top? (34)
- TPU Merch (10)
- Is there a formula to help normalize temperature testing when ambient is variable? (20)
- Need help with a persistent infection possible rootkit or other device. (2)
- Would you guys be ok with 70C idle temp on NVME storage. (19)
Popular Reviews
- Ugreen NASync DXP4800 Plus Review
- Team Group T-Force Vulcan ECO DDR5-6000 32 GB CL38 Review
- HYTE THICC Q60 240 mm AIO Review
- Upcoming Hardware Launches 2023 (Updated Feb 2024)
- MOONDROP x Crinacle DUSK In-Ear Monitors Review - The Last 5%
- Thermalright Phantom Spirit 120 EVO Review
- AMD Ryzen 7 7800X3D Review - The Best Gaming CPU
- Montech Sky Two GX Review
- FiiO K19 Desktop DAC/Headphone Amplifier Review
- ASUS Radeon RX 7900 GRE TUF OC Review
Controversial News Posts
- Intel Statement on Stability Issues: "Motherboard Makers to Blame" (202)
- Windows 11 Now Officially Adware as Microsoft Embeds Ads in the Start Menu (156)
- Sony PlayStation 5 Pro Specifications Confirmed, Console Arrives Before Holidays (117)
- AMD's RDNA 4 GPUs Could Stick with 18 Gbps GDDR6 Memory (109)
- NVIDIA Points Intel Raptor Lake CPU Users to Get Help from Intel Amid System Instability Issues (106)
- AMD "Strix Halo" Zen 5 Mobile Processor Pictured: Chiplet-based, Uses 256-bit LPDDR5X (103)
- US Government Wants Nuclear Plants to Offload AI Data Center Expansion (98)
- TechPowerUp Hiring: Reviewers Wanted for Motherboards, Laptops, Gaming Handhelds and Prebuilt Desktops (90)