 1
1
NZXT Tempest 410 Review
A Closer Look - Inside »A Closer Look - Outside

One of the most important aspects when deciding on a case is undoubtedly the look of the unit. I am not sure how you feel about the Tempest 410, but I think this is not the best work from NZXT in terms of the design. While I am all for the industrial look, it seems very superficial and repetitive. It may have been good to apply more smooth areas on the front of the chassis instead of going all out. As it stands now, the case looks alright, but is a bit overloaded in my humble opinion. Luckily. everyone's taste is different.


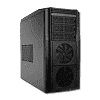
As mentioned before, the front has a lot of straight and edgy lines. That, in combination with the round cut-outs for the front fans and the lack of real depth kind of blur the looks. In terms of construction quality, the Tempest is quite good as most parts feel adequate for a chassis of this price range. Turning the enclosure around, we can see the white blades of the rear fan and the hint of an all black interior.


NZXT has created an opening in the main side panel, allowing you to install up to two 120 mm fans. Thanks to the elongated holes, you have a bit of flexibility on how to place these cooling units horizontally. There is no dust filter on this area - something that would have made sense here. On the other side you will find no holes openings or design elements.


Taking a closer look at the bottom, there are two spots for 120 mm fans. NZXT has employed the same system in the Tempest 410 as in the H2, as both fan covers can be removed. One white bladed unit is included in this area of the chassis. Thanks to the PCB and connecting pins, it is quite easy to equip or exchange these cooling systems while the system is running. Sadly, NZXT still does not allow for RPM signals to be passed on to the fan PCB, as there are only two connecting pads.
Behind these two covers are the eight hard drive bays. These can be pulled out through the front of the chassis, but due to a lack of SATA hot-swap connectors, you will still need to open the side panel up to disconnect any drives.


In the top are the three 5.25 inch bays. These are easily removable due to the little plastic clip holding them in place - so no pulling off the entire front panel. Next to these is the group of I/O consisting of power & reset buttons, three USB 2.0, a single USB 3.0 and the usual pair of audio connectors.


Turning the chassis over, we have the bottom PSU bay. As is the case with most modern enclosures, you have the choice to install the power supply with the fan facing upward or downward. Above that are the seven motherboard expansion bays and two openings for watercooling. Interestingly enough, there are no rubber grommets in place here and NZXT does not supply any either. In the very top you will find the 120 mm exhaust fan.


NZXT has placed a compartment in the top of the chassis. While this is great, the plastic feels cheap and the interior quite lackluster. There is a little divider so that you can part this storage into two separate chambers. It would have been nice if NZXT had invested a bit more thought into this area, for example lining the interior with a rubberized, scratch resistant surface. In the rear of the top is a metal mesh panel which covers the top fan spots. Due to the removable nature of the panel and the space in this area you should have no problems installing a radiator here or at least the fans cooling it, thus saving you some space within the chassis.

A very simple dust filter has been placed on the underside of the chassis. It is held in place by metal cut-outs of the chassis floor and is nothing more than a metal mesh sheet, cut down to the right size. I would expect to see something like this in a 35 Euro chassis, but not in one costing at least twice as much.
Jun 4th, 2024 20:47 EDT
change timezone
Latest GPU Drivers
New Forum Posts
- Zen5 only 16 core. (32)
- All Intel DG1 needs special bios? (27)
- Post your cooling. (61)
- Dell Workstation Owners Club (3103)
- Have you got pie today? (16358)
- Insyde software announces AI BIOS! (5)
- Milestones (13902)
- WCG Daily Numbers (12537)
- TPU's Rosetta Milestones and Daily Pie Thread (1912)
- Folding Pie and Milestones!! (9048)
Popular Reviews
- Intel Lunar Lake Technical Deep Dive - So many Revolutions in One Chip
- Kioxia Exceria Plus G3 2 TB Review
- Corsair iCUE XC7 RGB Elite LCD CPU Water Block Review
- NZXT H6 Flow RGB Review
- SilverStone KL07E Review
- Upcoming Hardware Launches 2024 (Updated May 2024)
- NuPhy Air96 V2 Low Profile Wireless Mechanical Keyboard Review
- AMD Ryzen 7 7800X3D Review - The Best Gaming CPU
- Ghost of Tsushima Performance Benchmark Review - 35 GPUs Tested
- ASUS GeForce RTX 4060 Dual OC Review - The Best RTX 4060
Controversial News Posts
- NVIDIA to Only Launch the Flagship GeForce RTX 5090 in 2024, Rest of the Series in 2025 (154)
- AMD Hits Highest-Ever x86 CPU Market Share in Q1 2024 Across Desktop and Server (140)
- AMD RDNA 5 a "Clean Sheet" Graphics Architecture, RDNA 4 Merely Corrects a Bug Over RDNA 3 (139)
- NVIDIA RTX 5090 "Blackwell" Founders Edition to Implement the "RTX 4090 Ti" Cinderblock Design (118)
- Core Configurations of Intel Core Ultra 200 "Arrow Lake-S" Desktop Processors Surface (101)
- Biden Administration to Revive Trump-Era Tariffs on China-made GPUs and Motherboards (95)
- AMD Ryzen 9000 Zen 5 Single Thread Performance at 5.80 GHz Found 19% Over Zen 4 (88)
- ASRock Innovates First AMD Radeon RX 7000 Graphics Card with 12V-2x6 Power Connector (88)