 10
10
Silverstone Raven 2 Evolution USB 3.0 Review
Value & Conclusion »Assembly

Installing the mainboard is pretty traditional besides the fact, that it is turned 90 degrees with the connectors facing toward the ceiling of the chassis. There is plenty of space for even the largest CPU coolers and you should not have to worry about these hitting the side panel - especially considering that the Super Mega is one of the taller coolers on the market.


Preparing the hard drives takes a tad bit more work, as you have to place the drives in the appropriate tray and then secure it with the special screws provided. Other manufacturers manage to provide trays that are flexible enough to include metal pins instead. Due to the additional holes in the tray underside, installing 2.5 inch drives is also possible. Once done, simply slide them back into the chassis and close them shut to lock them in place.


Once they are all the way in the bay, you will not be able to see which trays are filled, due to the very restrictive look of each tray. Turning the chassis around reveals much more, as you can clearly view each connector. Silverstone has shaped the trays in such a way that a 2.5 inch drive can be used as a hot-swap unit as well. The connectors line up perfectly with the CP05 bracket.


Installation of the optical drive is quite straight forward. Simply remove the cover of your choice - which does not require the removal of the entire front, then slide the drive in and secure it with the supplied thumb screws.


Silverstone has also provided a fairly sturdy plastic handle on the ceiling of the chassis. This is so that you do not end up grabbing the case by the top cover when wanting to pick it up. To allow for easy access to the screws of the power supply, there are cutouts in this handle.

Last but certainly not least you may install an additional 2.5 inch hard drive with the use of the plastic SSD bracket. This drive is probably best used as a system drive due to the special location on the side of the 5.25 inch drive bays.
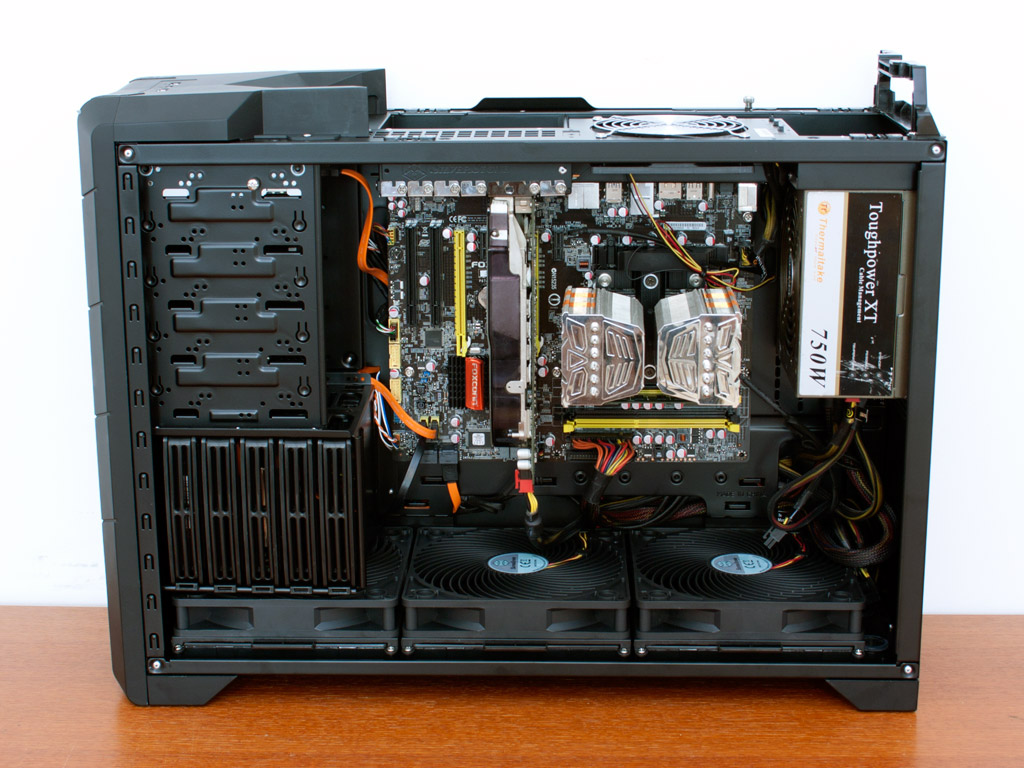

Once everything is installed, the chassis makes a good and clean impression. All the major cables have been routed behind the chassis and I am sure you can clean things up even more with a bit more effort.
Finished Looks

Once everything is closed up and turned on, the first thing you notice is the large blue light in the top of the chassis. The Raven 2 Evolution manages to look very similar to the normal Raven, even when filled with hardware.

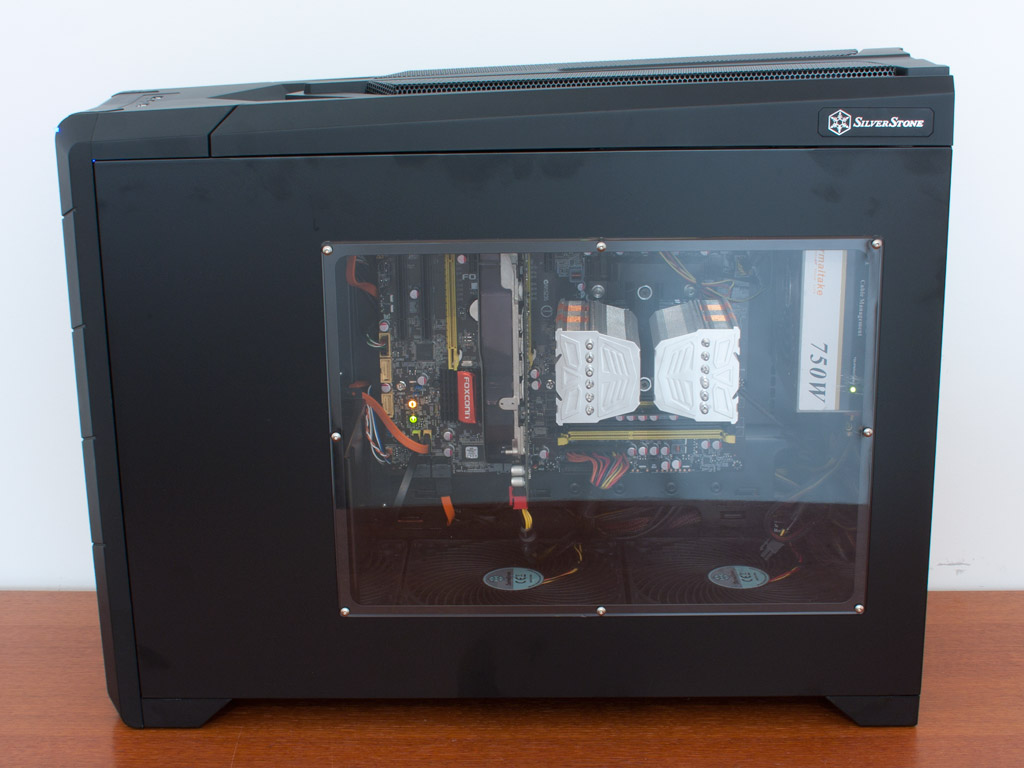
As you can see, the cables run out the rear of chassis, through the hole of the top cover. There is enough room here even for thick cables to bend them this way. The upside of such a system is, that all cables can be combined and tied together. Silverstone has included a long Velcro strip for this purpose. The window allows you to take a close look at all the major hardware within the chassis - pretty spiffy!

The v-shaped LED strip on the front of the chassis is a bit too large for my taste, but fits the overall theme of the chassis quite well. It is very bright, which may bother some people - especially those placing the chassis next to their monitors on top of the work space.
May 6th, 2024 04:30 EDT
change timezone
Latest GPU Drivers
New Forum Posts
- The Official Thermal Interface Material thread (1158)
- reinstalled kingdom come deliverance and getting very poor fps (4)
- Overheating/undervolt/setup issues (5)
- Browser startup performance test (5)
- Only some humans can see refresh rates faster than others, I am one of those humans. (146)
- What software are you using to monitor CPU temps during gaming session? (22)
- Post your JetStream 2 speeds! (143)
- Browser Bechmark scores (97)
- MSI 5700XT rom flash issue (5)
- [HELP] AMD GPU FINDING BIOS PROBLEM (12)
Popular Reviews
- Finalmouse UltralightX Review
- ASRock NUC BOX-155H (Intel Core Ultra 7 155H) Review
- Meze Audio LIRIC 2nd Generation Closed-Back Headphones Review
- Cougar Hotrod Royal Gaming Chair Review
- Upcoming Hardware Launches 2023 (Updated Feb 2024)
- Montech Sky Two GX Review
- AMD Ryzen 7 7800X3D Review - The Best Gaming CPU
- HYTE THICC Q60 240 mm AIO Review
- ASUS Radeon RX 7900 GRE TUF OC Review
- Logitech G Pro X Superlight 2 Review - Updated with 4000 Hz Tested
Controversial News Posts
- Intel Statement on Stability Issues: "Motherboard Makers to Blame" (240)
- Windows 11 Now Officially Adware as Microsoft Embeds Ads in the Start Menu (167)
- AMD to Redesign Ray Tracing Hardware on RDNA 4 (156)
- Sony PlayStation 5 Pro Specifications Confirmed, Console Arrives Before Holidays (117)
- AMD's RDNA 4 GPUs Could Stick with 18 Gbps GDDR6 Memory (114)
- NVIDIA Points Intel Raptor Lake CPU Users to Get Help from Intel Amid System Instability Issues (106)
- AMD Ryzen 9 7900X3D Now at a Mouth-watering $329 (104)
- AMD "Strix Halo" Zen 5 Mobile Processor Pictured: Chiplet-based, Uses 256-bit LPDDR5X (103)