 1
1
Akasa Integral P2NES 2.5" IDE/SATA Review
Performance »A Closer Look

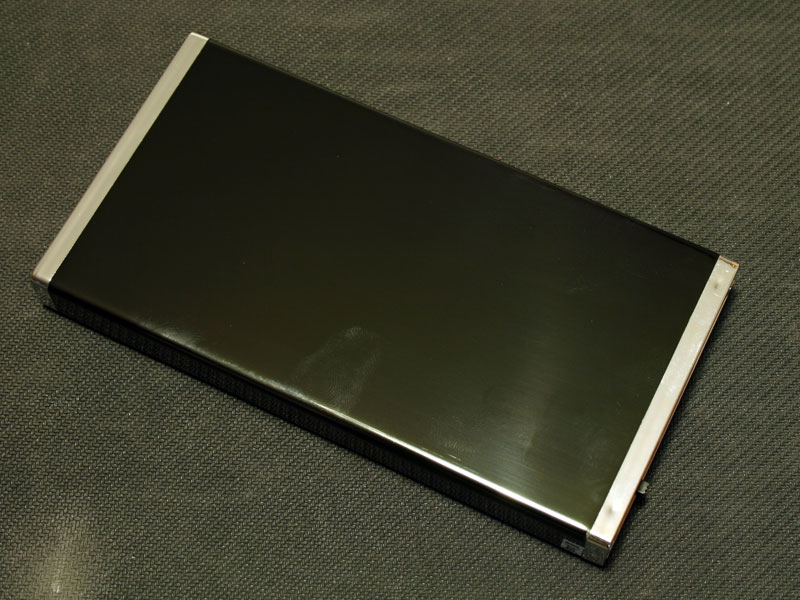
The top of the P2NES only sports the Integral branding and a streak in the aluminum, while the bottom is completely clean. - void of any such additions.


As is the case with all enclosures of the Integral lineup, Akasa has kept the front clean, only placing the Series name on the front. It also doubles as a power on and hard drive access LED. The rear holds all the connections. A miniUSB and eSATA plug provide the interface, while the DC is needed to power the device. You will also find a little switch all the way to the right, giving you the choice between USB 2.0 or eSATA connectivity. Akasa has placed a thin plastic film on both ends of the P2NEX to protect it from scratches. The above pictures show the front without the film, while the back is still covered. Simply peel it off and you are good to go.

The pouch is specifically designed for this enclosure. While it may look like leather, it is not, but still serves its purpose well.
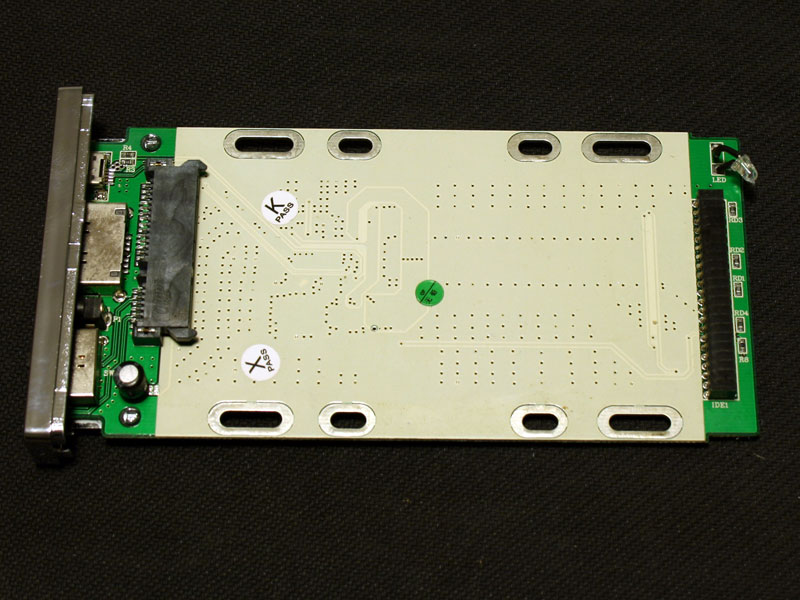

The Akasa Integral P2NES is one of the first 2.5 inch enclosures to offer both IDE and SATA support in one package. It does make the device a bit longer when compared to traditional offerings. The reason for this is simple: Akasa has placed the two interfaces at either end of the PCB, which requires a bit more space. The top is lined with a protective white coating, while the back holds the small controller chip.

The JM20337 (Spec sheet in PDF) is s single chip solution to bridge between USB 2.0, SATA and ATA/ATAPI-based mass storage devices. It provides the capability to translate USB 2.0 mass storage commands to Serial ATA and ATA/ATAPI communications protocol. eSATA functionality is provided by simply routing the SATA connectivity out of the enclosure to the PC. There is no need for an additional controller IC.
Installation

Installing a hard drive is very similar to the larger Integral enclosures. Simply unscrew two small screws in the back of the enclosure and slide out the PCB.


Connect the hard drive, in this case a 2.5" 4200 RPM IDE drive and secure it with the provided screws on the underside of the PCB.

Then, simply slide it back into the chassis, replace the two little screws - done.
Apr 26th, 2024 06:40 EDT
change timezone
Latest GPU Drivers
New Forum Posts
- Horizontal black lines popping up on my screen? (8)
- What's your latest tech purchase? (20347)
- Share your AIDA 64 cache and memory benchmark here (2918)
- Secure boot already open help (1)
- What are you playing? (20535)
- Best SSD for system drive (83)
- TPU's Nostalgic Hardware Club (18472)
- Last game you purchased? (258)
- Alphacool CORE 1 CPU block - bulging with danger of splitting? (22)
- Nvidia CMP 100-210 or 100HX (GV100 GPU) (9)
Popular Reviews
- HYTE THICC Q60 240 mm AIO Review
- Alienware Pro Wireless Gaming Keyboard Review
- MOONDROP x Crinacle DUSK In-Ear Monitors Review - The Last 5%
- Upcoming Hardware Launches 2023 (Updated Feb 2024)
- Thermalright Phantom Spirit 120 EVO Review
- ASUS Radeon RX 7900 GRE TUF OC Review
- RTX 4090 & 53 Games: Ryzen 7 5800X vs Ryzen 7 5800X3D Review
- NVIDIA RTX 4090: 450 W vs 600 W 12VHPWR - Is there any notable performance difference?
- RTX 4090 & 53 Games: Core i9-13900K vs Ryzen 7 5800X3D Review
- FiiO K19 Desktop DAC/Headphone Amplifier Review
Controversial News Posts
- Windows 11 Now Officially Adware as Microsoft Embeds Ads in the Start Menu (123)
- Sony PlayStation 5 Pro Specifications Confirmed, Console Arrives Before Holidays (117)
- NVIDIA Points Intel Raptor Lake CPU Users to Get Help from Intel Amid System Instability Issues (106)
- AMD "Strix Halo" Zen 5 Mobile Processor Pictured: Chiplet-based, Uses 256-bit LPDDR5X (101)
- US Government Wants Nuclear Plants to Offload AI Data Center Expansion (98)
- AMD's RDNA 4 GPUs Could Stick with 18 Gbps GDDR6 Memory (89)
- Developers of Outpost Infinity Siege Recommend Underclocking i9-13900K and i9-14900K for Stability on Machines with RTX 4090 (85)
- Windows 10 Security Updates to Cost $61 After 2025, $427 by 2028 (84)