 16
16
Coolink Corator DS LGA2011 Review
Installed »Installation


Installing the Coolink Corator DS LGA2011 is a simple affair. Starting off, we install the posts by screwing them into the M4 threaded holes around the socket. This process is easy: simply screw them in by hand until they are tight to complete the first step.
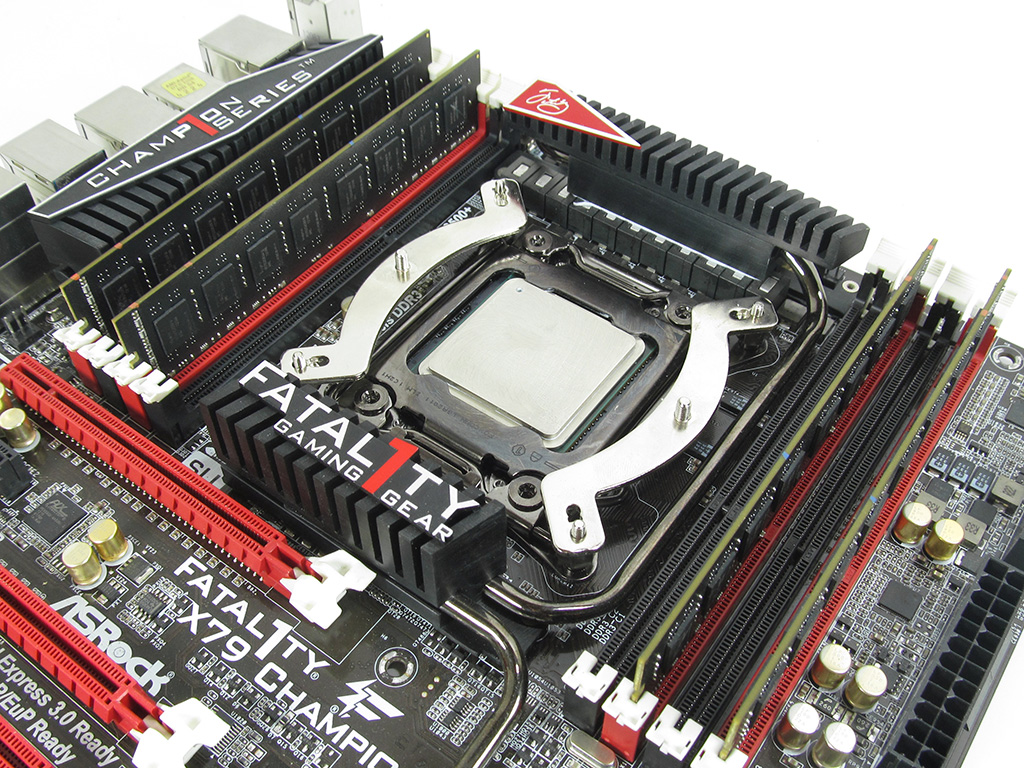

It is time to install the mounting bars after getting the posts in place. This is where things got problematic. As you can see in very first image, when installing the posts, the one sitting on the CPU was not threaded. I thankfully had another SecuFirm 2 mounting kit on hand, but this would be a serious problem for the typical user. With the cooler only coming with LGA2011 mounting, the fact that one of the posts was not threaded and that, as a consequence, one of the mounting bars is impossible to secure, cannot be excused. I was, thankfully, able to continue with an extra mounting kit on hand. After placing the mounting bars, users will need to tighten down four thumb screws to hold them in place.


Before moving on, users should check to see what orientation of the Corator DS LGA2011 would work better for cooling in their case. The two options boil down to the cooler exhausting air out the back or top of the case. Depending on the situation, one may offer better cooling than the other. Most users will generally elect to exhaust air out the back.
At this point, users will line the two screws up with the two posts on the mounting bars. Now, tighten them down to securely attach the cooler to the motherboard.


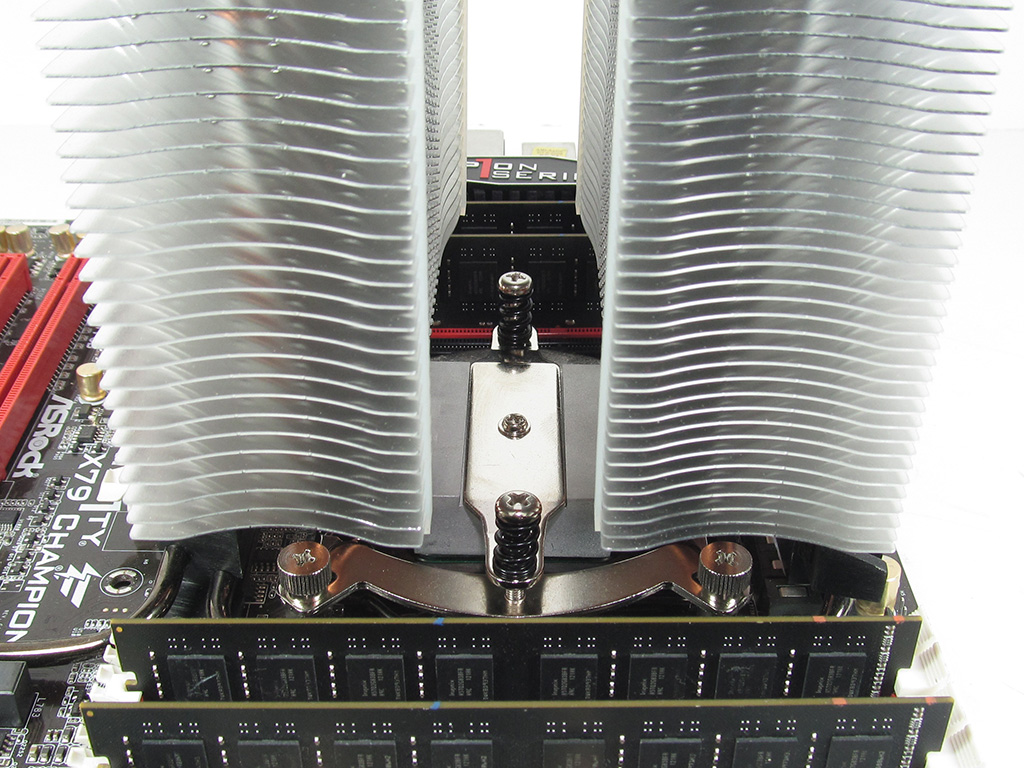
After that it's simply a case of re-attaching the fan to the cooler using the metal fan clips. You can see the two different options for mounting the cooler. The traditional option offers better clearance for memory; however, it does hang over one DIMM slot on each side of the CPU socket, which is not a big deal for memory modules with heatsinks of a typical height, but those slots will be unusable with such modules as Cosair's Dominators.
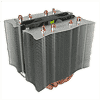
Overall, the process of installing the Coolink Corator DS LGA2011 was extremely easy. Installing the cooler was an 8 on a scale of 1 (hardest) to 10 (easiest). It really is just that easy to install onto an LGA2011 socket.
May 14th, 2024 10:01 EDT
change timezone
Latest GPU Drivers
New Forum Posts
- not impressed - nvme vs ssd (101)
- Free Games Thread (3801)
- Your PC ATM (34547)
- Can't find rx 580 2048sp vbios (24)
- Windows 7 Club (1026)
- Regular frametime spikes in all games (10)
- Ads in forums. under news (0)
- Homeworld 3 [Official Thread] (38)
- Purchased an AX1200i PSU as part of some forward planning, what tier is this PSU? (99)
- Having to login and enable push note every day. (5)
Popular Reviews
- Homeworld 3 Performance Benchmark Review - 35 GPUs Tested
- ZMF Caldera Closed Planar Magnetic Headphones Review
- Corsair MP700 Pro SE 4 TB Review
- ThundeRobot ML903 NearLink Review
- Upcoming Hardware Launches 2023 (Updated Feb 2024)
- AMD Ryzen 7 7800X3D Review - The Best Gaming CPU
- Bykski CPU-XPR-C-I CPU Water Block Review - Amazing Value!
- CHERRY XTRFY M64 Pro Review
- ASUS Radeon RX 7900 GRE TUF OC Review
- ASRock Radeon RX 7900 XT Phantom Gaming White Review
Controversial News Posts
- Intel Statement on Stability Issues: "Motherboard Makers to Blame" (266)
- AMD to Redesign Ray Tracing Hardware on RDNA 4 (227)
- Windows 11 Now Officially Adware as Microsoft Embeds Ads in the Start Menu (172)
- NVIDIA to Only Launch the Flagship GeForce RTX 5090 in 2024, Rest of the Series in 2025 (152)
- AMD Hits Highest-Ever x86 CPU Market Share in Q1 2024 Across Desktop and Server (123)
- Sony PlayStation 5 Pro Specifications Confirmed, Console Arrives Before Holidays (119)
- AMD's RDNA 4 GPUs Could Stick with 18 Gbps GDDR6 Memory (114)
- AMD Ryzen 9 7900X3D Now at a Mouth-watering $329 (104)