 12
12
Corsair Graphite 760T Review
Assembly & Finished Looks »A Closer Look - Inside


To access the interior, simply pull on the doors to pry them off the frame and flip them open. There is no lock on the large latch to hold each panel in place, so your hardware will be vulnerable to thieves and saboteurs, which makes the Graphite 760T a poor choice for LAN parties.


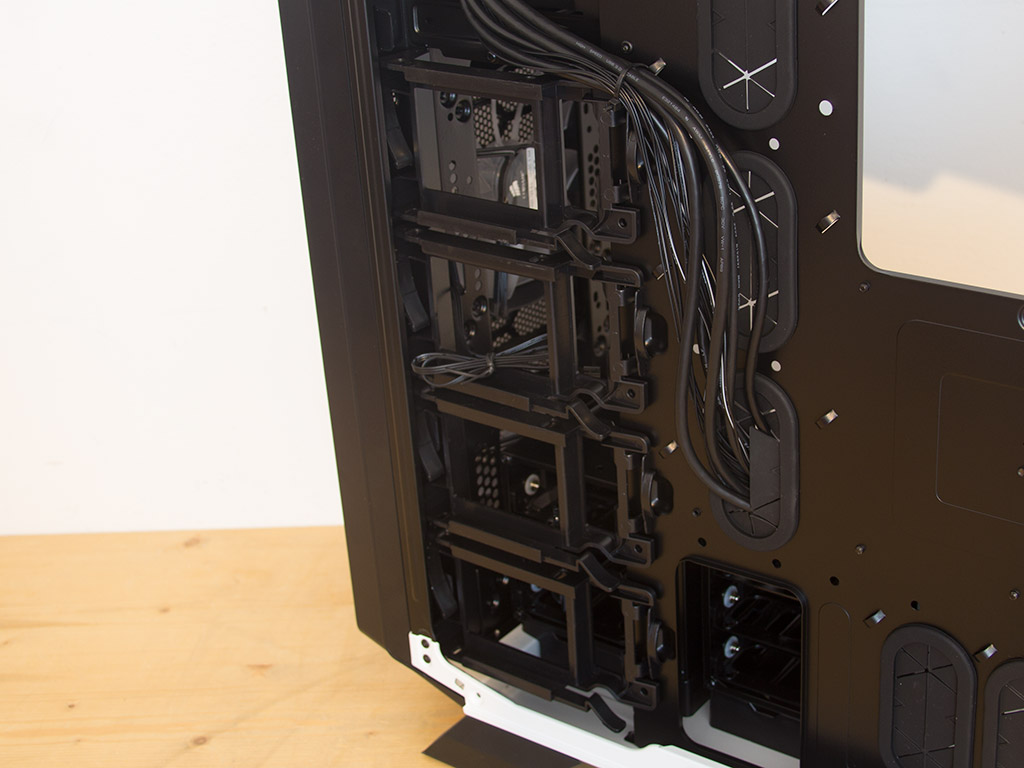
As the doors themselves are held in place by gravity alone, you can easily detach them. While the 750D featured bumps to install main boards on, Corsair has done away with those in the Graphite 760T to use traditional spacers instead. Corsair has also done an excellent job in maximizing cable-routing and hiding possibilities, with a large number of hooks one may attach unwanted leads to during assembly. You should also have no issues installing even the largest GPUs or PSUs within the case. Behind the motherboard tray are 30 mm worth of space for cable management - a nice amount of room between the motherboard tray and side panel for routing a lead to its appropriate connector.


The area at the bottom of the front stores all hard drives. Corsair also decided to place both cages next to one another, but you may stack these on top of one another instead. If there were a third cage, it would fit in here as well. While you could leave these to hang off the 5.25" bays, which would keep the bottom free, such a constellation is only interesting to modders as there is no way to properly secure it. The default configuration leaves both fans in the front nearly unobstructed and ready to keep things as cool as possible by pushing a ton of air into the interior.


With all the cages removed, you could go crazy with an elaborate liquid-cooling setup inside the Graphite 760T; without having to worry about space too much. You will find the 5.25" bays in the very top. Each has its own plastic tension lock for easy, tool-less installation.
You will also find four plastic frames that can hold individual 2.5" drives. Each of these can be removed without tools because of a clipping mechanism.

Taking a look at the ceiling, it becomes apparent that a long radiator will block the 5.25" bay at the very top, which is a small price to pay for those who really want to squeeze the most out of the chassis.


The PSU bay in the bottom of the rear comes with a large air vent, which gives even long units access to as much fresh air as possible, although things could get a bit tight if you were to install a potent unit with the hard-drive cages in their default position. Above the bay are the nine motherboard-expansion slots, each protected by an individual cover that is in turn held in place by a thumbscrew. The exhaust fan at the very top and in the rear takes up most of the space there.


The Graphite 760T's cables are sleeved black to go with the overall color scheme. Each individual plug is of the default variety, so you should be able to make the most of the I/O by connecting each properly without running into any problems. The fan controller is powered by a SATA plug and features four PWM connectors for your cooling fans.
Aug 2nd, 2025 00:55 CDT
change timezone
Latest GPU Drivers
New Forum Posts
- I just bought an RX570 4Gb (27)
- TechPowerUp Screenshot Thread (MASSIVE 56K WARNING) (4285)
- Question about Intel Optane SSDs (90)
- memory used for store firmware in adapters wifi usb (3)
- Calling all 6950XT owners, what's your max daily stable OC? (1)
- 9800x3d apart from gaming (26)
- What's your latest tech purchase? (24427)
- My UPS keep sending alarm when I game (38)
- Solidigm NVMe Custom Modded Driver for All NVMe Brands SSDs & Any NVMe SSDs (239)
- Need Help finding right VBIOS for RX 580 2048sp 8GB JieShuo (6)
Popular Reviews
- ASUS ROG Crosshair X870E Apex Review
- MSI Claw 8 AI+ A2VM Review
- Montech X5 Review
- Orbital Pathfinder Review
- Herman Miller Logitech G Embody Review - No Pain, No Gain
- Lenovo Legion 5i (15IRX10) Review - Feature-Rich and Wallet Friendly
- Lian Li HydroShift II LCD-C 360TL Review
- Upcoming Hardware Launches 2025 (Updated May 2025)
- Noctua NF-A12x25 G2 PWM Fan Review
- Lian Li O11 Dynamic Mini V2 Review
TPU on YouTube
Controversial News Posts
- AMD's Upcoming UDNA / RDNA 5 GPU Could Feature 96 CUs and 384-bit Memory Bus (137)
- AMD Radeon RX 9070 XT Gains 9% Performance at 1440p with Latest Driver, Beats RTX 5070 Ti (131)
- Intel "Nova Lake-S" Core Ultra 3, Ultra 5, Ultra 7, and Ultra 9 Core Configurations Surface (110)
- DDR6 Memory Arrives in 2027 with 8,800-17,600 MT/s Speeds (102)
- NVIDIA to Debut GeForce RTX 50-series SUPER GPUs by Christmas (101)
- AMD Sampling Next-Gen Ryzen Desktop "Medusa Ridge," Sees Incremental IPC Upgrade, New cIOD (97)
- Intel CEO Confirms SMT To Return to Future CPUs (95)
- NVIDIA Becomes First Company Ever to Hit $4 Trillion Market-Cap (94)