 14
14
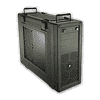
Corsair Vengeance C70 Review
Assembly & Finished Looks »A Closer Look - Inside
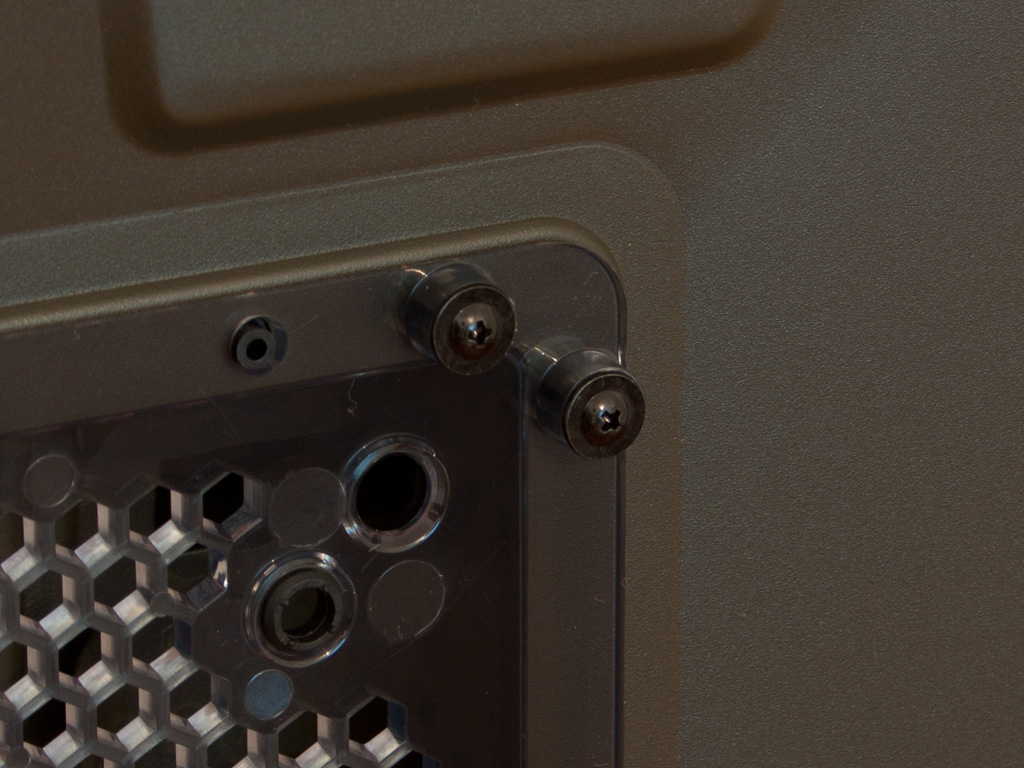
Taking a quick look at how the window is secured, Corsair is using real screws to hold the afore mentioned frame in place, which sandwiches the window in-between this and the metal side panel perfectly. The result is a window without any visible mounting parts on the outside.
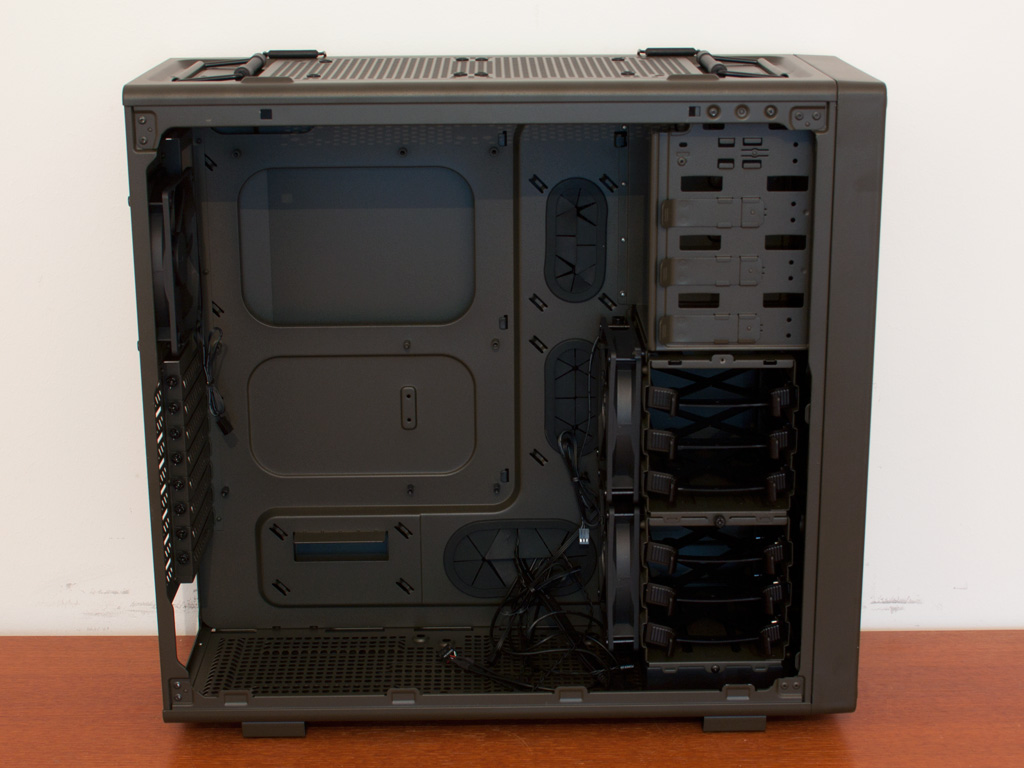

As expected, the insides of the Vengeance C70 are kept in the same color as the outer shell. This means that you will get an all white or all black chassis, if you choose to go for these C70 variants. The layout of the interior is quite traditional, but there are a few nice tidbits behind the motherboard tray. It comes with plenty of holes to route cables nicely within the chassis, along with a large opening to give way to CPU cooler backplates.


While you only have around 20 mm of space behind most of the motherboard tray, thanks to a trench along the black grommets for cable management, the depth is increased to nearly 30 mm where it counts the most. To aid in cable management, Corsair has included plastic clips to pin any cables to the motherboard tray. While we have seen various implementations in the past, this is the first that actually works flawlessly. The plastic is very strong and snaps into place perfectly, so that you will not have to worry about anything breaking when stuffing cables below it.

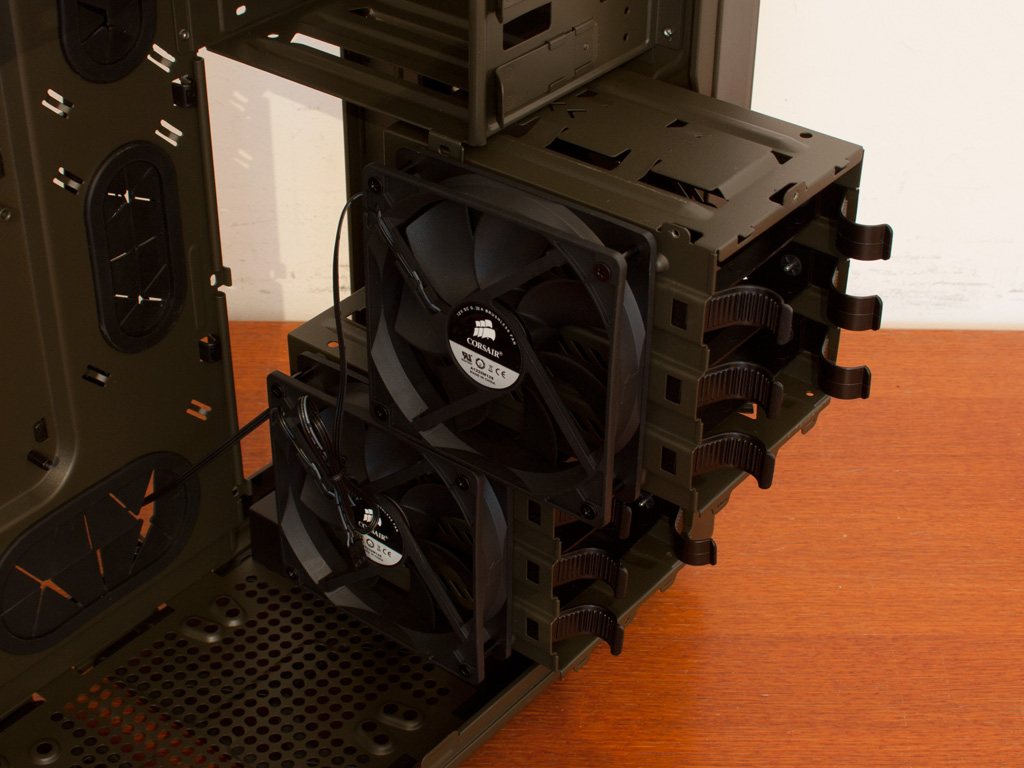


Each of the two hard drive cages comes with its own fan, cooling the hard drives by pulling air from the front of the chassis and pushing it into the interior. While this may mean that the hard drives do not benefit from the air pressure generated behind the blades, graphics cards and other internal components do. You may remove each of these cages giving you space for water cooling and other modding ideas. On a side note, if you look closely at the bottom cage, you will see three arrows cut out in the top - this does not only help in allowing one to remember in which direction to push the unit back in, but also is a testament to the level of detail Corsair has gone for within the Vengeance C70.

Above these cages are the three external 5.25 inch bays. Each features a metal clipping system which uses the tension in the metal instead of screws or locks to hold things in place. It will be interesting to see, how this system fares later on.


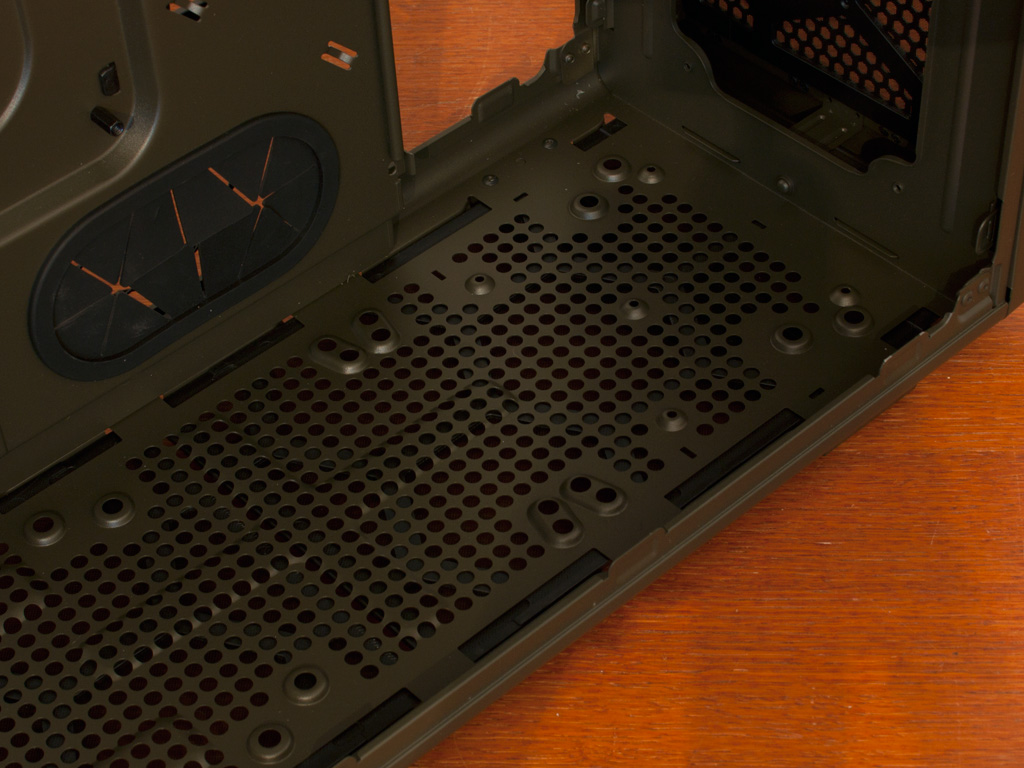
In the rear, the PSU bay is nothing out of the ordinary. No rubber domes or foam lining can be found here. While it would have been nice and reassuring to have such a feature, it - in all honesty - should not really matter and does not really increase the chance of vibrations in this area of a system. Above that are the eight individual motherboard expansion slot covers, each held in place by a thumb screw. In the very top you will find the 120 mm exhaust fan, which is identical to the two found in the front of the Vengeance C70.

You may install two 120 or 140 mm fans in the ceiling of the chassis. A cutout in the top of the 5.25 inch bays ensures that there is enough space should you use the larger fan type. You will easily be able to install a 240 mm radiator here as well. There is another similar configuration in the floor of the case, so you should be able to place another radiator of the same size here as well, if you are willing to sacrifice the bottom HDD cage. Doing so will still allow you to use the top cage, thanks to well engineered hooks holding it in place.
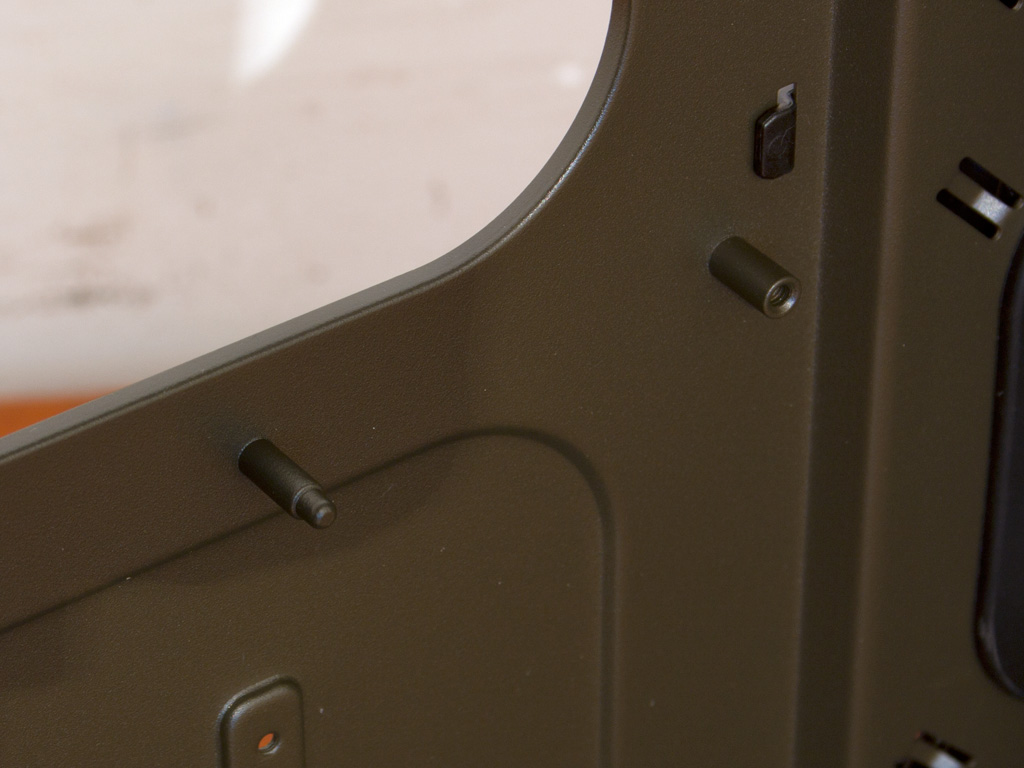
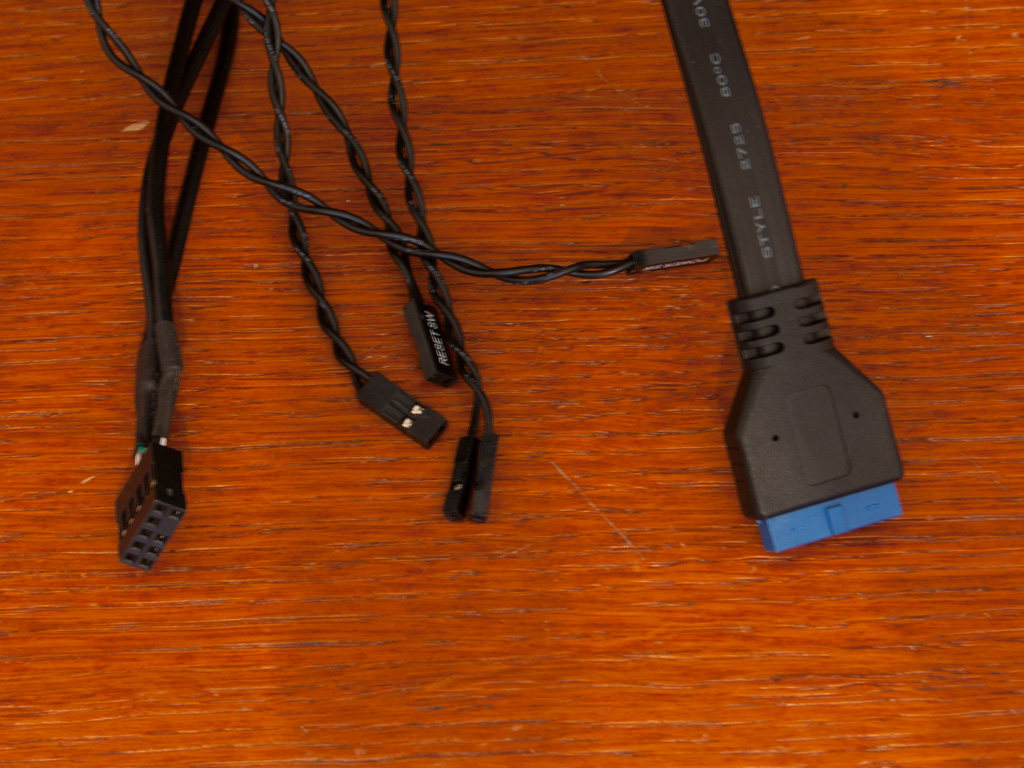
While the chassis uses traditional spacers to hold a motherboard in place, one of these has been extended, so that you may place the board here while the chassis is upright and do not need to worry about holding it at the right position when screwing it down. All the cables are of the standard variety, except the USB 3.0 one. Unlike other implementations, the one in the Vengeance C70 is flat, which makes it much easer to route and hide.
Apr 26th, 2024 19:31 EDT
change timezone
Latest GPU Drivers
New Forum Posts
- Alphacool CORE 1 CPU block - bulging with danger of splitting? (32)
- Strange system crashes out of nowhere help (5)
- Your PC ATM (34508)
- Black screens leading to restarts (Event ID 18) on AMD platform since changing graphics card (42)
- Best SSD for system drive (104)
- The Official Linux/Unix Desktop Screenshots Megathread (703)
- What phone you use as your daily driver? And, a discussion of them. (1493)
- AMD Radeon™ R9 390X (GV-R939XG1) (0)
- TPU's Nostalgic Hardware Club (18475)
- looking to build a new system and im considering asrock brand but i have some doubts/concerns. (6)
Popular Reviews
- HYTE THICC Q60 240 mm AIO Review
- MOONDROP x Crinacle DUSK In-Ear Monitors Review - The Last 5%
- Upcoming Hardware Launches 2023 (Updated Feb 2024)
- Ugreen NASync DXP4800 Plus Review
- Alienware Pro Wireless Gaming Keyboard Review
- Thermalright Phantom Spirit 120 EVO Review
- FiiO K19 Desktop DAC/Headphone Amplifier Review
- ASUS Radeon RX 7900 GRE TUF OC Review
- AMD Ryzen 7 7800X3D Review - The Best Gaming CPU
- Sapphire Radeon RX 7900 GRE Pulse Review
Controversial News Posts
- Windows 11 Now Officially Adware as Microsoft Embeds Ads in the Start Menu (135)
- Sony PlayStation 5 Pro Specifications Confirmed, Console Arrives Before Holidays (117)
- NVIDIA Points Intel Raptor Lake CPU Users to Get Help from Intel Amid System Instability Issues (106)
- AMD "Strix Halo" Zen 5 Mobile Processor Pictured: Chiplet-based, Uses 256-bit LPDDR5X (103)
- US Government Wants Nuclear Plants to Offload AI Data Center Expansion (98)
- AMD's RDNA 4 GPUs Could Stick with 18 Gbps GDDR6 Memory (95)
- Developers of Outpost Infinity Siege Recommend Underclocking i9-13900K and i9-14900K for Stability on Machines with RTX 4090 (85)
- Windows 10 Security Updates to Cost $61 After 2025, $427 by 2028 (84)