 5
5
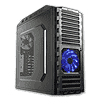
Enermax Hoplite Review
Assembly & Finished Looks »A Closer Look - Inside


To gain access to the interior, simply remove the pair of thumb screws holding each side panel in place. As expected, the interior is all black, but it does feature some unique approaches to accommodate long graphics cards of up to 315 mm length. Considering the fact that there is only around 10 mm of space between the mainboard tray and case wall, the extrusion of the side panel is not only a visual aspect but a dire necessity. Otherwise you would not be able to really route any cables behind the tray. Even though there is enough space, the holes in the mainboard tray are very small, which should make it rather difficult to fill the entire chassis and route all the cables through them.


Taking a closer look at that funky contraption, the hot-swap bays are on the very bottom. A PCB with two SATA connectors and a single Molex power plug enables this functionality for both drive bays. On top of that Enermax has included two 3 pin fan headers. This should further reduce the cable mess within the chassis. Above that you may fit four additional 3.5 inch drives and two 2.5 inch variants. Installation is completely screw-less. Just open the metal door up, slide the drive into place and close the door. This is an ingenious approach and works surprisingly well as we will see later on. The four 5.25 inch bays are equipped with another system to eliminate the need for any tools. While the plastic mounts may look fragile, they actually hold metal screws. This means you just line them up with the holes of the drive and wind them down to secure it in place. This combines the best of both worlds: real screws to hold things tight and an easy and quick installation method.


Turning our focus to the rear, the PSU bay is nothing out of the ordinary. There is no foam lining or rubber mounts anywhere in sight, so if you have a PSU with a fast fan, you may want to consider something to reduce the chance of any vibrations being passed on to the case. Above that are the seven standard expansion slots and two water cooling holes. The fan utilizes a Molex connector instead of a 3-pin mainboard header, so you can only run it at full speed.


Taking a quick look at the top area, due to the large ceiling cover, the fans can be installed a bit higher, essentially just about the traditional ceiling of the case. You are free to go with two 120 or two 140 mm units. While spacing looks good for a dual radiator, I wonder if it will fit due to the larger dimensions of the radiator itself. As you can see, the PCB for the hard drive dock has simply been screwed unto the metal ceiling here, no guides anywhere in sight.

Before we dive into the assembly process, let us take a quick look at the cables. Here the Hoplite offers everything up in standard variety. The USB 3.0 cables are blue and the mainboard connector is multi-colored.
May 7th, 2024 09:19 EDT
change timezone
Latest GPU Drivers
New Forum Posts
- not impressed - nvme vs ssd (26)
- How to check flatness of CPUs and coolers - INK and OPTICAL INTERFERENCE methods (117)
- 6800XT Red Devil with 18°C difference from Core to Hotspot (4)
- The Official Thermal Interface Material thread (1172)
- Dota 2 GPU performance test (5)
- Only some humans can see refresh rates faster than others, I am one of those humans. (205)
- My new folding rig. (5)
- What are you playing? (20595)
- What's your latest tech purchase? (20458)
- VR/MR/AR Concert experiences (0)
Popular Reviews
- Finalmouse UltralightX Review
- Corsair iCUE Link RX120 RGB 120 mm Fan Review
- Cougar Hotrod Royal Gaming Chair Review
- Meze Audio LIRIC 2nd Generation Closed-Back Headphones Review
- Upcoming Hardware Launches 2023 (Updated Feb 2024)
- ASRock NUC BOX-155H (Intel Core Ultra 7 155H) Review
- AMD Ryzen 7 7800X3D Review - The Best Gaming CPU
- ASUS Radeon RX 7900 GRE TUF OC Review
- Montech Sky Two GX Review
- HYTE THICC Q60 240 mm AIO Review
Controversial News Posts
- Intel Statement on Stability Issues: "Motherboard Makers to Blame" (250)
- AMD to Redesign Ray Tracing Hardware on RDNA 4 (191)
- Windows 11 Now Officially Adware as Microsoft Embeds Ads in the Start Menu (167)
- NVIDIA to Only Launch the Flagship GeForce RTX 5090 in 2024, Rest of the Series in 2025 (123)
- Sony PlayStation 5 Pro Specifications Confirmed, Console Arrives Before Holidays (119)
- AMD's RDNA 4 GPUs Could Stick with 18 Gbps GDDR6 Memory (114)
- NVIDIA Points Intel Raptor Lake CPU Users to Get Help from Intel Amid System Instability Issues (106)
- AMD Ryzen 9 7900X3D Now at a Mouth-watering $329 (104)