 16
16
Fractal Design Define R4 Review
Assembly & Finished Looks »A Closer Look - Inside


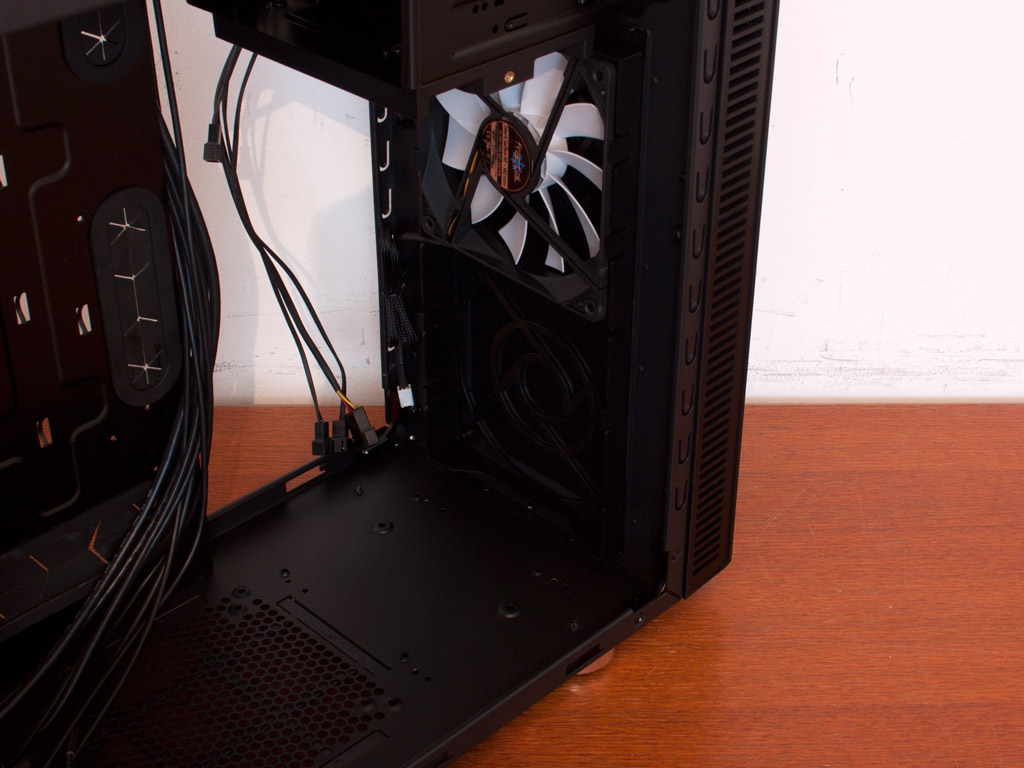
To gain access to the interior, simply remove the two thumbscrews holding the side panel in place. As mentioned before, the entire interior has the same black and white color-theme we have come to love from Fractal Design. A large opening in the mainboard tray should give you access to the cooler backplate, while openings on three sides around the mainboard allow you to route any cables nicely. You have well over 2 cm (almost one inch) of space behind the mainboard tray, along with multiple hooks for zip ties. All of this should make cable management pretty easy.


Fractal Design has chosen to sacrifice some external 5.25 inch bays and includes eight hard-drive bays instead. The top bay may be turned by 90 degrees or taken out completely if you happen to need the space for long graphics cards. The single 140 mm intake-fan has been placed in the upper slot at the factory, while the bottom one remains unused.
You may also move three bottom HDD trays away from the front, which comes in handy if you want a radiator in the front. This feature allows you to keep three hard drive bays with such a configuration.
You could also go ahead and mount the cage on any 120 mm fan location because of 120 mm spaced holes on the bottom hard-drive bay. While a cool feature, there is really no other place to put the cage as there is simply not enough space.

The two 5.25 inch bays are nothing out of the ordinary and are identical to those found in the Arc chassis. Instead of an inadequate plastic locking systems, Fractal Design still offers simple but effective thumbscrews for these drive bays, taking tools out of the equation.


The PSU bay is on the bottom of the rear. A power supply will rest on four foam-mounted knobs, while the rear is also lined with the same material. This should kill vibrations on the spot. Above that are eight, white mainboard-expansion-slots, each held in place by a black thumbscrew. In the very top is another white bladed 140 mm fan to, this time, push air out the back of the chassis.
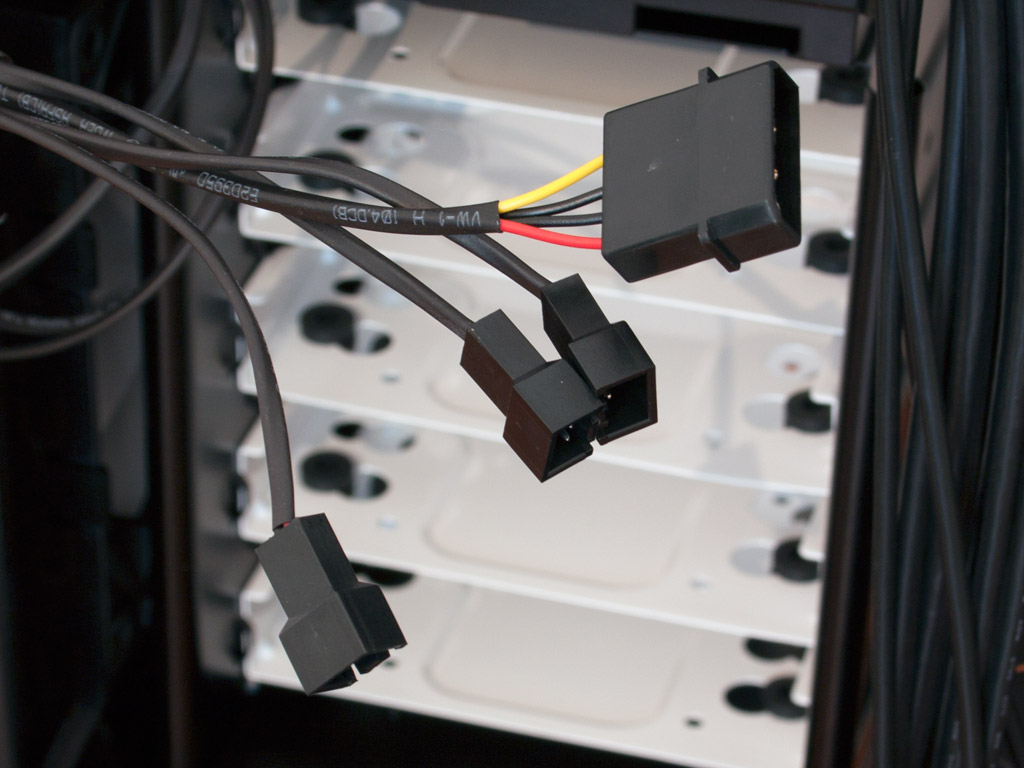

Instead of a separate fan-controller, the Define R4 has a built-in variant able to connect up to three cooling units to the device. Instead of a dial, you may pick from three speed settings at the front of the chassis. The I/O is modern with a 20-pin USB 3.0 connector and the usual suspects in terms of USB 2.0 and case I/O.


Taking a quick look at the ceiling, the two fan-openings are covered by panels with thick, sound-dampening foam-material, while the fan-opening in the floor, for the 120/140 mm fan, does not come with such a part installed. This should not be an issue since it points downward.
Apr 26th, 2024 00:53 EDT
change timezone
Latest GPU Drivers
New Forum Posts
- What's your latest tech purchase? (20341)
- Horizontal black lines popping up on my screen? (0)
- Which new games will you be buying? (316)
- Alphacool CORE 1 CPU block - bulging with danger of splitting? (20)
- Black screen after muting (5)
- What phone you use as your daily driver? And, a discussion of them. (1481)
- What are you playing? (20530)
- Secure boot already open help (0)
- TPU's Nostalgic Hardware Club (18465)
- Post your Speedometer 3.0 Score (36)
Popular Reviews
- Fractal Design Terra Review
- Thermalright Phantom Spirit 120 EVO Review
- Corsair 2000D Airflow Review
- ASUS GeForce RTX 4090 STRIX OC Review
- NVIDIA GeForce RTX 4090 Founders Edition Review - Impressive Performance
- ASUS GeForce RTX 4090 Matrix Platinum Review - The RTX 4090 Ti
- MSI GeForce RTX 4090 Suprim X Review
- Gigabyte GeForce RTX 4090 Gaming OC Review
- MSI GeForce RTX 4090 Gaming X Trio Review
- MSI GeForce RTX 4090 Suprim Liquid X Review
Controversial News Posts
- Sony PlayStation 5 Pro Specifications Confirmed, Console Arrives Before Holidays (117)
- Windows 11 Now Officially Adware as Microsoft Embeds Ads in the Start Menu (110)
- NVIDIA Points Intel Raptor Lake CPU Users to Get Help from Intel Amid System Instability Issues (106)
- AMD "Strix Halo" Zen 5 Mobile Processor Pictured: Chiplet-based, Uses 256-bit LPDDR5X (101)
- US Government Wants Nuclear Plants to Offload AI Data Center Expansion (98)
- AMD's RDNA 4 GPUs Could Stick with 18 Gbps GDDR6 Memory (88)
- Developers of Outpost Infinity Siege Recommend Underclocking i9-13900K and i9-14900K for Stability on Machines with RTX 4090 (85)
- Windows 10 Security Updates to Cost $61 After 2025, $427 by 2028 (84)