 17
17
Lancool Dragonlord PC-K62 Review
Value & Conclusion »Assembly

Installing the parts in the Lancool Dragonlord K62 is refreshingly easy, as the only part that requires screws is the mainboard. As you can see, there is plenty of space for large CPU coolers as well as large GPUs. Due to the eight bracket in the back, there is some space between the PSU and mainboard as well. The one downside was the fairly short audio cable to connect the front microphone & headphone jack. It would never reach the left area of the installed board.


Our passive graphics card was held perfectly in place by the extremely high quality metal locks. Even though this GPU is fairly small you can rest assured, that even large cards will not move at all. This system stems from Lian-Li and it is great to see it in a chassis of this price point.


Installing the hard drive is done easily as well. Simply place it in the tray, push the plastic locks on both sides into place and slide it into the appropriate slot. Finally, push down the vertical lock and you are ready to go. The trays are rubber mounted, thus no vibration here either and they are ready for 2.5 inch drives or SSDs as well.


Installing an optical drive is done without the use of any tools as well and it actually works too! Simply slide the device into place, push the bar back so that it locks into place and it is secured in place with just a tad of play. Now for the real kicker: screw-less power supply installation. Considering that the PSU is by far the heaviest part of a system I was a bit skeptical about the approach Lancool has taken here, but my worries were unfounded. Placing the metal clip across the PSU and locking it into place requires a lot of force. For comparison, take the force required to install one of those old Socket A CPU coolers with a flat head screw driver and pretty much triple or quadruple that force required, then add the fact that this lock is made of metal and has a foam lining to hold the PSU firmly in place. I was not able to push the unit out of position at all. In fact, the rear air vent of the PSU started bending inward instead.

After filling the chassis with all the major parts, it is clear that there is still plenty of space to work in. All the major connections and slots are easily accessible.
Finished Looks

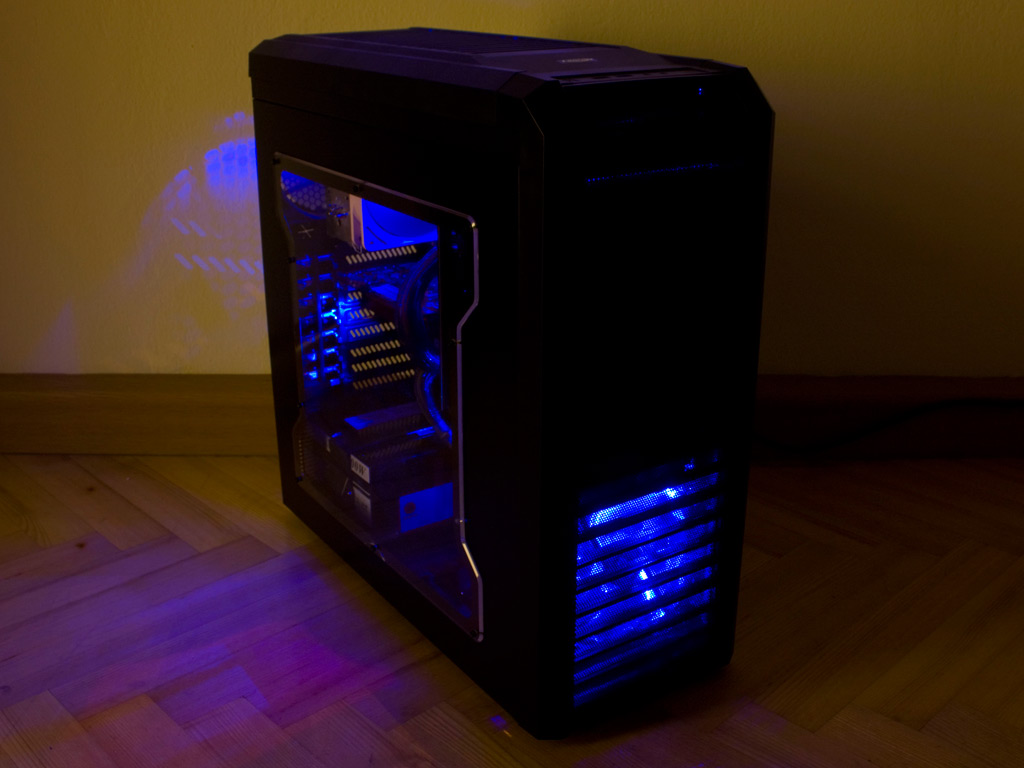
The last step meant placing both side panels back on the Dragonlord K62 and firing it up. The three blue LED fans add a very nice glow, especially the two ceiling fans. These light the insides of the system quite well, so that you may not need to go out and grab any additional CCFLs. On the other hand these units have to very positive attributes. First, the blue lighting seems to light up brightly, even if the fan is pulling less voltage to run slower and all of the units are extremely quiet.
May 14th, 2024 22:46 EDT
change timezone
Latest GPU Drivers
New Forum Posts
- Your PC ATM (34557)
- Homeworld 3 [Official Thread] (39)
- Is It The 1080 TI The Best GPU Ever? (220)
- Ryzen Owners Zen Garden (7339)
- Corsair CPU Cooler and fans setup (1)
- What are you playing? (20651)
- Post your Cinebench 2024 score (458)
- 2024 and STILL no dark mode? (47)
- I am getting artifacting when I change Windows security settings. Is my GPU failing, or is this just a Windows issue? (11)
- AMD RX 7000 series GPU Owners' Club (1106)
Popular Reviews
- Homeworld 3 Performance Benchmark Review - 35 GPUs Tested
- Enermax REVOLUTION D.F. X 1200 W Review
- ZMF Caldera Closed Planar Magnetic Headphones Review
- Upcoming Hardware Launches 2023 (Updated Feb 2024)
- Corsair MP700 Pro SE 4 TB Review
- AMD Ryzen 7 7800X3D Review - The Best Gaming CPU
- ThundeRobot ML903 NearLink Review
- Bykski CPU-XPR-C-I CPU Water Block Review - Amazing Value!
- ASUS Radeon RX 7900 GRE TUF OC Review
- CHERRY XTRFY M64 Pro Review
Controversial News Posts
- Intel Statement on Stability Issues: "Motherboard Makers to Blame" (266)
- AMD to Redesign Ray Tracing Hardware on RDNA 4 (227)
- Windows 11 Now Officially Adware as Microsoft Embeds Ads in the Start Menu (172)
- NVIDIA to Only Launch the Flagship GeForce RTX 5090 in 2024, Rest of the Series in 2025 (152)
- AMD Hits Highest-Ever x86 CPU Market Share in Q1 2024 Across Desktop and Server (132)
- Sony PlayStation 5 Pro Specifications Confirmed, Console Arrives Before Holidays (119)
- AMD's RDNA 4 GPUs Could Stick with 18 Gbps GDDR6 Memory (114)
- AMD Ryzen 9 7900X3D Now at a Mouth-watering $329 (104)