 1
1
NZXT Hush Review
Installation & Finished Look »A Closer Look


Opening the sides of the case is both easy and difficult. The one side, which gives you access to the bulk of the case is easily removed due to the thumb screws, but you will also need to take off the other as the screwless devices are located on both sides. I was very surprised to see, that all the 5.25 inch and both floppy securing devices are missing. This is not the first time this has happened with NZXT cases. The Adamas is also missing four 5.25 inch rails. Even though I was told that this was a mistake, the packing list which was included in the Adamas only mentioned four instead of eight rails as well. Ask if you may unpack the case at the shop to check if all these devices are included or not. The interior layout of the HUSH is nothing out of the ordinary. You will not find any exotic placement of the drives or mainboard. The big selling point of the case is pure silence. To achieve this, the entire case is covered with noise dampening material. This covers the sides, bottom, front and roof of the case.
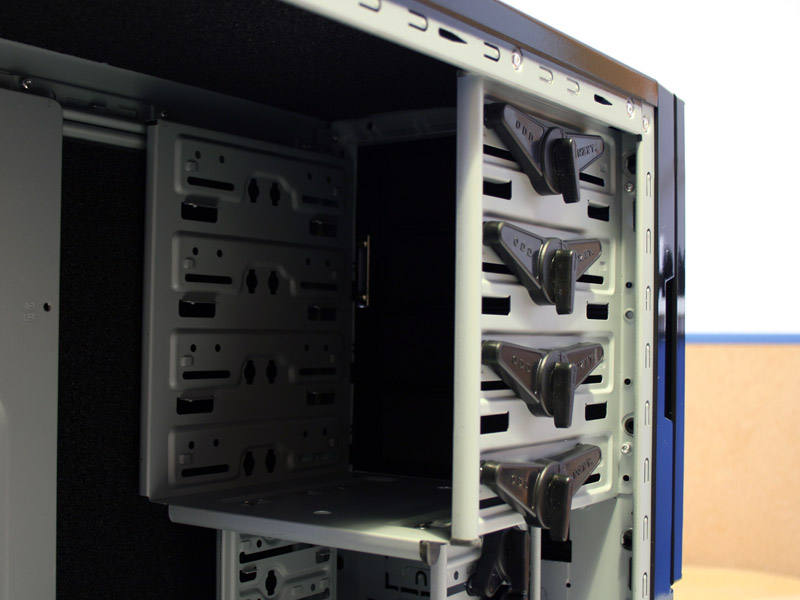

The four 5.25 inch drive bays can easily be accessed from the front of the case. All sharp corners are rounded, so you will not cut yourself during assembly. The same goes for the two walls, which form the 3.5 inch bays. There is no divider between the external and internal bays, which means that you may also use the two external ones for hard drives. This is a very simple approach to put drive bays inside a case, but quite effective. The black devices on the side in different sizes make the installation of drives screwless. There is a clear fan in front of the hard drive bays, which has blue LEDs for lighting.


The smallest one of the bunch is meant for floppy drives, the middle for hard drives and the largest is to be used for optical drives. These are not completely made of plastic, as the parts that hold the drives in place are metal, The locs are labled clearly. Securing the drives can be done by turning the lock to the right position.


The front I/O is actually located on the right side of the case. If you have your case under the desk, chances are it will be toward the right of your chair simply because the door opens from left to right. This would make it hard to access these connectors. It would have been better to see them on the left side or the front of the case. The mainboard connectors are the same kind you would find in most cases. NZXT includes all the different audio connectors, so you will not have to worry about any incompatibity.
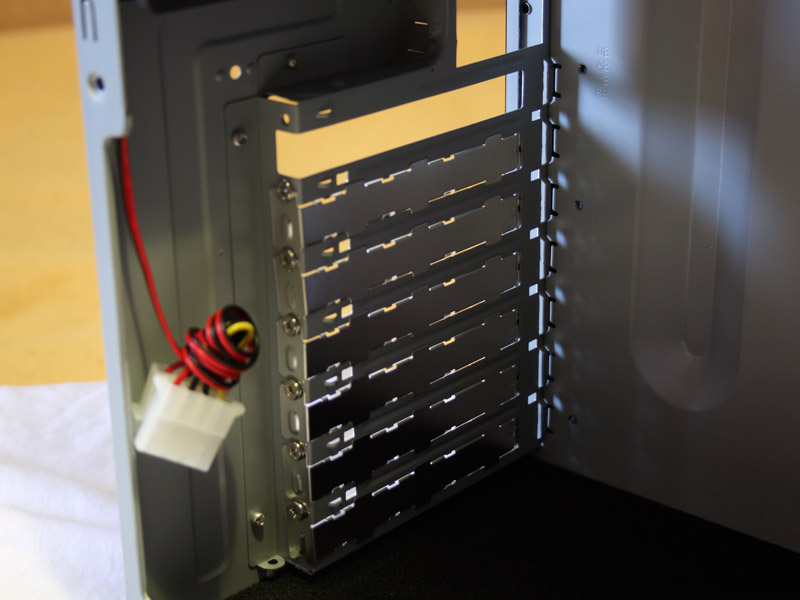

As mentioned before, the PCI slots can be removed easily by unscrewing screws. The fan utilizes a Molex connector, so you will not be able to control the speed by using a mainboard header. The fan is black unlike the one in the front.

Even the plastic covers, which can be removed by pressing them outward, are covered in sound dampening materials. NZXT went all out and covered all possible areas to make the case as quiet, as "hush" as possible.
Apr 25th, 2024 21:41 EDT
change timezone
Latest GPU Drivers
New Forum Posts
- What are you playing? (20529)
- TPU's Nostalgic Hardware Club (18465)
- Post your Speedometer 3.0 Score (36)
- Size on Disk Excessively Different than Size (9)
- Dell Workstation Owners Club (3056)
- Core PL1 + GPU PL1 + Ring EDP OTHER (10)
- Best SSD for system drive (80)
- Which new games will you be buying? (315)
- BSOD if I touch the pcache offset voltage in throttlestop (i9-13900hx lenovo pro 7i) (23)
- Alphacool CORE 1 CPU block - bulging with danger of splitting? (16)
Popular Reviews
- Fractal Design Terra Review
- Thermalright Phantom Spirit 120 EVO Review
- Corsair 2000D Airflow Review
- ASUS GeForce RTX 4090 STRIX OC Review
- NVIDIA GeForce RTX 4090 Founders Edition Review - Impressive Performance
- ASUS GeForce RTX 4090 Matrix Platinum Review - The RTX 4090 Ti
- MSI GeForce RTX 4090 Suprim X Review
- Gigabyte GeForce RTX 4090 Gaming OC Review
- MSI GeForce RTX 4090 Gaming X Trio Review
- MSI GeForce RTX 4090 Suprim Liquid X Review
Controversial News Posts
- Sony PlayStation 5 Pro Specifications Confirmed, Console Arrives Before Holidays (117)
- Windows 11 Now Officially Adware as Microsoft Embeds Ads in the Start Menu (107)
- NVIDIA Points Intel Raptor Lake CPU Users to Get Help from Intel Amid System Instability Issues (106)
- AMD "Strix Halo" Zen 5 Mobile Processor Pictured: Chiplet-based, Uses 256-bit LPDDR5X (101)
- US Government Wants Nuclear Plants to Offload AI Data Center Expansion (98)
- AMD's RDNA 4 GPUs Could Stick with 18 Gbps GDDR6 Memory (88)
- Developers of Outpost Infinity Siege Recommend Underclocking i9-13900K and i9-14900K for Stability on Machines with RTX 4090 (85)
- Windows 10 Security Updates to Cost $61 After 2025, $427 by 2028 (84)