 10
10
NZXT Phantom 530 Review
A Closer Look - Inside »A Closer Look - Outside

Out of the box, all smooth plastic areas of the Phantom 530 are lined with another layer of plastic to protect it from scratches. Overall, the new case design has gotten a lot edgier when compared to the original NZXT Phantom chassis. The front door has also changed, with the door taking up most of the space and its forward shape being a bit more symmetrical than that of the original. You will still find the same two-colored approach, with a mix of black and white and a large air vent in the front of the Phantom 530.


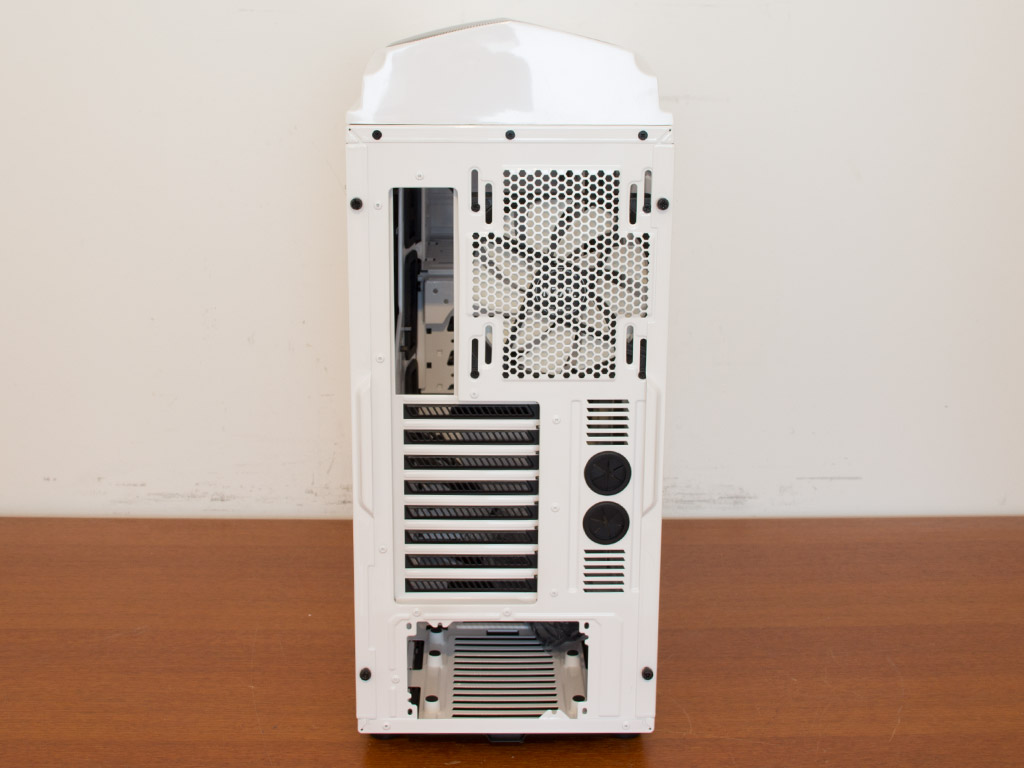
The door still opens from left to right, using magnets to stay in place. There should be enough space behind the door to keep all small fan-controller dials out of the way, which will allow you to close it properly. Turning the chassis around to the rear, it does become apparent that the interior is painted to match the exterior. This also holds true for differently colored cases. I am sure NZXT will diversify things over time as well, adding more color variants.

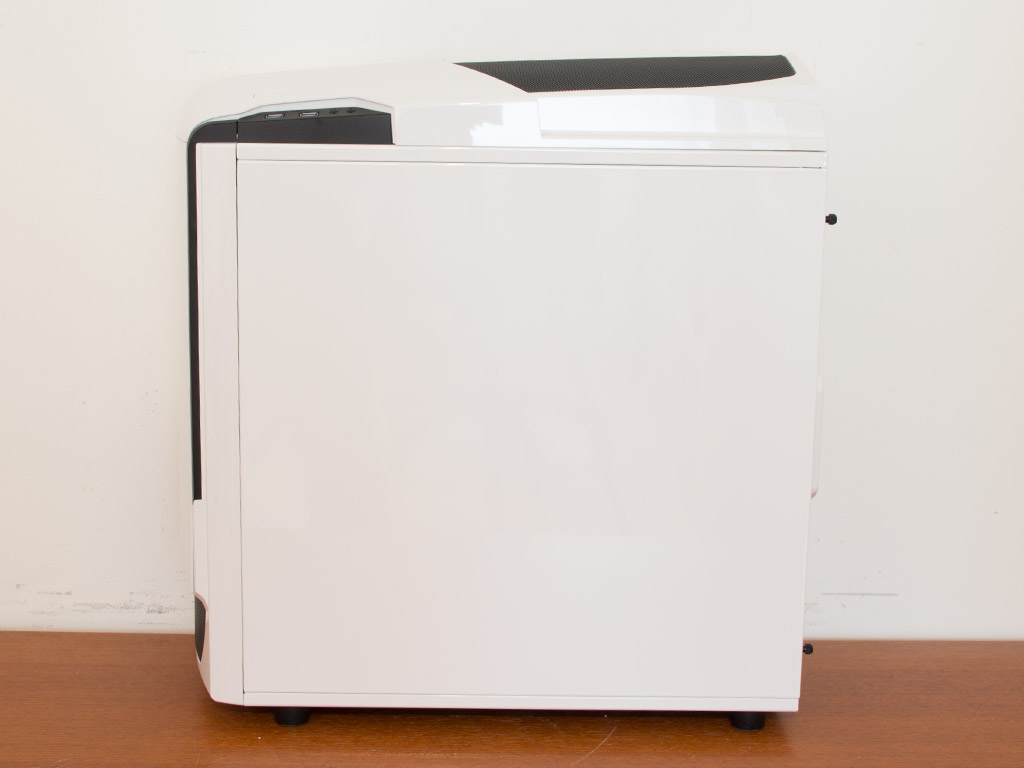
A fairly large window, along with a smaller black metal-mesh portion, can be found on the main side panel. You may install a single 140 mm fan in the bottom-right corner to cool any hard drives here. The window is fitted in a way that hides any mounting materials. The other side panel is completely solid and simple—not much else to see here, keep on moving.


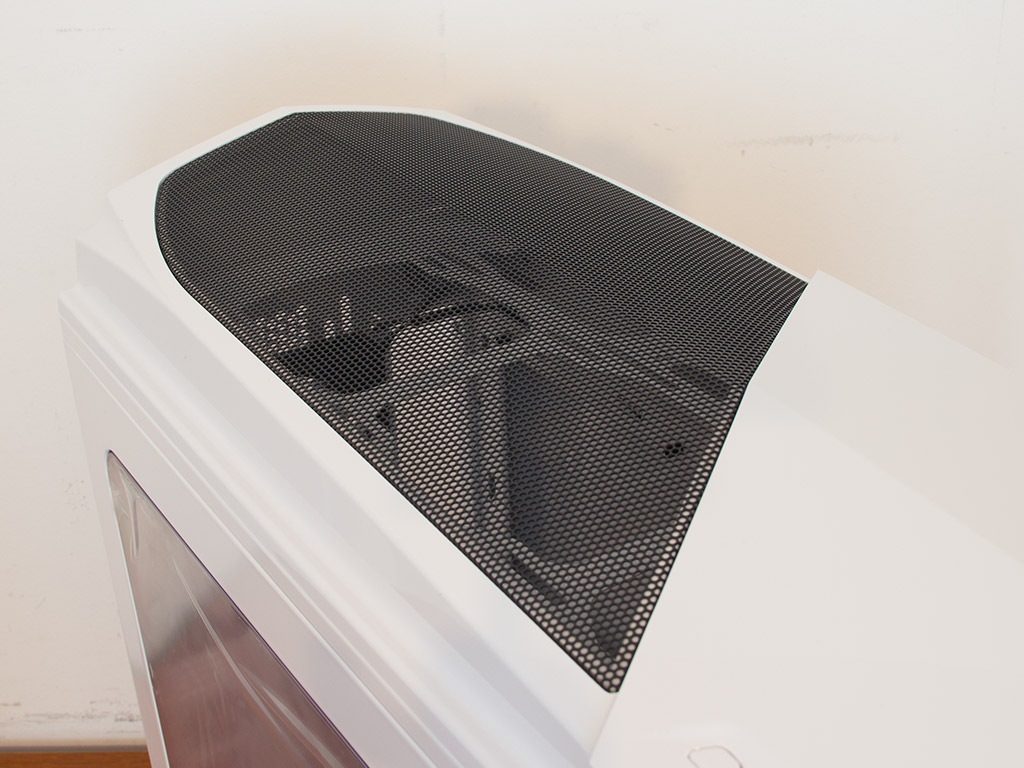
Behind the large, black metal mesh on the bottom is one 200 mm cooling fan that pulls air into the chassis. The fine metal mesh should keep larger dust particles out of the interior. Above that are the three external 5.25" bays. As with the other Phantom cases, you are able to remove each cover by simply pulling the little black sliding lock to the right. If you look closely, you will also see the reset button in the top-right corner of the front panel.

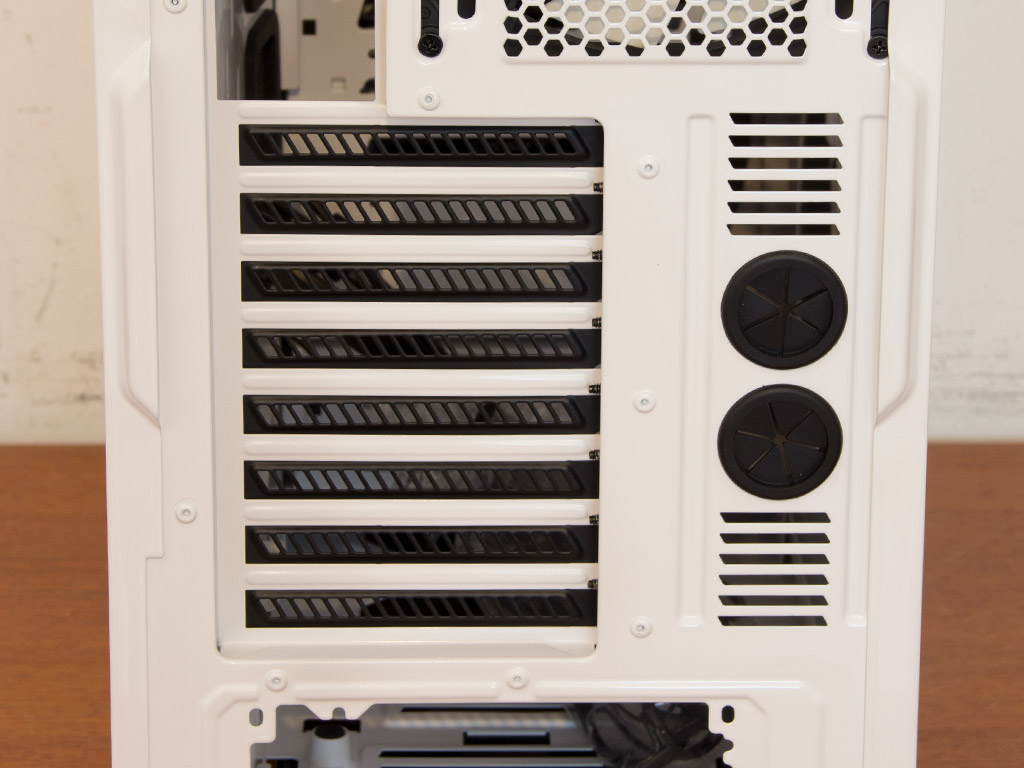

The PSU bay in the rear is located at the very bottom of the chassis. You will find two sets of mounting holes, so a power supply may be installed with the fan facing up or down. Above that are the eight motherboard-expansion slots. Each of them is protected by an individual, reusable cover. You will also find two water-cooling openings to the right of these slots. A 140 mm fan in the very top comes pre-installed right out of the box. Its location may be adjusted vertically, which allows you to align it perfectly with the motherboard.
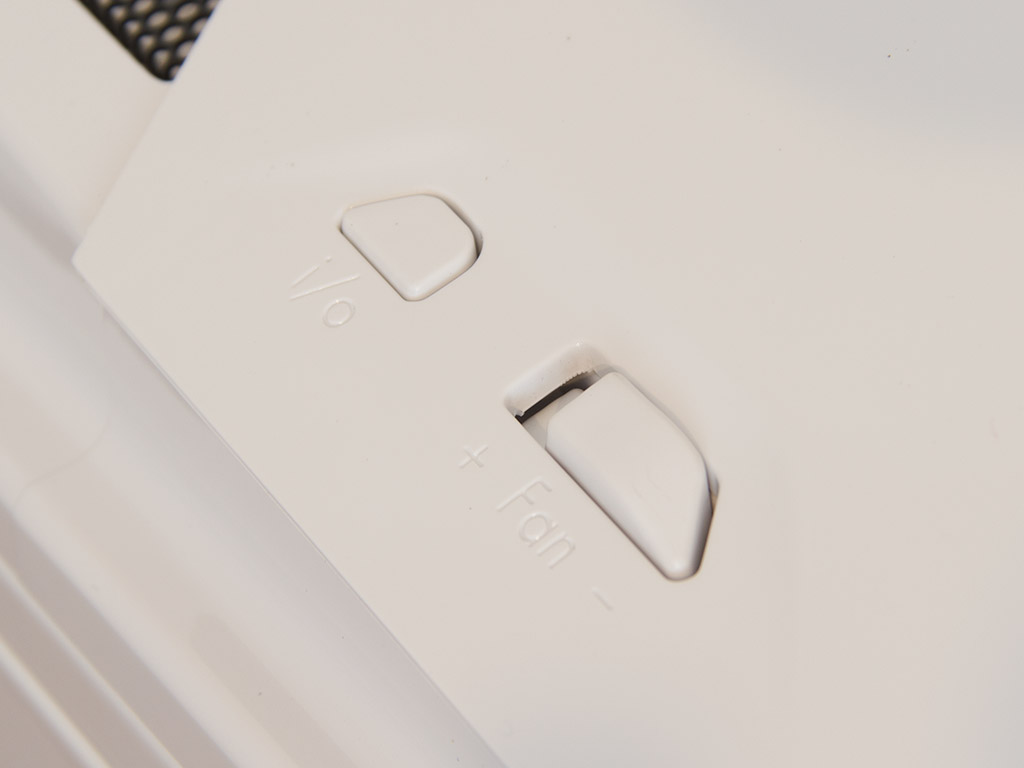

On the top are an I/O light switch and a basic fan controller with two settings: high and low. The opposite side has a power button and two USB 3.0 connectors alongside the traditional audio I/O.

You will find two dusts filters on the underside. These cover all openings of the underbelly. The larger one spans the entire front area, while a smaller variant protects the PSU intake area from dust. Both of them are of the same material and may be removed for easy cleaning.
Apr 26th, 2024 18:21 EDT
change timezone
Latest GPU Drivers
New Forum Posts
- What phone you use as your daily driver? And, a discussion of them. (1492)
- Best SSD for system drive (94)
- AMD Radeon™ R9 390X (GV-R939XG1) (0)
- TPU's Nostalgic Hardware Club (18475)
- looking to build a new system and im considering asrock brand but i have some doubts/concerns. (6)
- What's your latest tech purchase? (20354)
- 5800x (and other Zen 3 chips) PBO settings/Temperature fix (934)
- Only EDP Other in Core? (2)
- Alphacool CORE 1 CPU block - bulging with danger of splitting? (30)
- Dell Workstation Owners Club (3061)
Popular Reviews
- HYTE THICC Q60 240 mm AIO Review
- MOONDROP x Crinacle DUSK In-Ear Monitors Review - The Last 5%
- Upcoming Hardware Launches 2023 (Updated Feb 2024)
- Alienware Pro Wireless Gaming Keyboard Review
- Thermalright Phantom Spirit 120 EVO Review
- Ugreen NASync DXP4800 Plus Review
- FiiO K19 Desktop DAC/Headphone Amplifier Review
- ASUS Radeon RX 7900 GRE TUF OC Review
- AMD Ryzen 7 7800X3D Review - The Best Gaming CPU
- Sapphire Radeon RX 7900 GRE Pulse Review
Controversial News Posts
- Windows 11 Now Officially Adware as Microsoft Embeds Ads in the Start Menu (135)
- Sony PlayStation 5 Pro Specifications Confirmed, Console Arrives Before Holidays (117)
- NVIDIA Points Intel Raptor Lake CPU Users to Get Help from Intel Amid System Instability Issues (106)
- AMD "Strix Halo" Zen 5 Mobile Processor Pictured: Chiplet-based, Uses 256-bit LPDDR5X (103)
- US Government Wants Nuclear Plants to Offload AI Data Center Expansion (98)
- AMD's RDNA 4 GPUs Could Stick with 18 Gbps GDDR6 Memory (95)
- Developers of Outpost Infinity Siege Recommend Underclocking i9-13900K and i9-14900K for Stability on Machines with RTX 4090 (85)
- Windows 10 Security Updates to Cost $61 After 2025, $427 by 2028 (84)