How to build a computer |
|
Getting the motherboard ready for the case
Congratulations, your case is just about ready for your motherboard. However, your motherboard isn't quite ready to be put inside your case. And so, here's what you should do to get your motherboard ready for its case.Installing your computers memory
Now that you have straight access to your memory slots, now would be a great time to install your computers memory. This step is done at this point because some big CPU coolers may block access to the memory slots once the cooler is installed. Also it is a lot easier to install memory if you have open access to the motherboard.
Simply open up the RAM tabs...

Place the memory in the RAM slots... Please take a look at the little notch in the memory PCB and in the slot for the correct alignment of the module.
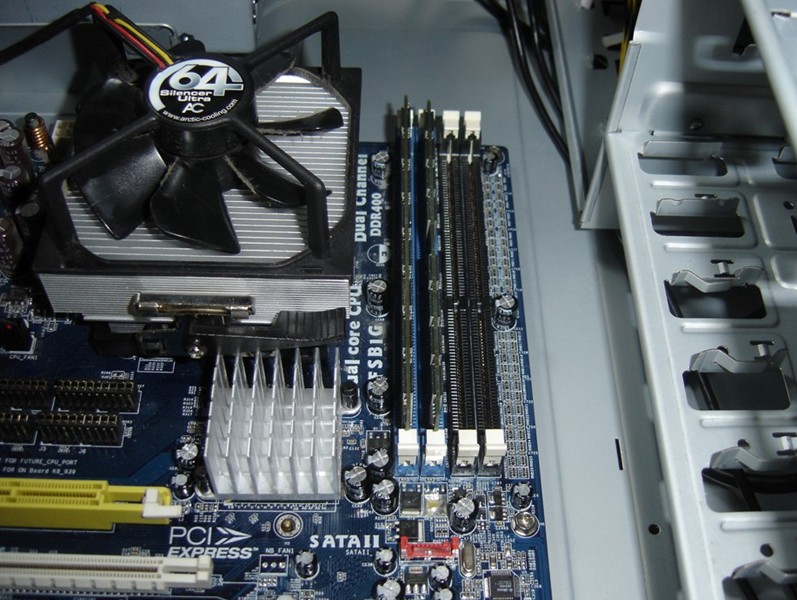
And gently push the memory into its slot until the tabs are closed.
Remember that if your motherboard supports DDR and DDR2, make sure you're putting the DDR in the DDR slot or the DDR2 in the DDR2 slot. DDR2 does not fit into DDR1 slots and vice versa.
Install the CPU and its heatsink
As much as I would love to post step by step instructions on how to put a CPU in, there are a TON of different sockets out there. Each socket requires a different way of inserting the processor, and each different way of inserting the processor has a different way of securing the heatsink. You're much better off reading the manual that came with your processor or heatsink. Just remember the following general guidelines-- If the CPU doesn't want to fit, it won't fit, so do not push. Neither AMD or Intel cover processors broken due to their customers frustration.
- If the CPU does not fit right take it out again and take a good look if all the pins are straight. If not take a razorblade or similar and very carefully bend them back. Of course you can always return the CPU to your vendor in case you feel uncomfortable doing that.
- Make sure that the CPU is all the way in. If it isn't all the way in, your motherboard won't recognize it, giving you a scare when you try to boot your machine for the first time.
- Ensure that the CPU heatsink is secure and has very good contact with the CPU. If it doesn't, the CPU could fry itself, you could get very bad (= high) temperatures, or the CPU heatsink could fall off and damage other components.
- After installing the heatsink, make sure to plug it in to the motherboard. The motherboard connector for the CPU is usually labeled "CPUFan".
My CPU is in. Now what?
Now comes the fun part.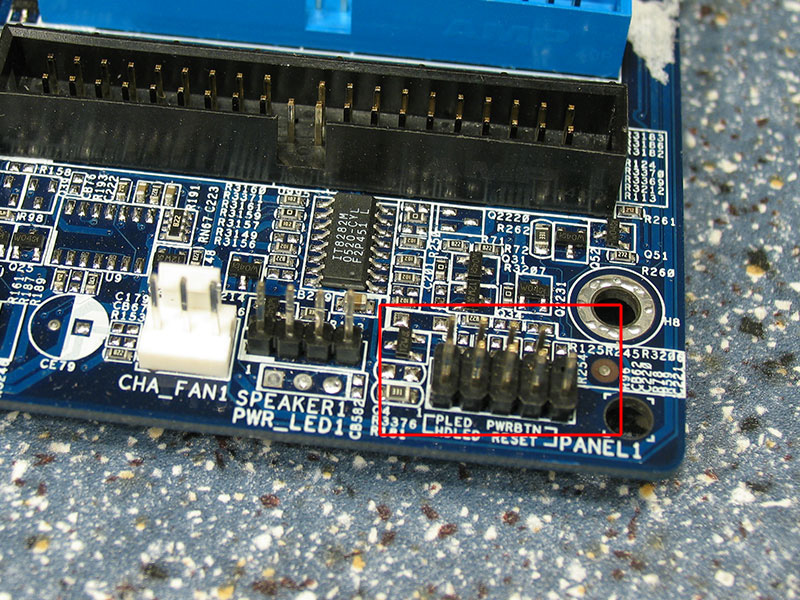
See these headers? This is what the case wires connect to. The case wires are responsible for turning your computer on and off, resetting it, and lighting front panel lights. If you put the motherboard in BEFORE connecting the headers, you will have a very hard time seeing what you are doing, and manuvering the headers will be a pain. So what you gotta do is set yourself up like this.

Connect each case wire to its respective header using your motherboard manual as reference. Remember, because the case wire connectors are very small, case makers have probably abbreviated the names of each cable. For example, PWR SW means Power Switch.
Now that that's taken care of, am I ready to put my motherboard in my case?
Yes. Put your case on its side, place the motherboard in gently, make sure to push the IO panel through the IO shield, ensure that the screwholes on the motherboard line up with the spacers, and screw in the motherboard to the spacers. It should look something like this.
It usually helps a lot with the placement of the motherboard if you lie the case down so that the motherboard can rest on the spacers and gravity won't work against you.
Powering the motherboard
Okay, good job, you've got the motherboard in. Now your rig demands power. If there is no power, then it obviously won't run. There should be no less than two power connectors- a 20 (or 24) pin main connector, and a square 4 pin connector. Plug those in, and then refer to your motherboard manual to ensure that you don't have any other power connections to plug in. Plug EVERYTHING in that the motherboard manual tells you to. The people who make your motherboard probably know alot more about your motherboard than I do.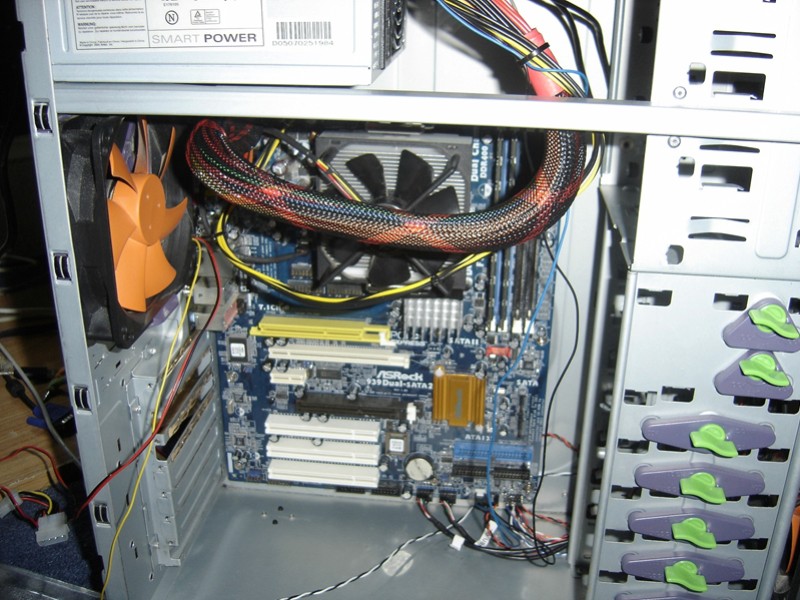
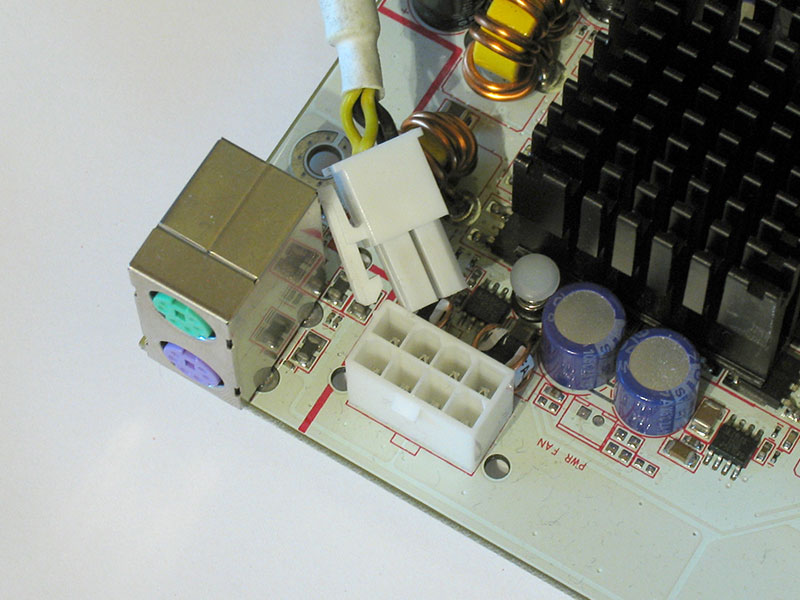
If your motherboard has a big 8 pin connector instead of the usual 4 pin connector and your PSU only has one 4 pin connector, do not worry. Just plug in the 4 pin connector where it fits there. The extra four pins are for very demanding systems to ensure stability and are usually not needed.

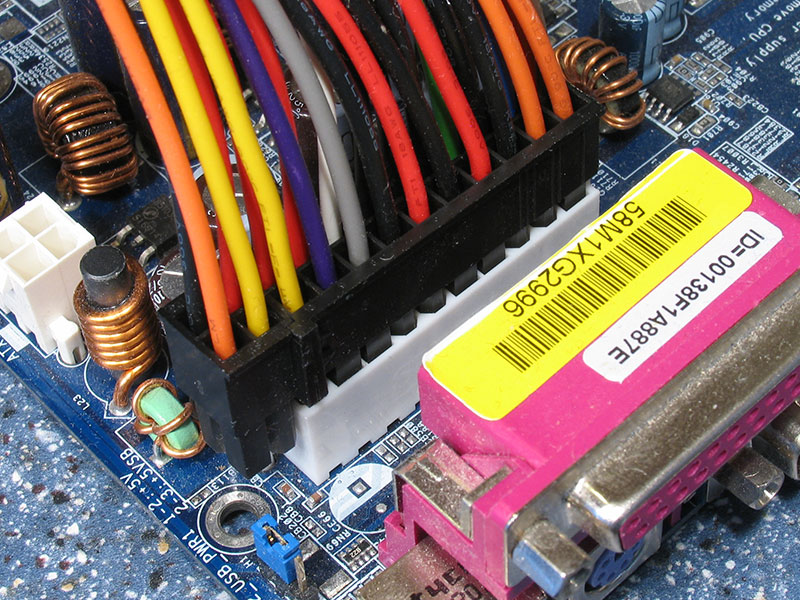
If your motherboard has a 20 pin connector and your PSU has a 24 pin connector (or vice versa). Just plug the connector in and it will work. The extra four pins are for additional power which might not be needed. Your system will still work fine.
CHECKPOINT!
So you've put in the motherboard successfully. Congratulations! Now, before we go any further, we need to make sure you didn't mess up. At this point, plug in your power supply, turn the power supply on, and press the on button. If you did everything right, the CPU fan should be spinning, and your case speaker should be giving you a long set of beeps summing up to "I have absolutely no hardware plugged into me right now". If you don't get a long set of beeps, then check the wiring of your case speaker. If you still get no beeps, I'd check your spacers, or hope that your case speaker is broken. If your CPU fan isn't spinning, turn off your system. Check all power connections, and if everything seems to be in order, I wouldn't be surprised if you received a dead motherboard or power supply. If your CPU fan was spinning and you got a long string of beeps, on to the next page!
Apr 25th, 2024 11:35 EDT
change timezone
Latest GPU Drivers
New Forum Posts
- TPU's Rosetta Milestones and Daily Pie Thread (1859)
- ThrottleStop 9.6 Voltage won't change (4)
- Folding Pie and Milestones!! (9008)
- Making Audio Enhancers Work on Windows (2649)
- Random blue screen from winload.efi error (0xc000000e) (1)
- which new soundcard or which 4.1 speakers kits ? (10)
- Alphacool CORE 1 CPU block - bulging with danger of splitting? (8)
- Free Games Thread (3767)
- Only EDP Other in Core? (0)
- RTX 4070 vs RTX 4070 Ti power scaling (7)
Popular Reviews
- Fractal Design Terra Review
- Thermalright Phantom Spirit 120 EVO Review
- Corsair 2000D Airflow Review
- Minisforum EliteMini UM780 XTX (AMD Ryzen 7 7840HS) Review
- ASUS GeForce RTX 4090 STRIX OC Review
- NVIDIA GeForce RTX 4090 Founders Edition Review - Impressive Performance
- ASUS GeForce RTX 4090 Matrix Platinum Review - The RTX 4090 Ti
- MSI GeForce RTX 4090 Suprim X Review
- MSI GeForce RTX 4090 Gaming X Trio Review
- Gigabyte GeForce RTX 4090 Gaming OC Review
Controversial News Posts
- Sony PlayStation 5 Pro Specifications Confirmed, Console Arrives Before Holidays (116)
- NVIDIA Points Intel Raptor Lake CPU Users to Get Help from Intel Amid System Instability Issues (106)
- AMD "Strix Halo" Zen 5 Mobile Processor Pictured: Chiplet-based, Uses 256-bit LPDDR5X (101)
- US Government Wants Nuclear Plants to Offload AI Data Center Expansion (98)
- Windows 11 Now Officially Adware as Microsoft Embeds Ads in the Start Menu (91)
- Developers of Outpost Infinity Siege Recommend Underclocking i9-13900K and i9-14900K for Stability on Machines with RTX 4090 (85)
- Windows 10 Security Updates to Cost $61 After 2025, $427 by 2028 (84)
- AMD's RDNA 4 GPUs Could Stick with 18 Gbps GDDR6 Memory (83)