• Welcome to TechPowerUp Forums, Guest! Please check out our forum guidelines for info related to our community.

Hatsune Miku x ASUS TUF Gaming Build

I let mine run WCG for a week, and it happily sat at 235-240w while doing 5400MHz and change..

nah. im not gonna stop until I start arcing the pads on the cpu.
 
@Solaris17 Do you have links on where I can purchase the B850 motherboard and RAM?
 
@Solaris17 Do you have links on where I can purchase the B850 motherboard and RAM?

A lot of this stuff was actually hard to find. The case didnt exist at all around the web. I reached out to an ebay seller some weeks ago and he managed to get one and incidentally so did many others several days later. A little proud of that tbh. but as it stands ebay is the easiest, simply because I can also use paypal and point it to my amex so I have that triple buyers protection know what I mean?

Here you go, I will do you one better. This is the seller specifically.


I trust anything on ebay about as far as I can throw a refrigerator, but all of it is on my kitchen table so there's that.
 
Last edited:
Yup, I knew you would probably give me an eBay link. This is not a problem. :)

Not sure if you have it set up for testing yet, but could you provide screenshots of the BIOS later? If it's like the Fubuki one, that would seal the deal in me dropping $500 for a B850 lol

This is ironic/coincidental as just yesterday our university procurement apparently has extra AM5 CPUs from a pallet they were going to return, but they are allowed to sell. I just so happened to talk with them and now I have an extra 9800X3D to mess around with and a tab with the university. :laugh:
 
but could you provide screenshots of the BIOS later? If it's like the Fubuki one, that would seal the deal in me dropping $500 for a B850 lol

I wont build it until I get the case, but you are 100% right because I already looked it up and hunted down the chinese user manual.

These are pictures from the showcase link (below)

1750283780541.png


yes it absolutely looks sick and

yes it absolutely has a language option in the bios

1750283867570.png


and yes it can be changed

1750283838167.png
 
Last edited:
I wont build it until I get the case, but you are 100% right because I already looked it up and hunted down the chinese user manual.

These are pictures from the showcase link (below)

View attachment 404282

yes it absolutely looks sick and

yes it absolutely has a language option in the bios

View attachment 404284


and yes it can be changed

View attachment 404283
God damn it man. :mad:

Should be in by June 25. :oops:
 
Should be in by June 25. :oops:

lets gooo!


Edit:

Here because were bros (and just in case)

Code:
Version 1057
Test version
15.73 MB
2025/06/05
SHA-256: 152A04DE7902159FB829E31E9A42B743DAEB71BB8677AE6463A44F04C44E6E48
"1. Updated AGESA to ComboAM5 PI 1.2.0.3d.
2. Significantly enhanced memory compatibility, with a focus on configurations utilizing all four DIMM slots.
3. Improved system stability for enhanced reliability.
Before running the USB BIOS Flashback tool, please rename the BIOS file (A5668.CAP) using BIOSRenamer."

 
Last edited:
All right! Test build time. Case made it a state away and the ETA is Friday! Should atleast have it built.

This time I decided to go with a Kryosheet and while it isnt under load the temps seem fine for now.

IMG_5362.JPG

Lets step through it.

@Cheeseball might appreciate some of this.
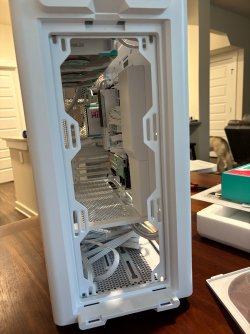
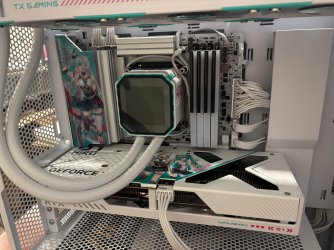
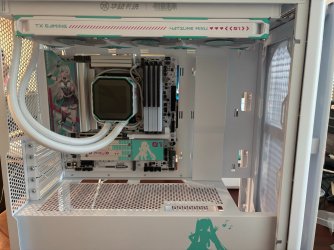
First we start assembly, all pretty boring, but here is the silver bracket going in. I also removed the stock AMD cooler bracket to make way for the radiator bracket.

IMG_5365.JPG

IMG_5366.JPG

You can certainly get a feeler gauge under the bracket, but it does get mighty close to the caps.

IMG_5367.JPG

Stock pre-applied paste actually had a great patch and it wasnt dry or hard to work with at all. I will always apply my own pastes, but if I just wanted to get this together and not care, I would have no issues using what was applied.

The cooler though is quite high in the center, but otherwise milled pretty well.

IMG_5368.JPG

Here is the Kryosheet. Its not fancy.

IMG_5369.JPG

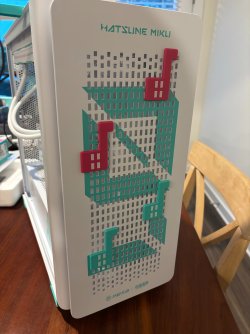
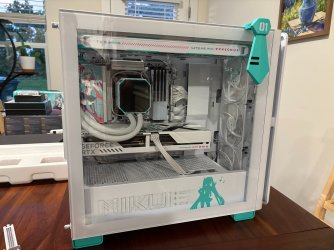
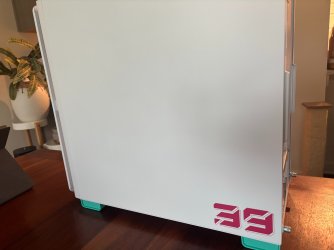
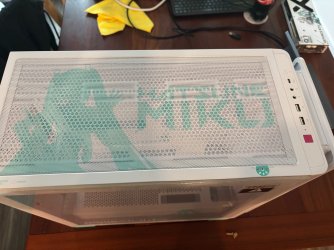
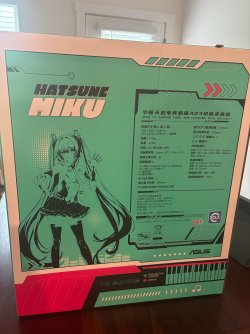
Ok lets get some glamor shots of the machine on the box. It should be noted the board only has 1 USB 2 header which the pump needs Im assuming to communicate with it. Kind of annoying, but it is a B850 so whatever.

IMG_5370.JPG

IMG_5372.JPG

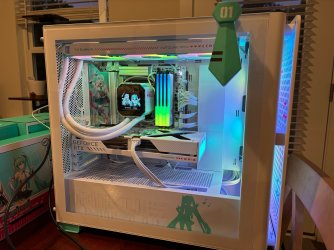
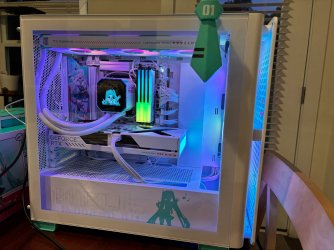
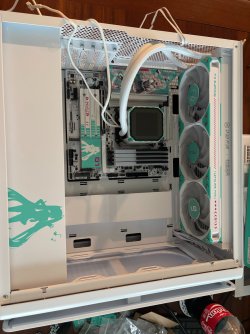
Now the pretty stuff!

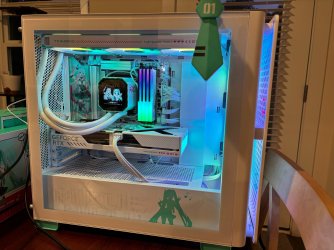
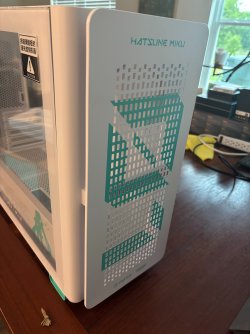
It should be noted the ARGB matches the Keyboard, RAM and cooler fans. Personal tastes or colors aside this themes purpose is to pop and wow, so well done.
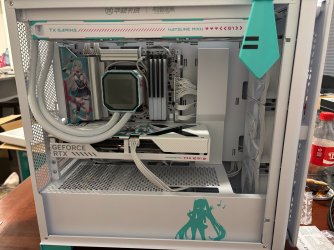
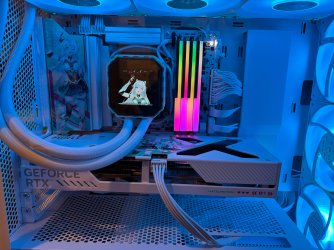
Radiator:


The pump itself is sick! Booted right up and the screen looks nice, don't let my phone fool you (and don't think your worth enough for me to get my DSLR) its crisp and very clear. It also comes pre-loaded! Given the rarity of this in the states, I won't be changing it.


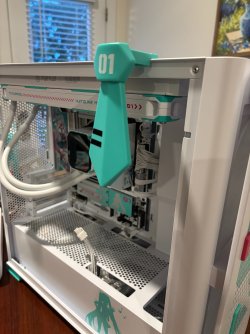
Finally, a nice touch, a quick demonstration of the PCIe release lever.


Finally we are ready to boot. The initial splash screen has all the primary keys in english and what appears to be the team up as the splash logo.

IMG_5376.JPG

Entering the BIOS the default is english, but as I found earlier like all others comes with a language selection menu. Still it saves me a step.

Moving on to the obvious, the background features Miku and Tianxuan Ji which while not a surprise does look nice. Additionally, the theme itself follows silver and the signature teal throughout.

IMG_5375.JPG

The BIOS defaults were sane and honestly I was really impressed. Generally I have to go through all of them to configure what I want. The notable exceptions were:

SRV-IO
Disable armory crate
HD Mode

You heard that right; further increase the bios image fidelity (not pictured) by enabling the HD mode. You will get a warning that you need atleast a 1080p screen or shit will get bananas but hey it does work. Mostly sharpened up the aliasing; still a nice touch.

As I said, I was mostly impressed with the default values, I work on servers a TON which arent generally super friendly, and the advanced features I want are generally disabled by default. What impressed me the most on this was:

fTPM - Enabled
Rebar - Enabled
Above 4G decoding - Enabled (stands to reason)
Virtualization - Enabled
UEFI - Enabled
CSM - Disabled

Not a big deal but just a taste, a lot was on auto and while I didnt necessarily take notes if you trust me at all this is me telling you other than the 3 personal switches I touched everything else was ready to take an OS. Super sane.

Its just a test to make sure all this boots before I start putting it in a case. So far its exactly what I wanted out of it though it is a shame no one has come here to seethe and froth at the mouth.

Id spend the money again.

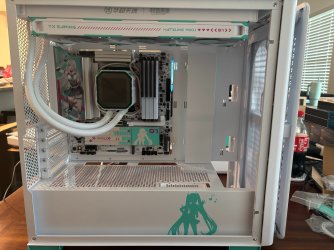
Oh and also, the grey slots are what it needs to be in to boot. 15min of my life gone waiting for ram training. Though its all my fault as the slot identifiers have a silk screen for people like me that cant read.

1750809864843.png
 
Last edited:
Here is the Kryosheet. Its not fancy.
It is fancy ^^, but not flashy :)
Oh and also, the grey slots are what it needs to be in to boot.
I was thinking why My ram where in different slots than Yours from pictures.

Ps Added to watch list :).
And will You post all of the posters, and everything that came with components on one photo ? :D (curious how much of it is there :) )
 
And will You post all of the posters, and everything that came with components on one photo ? :D (curious how much of it is there :) )

Sure I will get it all together and good news! The case is preparing for delivery with any luck I should be able to get this assembled by tonight.
 
Oh man

Phone loses its mind uploading all of these photos. Here are some you can have tonight.

IMG_5404.jpeg

IMG_5403.jpeg

IMG_5381.jpeg

IMG_5396.jpeg

IMG_5397.jpeg

IMG_5382.jpeg

IMG_5386.jpeg

IMG_5387.jpeg

IMG_5392.jpeg
 
Last edited:
I think I'm still asleep, I thought why there are red llamas on front of the case :)
 
I think I'm still asleep, I thought why there are red llamas on front of the case :)

Finding where to put them was surprisingly difficult I will get back to this later after work
 
Now I see blue llamas too. :)
 
where's the hatsune miku RAM and PSU as well as the SSD/NVME? I'd slap a Hatsune Miku pillow in there..lol
 
Thanks!

Delays happened, and the case and second kit of ram wont be coming until early next week between mon-wed. Thats unfortunate as I initially expected it by this weekend, but for 7600 miles I GUESS I can give them a pass this time.
did i miss something, or is AM5 less sensitive to using 2 (different) kits for ram (vs 4 stick kit)?
even on intel i would only mix if i know the dies are identical.
 
The Asus x miku collab unfortunately drew the line at PSUs, Storage and ram.

where's the hatsune miku RAM and PSU as well as the SSD/NVME? I'd slap a Hatsune Miku pillow in there..lol

Yeah I did mention that, shame.

did i miss something, or is AM5 less sensitive to using 2 (different) kits for ram (vs 4 stick kit)?
even on intel i would only mix if i know the dies are identical.

Must have missed something. They are 2 of the same kits.
 
Alright!

Finally had time to sit infront of my machine. Here you go! The assembly process. I am not sure what GPU will end up in it eventually, maybe my 4090 since its gathering dust on a table.

The case can handle dual 360s but it would be tight at the top. You could probably give yourself some breathing room going with slim fans and a slim rad.

The case comes with an SSD/HDD cage as well as an SSD plate. I removed the cage so I could buy some space to leave unused cables connected in the event I need them.

The bequiet fans fit just fine in the front, which as you can see, like the top and bottom contains a filter. Surprisingly the front grill shield is spaced really well and in and of itself is breathable. In short, no issues with front intake.

The mobo tray also comes with a nice vertical slit for wires with a nice bend cover. It makes it overall a little cleaner.

Speaking of cleaner, I was pleased that the piano design of this ram (even though part of a different collab) matches nicely with Miku's theme and mimics the piano keys in the BIOS.

The case also comes with some obvious flair like the clip on music notes and Mikus signature double pip tie.

Now that its assembled I will sort out the original posts with any updated pictures I have and will begin benchmarks as is.

I want to get performance metrics of the system "As it is intended" before I do a GPU swap.

If you have something you want to see in mind let me know!
 

Attachments

  • IMG_5394.JPG
    IMG_5394.JPG
    2.3 MB · Views: 24
  • IMG_5395.JPG
    IMG_5395.JPG
    2.4 MB · Views: 24
  • IMG_5396.JPG
    IMG_5396.JPG
    2.3 MB · Views: 28
  • IMG_5397.JPG
    IMG_5397.JPG
    2.1 MB · Views: 25
  • IMG_5398.JPG
    IMG_5398.JPG
    2.2 MB · Views: 26
  • IMG_5399.JPG
    IMG_5399.JPG
    3 MB · Views: 26
  • IMG_5400.JPG
    IMG_5400.JPG
    3.1 MB · Views: 34
  • IMG_5401.JPG
    IMG_5401.JPG
    2.8 MB · Views: 30
  • IMG_5402.JPG
    IMG_5402.JPG
    2.9 MB · Views: 40
  • IMG_5403.JPG
    IMG_5403.JPG
    2.9 MB · Views: 36
  • IMG_5404.JPG
    IMG_5404.JPG
    2.8 MB · Views: 34
  • IMG_5405.JPG
    IMG_5405.JPG
    2.6 MB · Views: 29
  • IMG_5393.JPG
    IMG_5393.JPG
    2.8 MB · Views: 29
  • IMG_5392.JPG
    IMG_5392.JPG
    2.8 MB · Views: 23
  • IMG_5391.JPG
    IMG_5391.JPG
    2.8 MB · Views: 20
  • IMG_5390.JPG
    IMG_5390.JPG
    3 MB · Views: 21
  • IMG_5389.JPG
    IMG_5389.JPG
    3.1 MB · Views: 21
  • IMG_5388.JPG
    IMG_5388.JPG
    2.7 MB · Views: 22
  • IMG_5387.JPG
    IMG_5387.JPG
    2.2 MB · Views: 21
  • IMG_5386.JPG
    IMG_5386.JPG
    3.8 MB · Views: 20
  • IMG_5383.JPG
    IMG_5383.JPG
    2 MB · Views: 25
  • IMG_5382.JPG
    IMG_5382.JPG
    2.6 MB · Views: 25
  • IMG_5381.JPG
    IMG_5381.JPG
    2.6 MB · Views: 26
  • IMG_5385.JPG
    IMG_5385.JPG
    2.2 MB · Views: 20
  • IMG_5384.JPG
    IMG_5384.JPG
    2.4 MB · Views: 21
That turned out super nice man, good job :)
 
I started benchmarking! Updates on page 1 in its dedicated post.
 
Man, good thing my daughter hasn't seen this thread or else!
 
Back
Top