• Welcome to TechPowerUp Forums, Guest! Please check out our forum guidelines for info related to our community.

Hello, World! :D - Robert B's PC builds - oogle away freely :) - OLD Hardware Emporium

eidairaman1

The Exiled Airman
Joined
Jul 2, 2007
Messages
40,435 (6.59/day)
Location
Republic of Texas (True Patriot)
System Name PCGOD
Processor AMD FX 8350@ 5.0GHz
Motherboard Asus TUF 990FX Sabertooth R2 2901 Bios
Cooling Scythe Ashura, 2×BitFenix 230mm Spectre Pro LED (Blue,Green), 2x BitFenix 140mm Spectre Pro LED
Memory 16 GB Gskill Ripjaws X 2133 (2400 OC, 10-10-12-20-20, 1T, 1.65V)
Video Card(s) AMD Radeon 290 Sapphire Vapor-X
Storage Samsung 840 Pro 256GB, WD Velociraptor 1TB
Display(s) NEC Multisync LCD 1700V (Display Port Adapter)
Case AeroCool Xpredator Evil Blue Edition
Audio Device(s) Creative Labs Sound Blaster ZxR
Power Supply Seasonic 1250 XM2 Series (XP3)
Mouse Roccat Kone XTD
Keyboard Roccat Ryos MK Pro
Software Windows 7 Pro 64
Havent Seen AT in a long time since Slot 1 Celerons.

I think 2 Threads might of been ok if Permission was given by mods, just way too many rigs to look through in 1 thread.
 
Joined
Jul 3, 2016
Messages
758 (0.27/day)
First I posted my stuff on TPU Nostalgic hardware thread and that got me a lot of flak :D - It was suggested by a moderator that I move here :D quality of presentation was way too much for that thread, too many files, too many posts :D

Anyway it was a good suggestion, I couldnt argue with that :) so no problems whatsoever.

TL;DR it seems it is my middle name :D - can't change that...

try the VOGONS site for a better experience :D - it's a little better on the eye :)

http://www.vogons.org/viewtopic.php?f=25&t=48835
 
Last edited:
Joined
Dec 6, 2005
Messages
10,881 (1.62/day)
Location
Manchester, NH
System Name Senile
Processor I7-4790K@4.8 GHz 24/7
Motherboard MSI Z97-G45 Gaming
Cooling Be Quiet Pure Rock Air
Memory 16GB 4x4 G.Skill CAS9 2133 Sniper
Video Card(s) GIGABYTE Vega 64
Storage Samsung EVO 500GB / 8 Different WDs / QNAP TS-253 8GB NAS with 2x10Tb WD Blue
Display(s) 34" LG 34CB88-P 21:9 Curved UltraWide QHD (3440*1440) *FREE_SYNC*
Case Rosewill
Audio Device(s) Onboard + HD HDMI
Power Supply Corsair HX750
Mouse Logitech G5
Keyboard Corsair Strafe RGB & G610 Orion Red
Software Win 10
just way too many rigs to look through in 1 thread.

A shit ton of work compiling those logs for sure. Looking at a lot of that has me all nostalgic and shit. Particularly seeing a screenshot of Descent, so much work time used up playing amongst co-workers back in the mid 1990's :p
 
Joined
Jan 5, 2006
Messages
17,780 (2.66/day)
System Name AlderLake / Laptop
Processor Intel i7 12700K P-Cores @ 5Ghz / Intel i3 7100U
Motherboard Gigabyte Z690 Aorus Master / HP 83A3 (U3E1)
Cooling Noctua NH-U12A 2 fans + Thermal Grizzly Kryonaut Extreme + 5 case fans / Fan
Memory 32GB DDR5 Corsair Dominator Platinum RGB 6000MHz CL36 / 8GB DDR4 HyperX CL13
Video Card(s) MSI RTX 2070 Super Gaming X Trio / Intel HD620
Storage Samsung 980 Pro 1TB + 970 Evo 500GB + 850 Pro 512GB + 860 Evo 1TB x2 / Samsung 256GB M.2 SSD
Display(s) 23.8" Dell S2417DG 165Hz G-Sync 1440p / 14" 1080p IPS Glossy
Case Be quiet! Silent Base 600 - Window / HP Pavilion
Audio Device(s) Panasonic SA-PMX94 / Realtek onboard + B&O speaker system / Harman Kardon Go + Play / Logitech G533
Power Supply Seasonic Focus Plus Gold 750W / Powerbrick
Mouse Logitech MX Anywhere 2 Laser wireless / Logitech M330 wireless
Keyboard RAPOO E9270P Black 5GHz wireless / HP backlit
Software Windows 11 / Windows 10
Benchmark Scores Cinebench R23 (Single Core) 1936 @ stock Cinebench R23 (Multi Core) 23006 @ stock
Joined
Jul 3, 2016
Messages
758 (0.27/day)
@Sasqui - it required some work, but for me it comes naturaly so I reached a point where I can cleanup, test, put together any old piece o f hardware very fast. I'm not trying to boast here. Usually I take more time for fine details that maybe only I see. All my logs are written in two languges my native one and in english. I write them right after I finish something so that the information is fresh. I dont write something in advance and then add stuff. Each piece of information is as it happened. For a log it takes me anywhere between 2 hours up until 5. I write in one go with no stops. More time is taken by pictures. I only make them in natural light with a Samsung Galaxy S4 GT-I9505 - nothing fancy. If my eye likes what I capture then it is good to go! :D

@P4-630 - some of my work might get lost in that thread, a moderator said that I should start a thread here for better visibility. I posted there the first part of this thread then I moved to vogons and then months later I decided to add the rest of my stuff here too. Few people there take their time to really clean and restore their pieces. (this is just a remark I dont try to be rude - each to his own ways :) )

Anyway I dont make this only for me (even if for me it is a need like breathing air), I do it for other people to enjoy too. Somebody might find this information useful. I still enjoy some sites from the nineties or the early 2000 with older stuff just to keep the memory going. Stuff that I didnt read back then.

As I said earlier in some of my post these pieces were collected starting 2015 after many years in which I just planned this stuff in my head. Some was bought from other people some found at the local flea market, some was received as a gift. I really try not to hoard stuff, it is bad for health and wallet.

I might put some systems in a contemporary case and mod it for this, but for now it's just a plan.

I'll have to test some of the systems to get a glimpse of their evolution over time. This is another project that I'm starting to draw.

If TPU will be alive I'll update this thread even it will be 10 years later.

I'm a very organized guy and I keep track of what I do :D
 
Last edited:
Joined
Jul 3, 2016
Messages
758 (0.27/day)
The three completed builds(look at the first two pages) have received much needed attention. All of them were working nicely but werent really free of some quirks.

1. The 5x86 build

This build was suffering from a weird resources conflict regarding the sound card ESS 1868F ISA. I tried numerous settings in BIOS and Windows but to no avail. In the end the solution was to install Windows 95 OSR2 and after I installed all the drivers and I received the conflict exclamation mark in Device Manager I just reinstalled Windows 95 OSR2 on top of the original installation and this worked nicely. No more conflicts. Each fresh clean install would otherwise end up with a resource conflict notification and the sound card wouldnt work.

The FDD was reading some disks and some would made me receive the "disk is not formatted" message. In the end the FDD was just past its best. After I changed the FDD with another unit, the same unreadable disks were in perfect condition.

2.The PIII build

I installed Windows 98 SE and my gut feeling was right. The GF 2 Ti and the Diamond Aureal Vortex 2 Monster Sound MX300 - PCI were working flawlessly. Even if the soundcard was looking beat up and some connectors were cracked, and some solid capacitor were scratched, it is working like the day it rolled of the assembly line.

1600x1200 on the HP LP 2065 is looking crispy on the GF2 card.

Partition Magic 8.0 still works nicely :)

3.The K6-2 build

This build suffered from some weird lockups from time to time. The memory test were passed flawlessly. The system would run games but it would sometime just freeze. The problem was traced down to a bent pin at the HDD connector and at least one bulging capacitor. I guess the ACorp 5ALi61 REV. D it's past its prime and is in need of a recap. One capacitor just bulged a little after beeing used for around 8-10 hours. If I would've seen this I wouldnt use it for a build.

So the ACorp 5ALi61 REV. D went out and I tested for the first time the Epox EP58 MVP3C-M 100MHz Rev. 0.8 motherboard fully loaded. It worked flawlessly. It even had recognized 512 MB SDRAM when the Acorp would struggle with 256 MB.512MB=1x128 DS+1x128 DS+1x256 DS. I will have to play with it more to see if it can use all the 512 MB. On startup it says 128 MB cacheable....I'll update this later.

I tried the 400MHz K6-2 CPU that had a ton a bent pins and this puppy worked flawlessly. I "repaired" this CPU and it was presented in the "little bent pin" guide.

I also tried a K6-2 450 MHz CPU but the revision 0.8 of the Epox motherboard would just take a maximum 400MHz CPU even if it has jumpers/settings for up to a 500 MHz CPU.So the 450 was detected as a 400 regardless of ratio settings. Later revisions can run more powerfull K6-2 CPU's. First I just installed a CPU and used a Socket 462 Titan CU5TB cooler unclamped just resting on the CPU with some thermal paste. The final setup received a socket 7 cooler with a Scythe fan.

I had to shave the retaining metal clamp of the heatsink because it would damage the transistor I changed (see the pages before). I guess the last owner was careless and ripped off the original transistor.

WEIRD DESIGN CHOICES EPOX!!! RIP

This early revision of the Epox MVP3 mother board suffers from other quirks too. Installing some expansion cards in the last two PCI slots makes the cards unable to seat fully in the slots because in one they rest onto a socketed component and in another they cover the USB motherboard connector.

The mouse would not work at all on the Epox motherboard. I tried the PS/2 connector and the serial connectors. Later the problem was traced to damaged serial cables. Now the mouse works brilliant.

I installed Win Me on the K6-2 machine. I kept the V3 3000 card but changed the sound card from the Creative AWE 64 Gold ISA to a more appropriate Yamaha YMF-724 PCI. I keep the AWE 64 in reserve for another build.

The EPOX motherboard is more suited for K6-2 CPUs because in my opinion the true K6-2 SS7 setup should have a MVP3 motherboard. Its just the way I remember them :D

This is it for now.


More later.

P.S. Taking pictures indoors in the winter time isnt so great as taking them outside in natural light.

 
Last edited:
Joined
Jan 29, 2012
Messages
6,431 (1.44/day)
Location
Florida
System Name natr0n-PC
Processor Ryzen 5950x/5600x
Motherboard B450 AORUS M
Cooling EK AIO 360 - 6 fan action
Memory Patriot - Viper Steel DDR4 (B-Die)(4x8GB)
Video Card(s) EVGA 3070ti FTW
Storage Various
Display(s) PIXIO IPS 240Hz 1080P
Case Thermaltake Level 20 VT
Audio Device(s) LOXJIE D10 + Kinter Amp + 6 Bookshelf Speakers Sony+JVC+Sony
Power Supply Super Flower Leadex III ARGB 80+ Gold 650W
Software XP/7/8.1/10
Benchmark Scores http://valid.x86.fr/79kuh6
Awesome thread. That noctua fan on the old board made me smile.
 
Joined
Jul 3, 2016
Messages
758 (0.27/day)
Glad you like it. This is the reason I post this stuff here. No to mention my GREAT PERSONAL SATISFACTION :D when I can see, feel and use these dinosaurs :)

That Noctua FAN costed as much as the whole system if I could find a working 5x86 PC at the flea market (this isnt happening now, they are pretty scarce). When bought in pieces these old PC's require a larger amount of money, but nothing too scary :D I guess in some years they will dry up.

That 5x86 recreation of my first PC is my pride and joy. Noctua was used as a revenge against the original crappy fan my PC had.
 
Last edited:
Joined
Jul 3, 2016
Messages
758 (0.27/day)
The testing of the Acorp 5VX32 Rev. 1.1 motherboard was a complete success :) The S3 Virge is in great condition too.

As expected the CMOS Odin Battery went the way of the DODO bird.

For this "problem" I have three potential sollutions:

a) Tear the case of the Odin CMOS battery and attach a regular button cell socket
b) Solder a socket for a regular button cell battery, because there is a place already on the motherboard
c) Find a new Odin Cmos battery.

I prefer the b) variant for commodity.

Because I had a PC Speaker shortage I bought four little speakers plus a BIG one and I made my won. I also bought three from a local computer repair shop.

I needed them to see if the Acorp 5VX32 did all the right noises :) beep beep :D. Even with a PC Speaker the Acorp wouldnt make any noise or boot. The problem was traced to a couple of jumpers which needed to be set correctly. I dont have a manual for this motherboard.


gallery: https://postimg.org/gallery/12bmckye6/
 
Last edited:
Joined
Jul 3, 2016
Messages
758 (0.27/day)
THE OPTICAL / MAGNETIC CHALLENGE

This endeavour has span across nine days, of which few time was spent on work done to restore these pieces. All in all it took me around 24 hours put together. More time was spent waiting for painted pieces to dry.

ENJOY!


***** STAGE 1 *****


Around nine days ago my gut feeling was saying GO TO THE FLEA MARKET. The weather is sunny!

I wanted to find a Creative CD-ROM unit for some time but I had no luck, until now :D

As my CD-ROM units were getting scarce I wanted to try and see if I can rescue some from the dumpster.

The Goldstar CRD-8240B (CP1) - CD-ROM from the posts above is not working properly - the door opens, the unit is detected by the PC, the led lights up on power up but the unit is not reading CD-ROMS. You load a CD, the leds lights up and then nothing happens. You can hear the motor working.

I also bought a Seagate HDD - 40GB which has a protective rubber sleeve. The chances are that it is ok.

FDD - Panasonic JU-256A428PC
FDD - Samsung SFD-321B
CD-ROM - LG CRD-8240B
CD-ROM - GOLDSTAR CRD-8160B - THE EXACT MODEL I HAD with my first PC - The door looks different but the model is the same :D
CD-ROM -
CREATIVE CD4834E
CD-RW - CREATIVE RW8435E
DVD-ROM - Pioneer DVD-120S - I bought this unit because it has a slot loader mechanism
HDD - Seagate ST340810A - 40GB - Certified Repaired HDD

I bought some surgeons gloves because these pieces look rather nasty. Especially the Creative 48X which is also rusty. If it didnt have the Creative name I wouldnt've even bothered...


gallery: https://postimg.org/gallery/juqsak2c/

***** STAGE 2 *****

Against my better judgment I decided to first clean the optical units and then test them :D I know I know it's not good I did this, but man they were nasty as hell and I just couldn't connect them to a nice clean working PC :D

Deep down inside I hope that al the units will work.....

Most important, is that I do the cleaning in a storage space at my workplace, otherwise at home it would be a nightmare :D

First I dismatled all the pieces and washed all the metal and plastic parts with hot water and detergent. I also used surgeon gloves for protection :D Better safe than sorry!

Next will be some CIF cream scrub of the plastics. I wont use this abrasive paste on screen printing as it will take it of!

The worst unit was the CREATIVE CD4834E - 48x it was rusty and crusty. So first I buffed the metal casing. Then I wet sanded with fine grit sandpaper the metal surface. Then I used an auto rust remover which also stripped the paint :D YAY!!!

Then two coats of PRIMER.

Next I'll put two coats of gray paint that its used for painting car exhausts (it can sustain up to 800 degrees C :D) so that I wont need clear coat for the paint. I'm still not sure if I will use clear coat as the unit will inevitably be scratched when I'll put it into a case.

The CREATIVE units have a nice mechanism and the door opened so smoothly it was unbelievable. I just used a long needle and they opened on the first try. Some goriila tried to open the door with a screwdriver and scratched the door of the Creative CD-RW.

The Goldstar and LG units are kind of generic.

The Pioneer DVD-ROM has an awesome mechanism.

I will have to wash the motherboards and clean the mechanisms with fine brushes and with great attention as I dont want problems :D I wont be able to make them mint but I'll be close to that :D

Observe the huge metal CD retention / centering plate on the Creative units. One of them has two plastic prongs broken I'll have to improvise a retention hook for one part.

This will be time consuming but I LIKE IT!!!

I still dont know which works :D and to be honest I dont care right now :D

gallery: https://postimg.org/gallery/kmpetbhe/


***** STAGE 3 *****

CREATIVE CD4834E

This unit received a lot of work to give it its former glory. After coats of primer, paint and clear coat it looks pretty well despite its age. I still have to give it one more coat of clear coat and then it will have to dry a few days.

I didnt want to use clear coat but it is essential for the durability of the paint. I really didnt want to see it peel off.

By mistake I didnt repair some bumps in the metal casing but it's no biggie I like it even more with its face full of battle scars and all...

The internal mechanism is something else. I like it a lot. It is different than what I have seen until now. One BIG PLUS is the absence of the rubber belt for the closing / opening of the tray. Everything is on SPROCKETS (no, this is not a Jetsons show :D) NOW THAT IS WHAT I CALL ENGINEERING!!!

gallery: https://postimg.org/gallery/oito859a/


CREATIVE RW8435E resembles the Creative unit from above but in this instance we are doing with a CD-RW unit.

gallery:https://postimg.org/gallery/1vmubvd4o/


The CREATIVE units will not be dismantled to nuts and bolts. For me it's childs play disassmeble them for better cleaning but their construction is a little more complicated and I'm worried about the ribbon cables which may be brittle after all these years.
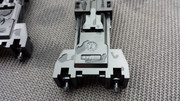
GOLDSTAR CRD-8160B- nothing spectacular, ancient rubber belt technology. MY FIRST CD-ROM model....WOW 19 years have passed....damn....

The PCB-ul needed washing with 99% izopropyl alcohol.

gallery: https://postimg.org/gallery/q83neh5g/


LG CRD-8240B

Standard optical drive...again nothing spectacular.

The PCB-ul also needed cleaning...

gallery: https://postimg.org/gallery/1vcoiukpg/


Pioneer DVD-120S

I played a little with the loading mechanism. Pretty CLEVER STUFF!!! :D

When I moved by hand the ejecting mechanism the CD was sent out without problems. When I'll make a live test, I hope I wont see a CD flying out from this unit cutting all the hanged meat in the slaughter house, like in the PREDATOR 2 movie scene :D.

gallery: https://postimg.org/gallery/2sadjlydw/


FDD - Panasonic JU-256A428PC & FDD - Samsung SFD-321B - nothing fancy. OLD and floppy :D i hope they work

The door of the PANASONIC unit had a torn plastic bit. I quickly improvised a solution with a needle, a lighter and some patience :D

gallery:https://postimg.org/gallery/2ncn8lb20/


Seagate ST340810A HDD

This HDD received a good cleaning. The rubber sleeve saved it from destruction. The IDE socket received some damage and some pins were bent. I straightened them up quickly with a fine pliers.

I washed the PCB with 99% izopropyl alcohol.

I really like the mirror finish of the HDD top cover. IT IS AWESOME!!!

When I move the HDD gently by hand, I can hear the sound of the motor. It sounds healthy :)

gallery:https://postimg.org/gallery/1kz28rna6/


More to come: cleaning of the internal components of the optical drives and FDDs.

***** STAGE 4 *****

Scratch scratch scratch :D

Because the sticker was old and damaged I had to clean it as good as I could. I used cotton swabs and some 99% isopropyl alcohol.

I also encountered some overspray which needed cleaning. Because the adhesive on the corners was weak I also encountered some underspray. But nothing too excessive.

The use of surgeon gloves ensured a smooth glide over the painted surface and I also didnt contaminate the surface.

After this, I put a last layer of clear coat which sealed the edges of the sticker. I didnt want to clear coat the entire sticker for fear that it will wrinkle. But I think it would've worked. Maybe next time.

All in all it came out pretty decent :D

I wanted to test at least this unit but it still requires some work :D If 2 units out of 5 will work it will be ok.

I briefly tested the HDD and the results are kind of meh.....it works but....more later :D


***** STAGE 5 *****

Last saturday I had 5 hours of free time and I put them to good use :D :

1. I cleaned with CIF cream all the plastic bits of the ODD's and FDD's
2. I assembled and tested the following units:

CD-ROM - LG CRD-8160B
CD-ROM - LG CRD-8240B
DVD-ROM - Pioneer DVD-120S

I had to use silicone grease on the rails and guides of the ODD's plastic trays so that they glide smoothly.

I also used a small quantity of silicone grease on the metal rails on which the read head glides.

The lenses were cleaned GENTLY with 99% isopropyl alcohol and a cotton stick, then wiped SOFTLY with a microfiber cloth.

The DVD-ROM Pioneer DVD-120S unit was harder to clean but with PATIENCE, with a soft long haired brush, with cotton sticks dipped in 99% isopropyl alcohol and with a soft rag, I managed to clean it up nicely. Not as I would've liked but it's better than nothing. The lens was harder to clean but I in the end I did it :D.

All these three units have problems with the rubber belt. I washed the belts with hot water and soap followed by a wipe with 99% isopropyl alcohol and a rag. Out of three tries the doors open twice. I will replace the belts FOR SURE. This was to be expected.

Next will be a full test in a working system. It is good news that at least they work. I'll see if they read optical disc as they need to :D

gallery: https://postimg.org/gallery/jz62cb84/


Seagate ST340810A - 40GB it's kind of MEH...

On startup I thought it is in good shape but upon a closer investigation the truth was revealed: 45 reallocated sectors....

After an 8 hour HDD Regenerator process followed by three passes of ERASE in HD Tune Pro, the READ / WRITE diagram came out pretty good.

New bads havent appeared but the entire magnetic surface registers delays in HDD Regenerator. I dont know if this is caused by the IDE-SATA adapter I used but I'll update the status when I'll test it a real system

As a plus it is very silent. I could short stroke it and use in a 486 system.

For this HDD his better days are far behind...

gallery: https://postimg.org/gallery/2is4jcele/


The CREATIVE units require more work but I already see the changes :D

***** STAGE 6 *****

The road to SUCCESS?
- I still have to wait until I can call this endeavour a true SUCCESS.

I wanted to save some anicent electronic "artifacts" of a bygone era and for the time beeing, I'm on the right track. Some pieces still need testing but for now they are in working mechanical / electric condition. I still have to fully test their read / write capabilities in a working system. At least they are alive and kicking :D

With what shall I begin?

AaaaaaAAA! YES! With a FDD unit which despite beeing clean as a whistle refused to work as it should:

Sony MP-F17W-59D - FDD - This unit had a problem with the movement of the read /write heads. The metal wire which was supposed to track the screw axle just jumped over the indentations. At first I thought that the problem was due to damage done to a plastic part but to my amazement the screw which tightens a metal plate which in turn keeps the metal wire on track over the indentation of the axle, WAS LOOSE. EASY FIX! Now I can't move the heads by hand sign that the unit might work. Before this fix the PC would report: Floppy Disk(s) Fail (40). I'll test the unit later. After this I can safely say I can dismantle a FDD unit in complete confidence.

gallery: https://postimg.org/gallery/1b8ncgjbg/


GOLDSTAR CRD-8160B

Smooth sailing.

gallery: https://postimg.org/gallery/n4dur690/


LG CRD-8240B

Smooth sailing. Again

gallery: https://postimg.org/gallery/l6onzdm8/


CREATIVE RW8435E

Smoo......SMOOTH SAILING my arse :D more like: *(#!()#*!)~~)~)~~~!@*@!#&!*()#~~~~~!!!

This unit didnt want to be saved.

Problems:

1. On one side the plastic hooks for the support / centering of the CD were torn off.
2. Sign of tampering - two screws of the metal cover were not completely tightened and the VOID stickers were damaged.
3. The metal / plastic guide for the read / write head was in bad shape with lots of cracks.

Solutions:

1. THE HUMBLE SCREW!
2. Nothing to report all screws ARE REPORTING.
3. Here I wanted to preserve the orginal part. I could have improvised a more sturdy part but for the sake of originality I decided to find a solution. I wanted to use and adhesive and I thought about POXIPOL but it was to thick and it would require sanding and could cause fittment issues. So I used SUPERGLUE. This stuff entered every nook and cranny. I used gravity and a cotton stick to distribute the liquid. Usually I dont use superglue but in this case it was the right "tool" for the job. Even without superglue the cracked pieces werent moving so this was like an inssurance. Before applying superglue I filed and sanded gently the entire part on wich the read / write head would glide.

I straightened some pins and a metal prong from the metal case. I used silicone grease where it was needed.

I tested the unit. The door opens, the led lights up and the motor spins the CD :)

Some signs of damage from attempts to forcefully open the door still remain.

gallery:


Pioneer DVD-120S

Smooth sailing. I changed the rubber belt with a slighlty thicker one from my BOX O' PARTS and the unit purrs :D

Man I LIKE THIS UNIT!

gallery: https://postimg.org/gallery/jegkaom2/


CREATIVE CD4834E

This unit was MY LITTLE PROJECT.

It was in bad shape, rusty, dirty, scratched in a word: UNDESIRABLE! but if I wouldn't've bought it I would still be thinking of her :D

It was cleaned and painted and now it stands in front of you in all its glory.

I had to clean the metal cover of the EJECT-CLOSE / PLAY switches with liquid auto rust remover as they were a little rusty.

Silicone grease was used where it was needed.

I should've removed the dents in the metal cover but I was in such a hurry to restore this unit that I missed it. Anyway I dont know if I could've make like it was new.

The biggest problems were caused by the fact that the temperature at which I painted the metal cover was very low. Also I couldnt paint in a clean closed space.

The next problem was caused by the fact that I didnt wait as much as I should have for the paint to dry. Even if the instructions were saying 30 min until applying the next coat because the temperature was low the paint wouldn't dry fast. It was dry to the touch but very soft.

After I waited a whole day before using clear coat I still had to put the finished metal case parts on supports over the radiator for 4 hours. After this the painted surfaces were good for assembly. The finished unit will stay for a few more days until I'll put it in a box.

I present you the finished results! Not to shabby!

gallery: https://postimg.org/gallery/2ds1hg0d2/


***** THE TOWER! *****

'NUFF SAID!

gallery: https://postimg.org/gallery/dxuqddze/


Next I have to:

1. finish cleaning the Samsung si Panasonic FDD's
2. test the three FDD's Sony, Samsung and Panasonic
3. test the read / write capabilities of the ODD's

This is a 5/5 in regard to the fact that the ODD's arent dead and they show signs of life. Now they are up to my standards required for testing and can be connected to a working system :D

More later.
 
Last edited:
Joined
Jul 3, 2016
Messages
758 (0.27/day)
A resounding SUCCESS!!!

Yesterday I was telling you that I was on the road to success.Well I've been there and even went to the next level :D

What would you say if I were to tell you that I had a success rate of 120% aka 6 out of 5?

Weird dont you think?

I took out of storage the Pentium III build and tested all the six ODD''s I had. GOOD NEWS, ALL ARE IN WORKING CONDITION!

The sixth unit is the COMPAQ-LG CRD-8420B(CP1) which I told you earlier that it doesnt work. Well it doesnt work in the 5x86 build but in the PIII it works as new!

Pentium III - Slot 1 Build

Vital statistics:

1. CPU: Intel Pentium III 550MHz - SL3FJ - Costa Rica 512KB cache / 100MHz bus / 2.0V
2. Motherboard: LuckyStar 6VABX2 VER. 2.0 - Slot 1 - Chipset - VIA VT82C693 & VT82C596A / 1xAGP 2x / 5 PCI (4 bus master 1 slave) / 2 ISA / ATA 33
3. RAM: 384 MB - PC133 @ PC100 speed : 2X128MB PQI / 1x128MB IBM
4. VGA: Inno3D Geforce 2 Ti - 64MB - VGA/TV out
5. AUDIO: Diamond Aureal Vortex 2 Monster Sound MX300 - PCI
6. HDD: QUANTUM FIREBALL PLUS AS40-40GB - 7200RPM
7. FDD: NEC
8. CD-ROM: ASUS QuieTrack 52X CD-S520/A
9. LAN: generic 10/100 Mbps
10. Mobile HDD rack 3.5/5.25
11. PSU: generic JNC Computer Corp. 235W
12. Cooling: Intel stock slot 1 cooler / Inno3D - DeepCool v50 / Enermax T.B Silence 80 mm
13. CASE: Generic ATX Case branded COMRACE ~ 1999


For testing I used the Good Ol' CD SPEED 99 program.
http://users.telenet.be/erik.deppe/cdspeed99.htm

Single pass test.The best result wasnt on my list of high priorities.

I used a Windows XP Home Edition silver setup CD. It wasnt in mint condition but all the units had the same chances to prove themselves.


As a note: I prefer low speed units because they are more silent and the chances of an optical disc break are lower. Only once, one of my ODD's, an ASUS CD-S520/A 52x unit, shattered a CD and it wasnt pretty.

Lets see the results.

GOLDSTAR CRD-8160B


LG CRD-8240B


Goldstar CRD-8240B (CP1) COMPAQ

On startup and when the unit stops, the sound of the loose ball bearings is unnerving :D You think the unit slices and dices your CD. Otherwise the unit is silent and well behaved.


CREATIVE RW8435E

The unit is silent and makes all the right noises :)

gallery: https://postimg.org/gallery/2fphji614/


CREATIVE CD4834E

This unit has loose ball bearings like the COMPAQ - Goldstar - CRD-8240B (CP1) unit, but in this case they are placed in a space above the motor spindle and not in the top centering mechanism. This is a faster unit and man I was nervous. The CD reading procedure goes like this: you load the CD, loose ball bearings noise, the motor builds up the rpms, more loose ball bearing, low to medium rattling, more speed, hissing noises and when you think that your CD will be minced meat, all the noises disappear and the motor has a balanced sound and the unit starts to read. It's witchcraft I TELL YOU! :D


Pioneer DVD-120S


So this was the story of the 6 out of 5.

BONUS: the results of the ASUS QuieTrack 52X CD-S520/A as it was already in the system.


The FDD's arent on my list of high priorities and will be tested when I decide to do so.

Next episode? I dont know what I'll think up next!
 
Last edited:
Joined
Jul 3, 2016
Messages
758 (0.27/day)
FDD Challenge

Now it is the turn for the FDD units to show their stuff.

WARNING: You should not dismantle the read / write heads of the FDD units. Doing so will mess up the calibration and getting it back is quite a challenge.Sometimes it is impossible without specialized hardware and skills. I did so and by chance I recovered the Panasonic unit. It wasnt pretty :D Sometimes you can make the unit work but it might read and write only disks made on it.

Sony MP-F17W-59D - Here I managed to make the motor move the read /write heads by tightening a loose screw but the calibration went bye bye. I tried to use the wear marks made by the upper head on the metal, as a guide, but as the head only had one plastic bit and not two as other units, which made the wear marks, it is impossible to calibrate this unit by hand. I consider this unit bye bye as it was from the beginning. Looking back I shouldn't've bothered.


Panasonic JU-256A428PC - I think the unit was ok but I didnt test before I cleaned it. I also removed the read / write heads and I was pissed that I did it. I had a clean BUT NOT WORKING UNIT. What to do?

Solution:

1. I used two floppy disks that I knew were good. One factory made with LG CD-ROM drivers and one I made on a good unit
2. I used the wear marks made by the upper read / write head onto the metal on which it rests when the unit is not in operation. I also checked the alignment with the marks when the unit had a floppy disk in it.
3. I made read tests with the disks from point 1. Those floppy disks worked on this unit, the samsung one from bellow and another good one I had.


gallery: https://postimg.org/gallery/25dfcea4c/


Samsung SFD-321B - works very well.


I tried to recover another Sony FDD unit that was on the 5x86 but with no luck. This unit was bad from the start so I couldnt use the wear marks as a guide. When I used it on the 5x86 I was confronted with Format Disk messages, it read disks when it felt like and it even didnt read disks made with it. The signal that it was bad came when I tested an important driver disk on another unit and it worked after I thought it was bad because this unit didnt read it.

USB floppy disk units are also prone to this kind of problems....so it's better to get a new unit or one in better shape. Dont despair when one unit doesnt read floppy disks, try another unit.

CONCLUSION:
when it breaks REPLACE IT. It's easier :)

So this was it! I need a BREAK :DAll the parts are resting and so will I :D
 
Last edited:
Joined
Jul 3, 2016
Messages
758 (0.27/day)
PIONEER DVD-120S - REPAIR / MAINTENANCE / DISASSEMBLY


During more testing the DVD-ROM Pioneer DVD-120s unit still didnt work as it should. Sometimes it would not take disks and once it scratched one.

I replaced the original belt with a thicker one but after several load /unload cycles it wouldnt load disks at all.

The original belt has a square profile and 1.0 mm thick. The belt I used is also square but 1.2 mm thick.

Eventually I reused the original belt because the place where it is located doesnt allow the use of thicker belt. If the belt is thicker it can interfere with the closing of the metal latch from the front after you insert a disk.

For sure, the scratching of the CD was caused by the slipping of the rubber belt onto the pulleys. The dirt from the gears and the old dusty grease were other factors that contributed to this problem.

You know what came NEXT? :D

FULL DISASSEMBLY! FTW!!!!!

a) I removed the rubber belt.
b) I removed 5 springs and a few metal components. I took great care to keep track of the location and orientation of the pieces I removed. I took notes and made pictures.
c) I pushed several plastic safety clips and removed the top disk load / unload mechanism. EASY AS PIE!
c) I removed, cleaned and greased with silicone grease almost all the gears. Two I didnt remove (but I greased them), as it was too risky. I would've had to remove the whole laser head assembly.
d) I greased with silicone grease the sliding grooves of the top load / unload mechanism. I lighlty greased the metal rails on which the laser head moves.
e) General cleanup
f) Greasing of other contact surfaces using common sense :D
g) Tests with and without CD's

DON'T USE TOO MUCH SILICONE GREASE AS IT CAN RUN AND DAMAGE THE RUBBER BELT OR OTHER COMPONET(s).

Works like a dream! :D

I made a tutorial in pictures because it's easier this way :D

Almost 6kg of optical units are resting ready to be put to work.

gallery:
https://postimg.org/gallery/38jk960g6/

 
Last edited:
Joined
Jul 3, 2016
Messages
758 (0.27/day)
Another PIONEER optical unit: PIONEER DVD-105SZ, MAN, I really like these Pioneer units!

Last sunday I went to the flea market, without a real goal, just to browse the merchandise :D. It wasnt a sunny day and it was kind of cold, so there werent near as many sellers as usual. I took a few steps inside the market and I immediately saw a slot load DVD-ROM unit. The model was Pioneer DVD-105SZ. Ever since I found the Pioneer DVD-120S I wanted to find another slot load Pioneer unit to have as a backup. I also wanted a unit with some decals on the front bezel. My wishes were heard by someone above and so I found this little gem :D

I haggled a little and paid just 2.2 EUR for it. NO BRAINER!

The unit was complete,
with some wear marks and a little dirty. It was missing the four screws that hold the metal cover. My gut feeling was saying that it is in good working condition so I didnt mind these "little" details. As usual the seller told me that it is working and if I have problems I can come the following week for a refund. Yeah right.....

I tested the unit home and it was working like it was new. The load / unload cycle was flawless and it read the CD's quickly.

This was my only purchase that day, as all the other old hardware available was in a condition which can be included in the following interval: ['DA F..K is DIS - Yep it MIGHT be still kicking]. :D

gallery: https://postimg.org/gallery/ncu8m76e/


Teardown wasnt very complicated

What a barn find..... :D dust devils inside :D.....

I washed the metal casing and the front bezel until they were squeaky clean.

The load / unload mechanism of the Pioneer DVD-105SZ is more streamlined than the one of the Pioneer DVD-120S:

1. no rubber belt - a screw and sprocket setup - very GOOD!!!!
2. simplified load / unload mecanism
3. micro switches for load / unload - it operates faster and easier
4. no complex metal or plastic parts.
5. fewer springs

I like more this type of construction. I think when Pioneer manufactured this unit, it employed some of its know how from car stereos industry.

More later.

gallery: https://postimg.org/gallery/3aebph250/


Next step was the cleaning of the inside of the unit.

The cleaning was straight forward and because the unit was in good working condition, I didnt want to damage something, so I didnt disassemble the unit until the last nut and bolt.

I managed to detach the PCB but I couldnt remove it completly because two wires from the load/unload motor were soldered on the motherboard. Even so I managed to clean it pretty well.

The inside of the unit was trickier to clean but nothing too difficult. A long soft brush and some cotton sticks were exactly what the doctor ordered :D

I also gently cleaned the laser lens and it was really dirty. Even so it read the CD's without problems.

I also lightly greased with silicone grease the sprockets, metal rails and a few guiding plastic rails.

Then I assembled the unit and tested it again. It works like it is new :)

Over and out. For now.... :D

gallery: https://postimg.org/gallery/n18amgqg/


eidairaman1

The Exiled Airman
Joined
Jul 2, 2007
Messages
40,435 (6.59/day)
Location
Republic of Texas (True Patriot)
System Name PCGOD
Processor AMD FX 8350@ 5.0GHz
Motherboard Asus TUF 990FX Sabertooth R2 2901 Bios
Cooling Scythe Ashura, 2×BitFenix 230mm Spectre Pro LED (Blue,Green), 2x BitFenix 140mm Spectre Pro LED
Memory 16 GB Gskill Ripjaws X 2133 (2400 OC, 10-10-12-20-20, 1T, 1.65V)
Video Card(s) AMD Radeon 290 Sapphire Vapor-X
Storage Samsung 840 Pro 256GB, WD Velociraptor 1TB
Display(s) NEC Multisync LCD 1700V (Display Port Adapter)
Case AeroCool Xpredator Evil Blue Edition
Audio Device(s) Creative Labs Sound Blaster ZxR
Power Supply Seasonic 1250 XM2 Series (XP3)
Mouse Roccat Kone XTD
Keyboard Roccat Ryos MK Pro
Software Windows 7 Pro 64
Interesting I never seen a disk shatter, it was only past 52 that they were
 
Joined
Jan 8, 2017
Messages
568 (0.21/day)
System Name ACME Singularity Unit
Processor Coal-dual 9000
Motherboard Oak Plank
Cooling 4 Snow Yetis huffing and puffing in parallel
Memory Hasty Indian (I/O: 3 smoke signals per minute)
Video Card(s) Bob Ross AI module
Storage Stone Tablet 2.0
Display(s) Where are my glasses?
Case Hand sewn bull hide
Audio Device(s) On demand tribe singing
Power Supply Spin-o-Wheel-matic
Mouse Hamster original
Keyboard Chisel 1.9a (upgraded for Stone Tablet 2.0 compatibility)
Software It's all hard down here
Someone should put an 'XXX' warning..

Good stuff, thank you for posting all this :)
 
Joined
Mar 11, 2009
Messages
1,778 (0.32/day)
Location
Little Rock, AR
System Name Gamer
Processor AMD Ryzen 3700x
Motherboard AsRock B550 Phantom Gaming ITX/AX
Memory 32GB
Video Card(s) ASRock Radeon RX 6800 XT Phantom Gaming D
Case Phanteks Eclipse P200A D-RGB
Power Supply 800w CM
Mouse Corsair M65 Pro
Software Windows 10 Pro
This thread is the epitome of "Because I can."

Well done.
 
Joined
Oct 24, 2004
Messages
1,294 (0.18/day)
The apparent complexity of a dvd player mecanism always scared me, it's like the gear-wheels of a watch :kookoo:
 
Joined
Jun 11, 2008
Messages
576 (0.10/day)
System Name Epsilon
Processor A12-9800E 35watts
Motherboard MSI Grenade AM4
Cooling Stock
Memory 2x4GB DDR4 2400 Kingston Hyper X
Video Card(s) Radeon R7 (IGP / APU)
Storage Samsung Spinpoint F1
Display(s) AOC 29" Ultra wide
Case Generic
Power Supply Antec Earthwatts 380w
Software Windows 10
no cartridge DVD-RAM recorders? I own like 3 of those and I'm plenty of those 9.4GB double sided cartridges
Ok, they were not very popular among regular PC users...
Very nice thread btw!
 
Joined
Mar 11, 2009
Messages
1,778 (0.32/day)
Location
Little Rock, AR
System Name Gamer
Processor AMD Ryzen 3700x
Motherboard AsRock B550 Phantom Gaming ITX/AX
Memory 32GB
Video Card(s) ASRock Radeon RX 6800 XT Phantom Gaming D
Case Phanteks Eclipse P200A D-RGB
Power Supply 800w CM
Mouse Corsair M65 Pro
Software Windows 10 Pro
Battle of the Slots or should I use a "u" instead of "o" hmm? :D

Work In Progress...


The first computer I ever built looked exactly like that top one. It was a Pentium 3 500mhz. I upgraded it to a P3 800mhz, upgraded the graphics card to a radeon 9500 (from an nvidia nforce 4 I think) and 768k ram (yuuuuge amount of ram back then.)
All so I could play morrowind on PC. And a bit of that sweet vanilla WoW.
 
Joined
Jul 3, 2016
Messages
758 (0.27/day)
Battle of the Slots 1 vs A

The SLOT 1 and SLOT A systems have a special place in my heart. I think that this is the results of the fact, that back in the day, I never owned such a SLOT system.

When the SLOT systems were heralded as the next BIG THING, I just upgraded my aging 5x86 to a Celeron 366A(scoketed)+440BX. I was reading about the new SLOT CPU's in the IT magazines and I was dreaming about PENTIUM II and VooDoo but I couldn't afford one.......yep Good Old Days...just of a different kind! :D

By the time I left behind the Celeron 366A, the world has moved on, and I bought a DURON 1.2GHz+Sis 735 which was soon replaced by Athlon XP 1900+ & Via KT333.

Due to these facts the SLOT systems remained as an undiscovered part of the map. " THERE BE DRAGONS! " and THE WORLD IS FLAT!

Today, after 20+/- years the SLOT systems are seen as something like an unnecessary move. Back then, they were seen as the light of a new beginning. Little did they know that their glory will be short lived. The socket outlived the SLOT.

The most vivid image from those times is the BATTLE FOR 1000MHz. I still remember it like it was yesterday.

After I worked with older systems the switch to SLOT systems came naturally. The fact that they had a short life made them even more enticing. Who needs a socket? Everybody has a socket! THE SLOT is the NEW socket! :D

The first SLOT system I owned was Pentium III - 450 MHz upgraded to a Pentium III - 550MHz. This system was given to me a couple of years ago. The next SLOT system I aquired was a SLOT A system with 4 CPU's K7 500, 550, 600 and 700MHz. I was very happy when I bought the SLOT A system. I never saw one in the flesh. WHITE WHALES and stuff.There she blows!!!!! I bought from the local OLX site.

The joy of owning a SLOT A system was shadowed by the fact that the motherboard: PC CHIPS M800LMR 1.3A was budget one and didnt permit the alteration of any settings for BUS, Memory Timings, Multiplier, etc...

To add assault to injury some CPU's were recognized as different models. The only plus is that the motherboard and CPU's worked as intended.

PIII-SLOT 1 & ATHLON-SLOT A info can be found here

https://www.techpowerup.com/forums/...ly-old-hardware-emporium.228932/#post-3574691
https://www.techpowerup.com/forums/...ly-old-hardware-emporium.228932/#post-3574696

So, for almost a year, I searched for a suitable SLOT A motherboard. The search wasnt frantic, but truth be told, the SLOT A motherboards arent so plentiful.

I also wanted to solve the mistery of the 500MHz CPU with 900MHz markings which was detected by the PC CHIPS M800LMR 1.3A motherboard as a 700MHz CPU.

The 550MHz didnt boot on the PC CHIPS M800LMR 1.3A motherboard and I wanted to see if it was still alive and kicking!

This was the PLAN

Finding a SLOT A motherboard in my country was easier said than done, because these motherboards are fewer than hens teeth!

After almost a year of searching I found on the local OLX site the motherboard I present you bellow.

In the morning, afternoon and evening, I entered frequently the local OLX site and searched the string "SLOT A". Usually this returned NO RESULTS. The few times I got a result I found only another budget motherboard or a beat-up SLOT A CPU CRYING - HEEEEEEEEEEEELLLLLLLLLLLLLLLP!!!!!!!!!!!!!!!!

On the 27th of March 2017 I found an add on the local OLX site which really got my blood pumping. In the pictures was my WHITE WHALE, A F.....G AWESOME overclocking friendly SLOT A motherbord. THE PERFECT SLO(U)T.With extras even, - A 700MHz CPU - F..KIN' A+++++++

The add was listed since 22th of March so I rushed and sent a message in which I stated I WANT THE SLOT A SYSTEM - PRONTO!!!!!!

!&@!!)!)&@!)&#)!#!)#&!#) THE KIT WAS RESERVED BY SOMEBODY ELSE....

DAMN! Back to:

SLOT A OLX =0 SLOT A OLX=0 SLOT A OLX=0....DIVIDE OVERFLOW....


On 11th April 2017 I typed on the OLX site, the now classic, string SLOT A and BAM! 2 results: The beat-up 750 SLOT A CPU crying for help and the SLOT A system I missed.

I sent a message instanlty. The guy who reserved the kit didnt want to pay the full price (22EUR) and it was again available. I bought it instanlty!

Besides the SLOT A kit I couldnt resist and I also bought a SLOT 1 kit. I really didnt have a 440BX motherboard. Good Old Chipset!

The SUSPECTS:

SLOT A

1. Asus K7M V1.04 Motherboard AMD 751 Northbridge & VIA 686A Southbridge, 3DIMM, 1xAGP x2, 5 PCI slots (with 1 shared ISA), PS2, USB, etc.
•Supports AMD Athlon™ processor de-signed for the AMD Athlon™ Processor Module (242-pin Slot A) and packagedin a plastic ball-grid array (PBGA).
•North Bridge System Chipset: AMD-751™ chipset with AGP/PCI/Memorycontroller supports a 200MHz Front Side Bus (FSB), supports up to 768MB ofPC-100 SDRAM DIMM, complies with AGP 2.0 specifications for 1X and 2XAGP modes and PCI 2.2. bus interface with support for 6 PCI masters.
•South Bridge System Chipset: VIA VT82C686A PCIset with PCI Super I/Ointegrated peripheral controller supports UltraDMA/66, which allows burst modedata transfer rates of up to 66.6MB/sec.
•PC100 Memory Support: Equipped with three DIMM sockets to support IntelPC100-compliant SDRAMs (16, 32, 64, 128, or 256MB) up to 768MB.
•Expansion Slot Options: Provides either four 32-bit PCI 2.2 and two 16-bit ISAexpansion slots or 5 PCI and 1 ISA. PCI supports up to 133MB/sec maximumthroughput. Each PCI slot can support a Bus Master PCI card, such as a SCSI card.
•AGP Slot: Supports an Accelerated Graphics Port card for high performancecomponent level interconnect targeted at 3D graphical display applications us-ing a 1X or 2X mode bus.
•USB: Supports up to 4 USB ports, two on the back panel and two midboard(optional), for more peripheral connectivity options
•UltraDMA/66 & UltraDMA/33: Comes with an onboard PCI Bus Master IDEcontroller with two connectors that support four IDE devices on two channels.Supports UltraDMA/66, UltraDMA/33, PIO Modes 3 & 4 and Bus Master IDEDMA Mode 2, and Enhanced IDE devices, such as DVD-ROM, CD-ROM, CD-R/RW, LS-120, and Tape Backup drives.
•Smart BIOS: 2Mb firmware gives a new easy-to-use interface that providesmore control and protection over the motherboard. Provides CPU/SDRAM fre-quency adjustments

2. AMD K7 SLOT A CPU 700MHz - AMD K7700MTR51B A, K7700CURBBA

SLOT 1

1. Gigabyte 6BXC V1.7 Motherboard - Intel 440BX
· CPU - Pentium II processor 200 – 633 MHz. Suporta si Pentium III.
- 242 pins 66 / 100MHz slot1 on board.
· SPEED - 66/100 MHz system speed.
- 66 MHz AGP bus speed. (133MHz 2xmode)
- 33 MHz PCI-Bus speed.
- 8 MHz AT bus speed.
· DRAM MEMORY - 3 banks 168 pins DIMM module sockets on board.
- 8 ~ 768MB SDRAM.
- Supports DIB speed mode for L2 Cache.
· I/O BUS SLOTS - 4 33MHz Master / Slave PCI-BUS.
- 3 8MHz 16 bits ISA BUS.
- 1 66MHz / 133MHz AGP bus.
· IDE PORTS - 2 Ultra DMA/33 Bus Master IDE channels onboard.(Using IRQ14,15)
- Supports 2 USB ports.
- Supports PS/2 Mouse & PS/2 Keyboard.

2. Pentium II CPU - 350MHz - SL37F

The components arrived without damage and the owner took the precaution to remove the retaining clips from the motherboard. THUMBS UP! Mister! :)

gallery: https://postimg.org/gallery/fjh4dy8m/


The Asus K7M has some huge capacitors.One is particulary BIG :D They are good capacitors branded Rubycon. Almost all the capacitors bear this brand. The only "problem" is a missing retaing clip form an SDRAM slot. NO PROBLEM!!!!

The Gigabyte 6BXC also has good capacitors branded Sanyo. Almost all of them bear this brand. MADE IN TAIWAN used to be as good as it gets!.

Both of the motherboards are complete with jumpers and labels :D

gallery: https://postimg.org/gallery/eai2g1y2/

 
Joined
Jul 3, 2016
Messages
758 (0.27/day)
THE BIG mini CLEANUP!

I say BIG because I have lots to do. I say mini because it's no big deal.

First I cleaned the Pentium II 350MHz - SL37F. I didnt want to take it all apart. The plastic retaining pins are brittle and I wanted to keep it simple.

I cleaned the fan, the heatsink and the PCB using a fine, soft, long brush made from animal hairs. I also used 99% isopropyl alcohol, cotton and cotton sticks. It came out pretty clean if I say so myself! :D

The plus in this case is, because only the CPU makes contact with the heatsink, I only have to monitor the CPU temperature. The CACHE chips arent touching the heatsink. The CPU has a heatspreader and the thermal pad seems in good condition. If needed, I'll take this puppy to nuts and bolts in no time :D

The fan is in good shape.

gallery: https://postimg.cc/gallery/saqj3m86/


The next step was the cleanup of the AMD K7 SLOT A 700MHz - K7700CURBBA, CPU.

Here I went all out. In this instance I had to deal with metal pins and the plastic cartridge. I managed to take it apart without damaging the retaining holes.

Like in the case of the other SLOT A CPU's I dismantled, three retaining holes from the plastic cover, are oval and one is round. The round one is the worst one. I guess this was an anti-tampering/warranty measure form AMD.

Details for this operation in a post from the link bellow.
http://www.vogons.org/viewtopic.php?f=25&t=48835&start=20

I tried the method using a flat nosed pliers but this didnt work very well. I managed to loosen up the nasty pin caught in the round hole but I just couldn't get it to separate. I cracked a little the plastic cartridge. After this I used my bare hands and with carefull twisting an pulling I managed to remove the cartridge. My hand were hurting after this ordeal :D

I was greated by a familiar sight.

The fan is with ball bearings but it's past its prime. I might take apart the bearings and grease them. FUTURE PROJECT.

On the CPU die there is the same small old heatpad and the CACHE CHIPS have the same SHITTY paste. Look at the condition it's in. Just one half-assed drop...

I just couldnt powerup a CPU in this state. It wouldnt be right.

gallery:
https://postimg.cc/gallery/ivq4vm14/


EYE CANDY!

gallery: https://postimg.cc/gallery/1uhdi47ti/


gallery: https://postimg.cc/gallery/1ljq5w0m6/


BRACKETS AND STUFF!

gallery: https://postimg.cc/gallery/2qb52bf46/


READY FOR THE BIG WASH!

gallery: https://postimg.cc/gallery/1f85aa70g/


STACKED and WAITING!

gallery: https://postimg.cc/gallery/i3oj4ojq/


The K7 700MHz - K7700CURBBA CLEAN UP! and assembly

1. Deep cleaning
2.
I applied thermalpads on the the CACHE chips using the method detailed in a post found here: http://www.vogons.org/viewtopic.php?f=25&t=48835&start=20
3.ARCTIC MX-4 - FTW!!!!
4.
Final assembly and fine detailing.

THE RESULT? PRICELESS!!! :D

Hold ON! Did you think that all was smooth sailing? When I mounted the metal retaining clips I almost damaged an IC on the CPU's PCB. It was a close one! Thank GOD it wasnt TERMINAL!

Even with all my experience I STILL rush and cut corners....NOT RECOMMENDED! :D

Enjoy the pics!

After this I'll clean the motherboards and then it will be time for some SOFTWARE TESTING!

More to come!

gallery: https://postimg.cc/gallery/10az2hnvi/


gallery: https://postimg.cc/gallery/vi0nji1m/

 
Last edited:
Joined
Jun 27, 2015
Messages
785 (0.24/day)
System Name Fat NCASE
Processor Ryzen R9 3900X
Motherboard ASUS TUF GAMING B550M ZAKU (WIFI) Edition
Cooling Scythe Fuma with 3 SCYTHE Wondersnail 2400RPM + Arctic MX2
Memory Corsair Vengeance 128GB @3200Mhz Cl16 (32GB X 4)
Video Card(s) Palit RTX 3060 StormX ITX 12GB
Storage MX500 4TB SATA + Toshiba MG08 16TB HDD
Display(s) LG 27UL500 4K monitor
Case Jonsbo W2 black
Audio Device(s) Onboard realtek 1200 & Soundblaster G3 usb
Power Supply ASUS ROG STRIX 850W Gundam Edition
Mouse Elecom wireless mouse :)
Keyboard RK100 Royal Kludge
Software Windows 10 HOME
Benchmark Scores Don't know any benchmark. It runs good enough for me.
I love this thread! Going to spend hours reading this! I always wanted to do something like this! But I don't have space to keep this much "thrash" (treasure). Add to to it the rarity of component and my lack of knowhow of getting it to work again and the type of old of slots.

Keep up the good work! Sub to this thread.

It getting rather sad to see these ancient relic diminishing by the day, their the ground work of modern day computing. NIce to see it being preserved.
 
Top