Monica Bellucci - Mediterranean Nights
MAD PROJECT #2:
GOT WOOL?! NOPE! Then GET RESTORED! 
Any resemblance to actual things or of other nature is purely coincidental!
Joke aside, now is the time to return to our muttons.
I mean components, cards and even more boards! For the HW maniac there is nothing more appealing than
a component, be it a motherboard, a graphic card, a soundcard or any lump of textolite littered with as many ICs as possible. The more components the better. Money is no object, the end justifies the means, so why bother? You know you need it! You know you want it! YOU HAVE TO GET IT!
We live in strange times! Graphic cards toil in the salt mines, prices are down right obscene, a hard time to be a gamer ...
I miss the days when things were simpler ... life was closer to the real stuff ... but I digress ...
ME+THE FLEA MARKET=LOVE!
Yep. Good ol' flea market. Come to think of it I really don't know why they call it flea market. I mean I understand the meaning of it but I found so many
treasures there that the naming "scheme" eludes me entirely.
The flea market. My father also had "a flaw". He used to go regularly at the flea market but he didn't buy anything. He just went to see what's for sale and to repair our family car. A LADA 1200s in the '90s. We had three LADA 1200 cars but the one with
the s was the best. I loved that car and I still do! My first car. The car I learned to drive. The car I drove 'till the pistons gave up. Rear wheel drive. No ABS. No Power Steering. When others used to freeze in their cars I was in short sleeves in my LADA.
... but I digress again ... The sound of the engine @ 120 km/h in 4th gear! The speedometer needle was leaning toward the right. You could feel the drive shaft vibrate with every fiber of your body. Ahh the sound ... Ops! I digress again ...
I think that the flea market affliction got transmitted genetically as I have the same "flaw" as my father. If only he was still alive so that we could drink a beer and chat some more ... but I digress again ...
Once in a while, something gets past my armor and I buy stuff that plainly screams:
DO NOT BUY ME!
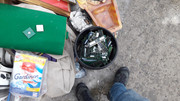
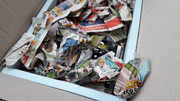
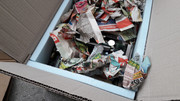
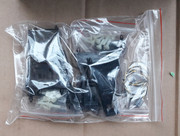
Are you a fluffer? Sure boss! For 3 EUROS I got stuck with this puppy:


 WOOL INSIDE! Idiot OUTSIDE!

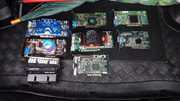
ATI Radeon HD 5870 cards represent something special to me and I have great respect for them. I can clearly remember the time when these monsters appeared and
I still get goose bumps!
If I could afford such a card? Ha Ha Ha! NOPE! Me, an nvidiot through and through, was using a GAINWARD BLISS 9800GTX 512MB DDR3 256-bit bought right before the launch of the GTX 260, in 2008, ... 999,99 RON wasted away.
Regardless, I still loved the 9800GTX as it was mine!
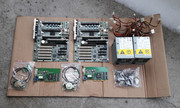
The actor of this episode is none other than:
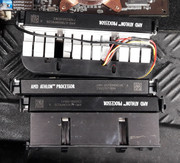
PowerColor ATI Radeon HD 5870 2GB Eyefinity 6
It was an impulse buy as it looked to be whole. The backplate did its job and protected the card and I said to myself:
WHY NOT?
What could possibly go wrong? Yep! What on Earth could possibly go wrong?!
Ever since I bought the card I new that I would have to take my restoring skills to the next level.
So, methodically, I went on to eliminate each obstacle that stood in my way , until the total conquest of the Pl..t, ahem, conquest of the ATI 5870!
Initialy I expected the dismantling of this card to be a complicated matter but to my surprise everything went smoothly, like when you undress a beautiful woman, ahem, a high caliber graphic card.
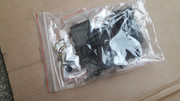
The screws were easily sorted depending of their size and location. Every element that has been removed could easily be put back just by using the power of intuition.
THE REDS really know how to make stuff said the envious
GREEN guy inside me ...
Screw after screw, I got to the point when I was about to separate the backplate from the card.
I heaved. I heaved again!
NOTHING happened! The F..K?!?!
Hoping to separate the backplate I tried to heat up the card using a hair dryer.
Still NO DICE!
Well, brute force from a gentle angle came to the rescue. From one side I managed to lift the backplate a little and with carefully placed force I could feel it giving in.
It gave up but at what cost?

Add thermal pads to the shopping cart please.
Maybe you are wondering why I didn't power up the card as it was. Well, the cooler was looking quite tired and I wasn't going to risk giving the juice to something in that state.
I mean, respect for the cards must come first even if in the end you might not get what you were hoping for. You know me.
ALL IN or ALL OUT! No half measures. No corners cut! The straight and narrow! Nothing will stop me!
Without even feeling it, I emarked on an expedition toward the unknown, guided by a blind belief in the vivacity of this card.
Every path must have a guiding light. I had complete and total faith in this card. If a 470 GTX managed to crawl out of the gutter why couldn't a mighty 5870 do the same?
Add to the mix the 2GB of VRAM plus Eyefinity E6 and this card had all the data to become legendary.
Let's get to nutcracking.
Torn thermal pads. You have to break some eggs if you want to make an omelette.
 2010
2010. A good year! I was 11 years younger! It seems like yesterday!

As expected, the separation of the PCB from the cooler didn't go according to plan. I got a little sweaty in the process.
Against all the odds I managed to save the wide majority of the thermal pads. At least I thought I did at that time! Those soft and yellowed bits had
SINGLE USE plastered all over them.
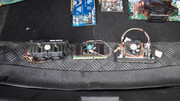
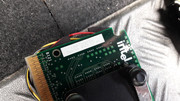
 The mighty PCB! NAKED!

Look at that real estate! I feel something rising and that isn't the real estate price!
The
naked die made all the effort to be worthwhile.


 My precious! So perfect! I was in love ...
Encased into an impenetrable armor made from plastic, aluminum and copper, the PCB was intact. Apart of some dirt and grime in the cooling fan area it was minty fresh.
It seemed that I had a winner in my hands.


All the data gathered implied the high end nature of this monster.
Some stains and dirt.

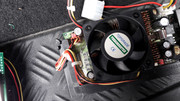
What's the matter with this screw that is kind of loose? Hmmm ...

Ever since I bought the card I just couldn't help but notice the stuff that was clogging the cooling fan. Even so I was still caught with my guard down by the deposits inside the cooler. Also the fan wasn't spinning too well and I knew that it will require some elbow grease if I was about to use it.


These tiny bits of plastic gently whispered to me that I will have more stuff do somewhere down the line.

The scratches and the tiny dents in the backplate were a clear indicator that this card suffered not only from a bad treatment from its former (careless) owner but also from "a good" treatment applied in transit aka from where it came until it reached me. Supposedly from Germany.
Against all of the warning signs I was still unabated and my belief in this card was at an all time high.
Besides, if in the end the card would prove to be a lost cause I could console myself with the saying: the journey is more important than the destination!


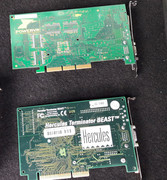
What beast can leave a card like this? Ignorance is bliss ...
Taking into account the dirt inside the cooling fan, I equipped myself with a breathing mask, protection goggles and latex gloves. The hairs inside the fan blades were clearly from some animal.
I used a pair of fine tweezers to remove most of the wool that was stuck inside the cooling fan but the operation didn't go according to plan as the result was kind of meh.

After "the failure" with the tweezers I resorted to the BIG GUNS.
Water under pressure.

Look at the debris.

MORE!
 Heatsink included!

After many minutes of using water under pressure I held in my hand something that looked familiar. The stock fan.


After this initial cleanup I could closely inspect
the wobble that the cooling fan had. The play inside the bearing was colossal and nothing could've made me foresee the damage inside .
Due to the accumulated dirt, the propeller was off balance and the steel shaft dug into the bearing. In turn, the cooling fan ate from the aluminum onto which is was fixed and also seriously scraped the plastic shroud.
At that time I still believed that I could save the fan so I searched on the Internet for a way to dismantle it.
An easy procedure and totally safe if done properly aka my middle name.
After I managed to clean the poor cooling fan , I quickly washed the PCB using hot tap water and some Fairy dish soap.


When in doubt water it down or something like this?! Well, ..., in the ballpark at least ...
After the hot tap water and dish soap stage, an IPA 99% wash was in order and then the PCB was dried using the now classic method:
hanged to dry.


The thermal pads were toast but I kept them for future reference.

I washed the metal parts and the plastic shroud with hot tap water and dish soap. I used microfiber cloths and soft brushes.
I took precautions to keep the contact of the water with the plastic shroud to a minimum. I really didn't want to damage the massive paper sticker that was present. It had a glossy surface but on the sides the paper was clearly visible.


The massive heatsink turned out quite well after the wash with water. To be safe I quickly dried it using an air compressor.

In the picture bellow you can clearly see how the fan ate from the aluminum.
Even now I can't understand how a human being can use a card in such conditions. It is beyond me. Ignorance is bliss, again ...

Until I dismantled the cooling fan, more cleaning stages were in order.
With a sharp blade I had to scrape off the black stuff from the plastic shroud that dug inside the surface and also to scrape off the black paint from the heatsink that contaminated the red plastic.
A pig of a job. Labor and time intensive.
Let's see what I got in the end.


At last! Something that I can work with!
The PCB was cleaned one more time and it came close to what I wanted but I was still not satisfied. I WANTED MORE!


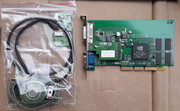
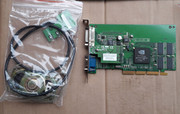
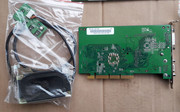
Ever since I got the card it was obvious that if I wanted to test it I would need an adapter.
A quick search has revealed that a suitable mini DP - DVI adapter can be expensive.
The flea market came to the rescue as I found there a couple of Apple adapters that seemed that they might do the trick. 2 EUROS / pcs.

As expected, the
NTK(HK) FD9238H12S DC 12V 0.8A fan, is capsulated.

So I had to use the "three levers method" as presented on the internet.

The picture above is for reference only.
The safe method is to position two of the levers on top of each other in such a way that they do not make contact with the PCB of the fan. The third one is used as a counter force when you will dismantle the fan.

I kept the screws so that the levers won't get out of their position.
I placed the fan on a soft rag or a soft surface and I
carefully applied force.
There is no need for excessive force. You just keep everything under tension and by gently alternating force on the right and left side you will feel the moment when the propeller will separate from the electric motor.
The YT clips are too violent and there is no need for the motor to pop up. You will hear and feel a soft click and that is it.
The propeller is held in place by
a teflon washer and can be put back without problems.
Easy as pie!

The groove that fixes the propeller into the teflon washer.

The motor!

To my surprise, the brownish dirt that was present on the fan, was also present inside the motor.
Due to the hard conditions it had to work, for who knows how much time, the old grease and the fine copper dust resulted from the damaged bearing, were a PITA to remove.
I still hoped that I could save the fan so I took everything past 11!


This wasn't supposed to happen but it did. More stuff to clean.


 If you think that I was ready to throw in the towel you are mistaken. This was absolute madness!
Next came some polishing stages using polishing paste and rags and because I didn't get what I was looking for I resorted to wet sanding with 1500 grit sandpaper.
This was uncharted territory and I wanted to see what must be done for the future when I'll have tackle this stuff again.
Many stages of cotton sticks and IPA 99% followed.
Even after so much cleaning some brown stuff would still creep out from an area that looked clean. Thank GOD that it wasn't tobacco residue!
I already was asking myself when I was going to see the light at the end of the tunnel as it seemed that I was going nowhere.


After so much scrubbing, the plastic wasn't looking too well. This was to be expected so I used some silicone grease that was left to dry on the affected surfaces and then the excess was wiped off with a soft rag.


So fresh, so clean!


Some black tape and some grease.
I am ready to power this sucker up and see what's what!


Well ... this didn't end well. I really don't know what I was expecting ... maybe the fan fixing itself ...
This fan is a beast and that wobble made me feel uncomfortable around it.
At full blast it can tear your face off!
Any sane person would've given up by now.
Not me!
To eliminate the wobble I planned to use a steel piece
to take out the play inside the bearing.

This didn't go according to plan as the steel piece was too small and got lost inside the cavern dug out by the steel shaft of the propeller.
At this point in time any tentative to save the fan was thrown outside the window and I just wanted to see if I could really could do something that would give me a somewhat usable item.
I drilled a hole inside the bearing.

As I didn't know how far I could go, while I drilled away, I touched with the teflon washer a little but I managed to not damage it too much. It was still in place.
In the pictures you can clearly see the teflon washer and its role..


As I still wanted to power up the fan even if the teflon washer lost its function I searched for alternatives.
The winner came into the form of the classic solution that is present on the wide majority of the fans. It was a PITA to shoehorn the new teflon washer but in the end I was successful.


As the tiny steel piece failed to do its job I used a bigger iron piece that seemed to be what I needed.
I cut a tiny piece and by carefully positioning that bit I was able to eliminate 95% of the wobble of the fan. To permanently fix the iron piece I used POXIPOL.
I was confident that I solved the problem even if I was fully aware that I will have to buy a replacement fan.
You don't want this beast loose inside your case!
This was just a matter of ambition beyond reason and nothing more.


 START YOUR ENGINES!

Well, ... no improvent!
For 6 EUROS plus shipping I bought a cooler from a Gigabyte ATI Radeon HD 5870, just for the fan.
This card was a money pit but I wasn't ready to stop spending.
I removed the label while I waited for the replacement fan.

After so much trouble with the fan if you think that the rest was smooth sailing you are quite mistaken. NO SIR!
The plastic shroud had many torn bits into which the screws went and many of them could not be glued back. Many more were missing.
So I asked myself
what options do I have?
To reconstruct the missing parts I resorted to POXIPOL.
I inserted a screw into each damaged channel and I used POXIPOL to create a thick collar.
As it was the first time I did this, the looks weren't to high on my list and the most important aspect was the strength of the patched areas. This was an "inside" job so the looks were secondary. What mattered the most was for it to hold.

A few minutes later, while the POXIPOL was still soft/tacky I gently removed the screws.
This way I got a mirror image of what was missing.
In the future I'll use some moldings in which I will press the POXIPOL and in the end everything will look close to factory spec.
I'm mad I know!


The heatsink came out shining.


A few fins were rattling and I used some POXIPOL to fix them in place. Nothing gets past me. Every imperfection must be addressed individually!


Some black paint to cover the scars.

I filed and scraped off the excess POXIPOL.

A good fit!


I'm still hoping!
 The replacement fan arrived.
As expected it was also dirty but it had zero play. YAY!
If you think that I used it as it was your are again mistaken as it underwent the same cleaning procedures as the one before it.
As an added bonus I had to tackle some rust that was present on the inside. I used an anti-rust solution to get rid of it.
No remorse. I used lots of hot tap water and dish soap.


Looking sorry for itself.


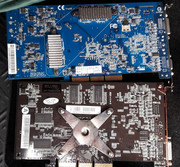
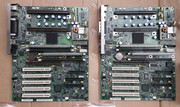
You can clearly see the difference in the evacuation of the hot air between the ATI 5870 and the ATI 5870 E6.

As good as it will ever going to get.


I performed the sticker transplant and I cleaned the propeller.


Bearing OK!

Fresh grease and a tiny drop of motor oil 5W40. Click and the propeller was in place as if nothing happened.

DONE AND DONE!


Clean bill of health.
Stacked and waiting.

One step closer to the truth.
I wonder if this card is still alive and kicking!


Power cable permanently fixed.


Looking good!


High intensity friction!

This almost got past me!
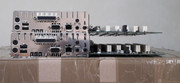
 Sisters
. I did a quick test to see if the screws were easily entering the areas that were reconstructed with POXIOPOL. All was OK and I registered nothing besides some moaning. I was careful not to tighten them to much. In the end the plastic shroud was held tightly against the heatsink.


Sparkling. I wasn't able to remove some stains and I insisted no more.


 The thermal pads are of two types.
 1 mm the soft squishy type, which once pressed is around 0.5-0.8 mm depending of the location and 0.5 mm fiberglass reinforced.

As I didn't want to buy two types of thermal pads and I was anxious to power up the card, I resorted to the Arctic soft blue 0.5 mm thermal pad I had available.
To get the 1 mm I needed I stacked two sheets of 0.5 mm.
A not so sane approach as the Artic thermal pad even it is soft it is anything but squishy.
I was ready for a custom job and I had no doubts that I could pull this off.


Cya in another life. Into the trash you go!
 The PCB came out mirror like!


The cooling fan connector was damage during the dismantling procedure and it was repaired with POXIPOL. The plastic is thin and brittle.

Pads applied. Ready for a first test.

After the first test, the thermal pads adhered perfectly to the heatsink and stayed there when I separated the PCB.
The TIM imprint wasn't too good, a clear sign that the thermal pads required fine tuning.


More fine tuning needed.


After some fine tuning.


Some tests with various TIM thickness. Arctic MX-4.

Tighten it down!

On the right path.


The imprints in the thermal pads denote a good contact. After the card will be powered up the heat will do the rest.


The adjust the more rigid thermal pads I used a tiny plastic cylinder. I placed a tiny transparent film on them I gently applied pressure. I repeated this procedure as much as needed. No corners were cut or this could spell disaster.


Thermal pads applied on the memory chips on the back of the card.

Screws tightened.

Testing. Thermal pads showed good contact. Minimal tuning required.


I must mention that at all times I verified the deformation of the PCB in relation to the cooler and the backplate. Everything had to be as close to original as possible. The width of the thermal pads was adjusted until all was perfect.
After so many dismantling stages something was due to get out of my sight.
As I'm always paying attention to details, once I counted the bits of transparent film that were on the thermal pads something wasn't right. Each time I checked I came out one piece short.
I dismantled one more time the card even if I didn't want to.

With this occasion I got a confirmation of a fact that I already knew.


After a titanic effort that could only be compared to something close to insanity I managed to finish the restoration of the card.


 Expectations were HIGH!


Even from the first power up it was clear that something wasn't right.


 Black screen of nothingness.
The error returned on the Q-Code of my ASUS MAXIMUS IV EXTREME-Z says it all.
Error Code 62 (installation of the pch runtime services) : "Very often Qcode 62 is related to the GPU especially if the VGA_LED is lit".
Dead 5870 E6.
In a last attempt I plugged my MSI GTX 1070 Gaming X and next to it I installed the ATI 5870.
I managed to get into Windows and in Device Manager the ATI was detected but the system hanged no matter what I tried. All I was able to see was the Microsoft Basic Display Driver installed and that was it.
The card didn't output an image no matter what I tried.
Also the fan didn't get to normal speed and the card got hot as hell.
Dead and buried.


Many lines ago I was telling you that
the journey is more important than the destination and what a journey this was!.
I had faith in this card up to the last moment.
I have no regrets. I learned many things and much experience was gathered. It would've been nice to have a card that was living and breathing but at this point in time there is nothing more to be done.
If you believe that I won't buy these kind of cards in the future you are gravely mistaken.
Nothing more to add.
That's a wrap! And don't even think about coming up with stuff like: TOLD YOU SO!
Cya later with more episodes in a forum near you!
gallery:
https://postimg.cc/gallery/3YkCwPK
More later.


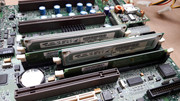


") I literally got goosebumbps looking at the shiny clean cards there, like I was transported back to 2002, when I was watching them in the shop wondering if I ever get one.
I literally got goosebumbps looking at the shiny clean cards there, like I was transported back to 2002, when I was watching them in the shop wondering if I ever get one.