- Joined
- Jul 3, 2016
- Messages
- 758 (0.27/day)
Boris Brejcha - Purple Noise [Minimal Techno]
I crack some skulls!
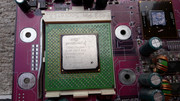
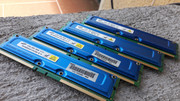
This episode will feature four SLOT CPUs which have received "the treatment".
Let's meet "THE VICTIMS"!
* Pentium II 266MHz/66 - SL2HE - IRELAND
* Pentium II 333MHz/66 - SL2S5 - 2 buc - MALAY/IRELAND
* AMD Athlon K7 - AMD-K7700MTR51B A
All of the CPUs have been bought from the flea market for a very low price. I really enjoy the trips I take to the local flea market. You never know what you are going to find there.
Not bad!
Lately, I put the PIIs/100 on the back burner and I focused more on PIIs/66 and I buy them without blinking an eye. They have more appeal in my book but I guess that's just me.
When it comes to SLOT A CPUs it is no contest. YES PLEASE! Any day of the week!


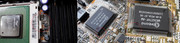
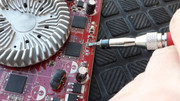
As usual, all of the CPUs have received a full SPA treatment - cleaning, fresh TIM (AC MX-4), the works. I dont just buy them and toss them in a box. They must be RESTORED! I take no prisoners!
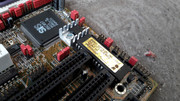
The CACHE chips of the SLOT A K7 CPU have received new thermal pads (soft, blue made by Arctic (Cooling)), because the old TIM used from the factory wasnt up to spec. This operation has been presented in the past.
I made detailed pictures of each of the CPUs, because I didnt want to mix-up the cases, the PCB or other components. Afterwards, each CPU has been put back as it came from factory. As usual, I take my work seriously. No half measures.
The opening of any SECC CPU has become a routine job. Zero incidents. Lately I use only my hands and a small fine screwdriver. This method is less likely to damage something but it takes patience and correctly applied force. The screwdriver is only used to gently separate three of the corners of the SECC cartridge and under no circumstance it is used on the inside.


Old TIM.


After all these years, the TIM was still soft. Interesting.

NAKED!


Ready for cleaning.


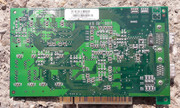
A nice spread.


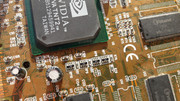
Details.Details. Details.


Clean. Clean. Clean.


IPA 99%.(lots of it)

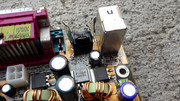
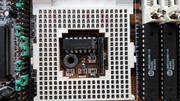
After I opened up the cases I was surprised to see that one of the PII-333(IRELAND) was missing a ceramic capacitor. It wasnt my blame and I'm surprised that it passed the quality control. I have no ideea what was the purpose of the missing cap and I wasnt expecting something like this. As it was protected by the plastic case and it had an armor bolted with screws, the chances of being damaged were pretty low, even if it came from the flea market or a salvage facility.
The placement of the missing cap, deep inside, under the heatplate made me think that it came like this from the factory. Besides, the plastic case didnt have signs of damage and I'm sure that it was never opened.
When I opened it I didnt have contact with that area.
All the time I handeled the CPU I didnt hear any rattle. I didnt use anything to try and pry the case from the inside either.
Total mistery.

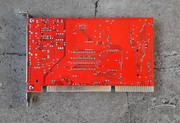
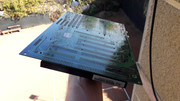
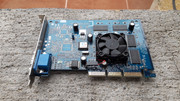
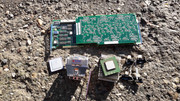
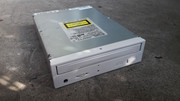
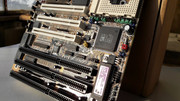
Enter my donor card Medion X740XL.


After this incident it was business as usual.


Ready to be GREAT AGAIN!

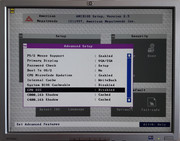
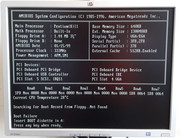
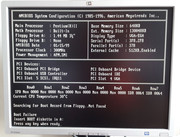
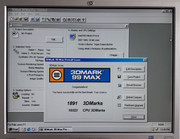
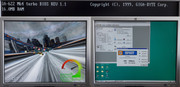
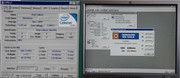
Testing has revealed that all the CPUs are at 100%!


Restored.


gallery: https://postimg.cc/gallery/2fd97o8dq/
More later.
I crack some skulls!
This episode will feature four SLOT CPUs which have received "the treatment".
Let's meet "THE VICTIMS"!
* Pentium II 266MHz/66 - SL2HE - IRELAND
* Pentium II 333MHz/66 - SL2S5 - 2 buc - MALAY/IRELAND
* AMD Athlon K7 - AMD-K7700MTR51B A
All of the CPUs have been bought from the flea market for a very low price. I really enjoy the trips I take to the local flea market. You never know what you are going to find there.
Not bad!
Lately, I put the PIIs/100 on the back burner and I focused more on PIIs/66 and I buy them without blinking an eye. They have more appeal in my book but I guess that's just me.
When it comes to SLOT A CPUs it is no contest. YES PLEASE! Any day of the week!
As usual, all of the CPUs have received a full SPA treatment - cleaning, fresh TIM (AC MX-4), the works. I dont just buy them and toss them in a box. They must be RESTORED! I take no prisoners!
The CACHE chips of the SLOT A K7 CPU have received new thermal pads (soft, blue made by Arctic (Cooling)), because the old TIM used from the factory wasnt up to spec. This operation has been presented in the past.
I made detailed pictures of each of the CPUs, because I didnt want to mix-up the cases, the PCB or other components. Afterwards, each CPU has been put back as it came from factory. As usual, I take my work seriously. No half measures.
The opening of any SECC CPU has become a routine job. Zero incidents. Lately I use only my hands and a small fine screwdriver. This method is less likely to damage something but it takes patience and correctly applied force. The screwdriver is only used to gently separate three of the corners of the SECC cartridge and under no circumstance it is used on the inside.
Old TIM.
After all these years, the TIM was still soft. Interesting.
NAKED!
Ready for cleaning.
A nice spread.
Details.Details. Details.
Clean. Clean. Clean.
IPA 99%.(lots of it)
After I opened up the cases I was surprised to see that one of the PII-333(IRELAND) was missing a ceramic capacitor. It wasnt my blame and I'm surprised that it passed the quality control. I have no ideea what was the purpose of the missing cap and I wasnt expecting something like this. As it was protected by the plastic case and it had an armor bolted with screws, the chances of being damaged were pretty low, even if it came from the flea market or a salvage facility.
The placement of the missing cap, deep inside, under the heatplate made me think that it came like this from the factory. Besides, the plastic case didnt have signs of damage and I'm sure that it was never opened.
When I opened it I didnt have contact with that area.
All the time I handeled the CPU I didnt hear any rattle. I didnt use anything to try and pry the case from the inside either.
Total mistery.
Enter my donor card Medion X740XL.
After this incident it was business as usual.
Ready to be GREAT AGAIN!
Testing has revealed that all the CPUs are at 100%!
Restored.
gallery: https://postimg.cc/gallery/2fd97o8dq/
More later.


")