• Welcome to TechPowerUp Forums, Guest! Please check out our forum guidelines for info related to our community.

Project: Diabolo

Joined
May 25, 2011
Messages
281 (0.06/day)
Location
Málaga, Spain
Project: Diabolo (12-12-12 Final Picks)

Hi Everyone!

So, this time round it won´t be a case revival or a "Mod in a Week" project, mainly because Cooler Master has decided I should have a HAF X and well, I kind of want to take my time with such a nice case :D!

cm.gif


Now, I am useless at google sketch and that kind of software that you guys use, not to mention drawing! So I will try to explain the concept of project Diabolo.

If any of you saw my Fallout Cause project (http://www.neonit.net/) you´ll know that, more than anything else, I enjoy painting, and with my previous project (Acid Burn) it was a pretty simple paint scheme, no matter how detailed it was and I feel like playing with shades and effects again so... I´m going to (or try to) turn this gorgeous HAF X in to a demon, (the fact I played through Doom 3 and it´s expansion again the other day ... may have something to do with it!

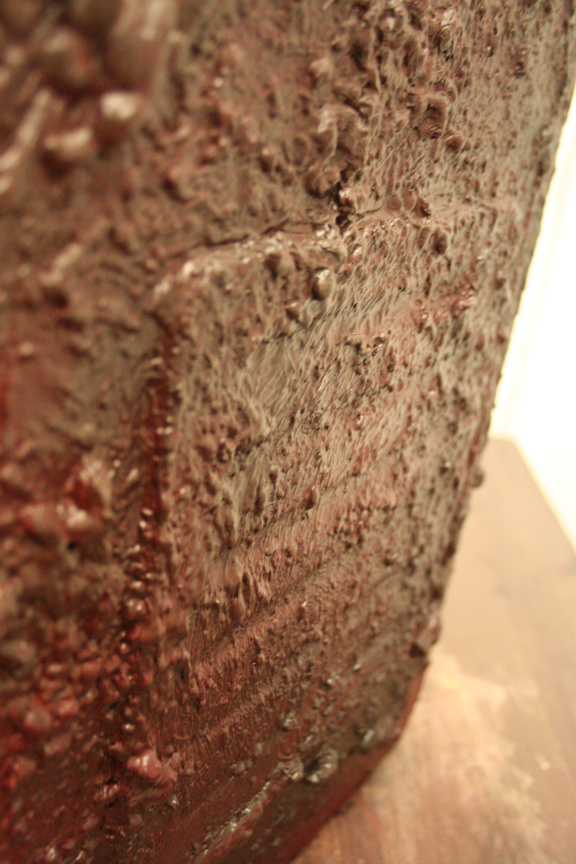
So, I will be using foam and epoxy (with internal reinforcing) to build 2 massive horns that will go through the lenght of the top of the case, depending on how these come out, I might also add a pointed tail. Aside from this, I will be modifying the body (it´s going to hurt bashing it in) and adding "skin deformations" to give it that tough demon skin look.

Paint wise, black, with dark red/purple skin tones, and bright-ish red details to accentuate irregularities in the skin. For the horns, I´m thinking white-ish cream with a dark brown dry brush touch, or I may go with dark colours like the rest of the case, we shall see!

Hardware wise, the wonderfull people at Cooler Master (I´m looking at you Gert!) have also sent me an awesome 80+ 1000w PSU. I will be using an ASUS P8P67 Sabertooth (I´ve chosen this mobo because of it´s thermal armor, which I can modify to match the design), with an Intel i5 2500k. 2x Asus ENGTX 275, a Creative X-Fi Titanium Fatality, 3x Seagate Barracuda 750Gb S-ATA2 drives and a Pioneer cd/dvd combo drive.

Other hardware like fan controllers, memory card readers and so forth I will add as I see fit if I can put them in to the design.

Right, for those of you who saw my week in a mod project (acid burn) you might remember my work place was a complete mess for several reasons I won´t go in. So, first thing´s first, let´s sort this place out!!!!!!

3.JPG


4.JPG


Quite a mess huh? I should also mention it´s currently 37c... and rather humid...ugh!

5.JPG


Yup that´s my old Fallout Cause sitting there waiting to be either sold or re-purposed :/ and of course, the goodies from CM!

Right so, assorted cables and accesories, sorted!

6.JPG


Assorted Hardware, sorted!

7.JPG


Bits and bobs, sorted!

8.JPG


Tools, sorted!

9.JPG


Workbench, sorted!

10.JPG


I can´t stress it enough, Thanks CM!

11.JPG


Let´s start unpacking...

12.JPG


13.JPG


14.JPG


15.JPG


And that´s it for now, tomorrow I pick up the materials needed to start the transformation of the case!
 
Last edited:
Hi Everyone!

First of all, sorry for the delay, I´ve been rather ill for the last week and a half, and still not 100% but well enough to continue, it´s a short update, but more tomorrow!

So, I continued to dismantle the case completely:

16.JPG


17.JPG


And this is how the bare chasis of the HAF X looks like:

18.JPG


Now that´s out of the way, i measured things up and drilled 2 small holes on the front cover, matching holes behind in the chasis in order to put the supports for the horns:

19.JPG


20.JPG


And lastly for today (I have to wait till tomorrow for the foam to dry), the straight mold of the horn filled with foam:

21.JPG


The horn isn´t going to be straight up, it will mold around the top of the case, however, I decided to make it straight in order to then brake it in to shape and filling the gaps with more foam, so I don´t end up with parts with structural weakness due to lack of foam.

Tomorrow, the other horn plus the shaping, filling, and coating with epoxy.
 
Hi Again!

First of all, a small rant, it´s stupidly HOT, arg!

Now, down to business:

First horn has been splitted in the desired zones to help curve the form for when the epoxy comes (which, no time for today as I forgot the detail of having to leave the foam tu cure in the filler spots, i.e. where the foam has been splitted) and filled. I´ve also mounted it on the case to see how it looks, unfortunately because of the design of the case frontal (really hard to take it off without taking the top off) I had to mount it permanently, so, when I do the epoxy tomorrow or whenever I will have to cover the rest of the case so i don´t get drops in it, which I might not do aniway because I was planning on leaving irregularities on the case to later help the paint simulate demon skin.

22.JPG


23.JPG


24.JPG


25.JPG


26.JPG


Also, I´ve started the second horn, a big THANKS goes to my sister for helping me out with both, as she has more experience with molds and supports for them.

27.JPG


And now, left to cure til ltomorrow!

28.JPG


That´s all for today!
 
Hi Everyone!

I know it´s been quite a while since the last update, I havn´t been home this long due to a work contract but I´m back now to my usual day to day life so, I can now officially continue with the project! :D (I´ve really missed doing so).

Now there´s no progress since the last update since I got back not long ago but will start again tomorrow.

However for now, news! A new sponsor has chosen to participate in this project...

So big thanks to Kingston!

Kingston_logo.jpg


The good folks at Kingston have sent me 16Gb of DDR3 1600 of HyperX RAM, undoubtedly one if not the most well known name in the performance memory market. Also, to top it off, they´ve sent 2 96Gb SSD drives of their SSDNow! series which will be going in a striping RAID config.

So thank you very much Kingston!!!!!!

29.JPG


Aside from that, an other I did has arrived!

2 clear fans with red led for the top of the case.

30.JPG


And an ASUS Sabertooth P67 motherboard, now I know it isn´t a high end ASUS motherboard but I just love the look of it!

31.JPG


Right that´s it for today folks, if all goes well, tomorrow or the day after, another update!
 
I´m just not going to say a date from now on as it always takes me longer!!

Small Update:

Second horn is on, and have realised it looks nothing like the original, but will make them more similar with the epoxy, aniway, all foamed up and currently drying, 24h wait, hopefully tomorrow I can go down and see if it needs any more filler, after that, epoxy.

32.JPG


33.JPG


34.JPG


35.JPG


36.JPG


37.JPG


It´s starting to take shape : )
 
So the first layer of epoxy is on and now waiting for it to harden so I can use a second layer for more filler, maybe a third if needed, after that, sanding down to create a smooth surface (in preparation for primer) yet rugged so the horns look like they have wear and tear on them : )

38.JPG


39.JPG


40.JPG


41.JPG
 
Last edited:
Update:

Sanded the solid expoxy down and applied the second and final coat of the stuff:

42.JPG


43.JPG


44.JPG


45.JPG


46.JPG


At one point I was thinking of 3rd epoxy filler layer to make it all one smooth surface, but then I though it would look very artificial, this way it looks like it has a lot of wear and tear, and the once painted in a way to reflect that it should look pretty awesome : )
 
Quick Update:

So I just ordered a few goodies, this should complete the list of accesories : )

Sharkoon Cold Cathode 30 4x RED Kit,

47.jpg


Sunbeam Cold Cathode 30cm single UV.

48.jpg


Revoltec 5.25" Fan Controller (will be painted according to color scheme).

49.jpg


L.I.S. Premium Silver Frontal Unit (will be painted according to color scheme and in shape of a mouth, teeth, etc).

50.jpg


Aquacomputer Aquabox Professional 5 Black Reservoir (will be painted to act as the eyes)

51.jpg


EK-Ekoolant Blood Red 1000ml x2

52.jpg


EK Waterblocks EK-KIT H30 - Supreme LT 360 Cu

53.jpg


All to arrive on Monday : )
 
Update:

I´ve given the horns one more coat of epoxy to round things up and give them their final shape before sanding down in order to get them ready for paint.

54.JPG


55.JPG


And started coating the rest of the case with the "skin" which will be painted in a mixture of black, brown, blood red and fire red tones...
...infected blisters anyone?

56.JPG


57.JPG


58.JPG


59.JPG


60.JPG


Now to let it dry till tomorrow.
 
Update:

I´ve aplied first coat of "skin" to the rest of the areas that where meant to have it. Once dry (in a couple of hours) I will cover all "skin" areas with a very very thin layer of epoxy, so it still keeps the detail but becomes much stronger (it is quite frail on it´s own).

61.JPG


62.JPG


63.JPG


64.JPG


65.JPG


66.JPG


67.JPG


68.JPG


69.JPG
 
Looking interesting so far :)
 
Second Update of the Day:

Second and final coat of "skin" (for this one, epoxy as opposed to foam) done. Now it has to dry, tomorrow I will sand any imperfections of over the edge material and prep it for paint (primer).

70.JPG


71.JPG


72.JPG


73.JPG


74.JPG


75.JPG


76.JPG


77.JPG
 
Update:

Ok, so, imperfections sanded down, panels put togueter, masking tape...

78.JPG


79.JPG


80.JPG


81.JPG


82.JPG


83.JPG


84.JPG


...and first coat of primer paint. Needs a second coat but I´m out of primer so will have to wait till tomorrow so I can go get some (was going aniway to buy the actual paint).

85.JPG


86.JPG


87.JPG


88.JPG


89.JPG


90.JPG


91.JPG


I´m really starting to see the final picture : )
 
Update:

So goodies arrived : )

92.JPG


Ok, lets start the paintjob!

First, a second coat of primer was added, but no need for pictures, it´s just primer, plus it looks like the previous pictures...

Second, a coat of visceral red (it really does look visceral!)

93.JPG


94.JPG


95.JPG


96.JPG


97.JPG


Now let´s darken the whole thing with tones of blood red, purple and black...

98.JPG


more...

99.JPG


mooore! (and while I´m at it, horns!, also, 100th picture of the project)

100.JPG


MORE!!

103.JPG


MOOOAAAAR!!!!!!!!!!

104.JPG


That´s more like it : )

Close ups of the horn that´s almost finished so far...

101.JPG


102.JPG


Now, 3 hours of dry time and then more ; )
 
very interesting so far :)
 
I like how you left the texture without a lot of modification. Cant wait to see the rest. :rockout:
 
I like how you left the texture without a lot of modification. Cant wait to see the rest. :rockout:

At one point a few days back I did start to sand it down to get a smoother surface, but as I did a portion I realised it didn´t go well with the theme, so I redid the foam and epoxy in that second and went on with the project, it´s not offen, not sanding & grinding is a good thing, so making the most of it ; )
 
At one point a few days back I did start to sand it down to get a smoother surface, but as I did a portion I realised it didn´t go well with the theme, so I redid the foam and epoxy in that second and went on with the project, it´s not offen, not sanding & grinding is a good thing, so making the most of it ; )
I think the texture will blend very well when you uncover your windows and the other things that dont have any texture to them.
 
In deed, really looking forward to unconvering the window and putting the system in to see it with the liquid cooling and cold cathodes : )
 
Second Update of the day:

Second and last fase for the exterior paintjob, another coat of paint and it´s different tones has been added, finished the horns, used brown ink (the one I used to stain the horns) to highlight corners and all sorts of parts in the case, to give it that worn feel to it.

Tomorrow morning I´ll be doing the paintjob of the inside, bright fire red to contrast, the components that will be painted I haven´t decided yet wether to paint them that way, or the same tones used on the outside.

Will let it dry for the rest of the day and then in the evening/night, assemble the whole thing, components, liquid cooling, fans, etc...

On wednesday it´s going to an all week long modding event to make it´s debut.

Aniway, enjoy. I´m knakered.

105.JPG


106.JPG


107.JPG


108.JPG


109.JPG


110.JPG


111.JPG


112.JPG


113.JPG


114.JPG


115.JPG


116.JPG


117.JPG


118.JPG


119.JPG
 
Update:

The interior paint is done and so are the case´s accesories, as you can see, I only gave it one coat (after primer) because I don´t think a perfect solid red paintjob would suit the look of the case, this way, it still has tones of the black primer, and it´s now been lackered in a metal finish, that way, even the tones shine. It´s time to start with the components.

120.JPG


121.JPG


122.JPG


123.JPG


124.JPG


125.JPG


126.JPG


Yes, those are the eyes ; ) (modified reservoir).

More updates and final completed update later today.
 
wow...this is very cool, looking forward to see how the whole thing ends up, will be awesome
 
Back
Top