 5
5
Aerocool Mechatron Review
Conclusion »Assembly

Installing the motheboard onto the aforementioned bumps posed no issues. There is enough space for the large Phanteks cooler to fit with a tad bit of room to spare above it, which will allow you to reach any cable connectors with a bit of tough love. The smaller 2.5" hard-drive bays also leave enough room for long graphics cards within the Mechatron.


As there are two different types of hard-drive cages within the chassis, you also receive two tray sizes—one for both 3.5" and 2.5" variants and the other for smaller 2.5" drives. Filling them takes no tools unless you put an SSD into a larger tray, which would require you to secure it with screws.


Once full, simply slide each tray into the appropriate bay until it snaps into place. Both variants of the design seem to secure the drive well, so that you won't have to worry about them moving during transport.


You have to pull off the front of the cover to access the drive bays at the front. Doing so also reveals the large LED-equipped intake fan of the Mechatron. Once the bay is free, slide the drive into position and use the plastic lock to pin it down. These locks do work, but you should sink a single screw into one of the mounting holes to keep the drive from vibrating during operation.


With everything in place, the Mechatron makes a good impression. Keeping things clean behind the motherboard tray is quite tough, though, as Aerocool does not include enough opportunities to secure cables to the tray with cable ties. But you can still keep the interior of the chassis free of cable clutter with a bit of creativity.
Finished Looks


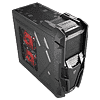
Once turned on, a big red LED strip on top of the chassis lights up. While this looks pretty cool, it may be a bit too much for some users who would like to sleep with their PC up and running, for example. You can clearly see the CPU cooler through the air vent on the side, which also means that dust is free to enter through this area of the Mechatron, while noise from within travels outward freely.


The large opening also allows you to see the GPU and power supply. Everything in the rear is where you would expect to be, with all the connectors easily reachable. The second large opening in the ceiling of the chassis even allows you to see the insides of the case without much obstructing your view. The top then also allows for dust to enter and noise to escape freely.
Jun 16th, 2024 07:36 EDT
change timezone
Latest GPU Drivers
New Forum Posts
- new tv/display what one? what to avoid? (31)
- Dell Workstation Owners Club (3111)
- Rare GPUs / Unreleased GPUs (1904)
- Should i upgrade my cpu (rtx 4070) ? (42)
- Advice for a professional build [Web Dev] [Linux] (15)
- Can you help me decide for which AM4 CPU to buy plz? (19)
- What are you playing? (20833)
- is this normal? (2)
- What phone you use as your daily driver? And, a discussion of them. (1544)
- Xeon Owners Club (8737)
Popular Reviews
- Pulsar Xlite V3 eS Review
- Aune AR5000 Headphones + S17 Pro Headphones Amplifier Review
- VAXEE Outset AX Wireless (4K) Review
- Upcoming Hardware Launches 2024 (Updated May 2024)
- Team Group T-Force G70 Pro 2 TB Review
- AMD Ryzen 7 7800X3D Review - The Best Gaming CPU
- Intel Lunar Lake Technical Deep Dive - So many Revolutions in One Chip
- NZXT H6 Flow RGB Review
- ASUS Radeon RX 7900 GRE TUF OC Review
- Thermal Grizzly KryoSheet Review - Tested on RX 7900 XTX with 475 W
Controversial News Posts
- Possible Specs of NVIDIA GeForce "Blackwell" GPU Lineup Leaked (132)
- NVIDIA RTX 5090 "Blackwell" Founders Edition to Implement the "RTX 4090 Ti" Cinderblock Design (118)
- AMD Ryzen 9000 Zen 5 Single Thread Performance at 5.80 GHz Found 19% Over Zen 4 (113)
- AMD Outs Ryzen 5000XT Processors for Socket AM4, an 8-year Old Socket (105)
- Nightmare Fuel for Intel: Arm CEO Predicts Arm will Take Over 50% Windows PC Market-share by 2029 (105)
- AMD Says Ryzen 9000 Series Won't Beat 7000X3D Series at Gaming (102)
- AMD Zen 5 Storms into Gaming Desktops with Ryzen 9000 "Granite Ridge" Processors (100)
- Biden Administration to Revive Trump-Era Tariffs on China-made GPUs and Motherboards (95)