 11
11
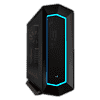
Aerocool P7-C1 Review
Assembly & Finished Looks »A Closer Look - Inside


To gain access to the interior, simply remove the thumbscrews holding each panel in place. The interior lacks any visible 3.5" drive bays and there is no 5.25" variant as there is no external opening for it. Looking at the motherboard tray from behind, there are two simple openings at the top's edge, but only one large, partially covered opening has been put into the left edge of the tray. While this will allow for some interesting cable routing, it also means you will have to route elements like audio all the way across the motherboard.


There are a total of four SSD-mounting positions, consisting of individual trays. While some manufacturers with the same case frame have reduced the number of trays to save some money, the P7-C1 comes fully equipped. You will find two behind the motherboard tray and two more on top of the shroud inside the chassis.


Looking at the front, starting underneath the shroud, there are two plastic drive trays for both 2.5'' or 3.5" drives. Look closely and you will see another set of mounting holes on the floor of the chassis. This means that you could install a third 3.5" drive there if you would like. The entire front cover is one big air vent for three fans or a large radiator. You could install as much as three 140 mm fans or a large 420 mm radiator here.


In the rear, once again starting below the shroud, you will find the simple but effective PSU bay. The PSU will rest on four foam spacers as an anti-vibration measure. Above that are the seven expansion slots and a basic black 120 mm fan set to push air out the back.


Looking at the ceiling of the P7-C1, you are able to install two 120 mm fans or a 240 mm radiator in the ceiling, and because of raised mounting rails, placing a thick radiator there should pose no issue either.


The cables for I/O and case power or reset are quite ordinary - you will easily be able to connect these to the motherboard of your choice.


You will, however, find two sets of unusual cables - there are two 4-pin plugs with which to extend the RGB lighting within the chassis with your own elements and these RGB LEDs are powered by Molex connectors.
Jun 7th, 2024 16:23 EDT
change timezone
Latest GPU Drivers
New Forum Posts
- Windows 11 General Discussion (5066)
- How to quickly & easily fix coil-whine(coil choke noise) (861)
- 5800x too much voltage? (4)
- Under volting and turbo in MSI click bios (3)
- 14900k - Tuned for efficiency - Gaming power draw (392)
- upgrading GPU with 8-pins power connector (20)
- Breathing new life into an "old" soundcard. Creative X-Fi Titanium HD (82)
- Post your cooling. (66)
- GPU-Z installer broken on Windows Vista since 2.57, NVIDIA driver version detection issue (4)
- 14900k or 14700k | Aircooling | Noctua U14S | Adobe Premiere Pro? (3)
Popular Reviews
- Intel Lunar Lake Technical Deep Dive - So many Revolutions in One Chip
- NZXT H6 Flow RGB Review
- Kioxia Exceria Plus G3 2 TB Review
- Corsair iCUE XC7 RGB Elite LCD CPU Water Block Review
- AQIRYS HYDRA 360 AIO Review
- Upcoming Hardware Launches 2024 (Updated May 2024)
- Pulsar Xlite V3 Review
- AMD Ryzen 7 7800X3D Review - The Best Gaming CPU
- SilverStone KL07E Review
- Ghost of Tsushima Performance Benchmark Review - 35 GPUs Tested
Controversial News Posts
- AMD RDNA 5 a "Clean Sheet" Graphics Architecture, RDNA 4 Merely Corrects a Bug Over RDNA 3 (142)
- AMD Hits Highest-Ever x86 CPU Market Share in Q1 2024 Across Desktop and Server (140)
- NVIDIA RTX 5090 "Blackwell" Founders Edition to Implement the "RTX 4090 Ti" Cinderblock Design (118)
- Core Configurations of Intel Core Ultra 200 "Arrow Lake-S" Desktop Processors Surface (101)
- AMD Zen 5 Storms into Gaming Desktops with Ryzen 9000 "Granite Ridge" Processors (95)
- Biden Administration to Revive Trump-Era Tariffs on China-made GPUs and Motherboards (95)
- ASRock Innovates First AMD Radeon RX 7000 Graphics Card with 12V-2x6 Power Connector (94)
- AMD Ryzen 9000 Zen 5 Single Thread Performance at 5.80 GHz Found 19% Over Zen 4 (88)