 16
16
Aqua Computer cuplex kryos NEXT CPU Water Block Review
Liquid Flow Restriction »Installation


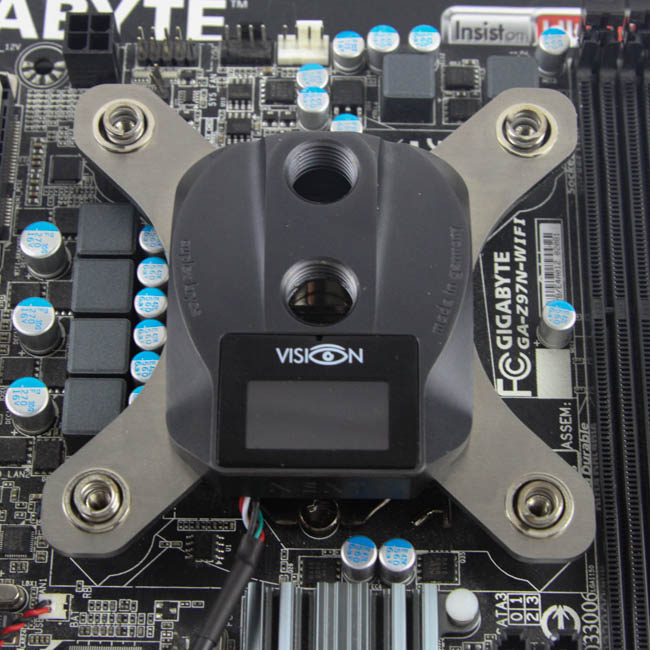


Since the sample provided came with Intel LGA 115x mounting hardware in the box, I began with it for the demonstration. Begin with the backplate and rubber gasket on the back of the motherboard by aligning the holes in the backplate with the socket latch mechanism's screws and having the ribbed end of the backplate facing away from the PCB. Now, flip the assembly over carefully or hold it from the side while screwing in the posts with the washers in between on the other side to prevent electrical shorting there as well. With the four posts screwed in, the assembly will be held in place, allowing you to apply TIM on the CPU IHS to then place the block on top. Given the nature of the display and the possibility of capacitors near the CPU socket, there is really only one orientation that is practical here (the two ports parallel to the memory slots), so once done, place a metal spring on each post to finally lock it all in place with the provided nuts and Allen wrench. This low-profile mounting solution is what Aqua Computer calls their Flush Mount System, wherein the springs are below the mounting brackets and, thus, the locking nuts are flush with the bracket.


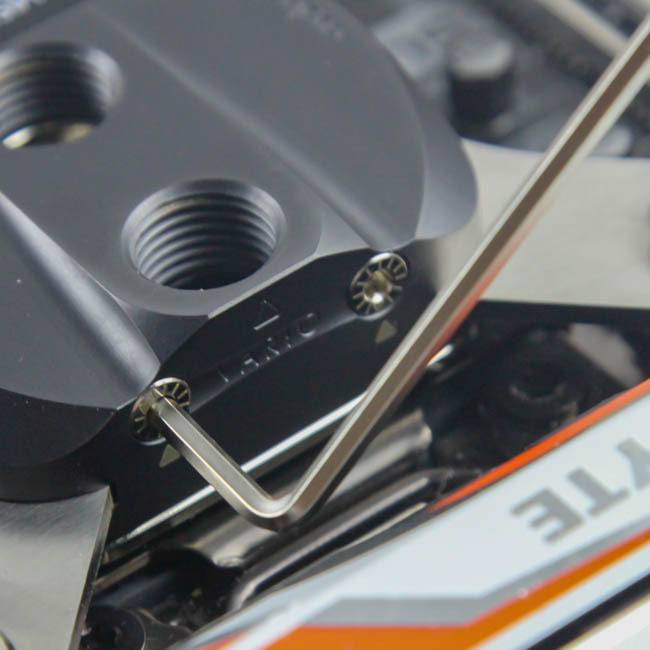
Installation on Intel LGA 2011(-3) and the new LGA 2066 socket is even simpler. Make sure the correct mounting brackets are installed if you have a conversion kit (see page 3) and begin by screwing the M4-threaded mounting posts into the cooler's mounting holes on the motherboard. Now, apply TIM on the IHS and go through the same steps as before. This should take no more than five minutes in total, and as before, it is best to do this with the motherboard outside the case.
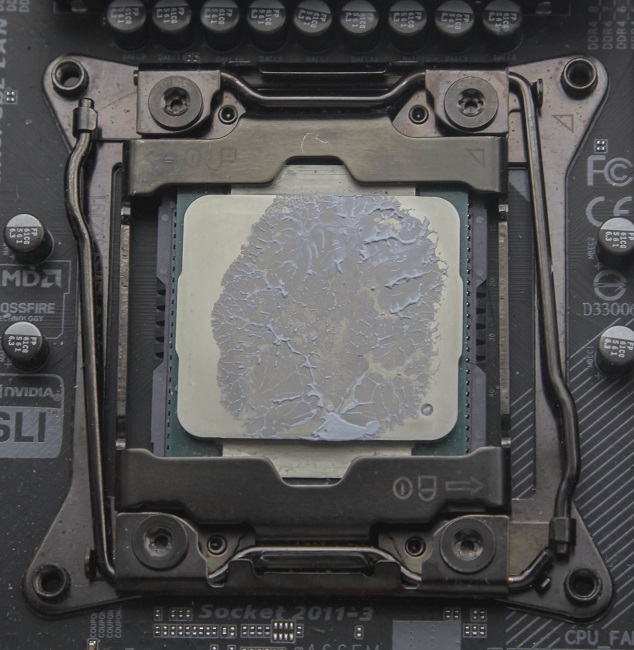

The default TIM spread was fairly good on LGA 115x, but could be better on the larger LGA 2011-3 socket. This is where the VARIO feature comes in. Use the provided Allen wrench on the four points such that you go inwards all the way and slowly move outwards. Have the loop completed already before doing so, and have the CPU be stressed so that you can monitor the CPU temperature as well. The goal is to basically find the spot where you have the lowest temperature (keeping all other conditions the same), and these are small changes overall, so you would find the optimal settings for each point with one full revolution in either direction.
No complaints as far as installation goes, and the L-shaped wrench coupled with the VARIO points being on the sloped sides means you can access them in nearly all situations. If you are going to use this in a crowded mITX case, I recommend doing the VARIO optimizations outside the case.
May 1st, 2024 11:54 EDT
change timezone
Latest GPU Drivers
New Forum Posts
- need help with power limiting my i7-8750h (4)
- Current Sales, Bundles, Giveaways (10213)
- Old high quality PSU, or semi-old mid-quality PSU? (20)
- EK seems to be having major issues (74)
- New High Performance, x86 Compatible Microprocessors from Centaur / VIA (148)
- Alphacool CORE 1 CPU block - bulging with danger of splitting? (55)
- What phone you use as your daily driver? And, a discussion of them. (1501)
- PC Game Retro Reviews (27)
- What's an inexpensive AIO product line with a strong pump and low price? (95)
- Only EDP Other in Core? (4)
Popular Reviews
- Ugreen NASync DXP4800 Plus Review
- Team Group T-Force Vulcan ECO DDR5-6000 32 GB CL38 Review
- HYTE THICC Q60 240 mm AIO Review
- Upcoming Hardware Launches 2023 (Updated Feb 2024)
- MOONDROP x Crinacle DUSK In-Ear Monitors Review - The Last 5%
- Montech Sky Two GX Review
- Thermalright Phantom Spirit 120 EVO Review
- AMD Ryzen 7 7800X3D Review - The Best Gaming CPU
- ASUS Radeon RX 7900 GRE TUF OC Review
- FiiO K19 Desktop DAC/Headphone Amplifier Review
Controversial News Posts
- Intel Statement on Stability Issues: "Motherboard Makers to Blame" (210)
- Windows 11 Now Officially Adware as Microsoft Embeds Ads in the Start Menu (157)
- Sony PlayStation 5 Pro Specifications Confirmed, Console Arrives Before Holidays (117)
- AMD's RDNA 4 GPUs Could Stick with 18 Gbps GDDR6 Memory (109)
- NVIDIA Points Intel Raptor Lake CPU Users to Get Help from Intel Amid System Instability Issues (106)
- AMD "Strix Halo" Zen 5 Mobile Processor Pictured: Chiplet-based, Uses 256-bit LPDDR5X (103)
- US Government Wants Nuclear Plants to Offload AI Data Center Expansion (98)
- TechPowerUp Hiring: Reviewers Wanted for Motherboards, Laptops, Gaming Handhelds and Prebuilt Desktops (90)