 49
ASUS ROG Crosshair X870E Extreme Review
Component Analysis »Board Layout


You'll need a strong arm to lift the ASUS ROG Crosshair X870E Extreme due to the sheer amount of aluminium that makes up the heatsinks for the power delivery and M.2 cooling, besides the full-cover backplate that provides board protection and additional cooling of the VRMs from the rear. Immediately obvious is the fact that the lower M.2 heatsink will require removal of your graphics card to get at the two M.2 ports here, meaning the DIMM.2 module could be very useful if you have more than one M.2 SSD. Still, it's a fabulous looking motherboard and one that visually and physically feels like it's worth its asking price.


There is a degree of lane sharing due to the nature of the X870E platform, but thankfully it won't impact you unless you intend on filling most of the PCIe and M.2 ports. There are eight CPU PCIe Gen 5 lanes via a multiplexer that are split between the primary PCIe Gen 5 x16 slot (which already has eight of its own), secondary PCIe Gen 5 x16 slot plus the second and third M.2 ports. As a result, using the third M.2 port will drop the primary PCIe Gen 5 x16 slot down to x8, the secondary PCIe Gen 5 x16 slot to x4 and the second M.2 port will be disabled. So probably best to avoid that third port. If you're happy using PCIe Gen 4 SSDs for the rest of your drives, the DIMM.2 module avoids this, as well as making your SSDs much easier to get at.

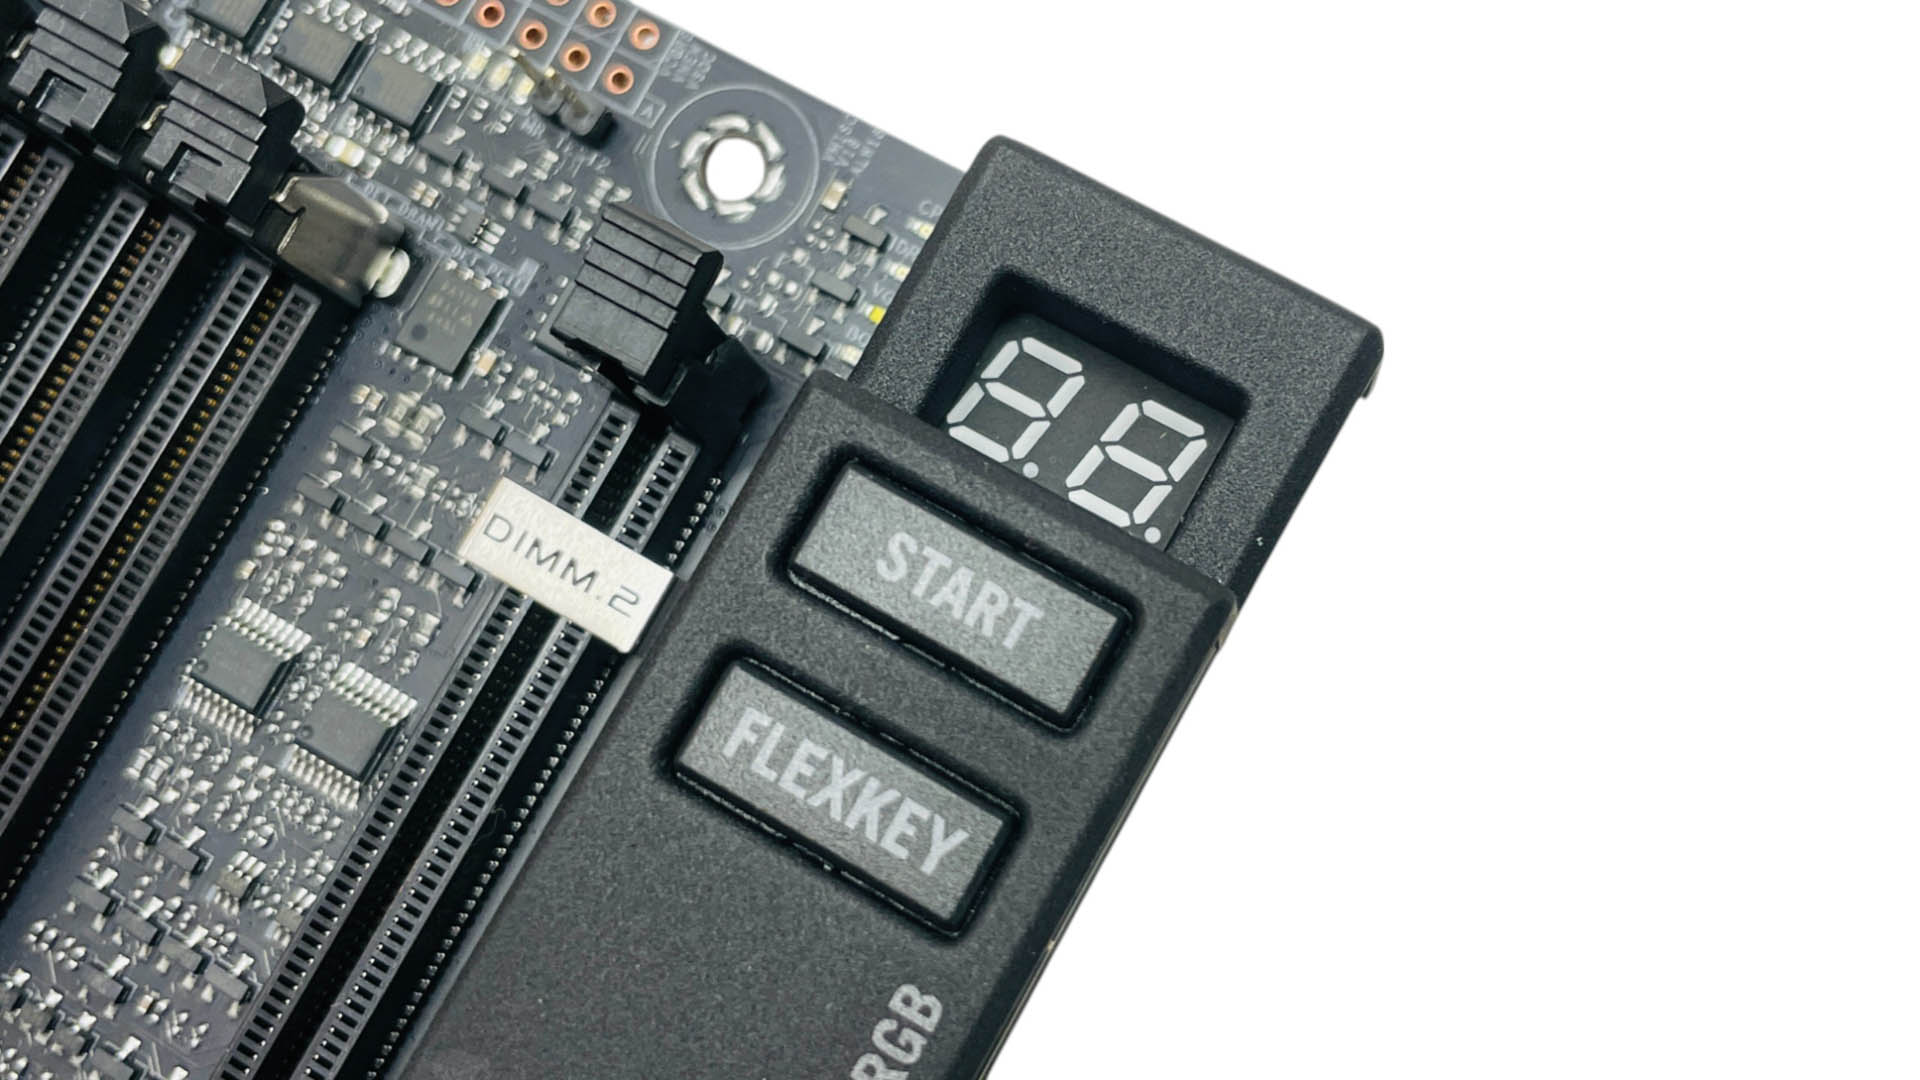
The ASUS ROG Crosshair X870E Extreme is just as much an extreme overclocking board as it is a daily driver, but definitely leans more towards the latter than other overclocking-focussed boards we've seen. Starting in the top right corner, and we have three of the eight 4-pin fan headers and Probelt voltage measuring points as well as an LED POST code display and power and reset buttons. The latter is actually labelled Flexkey, which is essentially a configurable button with a default assignment of reset, but can be set to other options in the EFI, such as turning the RGB lighting on and off.
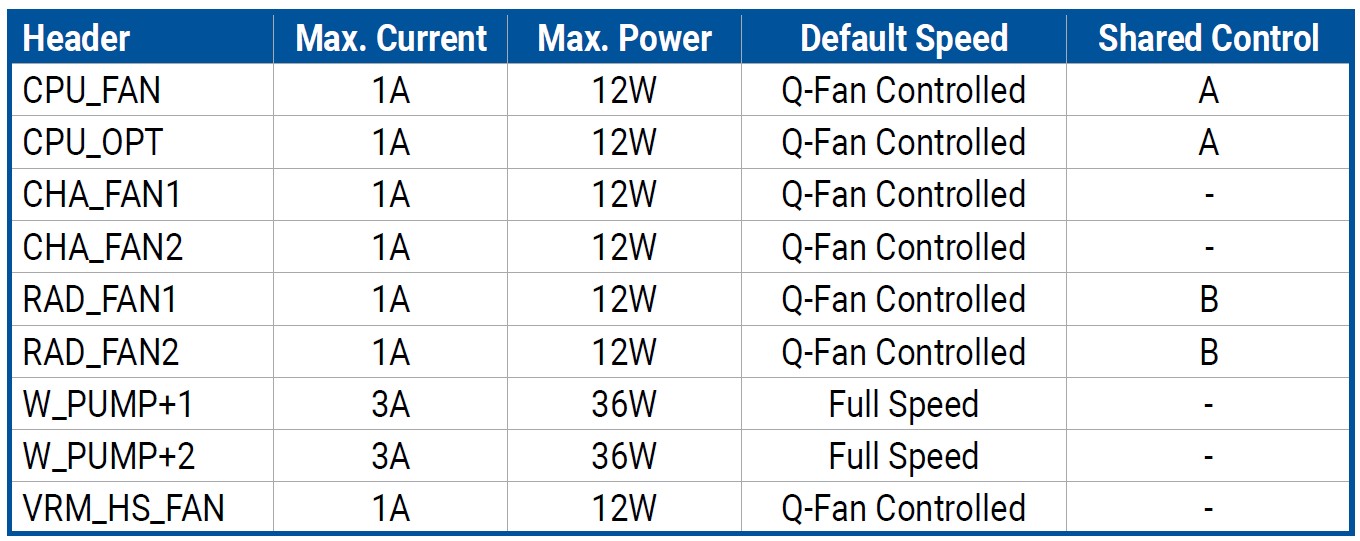
All fan headers except the two water pump headers have a maximum 1 A/12 W output, with those pump headers having a generous 3 A/36 W output each, ideal for hooking up the pair of 4-way splitter cables or watercooling pumps. There is a ninth header for the bundled VRM fan, but this uses a micro connector specific to that fan.

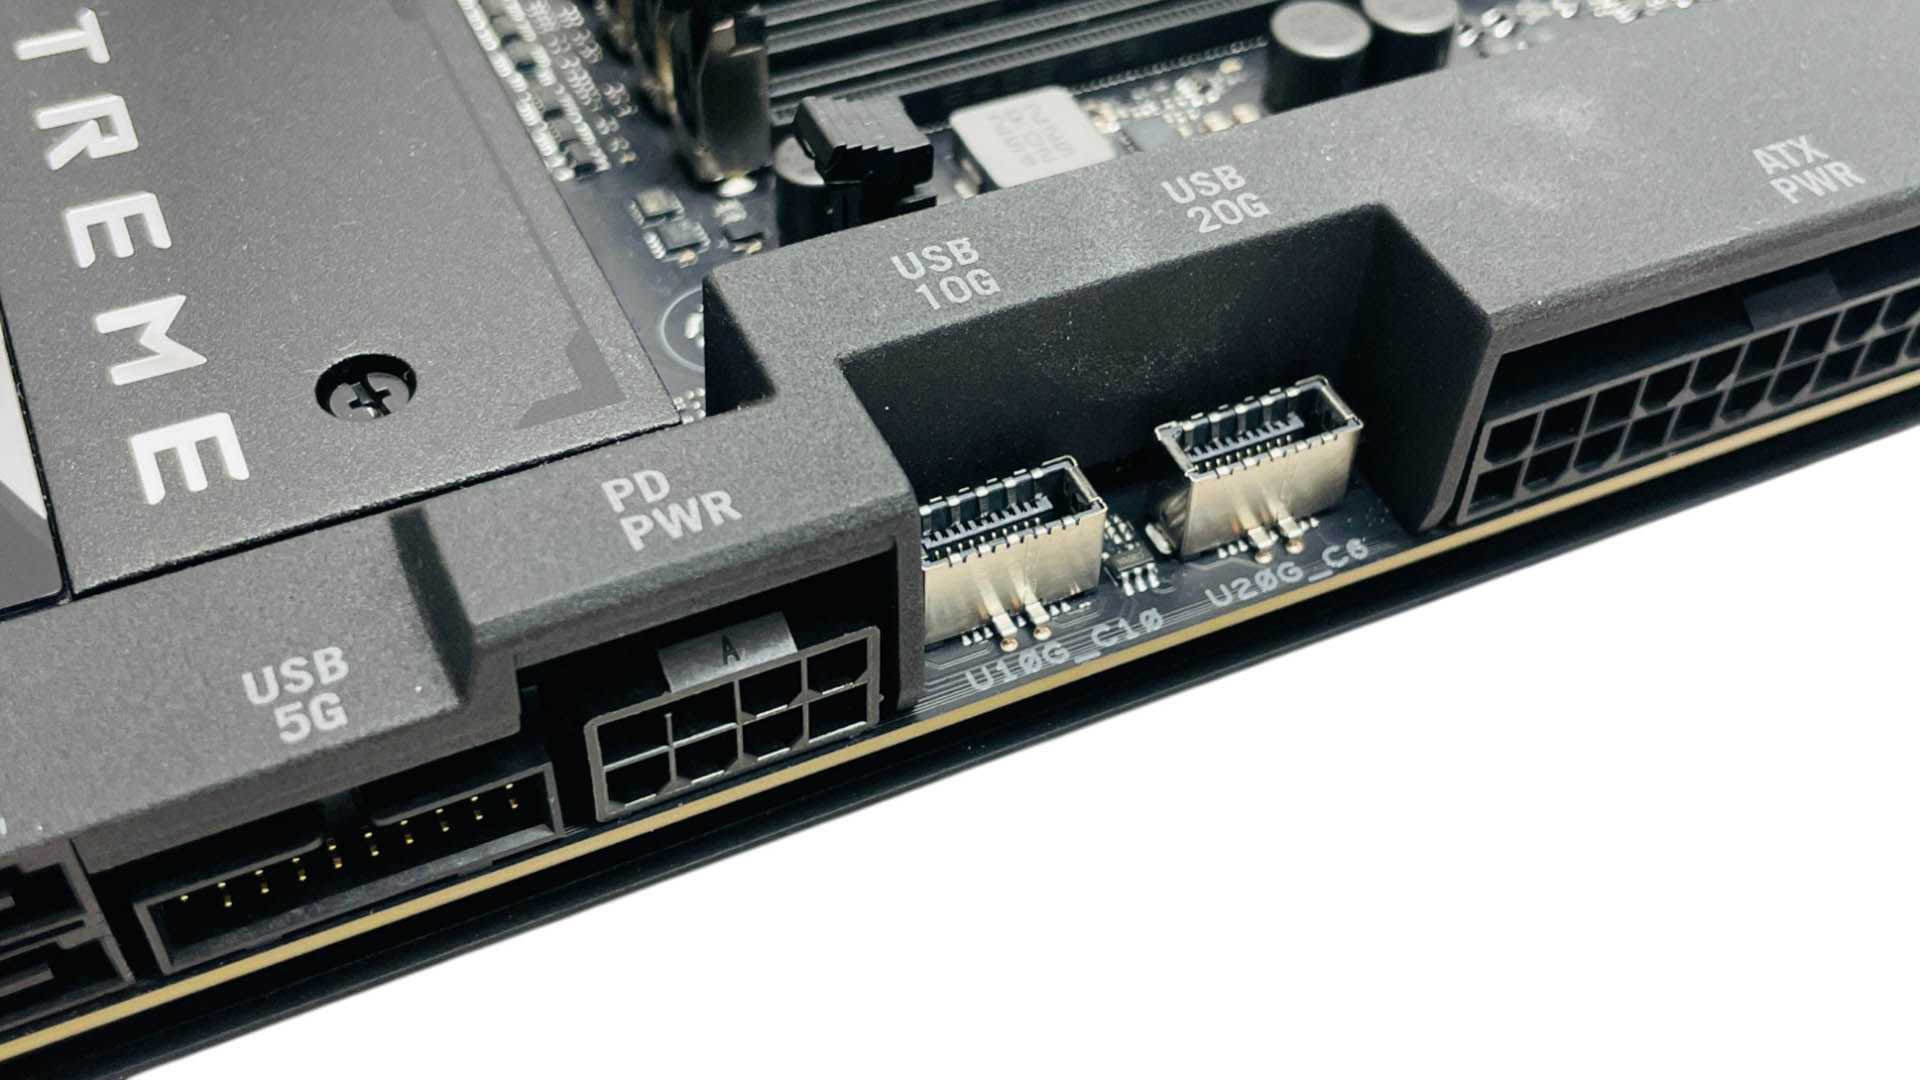
Top-down you'd be forgiven for wondering where a lot of the ports are, but that's because they're angled and hidden under the various shrouds on the PCB. At the top right we have one of the high wattage pump/fan headers and a chassis fan header as well as two 3-pin ARGB connectors. These lack the usual pinout of 3-pin ARGB connectors, though, so can only be used with the 2-way splitter cable that has a 6-pin connector at one end and two standard 3-pin ARGB connectors at the other. There are both USB 3.2 Gen 2 10 Gbps and USB 3.2 Gen 2x2 front panel type C headers, and the latter also offers up to 60 W power delivery and Quick Charge 4+ support, so long as you hook up an 8-pin PCIe connector to the port next to them. Otherwise, you're limited to 27 W.
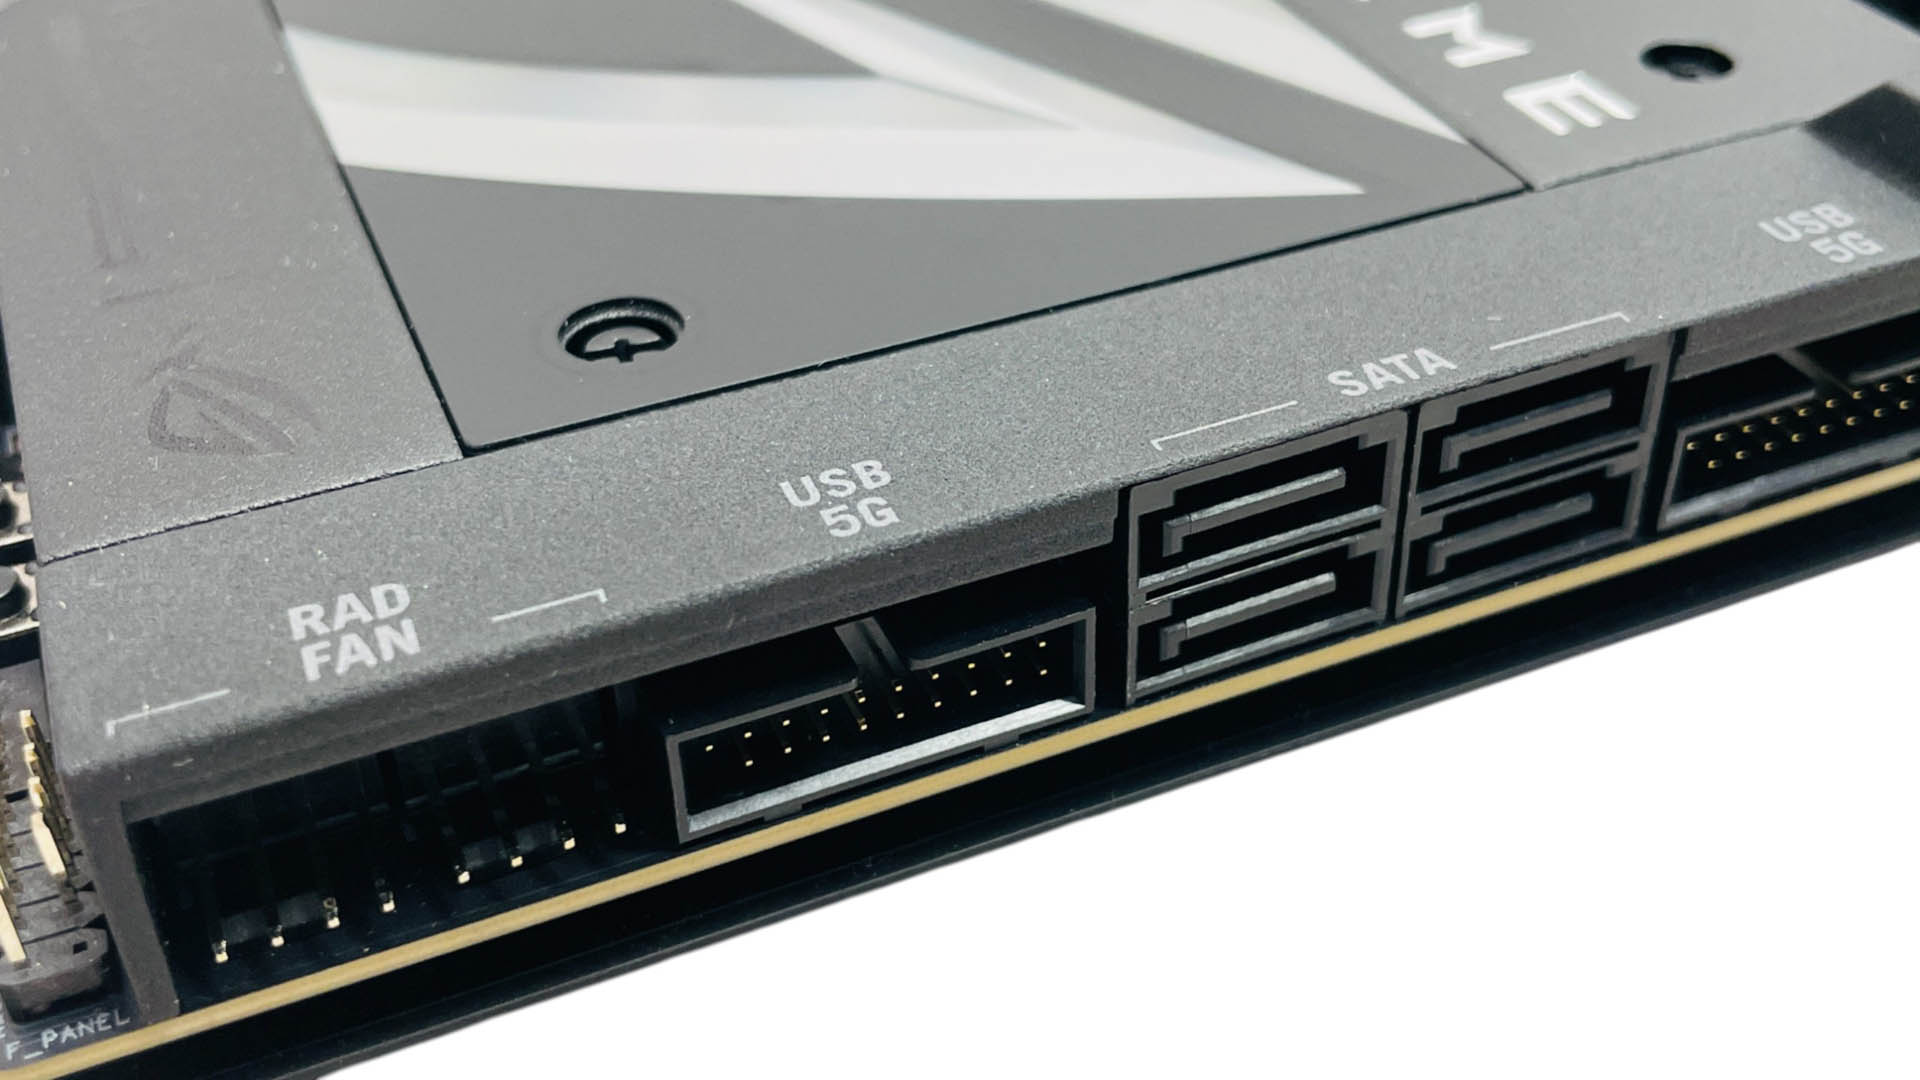

Besides five M.2 ports, you also get four SATA ports and SlimSAS makes a return too via its port at the base of the PCB, which supports PCIe Gen 4 x4. This useful port offers a variety of expansion options, enterprise grade drives, or even adding up to eight SATA ports with optional cables. This is also where the second watercooling pump header is, as well as safe boot and overclocking retry buttons.

The bottom left corner is bristling with headers and switches that extend the extreme overclocking credentials, featuring a dual BIOS switch, slow mode, PCIe slot switch and base clock plus and minus adjustment buttons. We also have an LN2 mode jumper and 2-pin thermistor probe header.

Heading inwards from the right edge of the PCB, we have the DIMM.2 port next to the memory slots. It's a shame this isn't PCIe Gen 5 compatible yet as the heatsink style and the fact that it's prominently protruding into your case's airflow would likely mean it deals very well with power-hungry PCIe Gen 5 SSDs. As it's the other side of the memory slots it likely won't interfere with anything else such as CPU coolers, although it does stand a good 10-15 mm or so higher than tall memory modules such as Corsair's Vengeance DDR5 DIMMs.

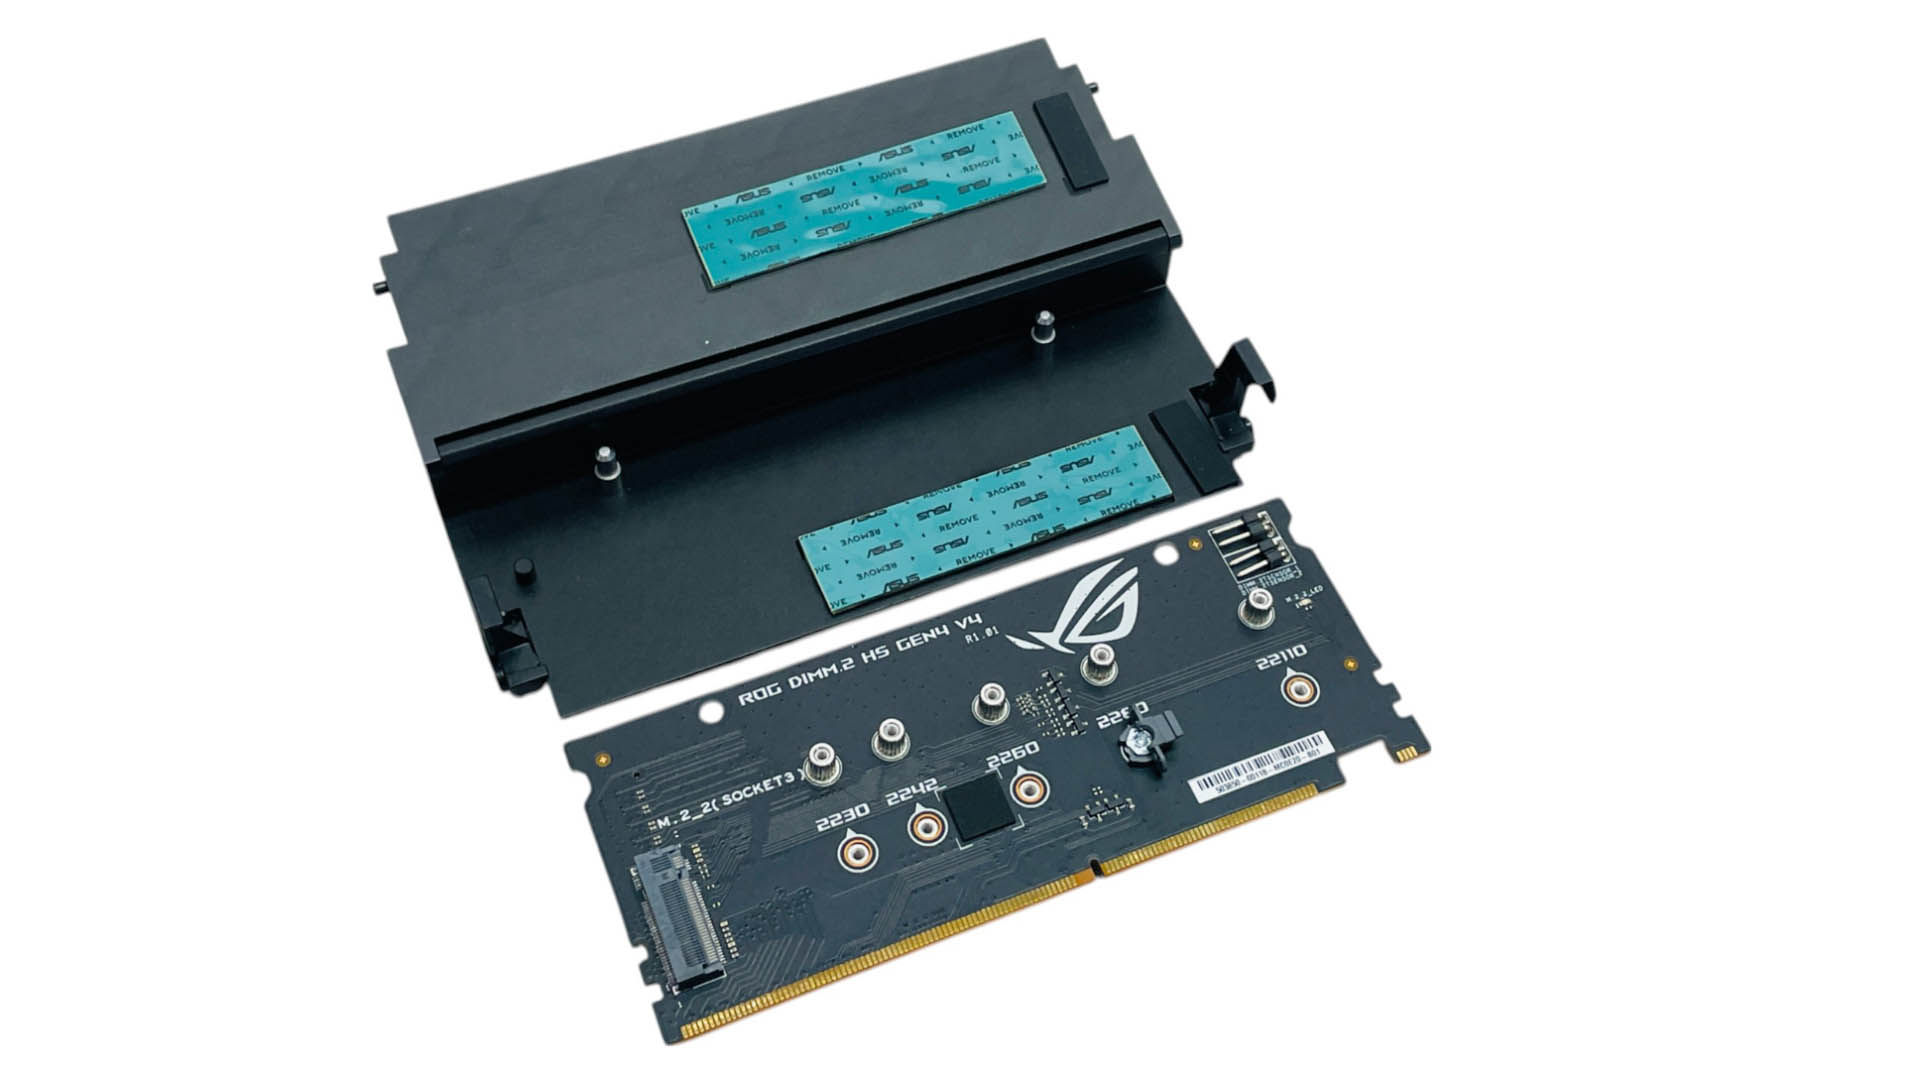
The two PCIe Gen 4 M.2 ports sit either side of the internal PCB and support a range of M.2 form factors. Only the top side of the SSD is cooled and like the other ports, you'll need to make sure you use the right combination of underside supports to ensure good contact with the thermal pad on the top side. No screws are needed here as both ports are tool-free, your SSD installs in seconds.
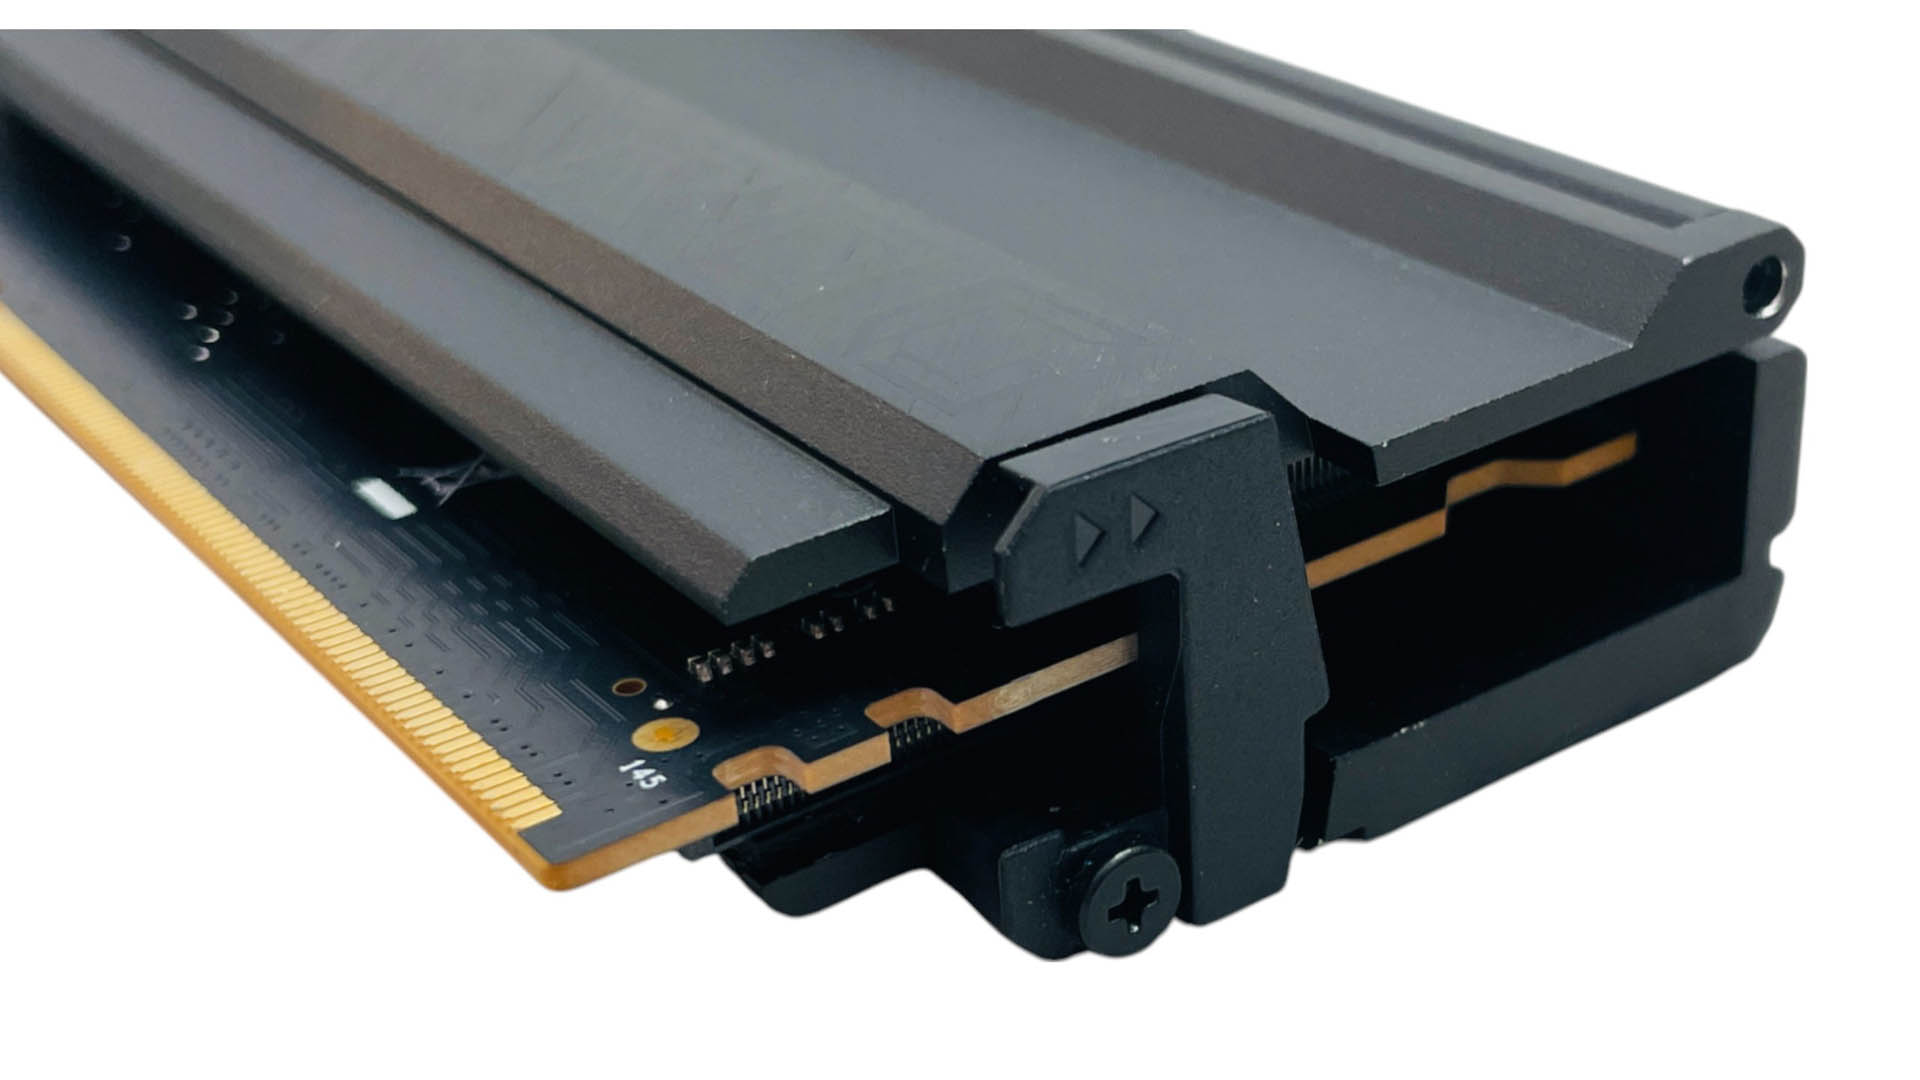
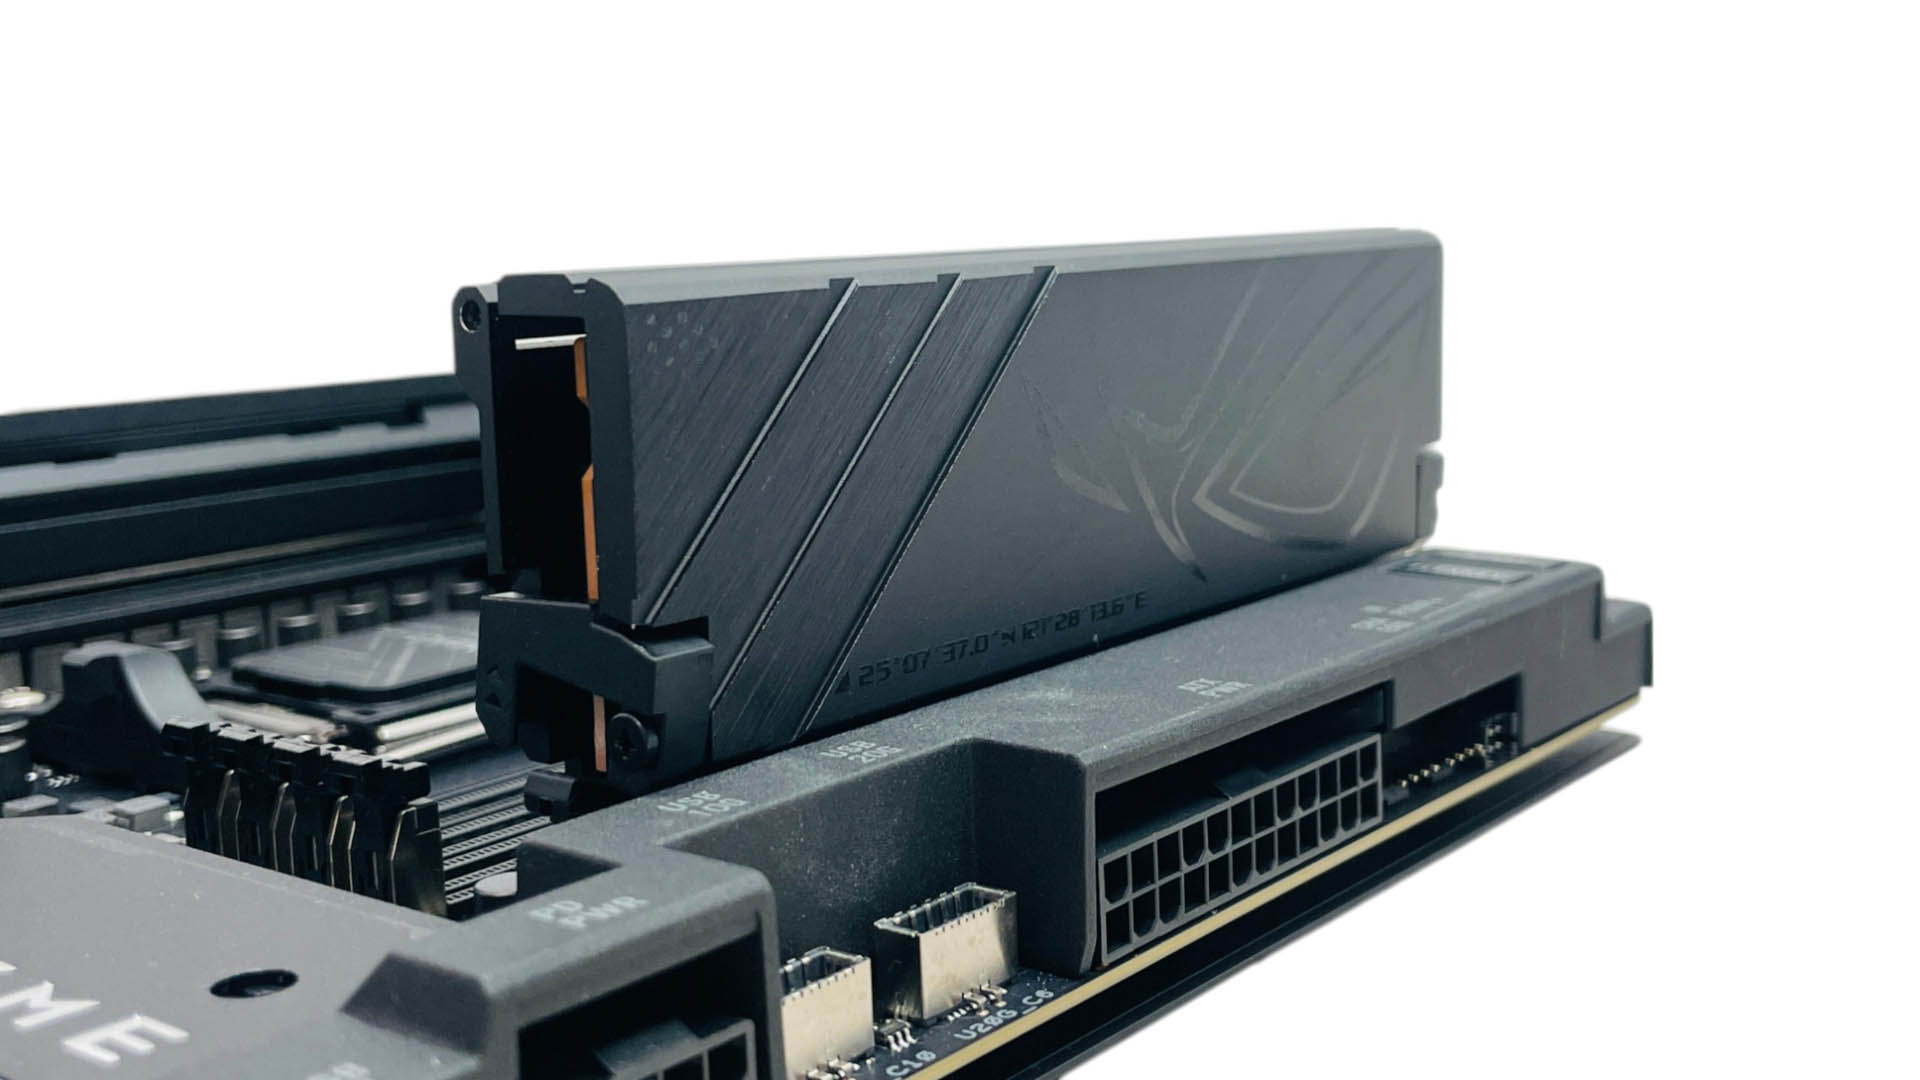
The DIMM.2 module is far easier to deal with than older versions as it's not just the ports that are tool-free but the heatsink too. There are two sides as usual, but they lock into place using latches rather than using screws. It's good to see these improvements to a useful accessory.
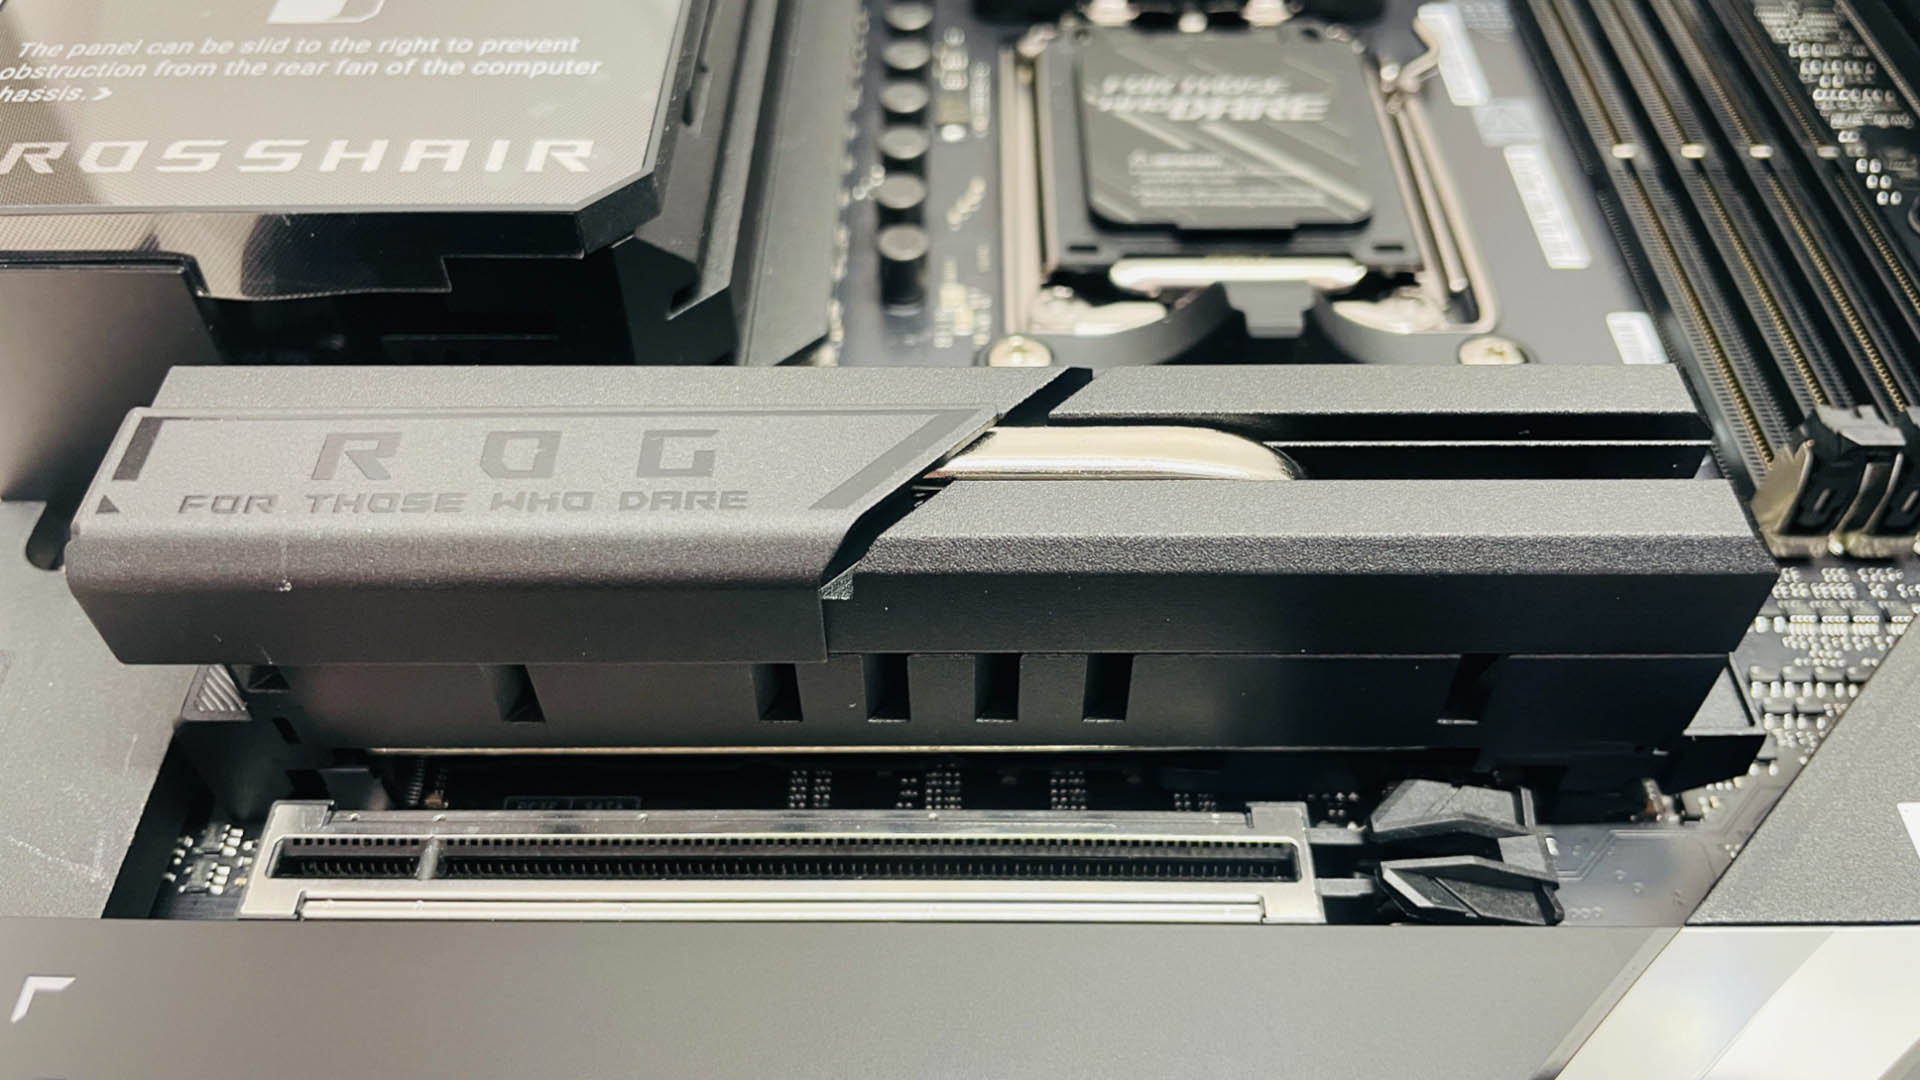
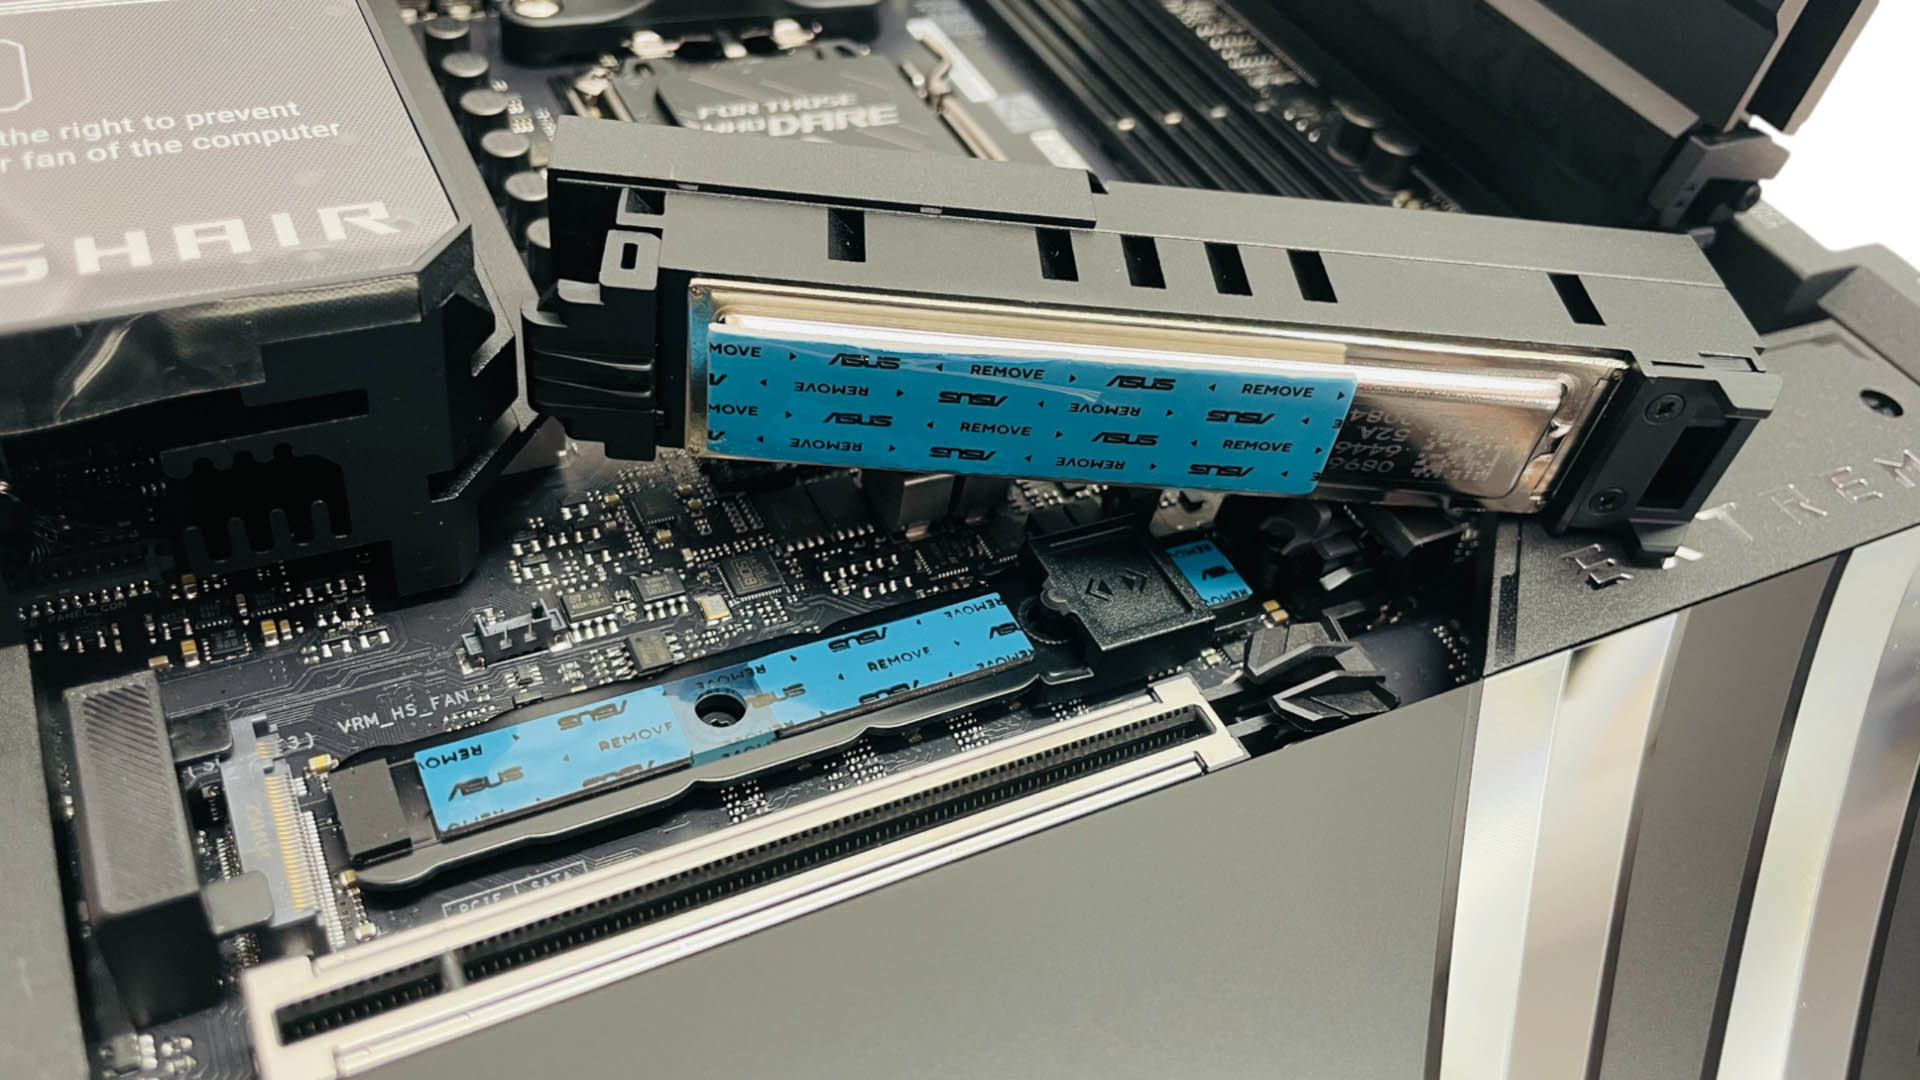
The primary M.2 heatsink is one of the largest we've seen and even includes a heatpipe. Thankfully, it's also fully tool-free with a large clip at one end that releases and locks with a firm push. The SSD is cooled on both sides by a heatsink underneath too, although if your SSD is single-sided you'll need to use one of the rubber supports to ensure decent thermal contact. This saw the temperature drop by nearly 10°C during our SSD stress test.

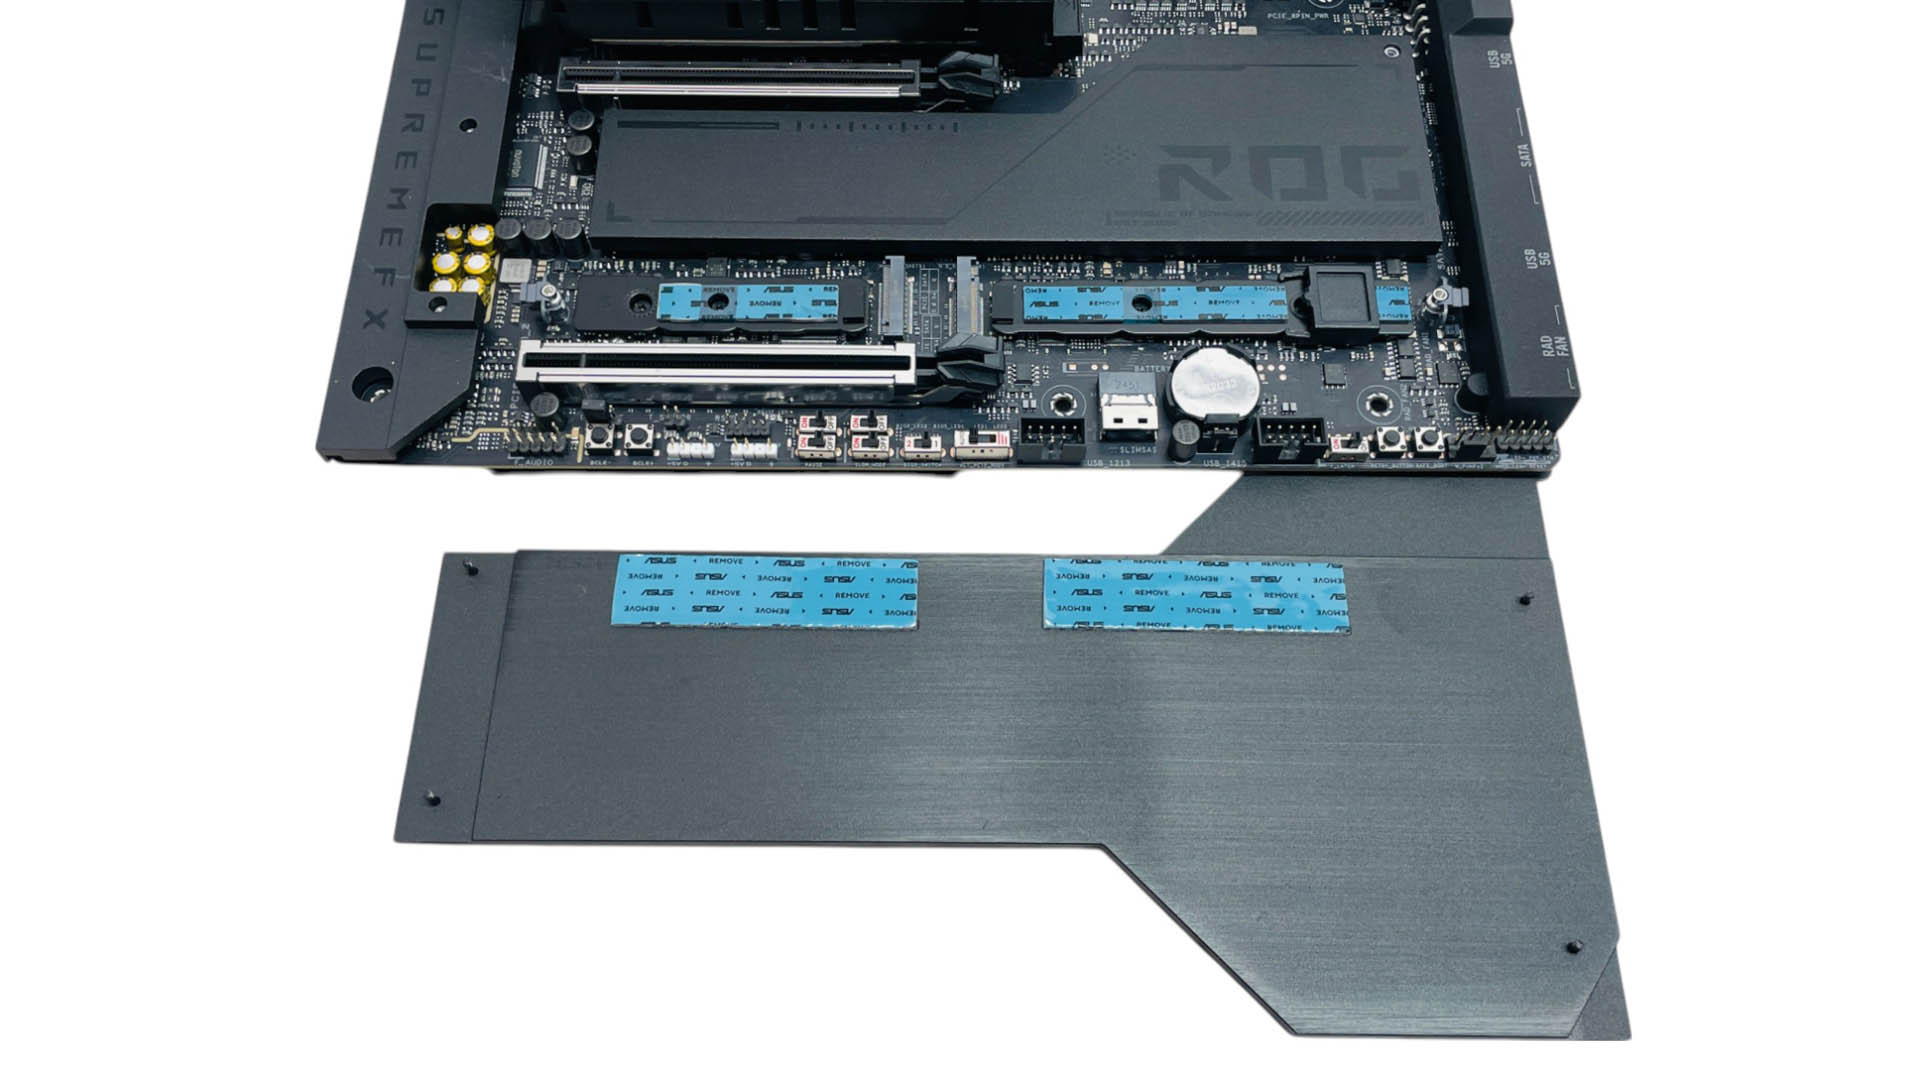
One issue we spotted is with the enormous lower heatsink which covers one of the motherboard mounting holes, meaning you'll need to remove it first. Considering it's dealing with just two M.2 slots, it does seem excessively large, but they are both PCIe 5 compatible so could potentially emit a lot of heat. They're both cooled on the underside too, but again, make sure you use the rubber supports provided if your SSD is single-sided so it makes decent contact with the thermal pad above. Sadly, this heatsink is not tool-free and there are four screws to deal with - a bit of a kick in the teeth at $1,000 given plenty of boards costing a lot less have tool-free heatsinks here. We shouldn't be dealing with anything fiddly at this price.
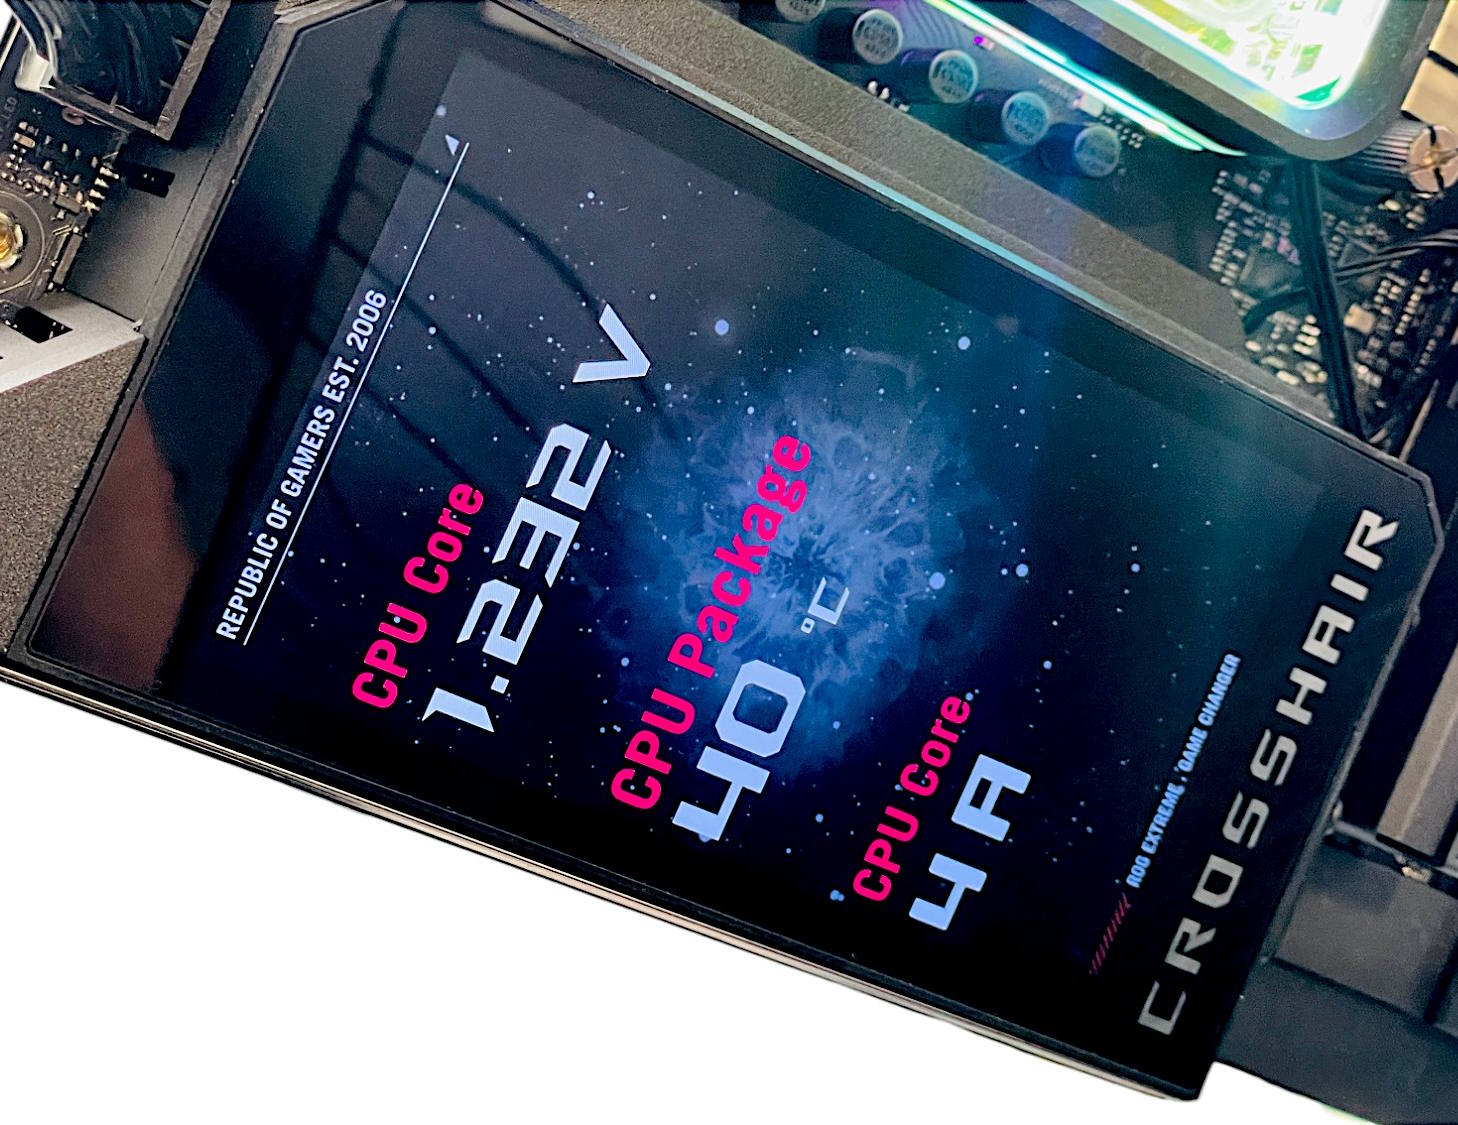

The 5-inch full color LCD is lavish and looks stunning, but does mean the VRM heatsink below isn't ideally placed for accessing your case's airflow. Still, you expect some aesthetic prowess at this kind of price. The screen offers the choice of displaying a variety of graphics that are configurable in Armoury Crate, various hardware monitor displays that can be configured with different readouts, or your own image. The screen itself can slide away from the I/O panel too, giving more clearance from rear fans or other visual obstructions.

Thankfully we have few complaints about the rear I/O panel, which boasts eight USB 3.2 Gen 2 10 Gbps Type-A ports, a pair of USB 3.2 Gen 2 10 Gbps Type-C ports and a pair of USB4 40 Gbps Type-C ports. It is curious ASUS has opted for standard USB4 ports here rather than the more versatile/higher bandwidth Thunderbolt 4 or 5, but this won't affect most users. This is also where you'll find the CMOS Clear and USB BIOS Flashback buttons. As you'd expect on a board at this price, you also get native 10 Gbps as well as 5 Gbps Ethernet, alongside Wi-Fi 7.
Nov 22nd, 2026 04:33 PST
change timezone
Latest GPU Drivers
New Forum Posts
- Honestly, do you care about GTA VI? (244)
- Gigabyte AORUS RTX 5080 MASTER – Up to 30°C GPU Hotspot Delta! Is This Normal, a Cooling Defect, or Should I RMA? (1)
- UPS what one to get? (31)
- The TPU UK Clubhouse (27289)
- Your PC ATM (36449)
- TPU's Nostalgic Hardware Club (22194)
- Zen 3 IF/IMC degradation (244)
- Local LLM General Discussion (696)
- How to prevent OLED burn damage due to PC freezes or power outtages? (54)
- Ryzen or Intel system (17)
Popular Reviews
- Microsoft Surface Laptop Ultra Review - The Next-gen Arm Laptop
- Corsair RM1200e (Second Generation) Review
- Pulsar Office Tour & First Look at P1 Dual-Sensor Mouse
- Upcoming Hardware Launches 2027 (Updated Nov 2026)
- Ugreen NASync DXP4800 GT Review
- AMD Ryzen 7 9800X3D Review - The Best Gaming Processor
- Biwin Black Opal NV7400 2 TB Review
- AMD Zen 6 Technical Deep Dive
- Phantom Blade Zero Performance Benchmark Review - 35 GPUs Tested
- AMD Ryzen 7 5800X3D 10th Anniversary Review
TPU on YouTube
Controversial News Posts
- NVIDIA Co-Founder and CEO Jensen Huang Officially Resigns (492)
- Report: Jensen Huang Eyes NVIDIA Comeback (262)
- Open Letter Asking NVIDIA to Reinstate Jensen Huang Passes 115,000 Signatures (184)
- OpenAI CEO Argues Home PCs Waste the World's Limited DRAM Supply (152)
- NVIDIA Launches Investigation Into Jensen Huang's Relationship With Suspected Chinese Spy (136)
- Intel "Raptor Lake Next" 16-Core and 20-Core CPUs Surface (130)
- NVIDIA GeForce RTX 50-Series Scheduled for up to $500 Price Hike This Week (89)
- Intel Razor Lake Gets a 12 P-Core bLLC Chip With No E-Cores, Per Leak (86)