 11
11
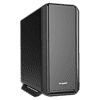
be quiet! Silent Base 802 Review - An Evolution of the 801
Temperature & Noise Testing »Test System
| System Parts for Case Reviews | |
|---|---|
| Processor: | Intel Core i5-9600K |
| Motherboards: | ATX: MSI Z390 GAMING EDGE AC MATX: Z370M GAMING EDGE AC Mini-ITX: MSI Z370I GAMING EDGE AC Provided by: MSI |
| Graphics Card: | ATX/mATX: Palit GeForce RTX 2080 Gaming Pro OC ITX: EVGA GTX 1650 SC Ultra Black 4 GB |
| Memory: | 16 GB XPG GAMMIX D30 DDR4 2666 MHz CL16-18-18 1.20 V 16 GB XPG SPECTRIX D60G DDR4 3000 MHz CL16-18-18 1.35 V Provided by: ADATA |
| HDD: | Western Digital 320 GB 7200 RPM |
| SSD: | ITX: ADATA SX6000 Pro M.2 256 GB mATX: ADATA GAMMIX S11 Pro M.2 256 GB ATX: ADATA SPECTRIX S40G M.2 256 GB ADATA XPG SX850 256 GB ADATA Ultimate SU630 240 GB ADATA Ultimate SU750 256 GB Provided by: ADATA |
| Power Supply: | Fractal Design ION+ 750W 80 Plus Platinum |
| Cooling: | be quiet! Dark Rock 4 be quiet! Dark Rock Slim be quiet! Shadow Rock LP Provided by: be quiet! |
Assembly

To install the motherboard, simply employ classic screws and spacers. There is loads of space above and to the right of the board, and be quiet! included a little gap underneath it for a unique cable-routing approach that also allows you to keep the shroud covers in place while doing so.


Adding a 2.5" drive bears no surprises, either, as you may simply remove the mounting frame of your choice and screw down the storage unit. With that done, simply put it back onto the backside of the motherboard tray.


For the 3.5" drive, each cage, whether dual or single-slot, is held in place by three small thumb screws. Once released, screw a drive down within the cage, using the rubber grommets as an anti-vibration measure. Once filled, slide the cage into its spot and secure the whole thing using the thumb screws.


Sliding the PSU into the case through the back is not only a design necessity, but means that even the biggest and longest units will find space easily. Once secured to the mounting frame, simply push your PSU in and utilize the four thumb screws to hold it in place securely as well.


After everything has been assembled, the interior looks nice and clean. The biggest visual difference between this and the windowed variant of the 802 is the lack of 3.5" bay covers, which keep things even tidier. Naturally, without an opening to see all the parts within your system, there is no real need for any.
Finished Looks


Once turned on, the be quiet! Silent Base 802 looks pretty much as it did when unboxed. You may pull off the top and front covers and throw the mesh variants on them at any time.


Looking at the front, there is obviously not much else to see with the solid panel in place, but you can catch a glimpse of the hardware within with the mesh panel for airflow is installed.


For an additional quick visual reference, the power button on top also glows white as soon as the system is up and running. In the rear, everything is where you would expect it to be in a modern ATX enclosure, though the Silent Base 802 packs a little extra bulk in general.
May 8th, 2024 16:28 EDT
change timezone
Latest GPU Drivers
New Forum Posts
- POLL: Can you see the difference past 60fps (gaming/other) (54)
- Arkane Austin and Redfall: what happened? (50)
- What's a good option for a digital touchless thermometer? (0)
- Urgent: PC wont turn on with PSU connected to MOBO (27)
- Does anyone here overclock their video cards? Is it really worth it? (70)
- Epic Games launcher's ridiculous CPU usage (30)
- not impressed - nvme vs ssd (70)
- AMD RX 7000 series GPU Owners' Club (1100)
- Your way of cooling your PC? (32)
- High c0% and system idle process (4)
Popular Reviews
- CHERRY XTRFY M64 Pro Review
- Corsair iCUE Link RX120 RGB 120 mm Fan Review
- Finalmouse UltralightX Review
- Bykski CPU-XPR-C-I CPU Water Block Review - Amazing Value!
- Upcoming Hardware Launches 2023 (Updated Feb 2024)
- Cougar Hotrod Royal Gaming Chair Review
- Meze Audio LIRIC 2nd Generation Closed-Back Headphones Review
- AMD Ryzen 7 7800X3D Review - The Best Gaming CPU
- ASRock NUC BOX-155H (Intel Core Ultra 7 155H) Review
- ASUS Radeon RX 7900 GRE TUF OC Review
Controversial News Posts
- Intel Statement on Stability Issues: "Motherboard Makers to Blame" (261)
- AMD to Redesign Ray Tracing Hardware on RDNA 4 (206)
- Windows 11 Now Officially Adware as Microsoft Embeds Ads in the Start Menu (167)
- NVIDIA to Only Launch the Flagship GeForce RTX 5090 in 2024, Rest of the Series in 2025 (142)
- Sony PlayStation 5 Pro Specifications Confirmed, Console Arrives Before Holidays (119)
- AMD's RDNA 4 GPUs Could Stick with 18 Gbps GDDR6 Memory (114)
- NVIDIA Points Intel Raptor Lake CPU Users to Get Help from Intel Amid System Instability Issues (106)
- AMD Ryzen 9 7900X3D Now at a Mouth-watering $329 (104)