 11
11
BitFenix Prodigy Review
Assembly & Finished Looks »A Closer Look - Inside
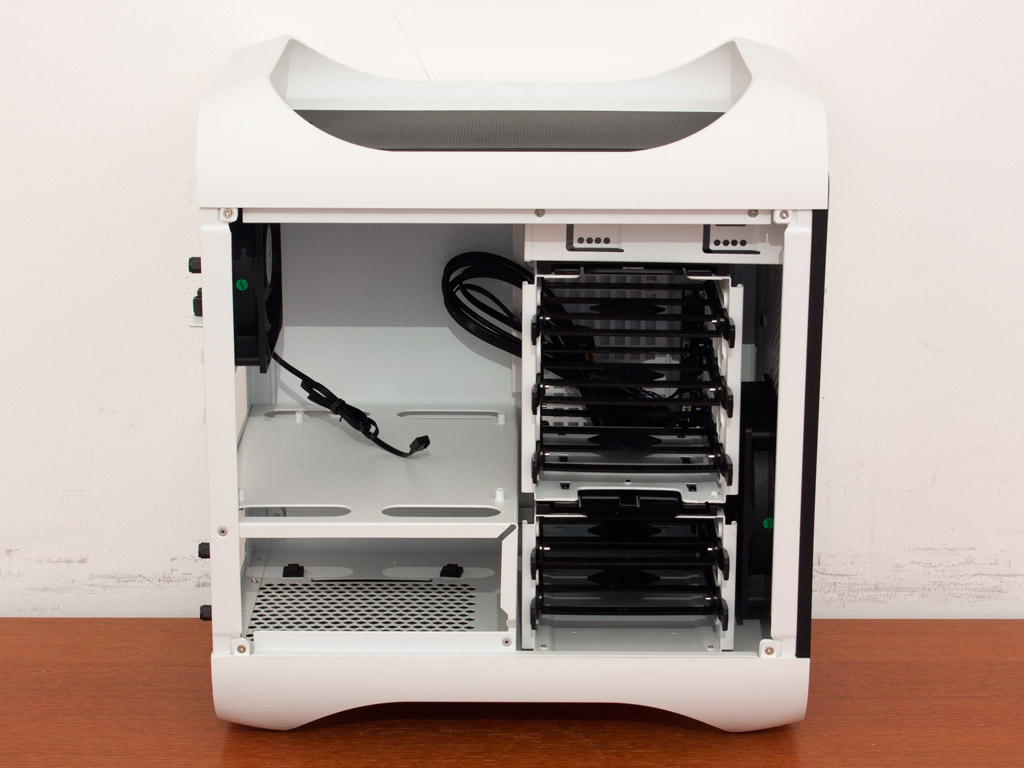


To gain access to the interior simply remove the pair of thumb screws holding each panel in place. As mentioned before, the entire interior is white to match the exterior of the Prodigy. An interesting feature presents itself when looking at the ride side panel. Invisible to the outside, due to some well placed screws are two 2.5 inch bays for hard drives.

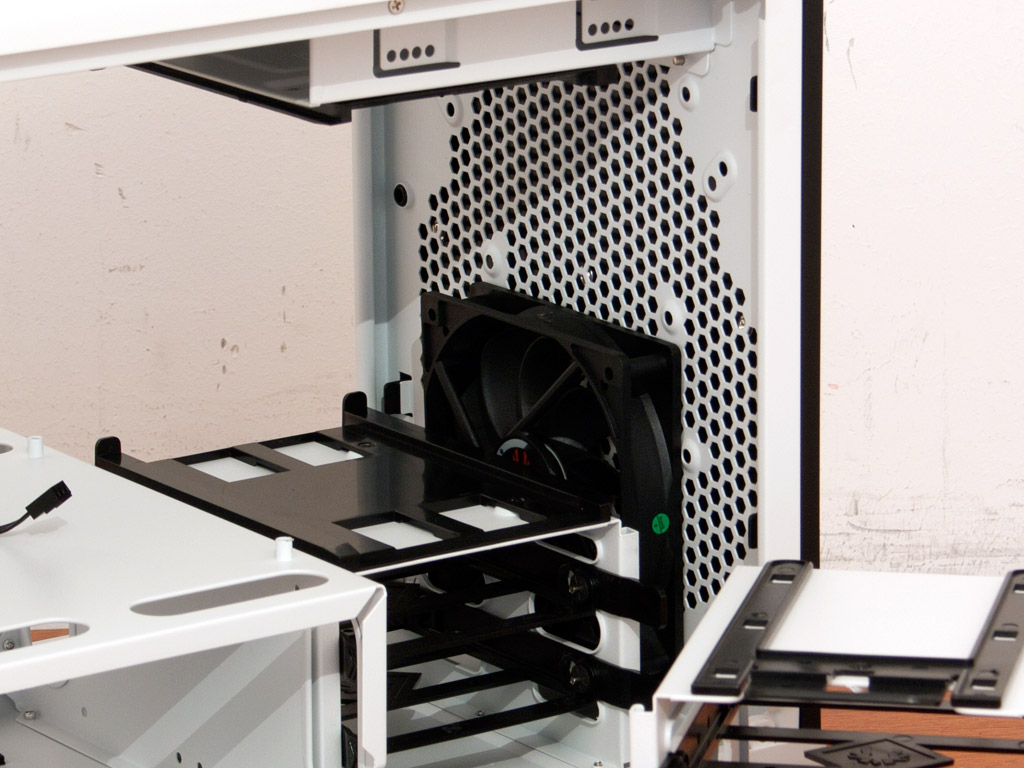

The prodigy may hold up to five 3.5" hard drives, but you may remove the top cage to reduce this to two, providing additional space for long GPUs or remove everything completely. This last step makes sense if you plan to remove the 5.25 inch bay as well and place a second fan for maximum air flow in the front of the Prodigy. Out of the box, the unit ships with a single 120 mm Spectre fan in the front, but it is good to have the flexibility to go bigger. With everything removed, you should even be able to place a 240 mm radiator in the front of the chassis for a total of 480 mm in radiators if you were to fancy such a high-end system.


On top of the drive bays shown, you may place up to three 2.5 inch hard drives in the floor and on the side of the PSU bay of the Prodigy. This is reduced to two if you choose to use the 3.5 inch bays as well, making for a total of nine hard drives that may be installed in the case. This setup results in great flexibility and is certainly of interest for those who want to have a compact and portable storage server. Realistically speaking, most users will probably go for the dual-bay cage in the floor and the remaining four 2.5 inch slots for a very good total of six bays while allowing for a long GPU to be installed as well.


The motherboard area is nothing out of the ordinary, but the horizontal placement gives you plenty of clearance for large CPU coolers with a maximum height of 175 mm. Below that is the PSU bay, which is probably the part which is most restrictive in the chassis. The compartment is good for PSUs with a length of 160 mm, but considering that most power supplies are modular nowadays, you need to reduce the length accordingly. In addition, since the openings for the cables are on either edge of the compartment, you need to consider that your cables need a turning radius as well. BitFenix is already working on an extension bracket which extends the PSU bay out the back of the chassis, giving you all the length you will need. This part should arrive shortly.

All the cables within the Prodigy are black and utilize the standard connectivity. The unique aspect is the USB 3.0 cable with an attached USB 2.0 header, so you won't need an additional adapter, regardless off what type of header your motherboard has.
May 1st, 2024 16:52 EDT
change timezone
Latest GPU Drivers
New Forum Posts
- Ejecting HDDs VS turning them offline (0)
- Alphacool CORE 1 CPU block - bulging with danger of splitting? (65)
- Need help with a persistent infection possible rootkit or other device. (3)
- Old high quality PSU, or semi-old mid-quality PSU? (32)
- Brother bought a house, found some old PC hardware.. (22)
- Aorus laptop 15p kd i7 11800h rtx 3060 (2)
- Arctic MX-6 shelf life is just a couple months? (60)
- 7900 XTX Seriously lacking (95)
- Need HELP, pic attached new build Gigabyte x670 Aorus Extreme new motherboard w new 7950x3d- power up STUCK on CPU LED RED,POST LEDS BLANK, no CODE (12)
- Looking for recommendations to upgrade the GPU (36)
Popular Reviews
- Ugreen NASync DXP4800 Plus Review
- Team Group T-Force Vulcan ECO DDR5-6000 32 GB CL38 Review
- HYTE THICC Q60 240 mm AIO Review
- Upcoming Hardware Launches 2023 (Updated Feb 2024)
- Montech Sky Two GX Review
- MOONDROP x Crinacle DUSK In-Ear Monitors Review - The Last 5%
- Thermalright Phantom Spirit 120 EVO Review
- AMD Ryzen 7 7800X3D Review - The Best Gaming CPU
- ASUS Radeon RX 7900 GRE TUF OC Review
- FiiO K19 Desktop DAC/Headphone Amplifier Review
Controversial News Posts
- Intel Statement on Stability Issues: "Motherboard Makers to Blame" (211)
- Windows 11 Now Officially Adware as Microsoft Embeds Ads in the Start Menu (157)
- Sony PlayStation 5 Pro Specifications Confirmed, Console Arrives Before Holidays (117)
- AMD's RDNA 4 GPUs Could Stick with 18 Gbps GDDR6 Memory (109)
- NVIDIA Points Intel Raptor Lake CPU Users to Get Help from Intel Amid System Instability Issues (106)
- AMD "Strix Halo" Zen 5 Mobile Processor Pictured: Chiplet-based, Uses 256-bit LPDDR5X (103)
- TechPowerUp Hiring: Reviewers Wanted for Motherboards, Laptops, Gaming Handhelds and Prebuilt Desktops (90)
- Superior Stability by GIGABYTE BETA BIOS with Intel Baseline on Z790/B760 Motherboards (86)