 20
Cooler Master Cosmos Alpha Review
Review System Setup »A Closer Look - Inside
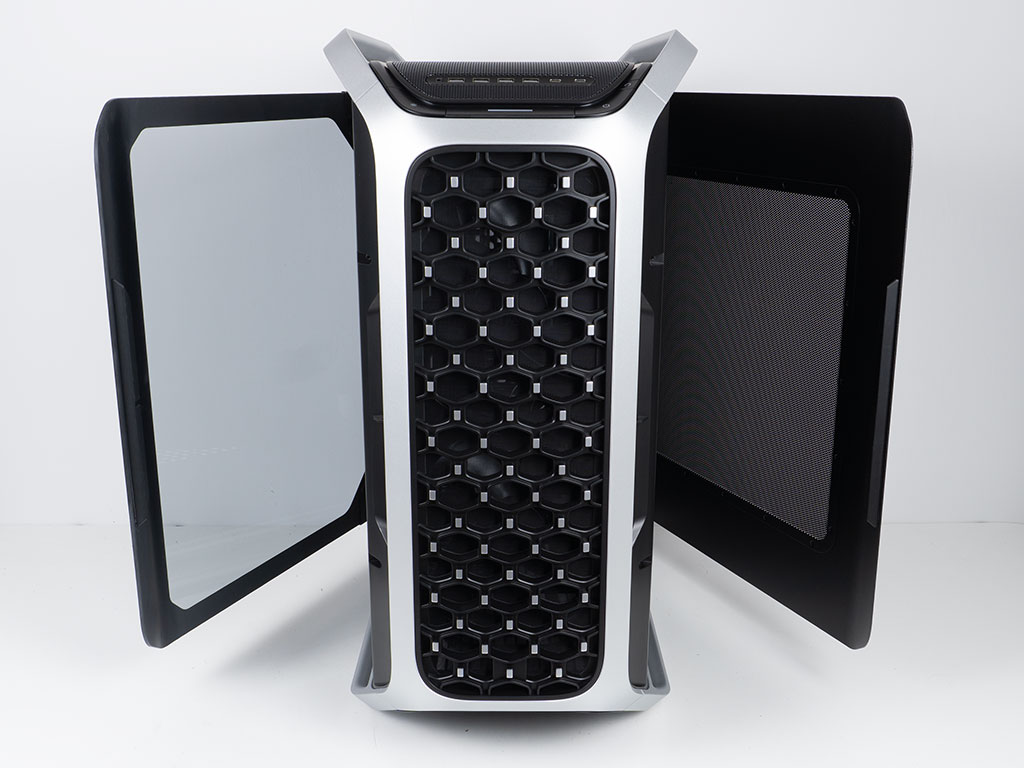
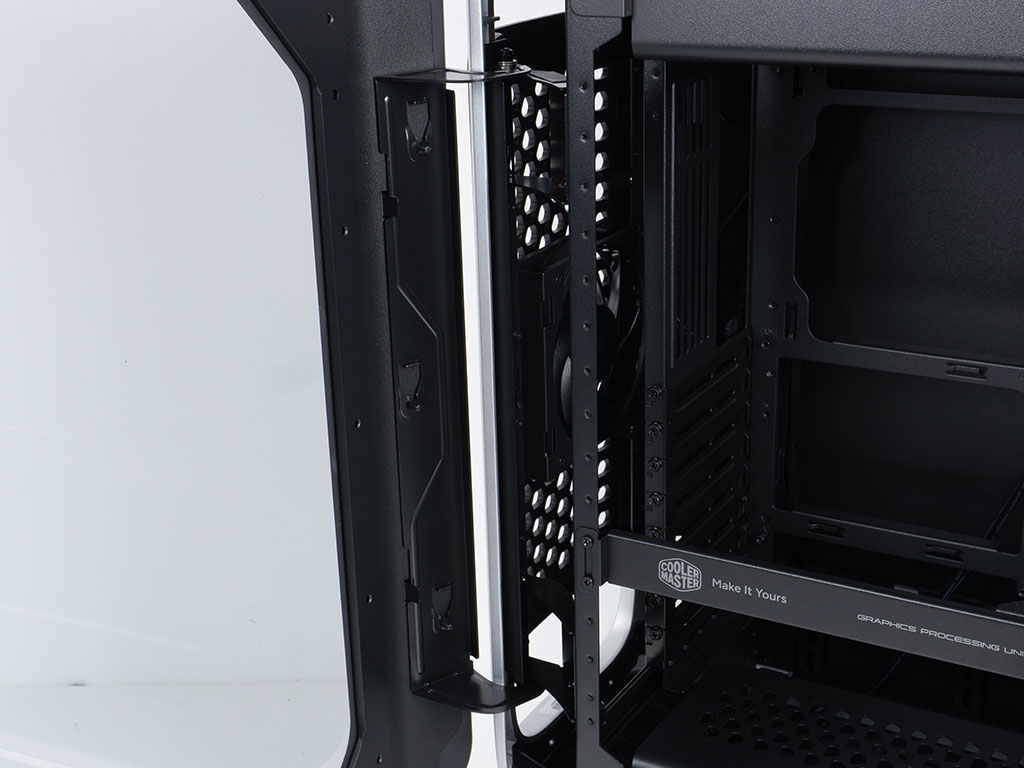
Both doors can be swung open, and the mechanics used haven't fundamentally changed from what we have seen in the previous version. You may pull both doors off the hinges, so you don't have to move with these moving parts and their weight when handling the chassis for assembly.
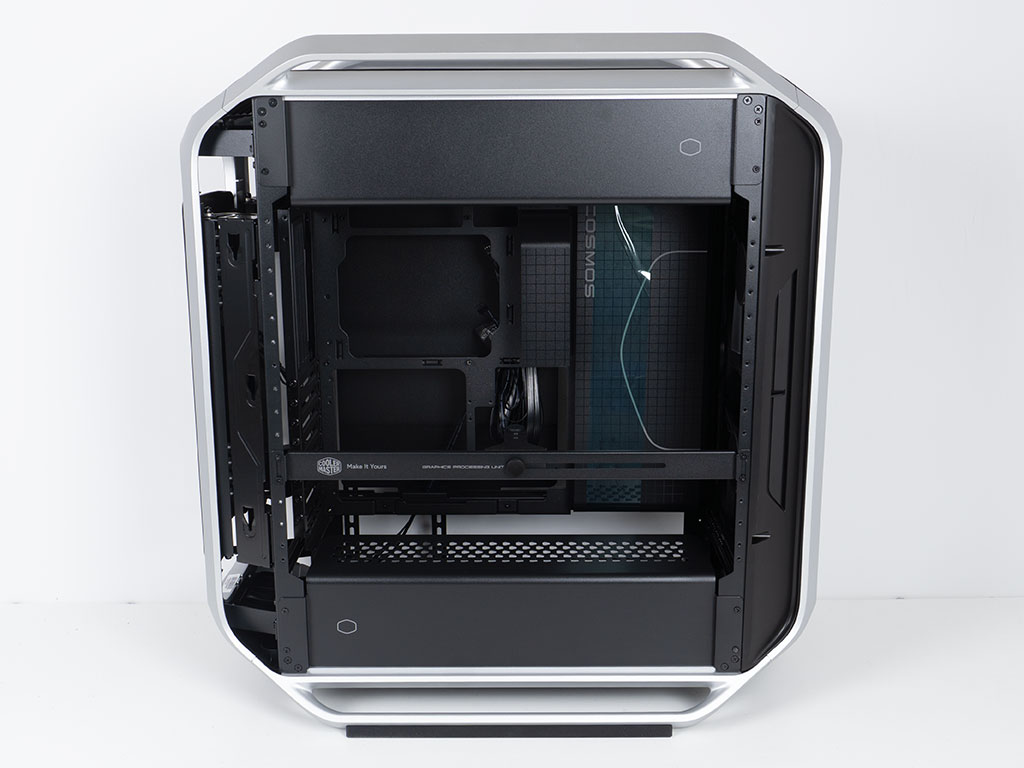
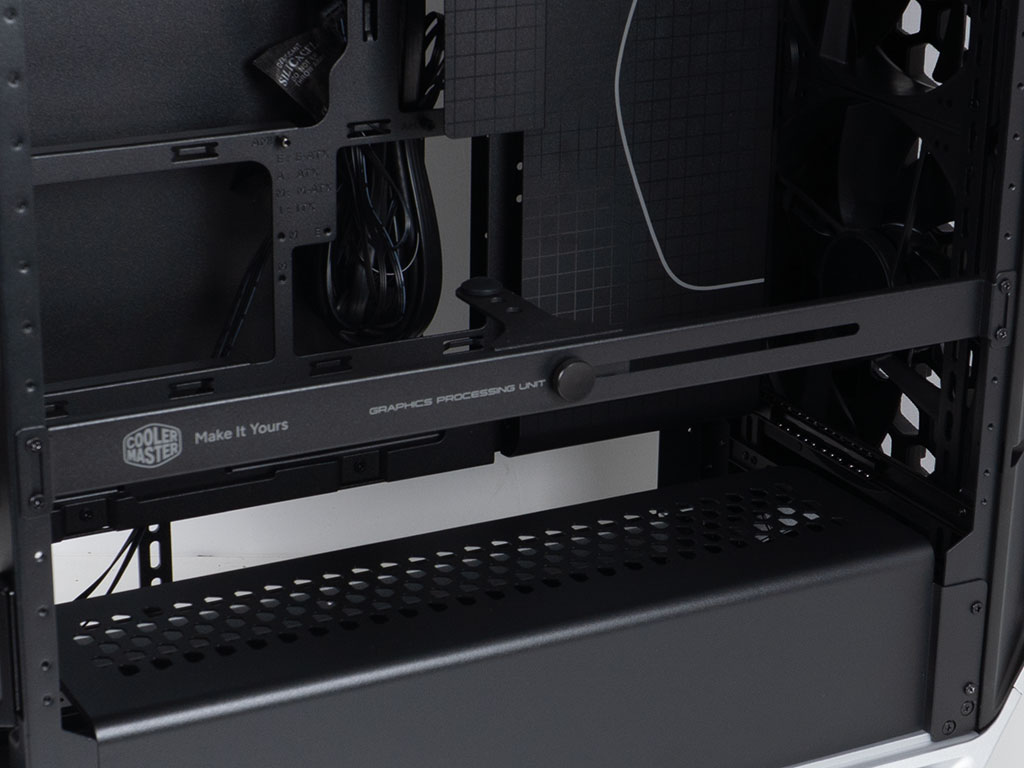
There is a lot going on inside the Cooler Master Cosmos Alpha, but the general layout revolves around a center area which holds the motherboard upright. It is flanked by removable metal shrouds at the top and bottom. These are identical, so even the little branding is inverted and thus at opposite corners. Across the front, you will find a GPU bar which you may adjust along the perforated screw holes edge of the chassis. The support beam itself can be slid along the bar to the best position so that it won't interfere with any fans of the graphics card. On top of that, the domed rubber tip minimizes the surface area that touches the GPU cover, and it may be moved between three holes. In other words, this implementation of GPU support is not only sturdy and strong but also offers flexibility, so it can accommodate pretty much every GPU design out there.
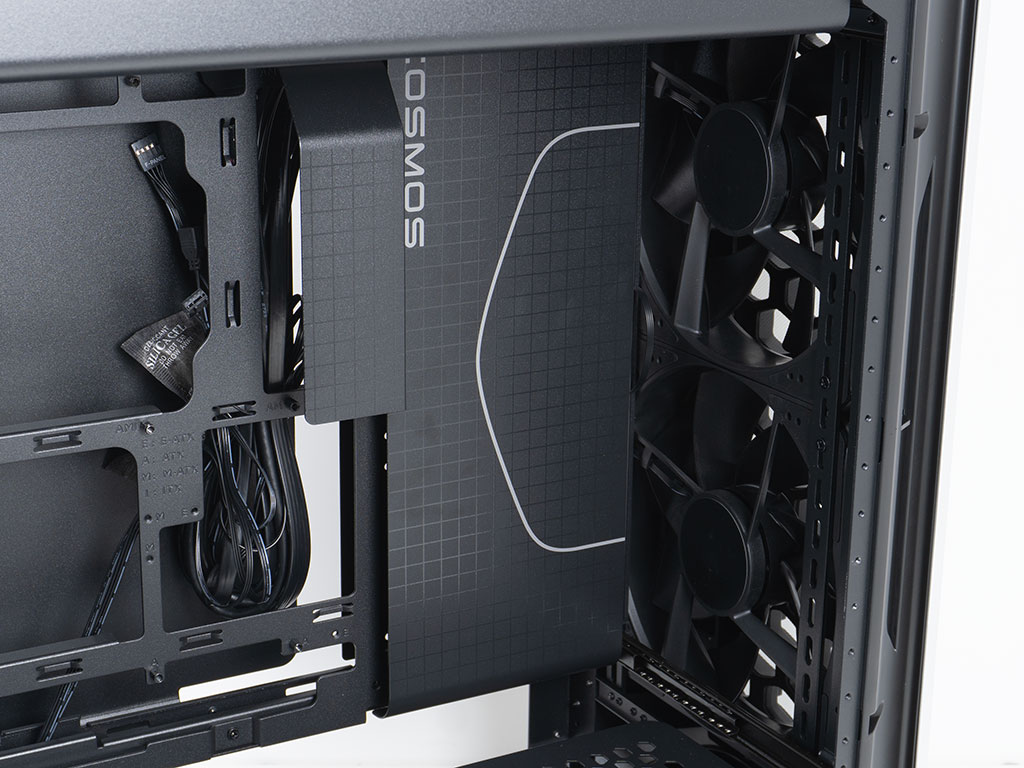
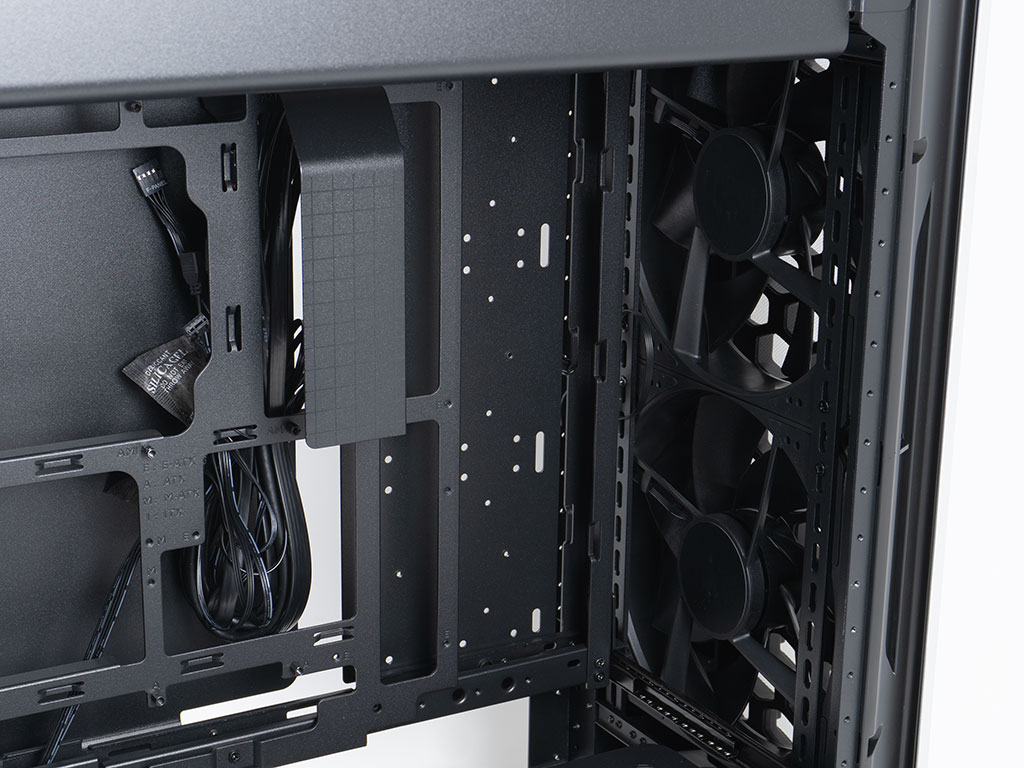
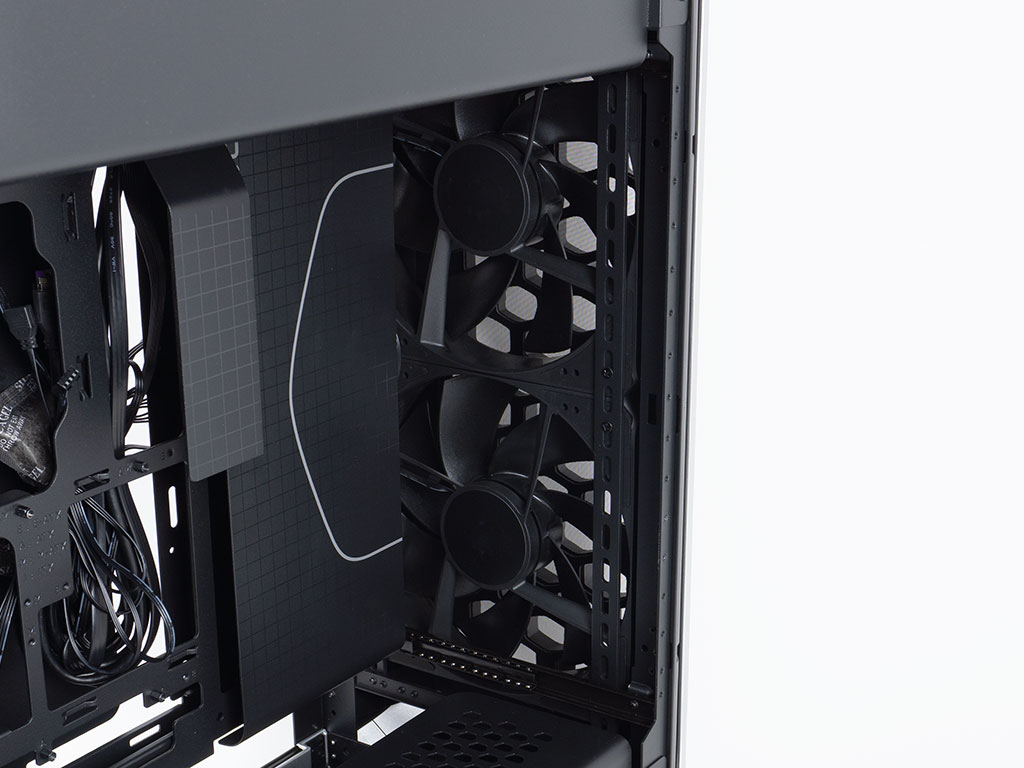
There are two separate cable covers inside the main area of the Cosmos Alpha. A smaller one, which is secured by screws, that wraps around the ATX connector area of your motherboard and a general, Cooler Master branded, cover towards the front of the case, which is situated next to your motherboard. This cover can be used for setups with E-ATX boards or below, but has to be removed when going for anything bigger than that. It can be pulled off without the need for any tools and provides access to the mounting holes on the storage plate.
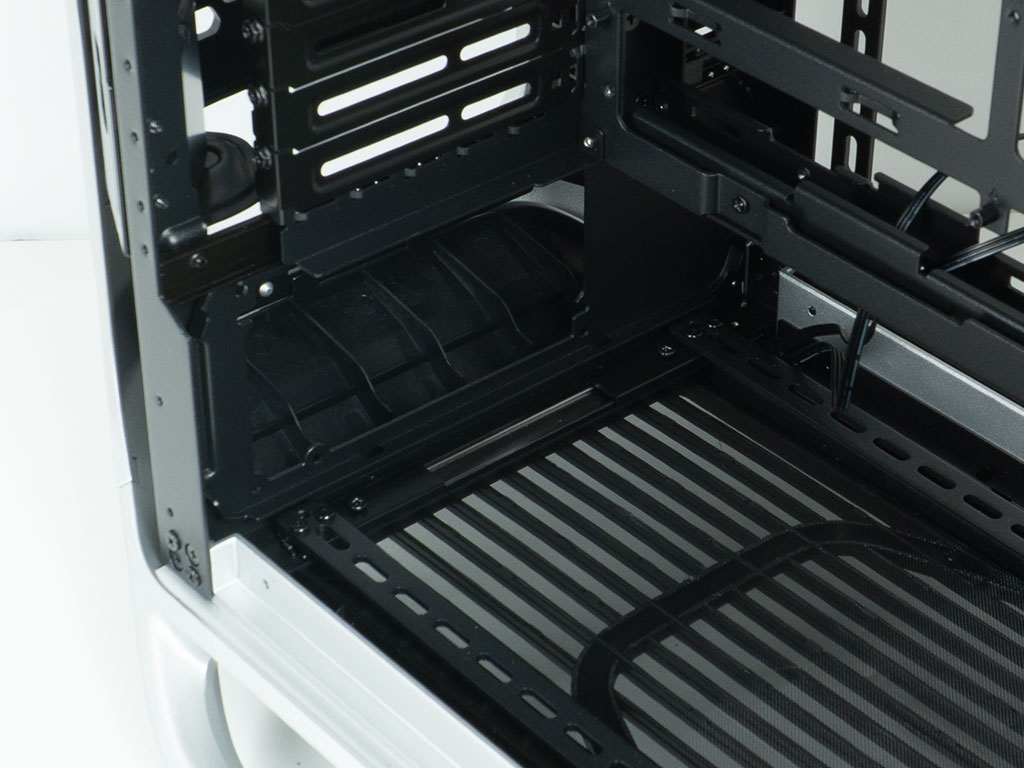
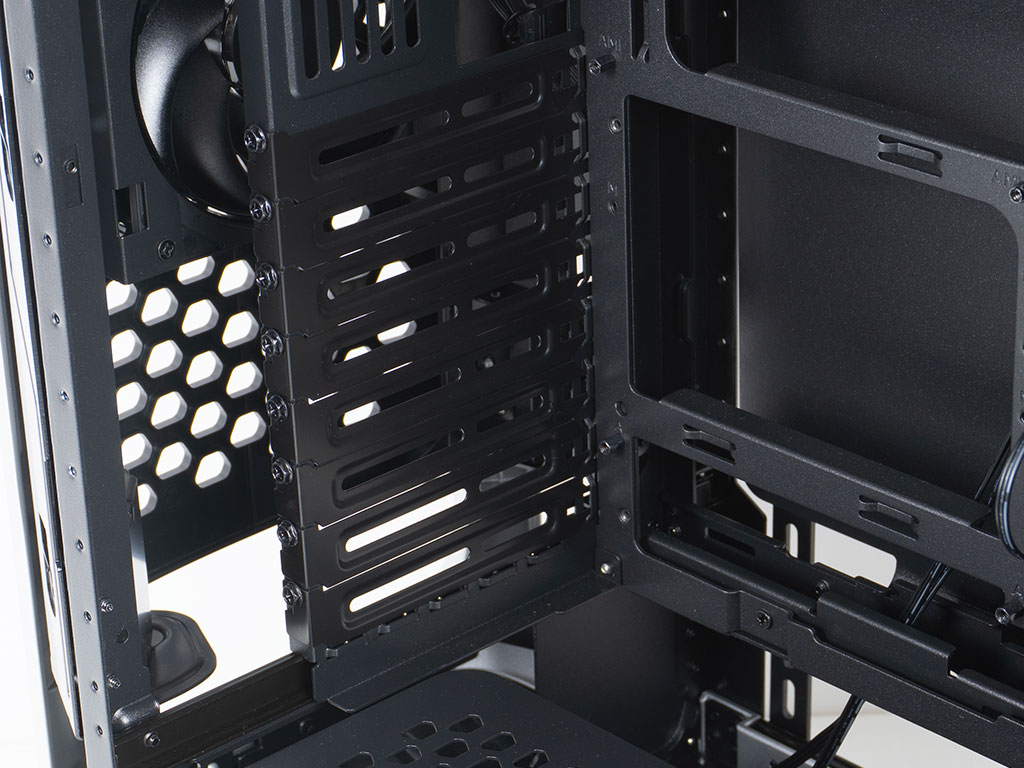
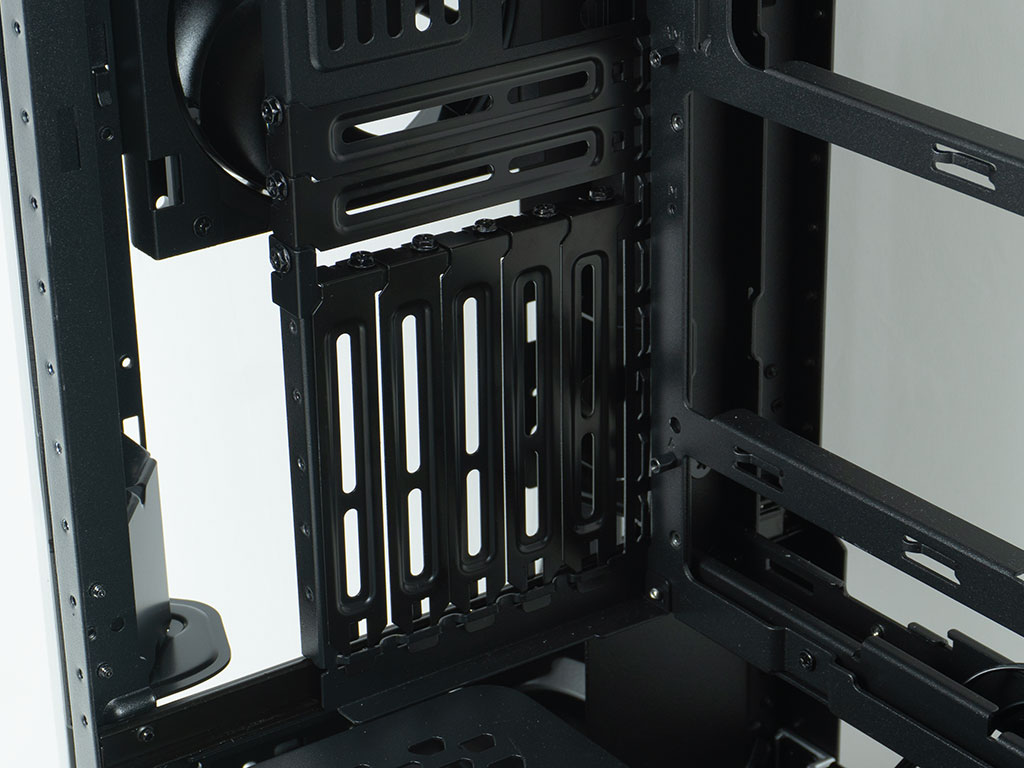
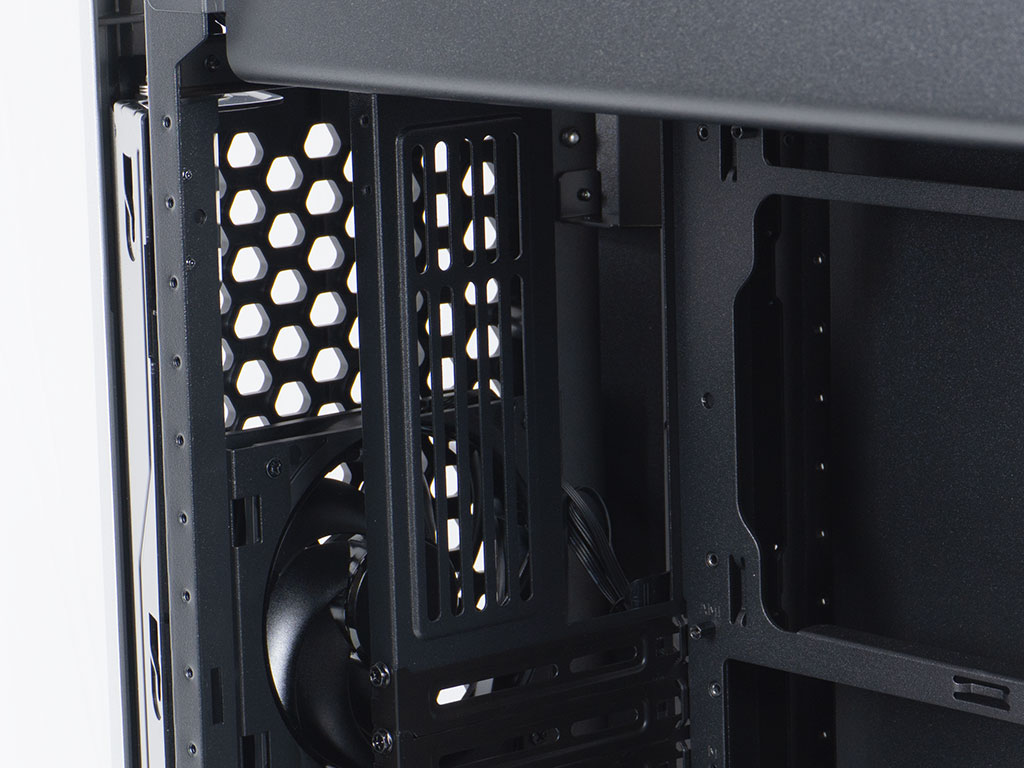
In the rear, there is the PSU bay on the bottom which is identical to the one in the top. We removed the shroud of one of these, just so this can be shown off. From this angle, you can also clearly see the removable mounting plate. Being symmetrical to the top, you can install the same amount of cooling here, but that also means any PSU will take away space from this area as well. The eight expansion slots are necessary for EBB board compatibility. You may remove the bottom six, install the supplied crossbar and then convert these to five vertical slots. In the very top it is all about rear IO of the motherboard. There is an ample gap to the fan in the rear, so you should have no issues with cables not being able to be routed nicely.
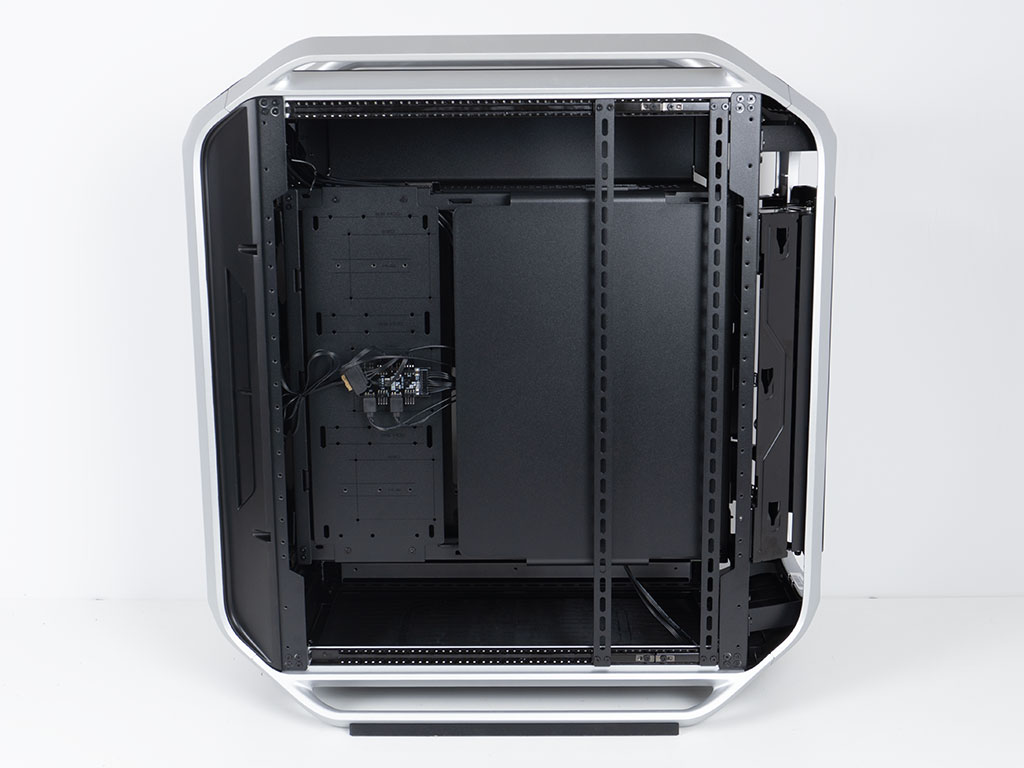
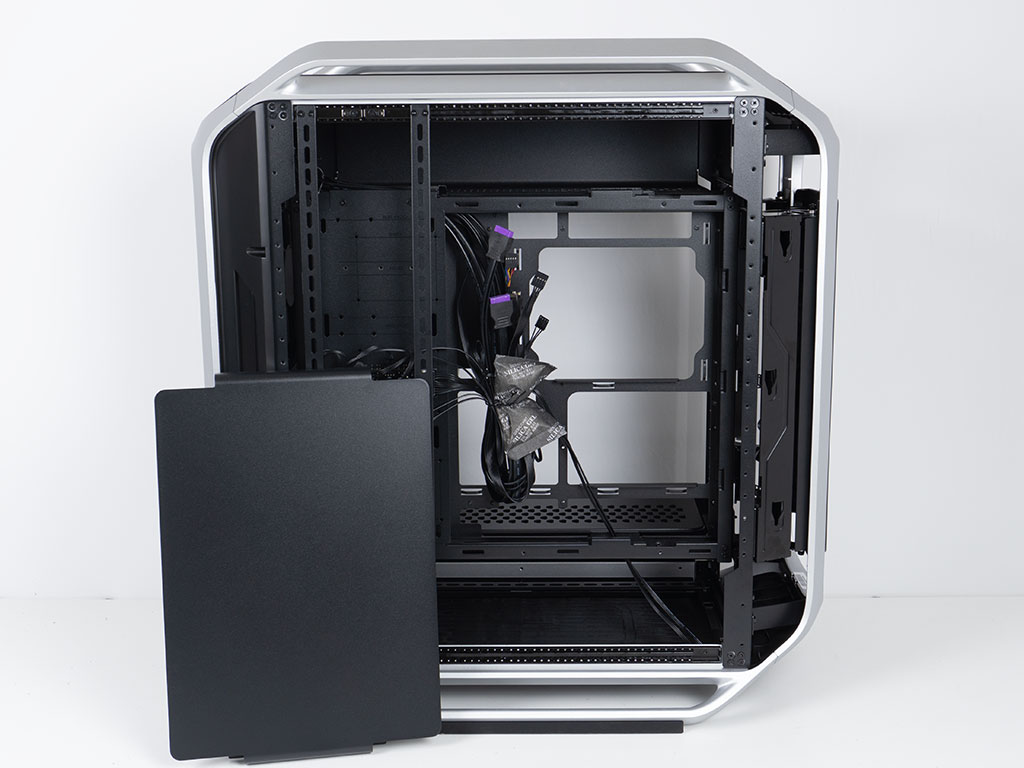
On the backside, you will find two more of the same mounting rails as are present at the top and bottom of the Cosmos Alpha. These are used to allow you to install active cooling anywhere along the surface of this side of the chassis. A secondary cable cover on the interior, which you would never really be able to see when the system is assembled, is also present. There are two screws at the bottom edge to remove it. While this is certainly nice to have, Cooler Master could have just opted for a second HDD plate and instantly more than doubled the storage capabilities of the case, without any massive change on BOM cost. But, we would not be surprised to see users use the sliding cooling mounting bars to secure additional storage to.
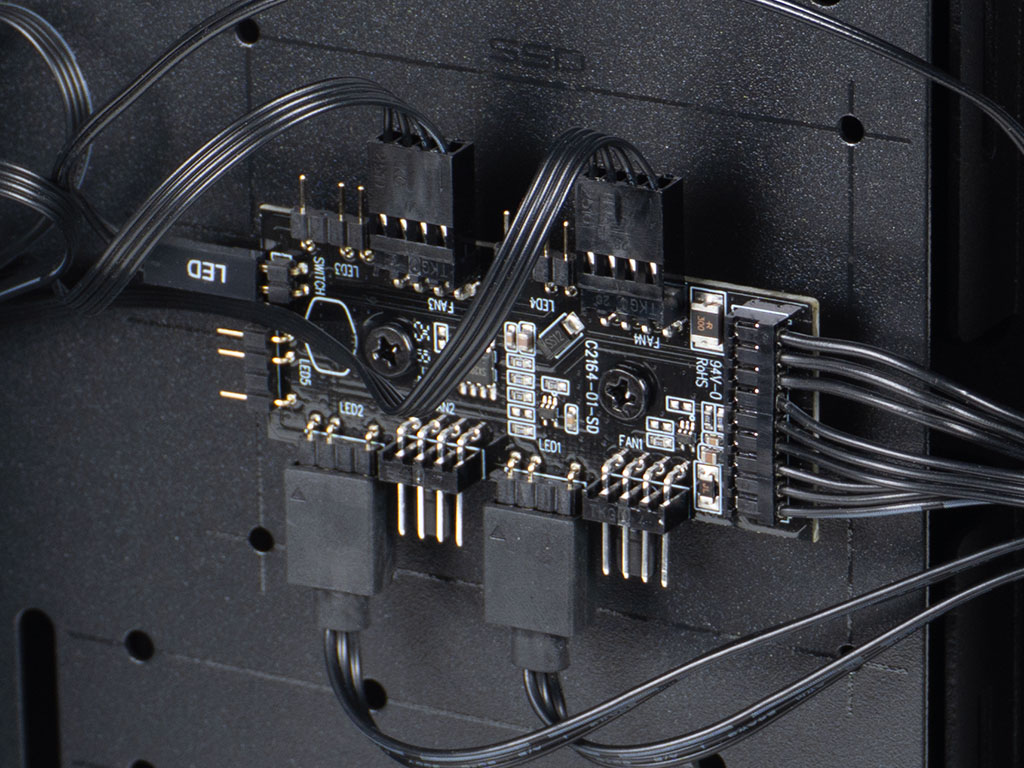
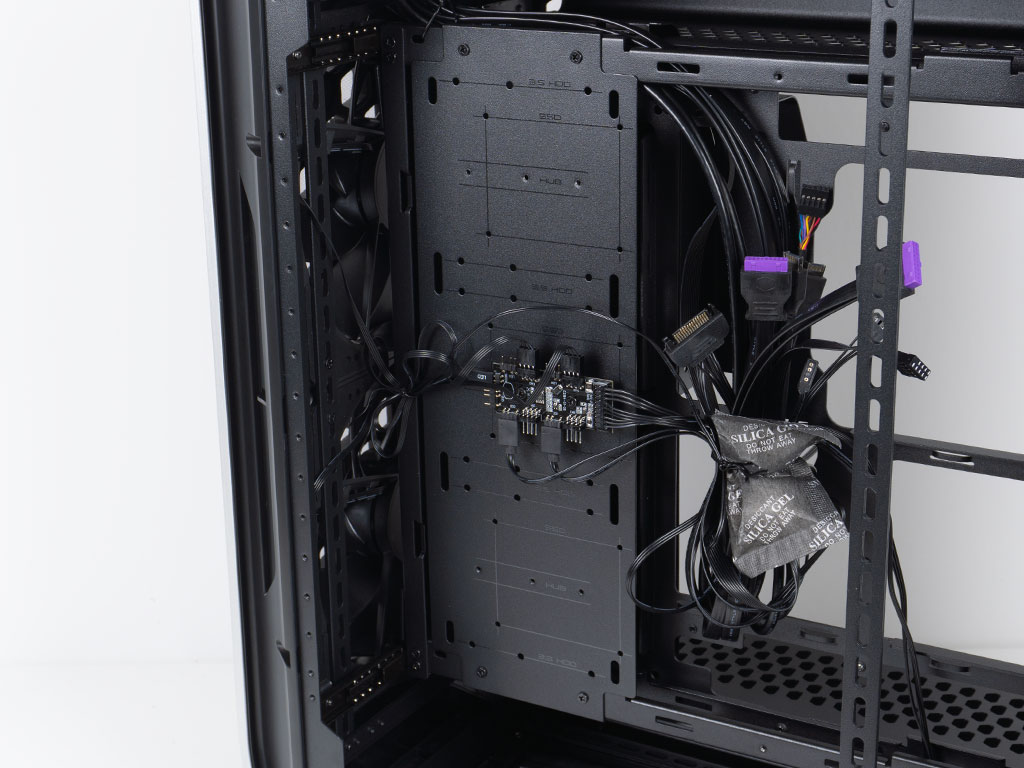
The PCB inside the Cosmos Alpha allows for four fans and four ARGB elements to be connected. This is exactly the same unit we have seen in the MasterCase 600 and is wired up to use case control for the ARGB elements, but you may also opt to use your motherboard header instead. By default, the controller is secured to the center of the storage plate. There are technically three positions for either 2.5" or 3.5" drives, but since one is occupied by the controller, Cooler Master is mindful to only advertise the truly available number in their specification table. It is interesting to see that this tray doesn't employ the Cooler Master tool-less combination of rubber rings and mounting pins for the 2.5" drives, or the rubber ring equipped screws for 3.5" variants, as both implementations would mean that you could simply install the drives without having to remove the cable cover on the other side to access the screw holes.
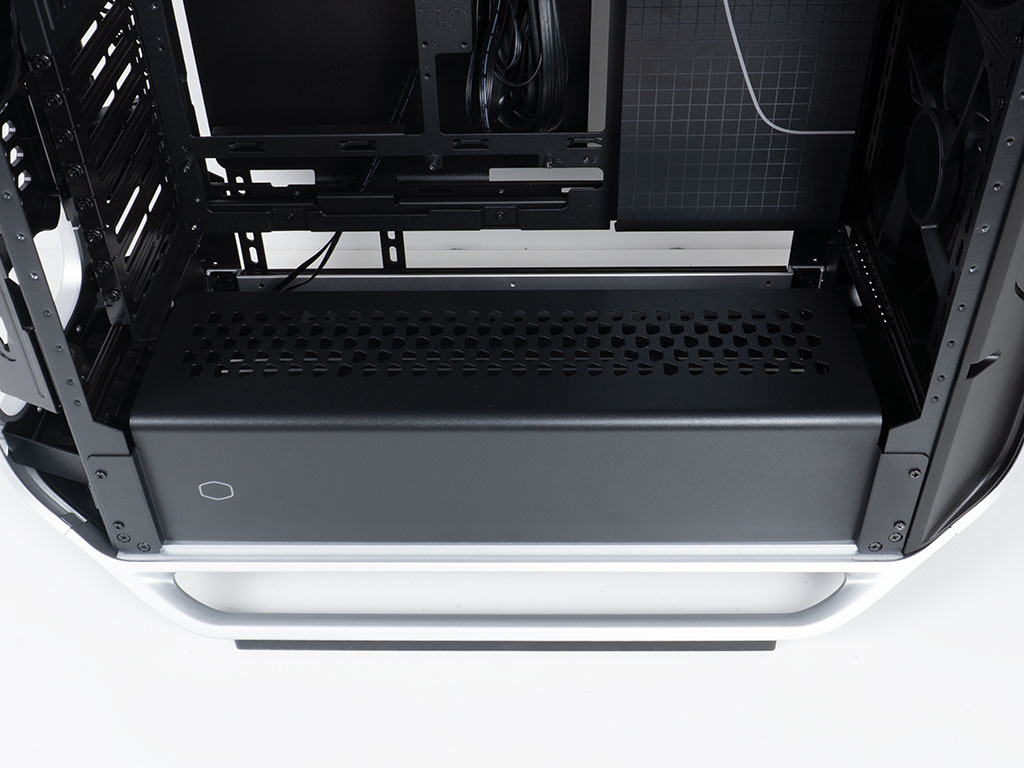
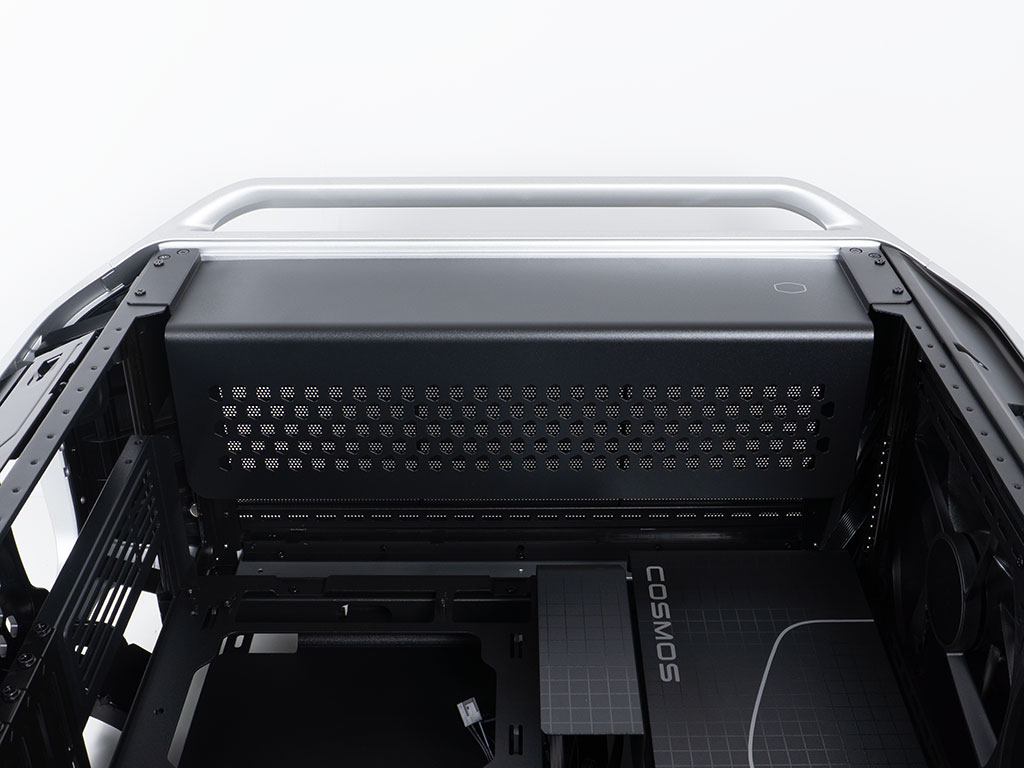
As mentioned the top and bottom areas of the Cosmos Alpha are identical, as such the covers are as well. There is a gap between the metal covers and the motherboard tray because you are able to move that interior divider to accommodate air coolers of up to 185 mm in size, or reclaim that space for liquid cooling room behind the motherboard.
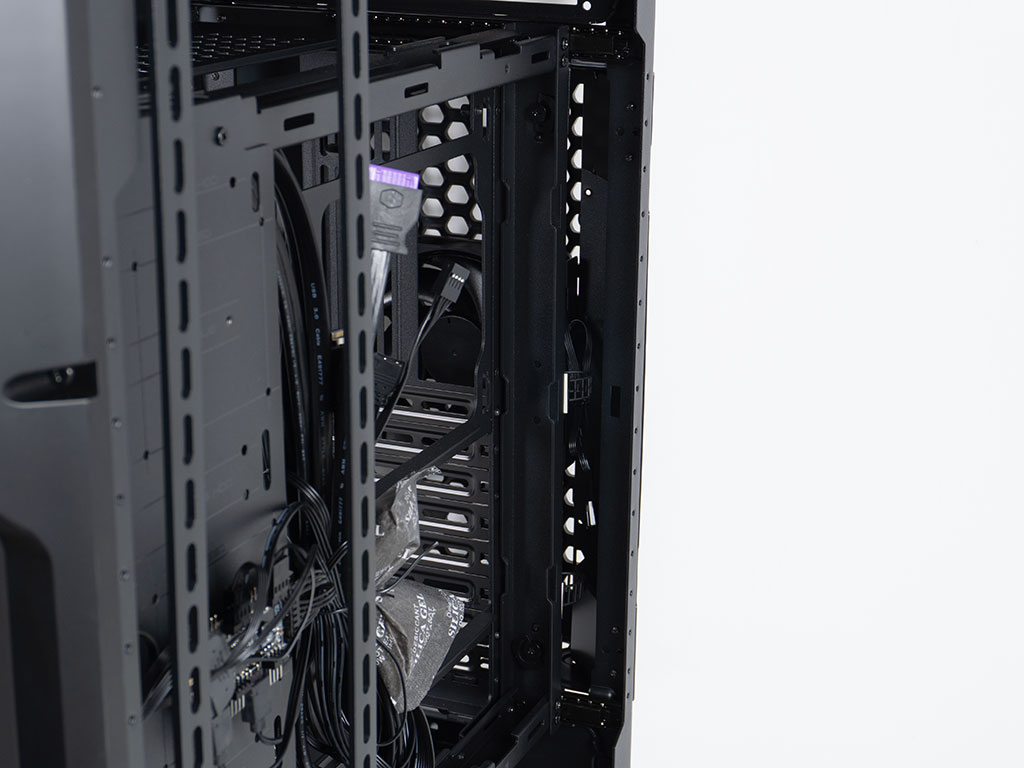
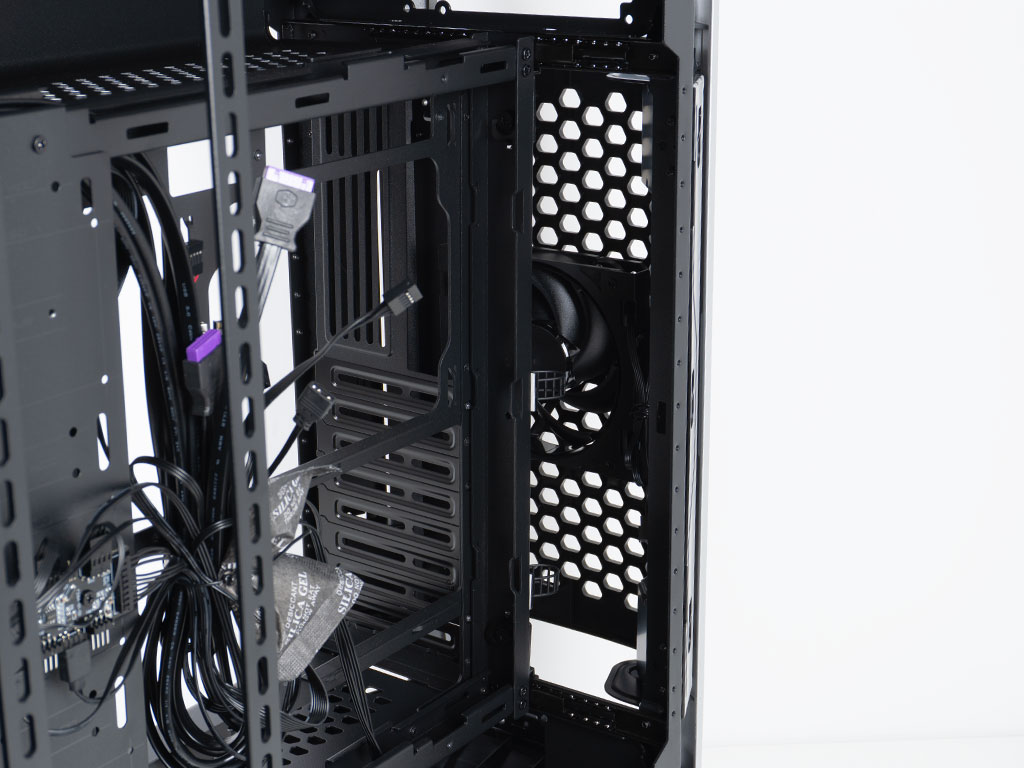
To move the divider, you simply have to loosen four special screws. You may have noticed that out-of-the-box, the two mounting bars for cooling on the side of the chassis did not have enough room to fit any fans, let alone liquid cooling. But once you move the divider towards the middle of the case, there is plenty of depth for such elements. Cooler Master even went as far as to develop a 360x360 mm liquid cooling solution for workstations that would perfectly fit inside the Cosmos Alpha.
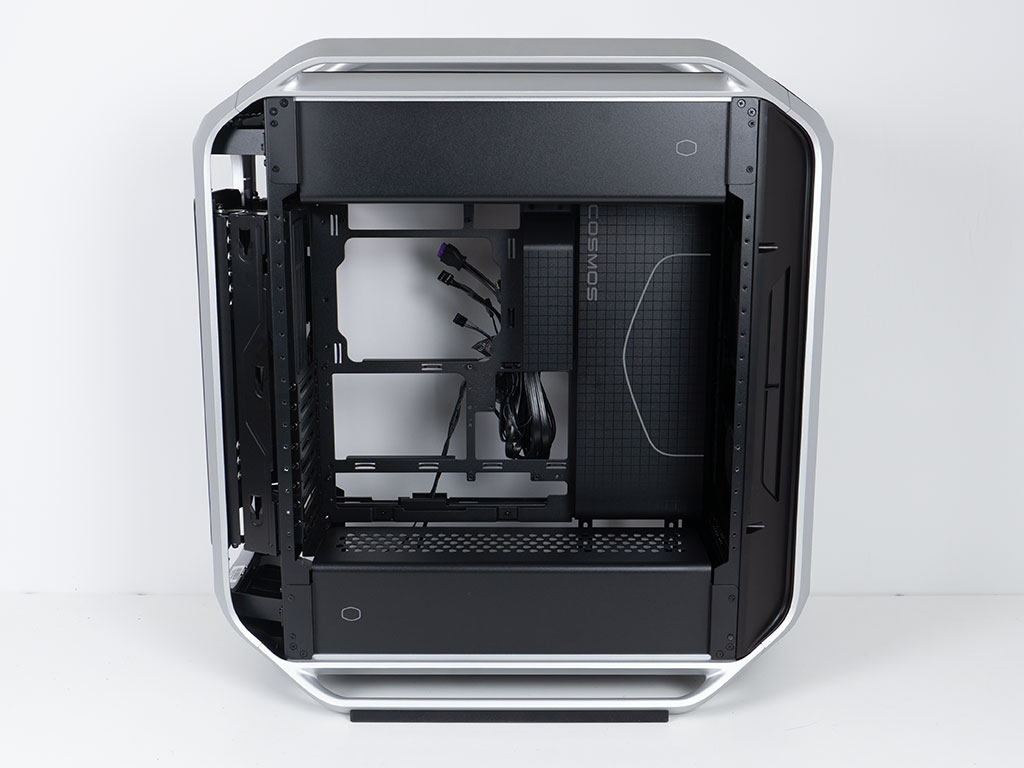
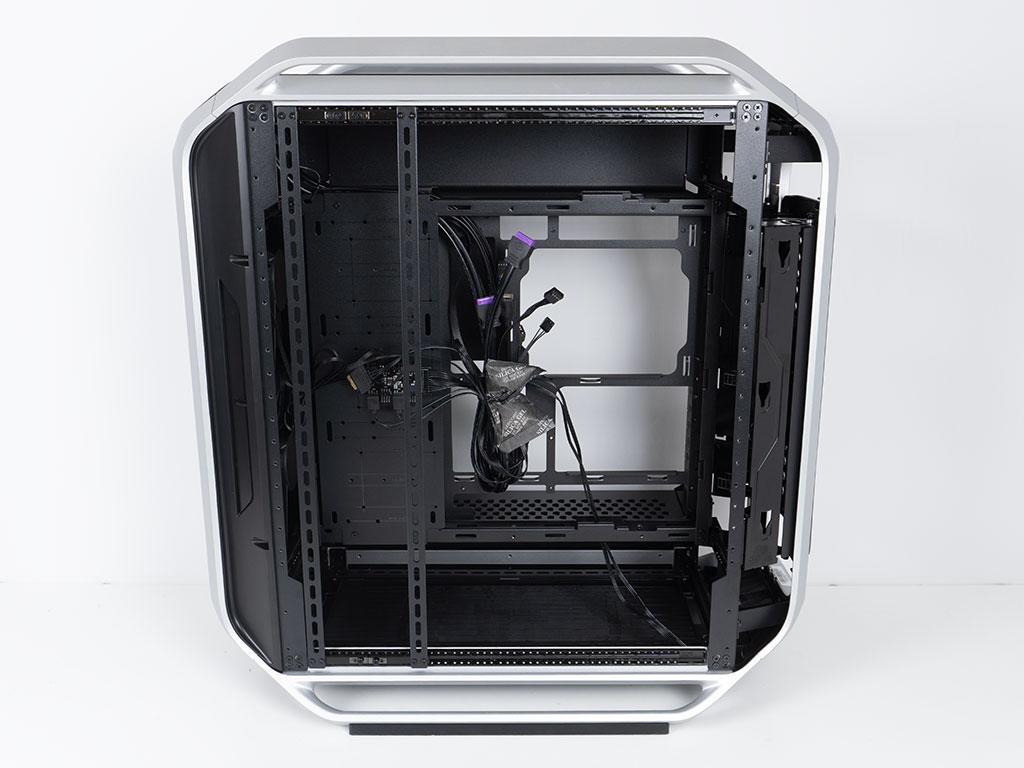
In this state, you do loose a lot of potential air cooler height, so the V4 Alpha 3DHP Black—which is considered a mainstream cooler—would not fit for example. But that is perfectly fine, as the only reason to set the interior up this way would be for liquid cooling. In this state, the gap between the motherboard and the shroud is reduced to be just big enough to remain useful for cable management. On the backside, you can clearly see how AIOs will now easily fit in this setup.
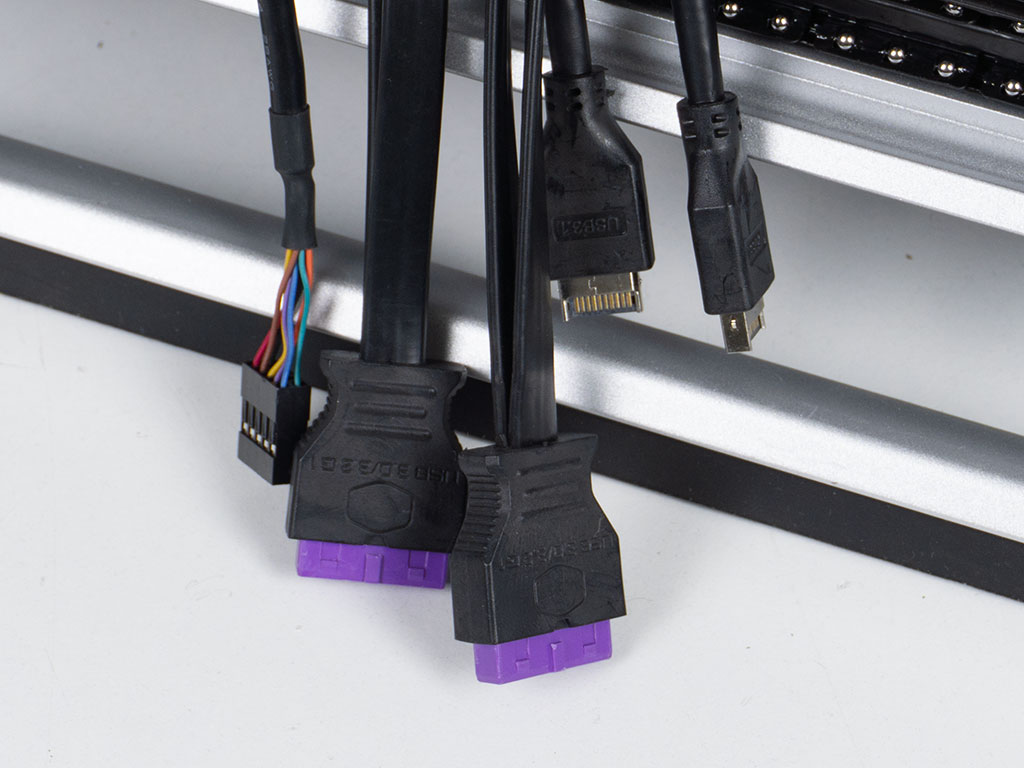
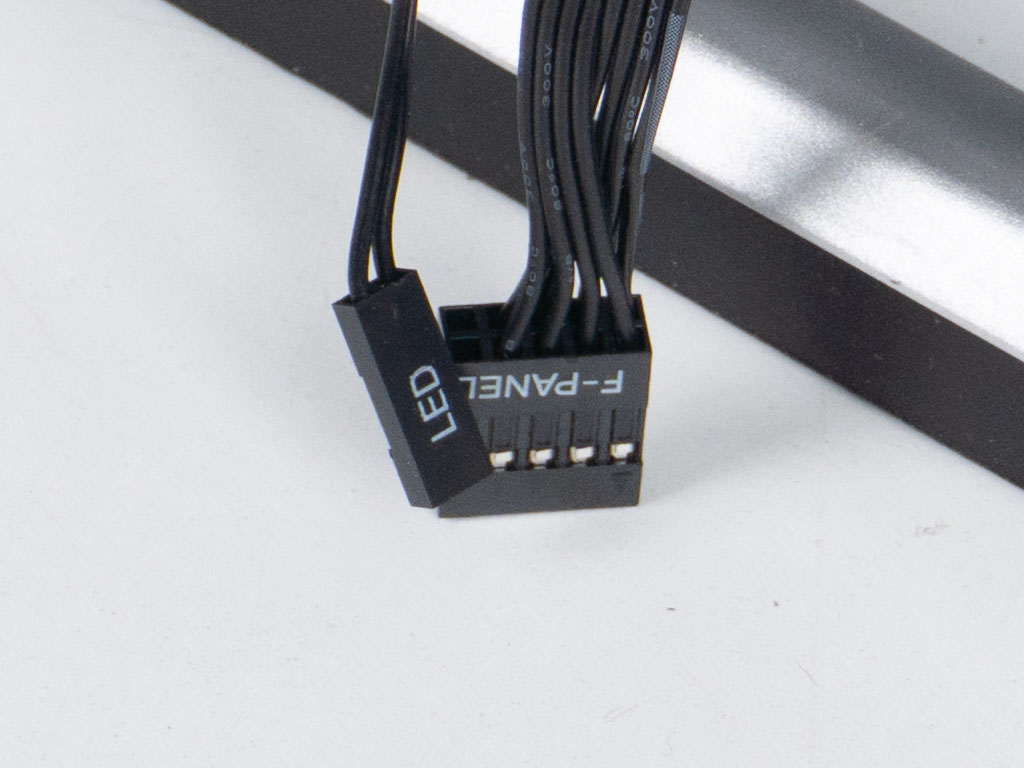
As the Cooler Master Cosmos Alpha has twice the usual number of USB-A and USB-C ports, you will also get twice the number of cables. There are only a handful of retail boards that offer this combination of headers. We took a quick look at Geizhals Europe at the time of writing this review, which listed nearly 1200 SKUs across Intel and AMD. As soon as we filtered down to boards offering two Key-A and two 20-pin headers we were left with just 10. The front panel connector has been unified and has a separate 2-pin LED wire so that you still get to retain your reset functionality alongside the RGB control.
Nov 19th, 2026 00:46 PST
change timezone
Latest GPU Drivers
New Forum Posts
- 3DMARK "LEGENDARY" (475)
- [Poll] 12V-2x6 Connector Protection: What Are You Using? (WireView / Ampinel / Equalizer / Other / Nothing) (43)
- Windows HDR on = Tinted colors (5)
- Time to upgrade CPU and MOBO (42)
- Without Jensen, PC gaming will be (47)
- WarpCoreBench scores! (68)
- Honestly, do you care about GTA VI? (155)
- Very unusual two gaming-pc scenarios. (13)
- TPU's Nostalgic Hardware Club (22168)
- Dual B70 or Dual R9700 Pro on Linux (7)
Popular Reviews
- Acemagic Retro X3 Review
- Ugreen NASync DXP4800 GT Review
- Upcoming Hardware Launches 2027 (Updated Nov 2026)
- AMD Zen 6 Technical Deep Dive
- Pulsar Office Tour & First Look at P1 Dual-Sensor Mouse
- Biwin Black Opal NV7400 2 TB Review
- Sapphire Radeon RX 7700 XT Pure Review
- Sapphire Radeon RX 7700 XT Pulse Review
- Chieftec Iceberg PRO 360 DARK Review
- ASUS ROG Strix B850-I Gaming Wi-Fi7 W Review
TPU on YouTube
Controversial News Posts
- NVIDIA Co-Founder and CEO Jensen Huang Officially Resigns (483)
- Report: Jensen Huang Eyes NVIDIA Comeback (196)
- Open Letter Asking NVIDIA to Reinstate Jensen Huang Passes 115,000 Signatures (184)
- OpenAI CEO Argues Home PCs Waste the World's Limited DRAM Supply (152)
- NVIDIA Launches Investigation Into Jensen Huang's Relationship With Suspected Chinese Spy (136)
- Intel "Raptor Lake Next" 16-Core and 20-Core CPUs Surface (130)
- Legendary Game Studio BioWare Shuts Down Following EA Layoffs (104)
- Dell CEO Says the Memory Shortage Will Get Worse in 2027 (95)