 14
14
Corsair 4000D Airflow Review - A Solid Performer with Attention to Detail
Temperature & Noise Testing »Test System
| System Parts for Case Reviews | |
|---|---|
| Processor: | Intel Core i5-9600K |
| Motherboards: | ATX: MSI Z390 GAMING EDGE AC MATX: Z370M GAMING EDGE AC Mini-ITX: MSI Z370I GAMING EDGE AC Provided by: MSI |
| Graphics Card: | ATX/mATX: Palit GeForce RTX 2080 Gaming Pro OC ITX: EVGA GTX 1650 SC Ultra Black 4 GB |
| Memory: | 16 GB XPG GAMMIX D30 DDR4 2666 MHz CL16-18-18 1.20 V 16 GB XPG SPECTRIX D60G DDR4 3000 MHz CL16-18-18 1.35 V Provided by: ADATA |
| HDD: | Western Digital 320 GB 7200 RPM |
| SSD: | ITX: ADATA SX6000 Pro M.2 256 GB mATX: ADATA GAMMIX S11 Pro M.2 256 GB ATX: ADATA SPECTRIX S40G M.2 256 GB ADATA XPG SX850 256 GB ADATA Ultimate SU630 240 GB ADATA Ultimate SU750 256 GB Provided by: ADATA |
| Power Supply: | Fractal Design ION+ 750W 80 Plus Platinum Provided by: Fractal Design |
| Cooling: | be quiet! Dark Rock 4 be quiet! Dark Rock Slim be quiet! Shadow Rock LP Provided by: be quiet! |
Assembly
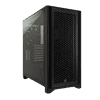
Installing the motherboard is done with screws and spacers. Corsair includes a pin to align it all in the center, which makes things a little easier as well. There is also plenty of space for cable-routing around the three edges of the motherboard.
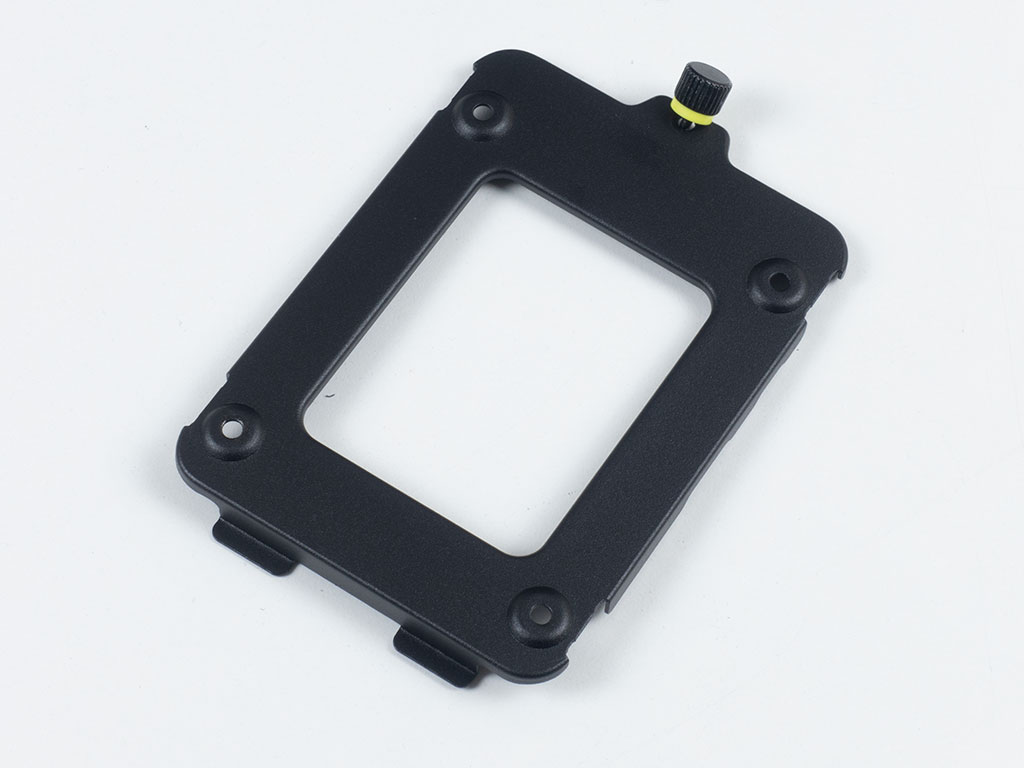

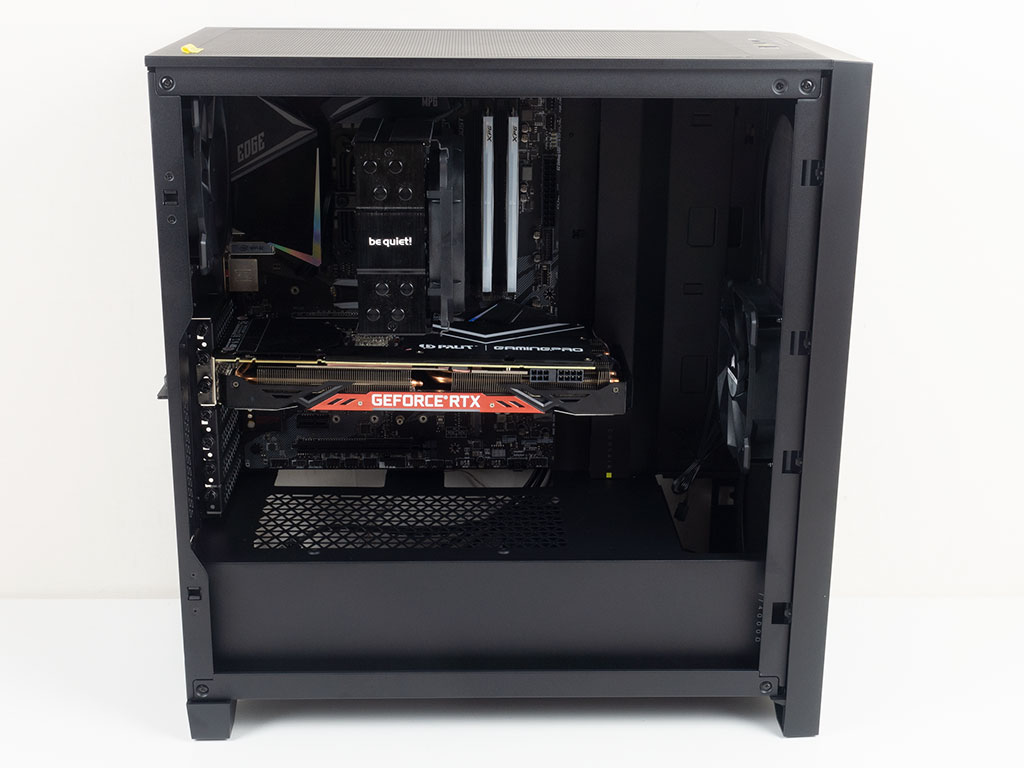
Adding an SSD to the 4000D Airflow is done by simply taking the frame off the case and screwing the drive down. Once filled, just pop it back into one of four possible locations.
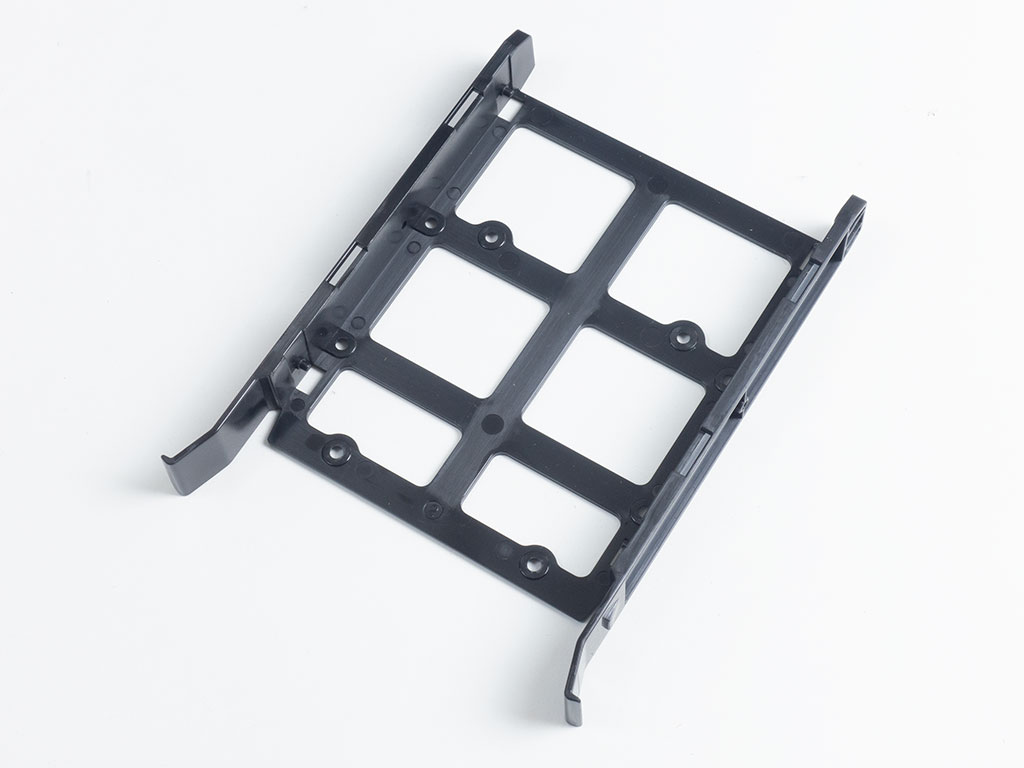
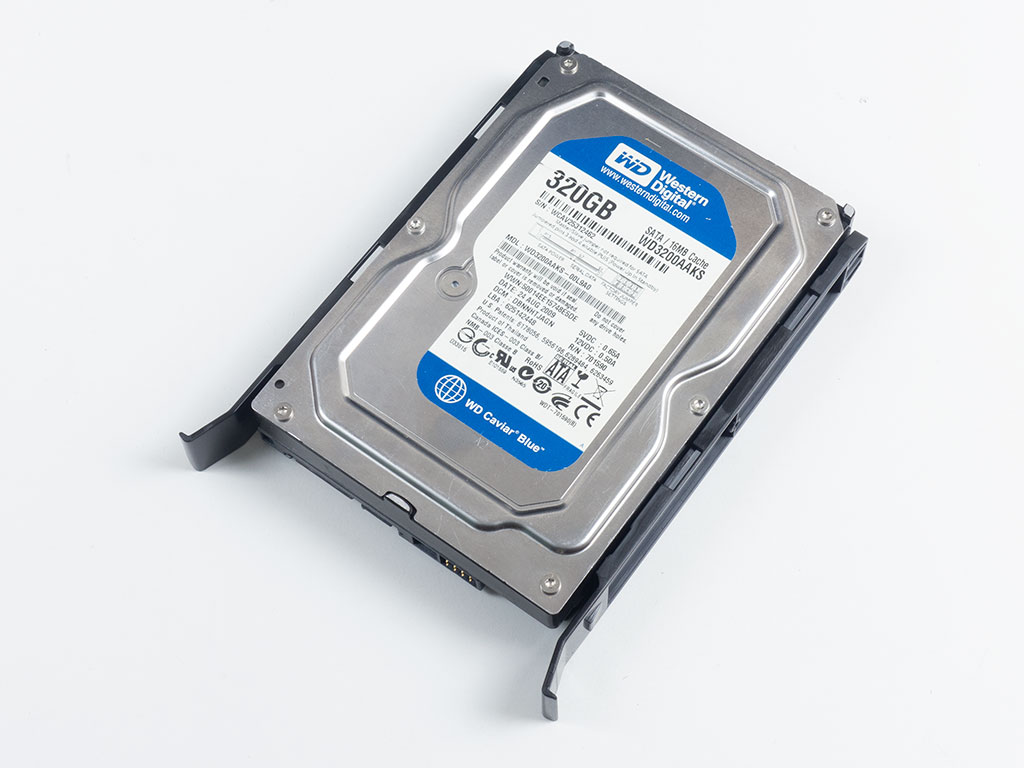


You do not actually need any tools for a 3.5" drive as you can snap it into place before sliding it back into the cage underneath the shroud until the two latches on either side of the tray snap down to secure the drive.

To add your PSU, slide it underneath the metal shroud and screw it down through the rear of the chassis, which is pretty straightforward as well. There is plenty of space, so you should have no issues with a potent unit to power all your gaming gear.
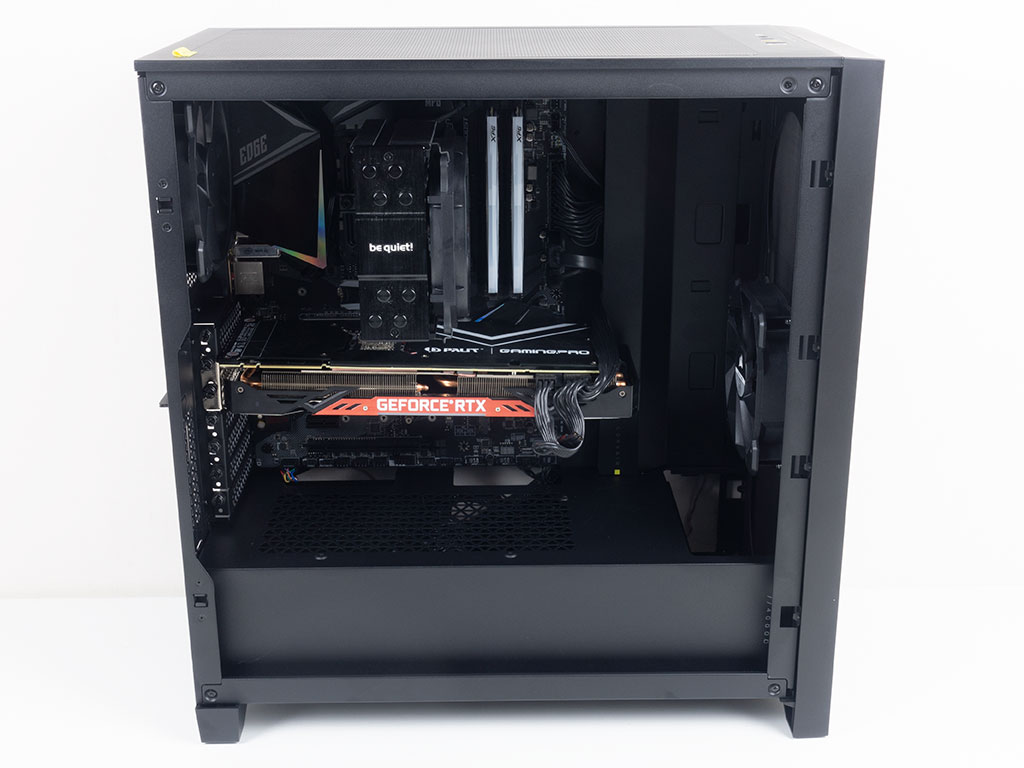
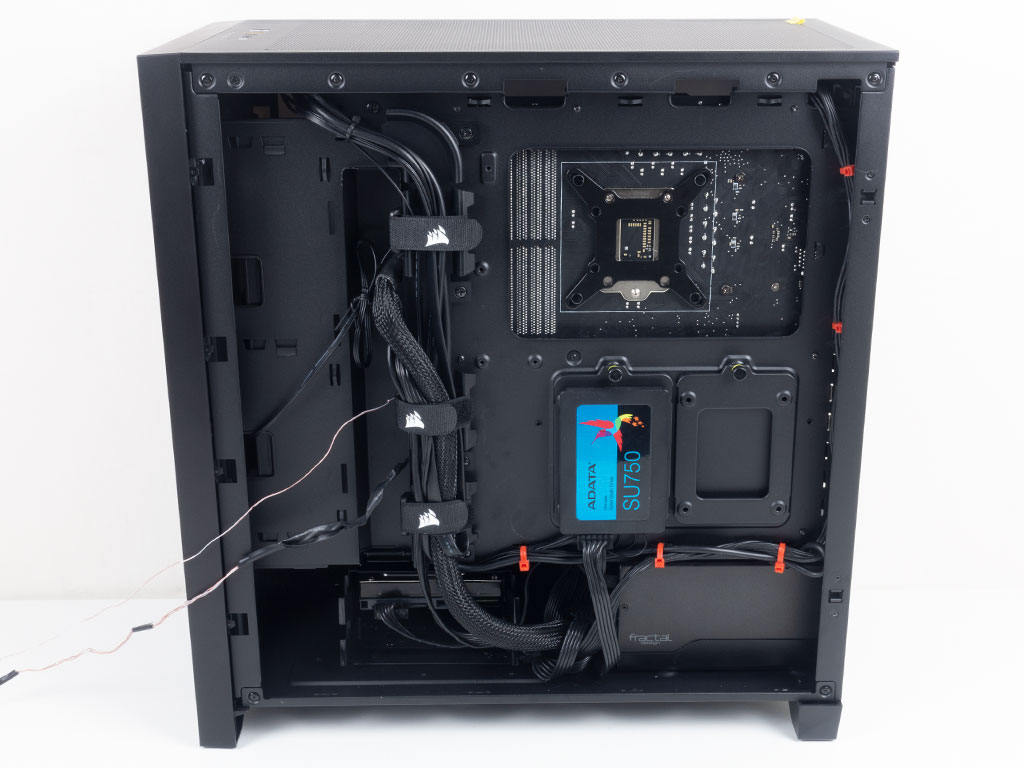
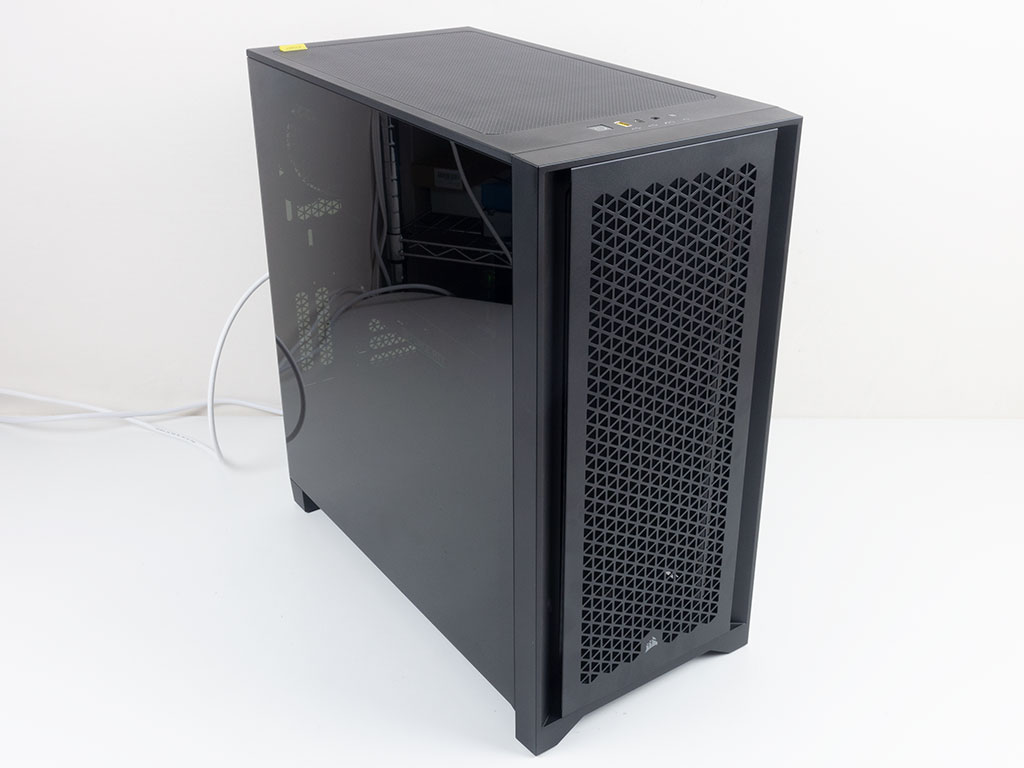
With everything installed, the Corsair 4000D Airflow makes a good, clean impression, but things could have been a little tidier on the bottom with smaller openings. However, the backside is nice and tidy because of the Velcro ties and cable channel, along with plenty of options to use zip ties.
Finished Looks
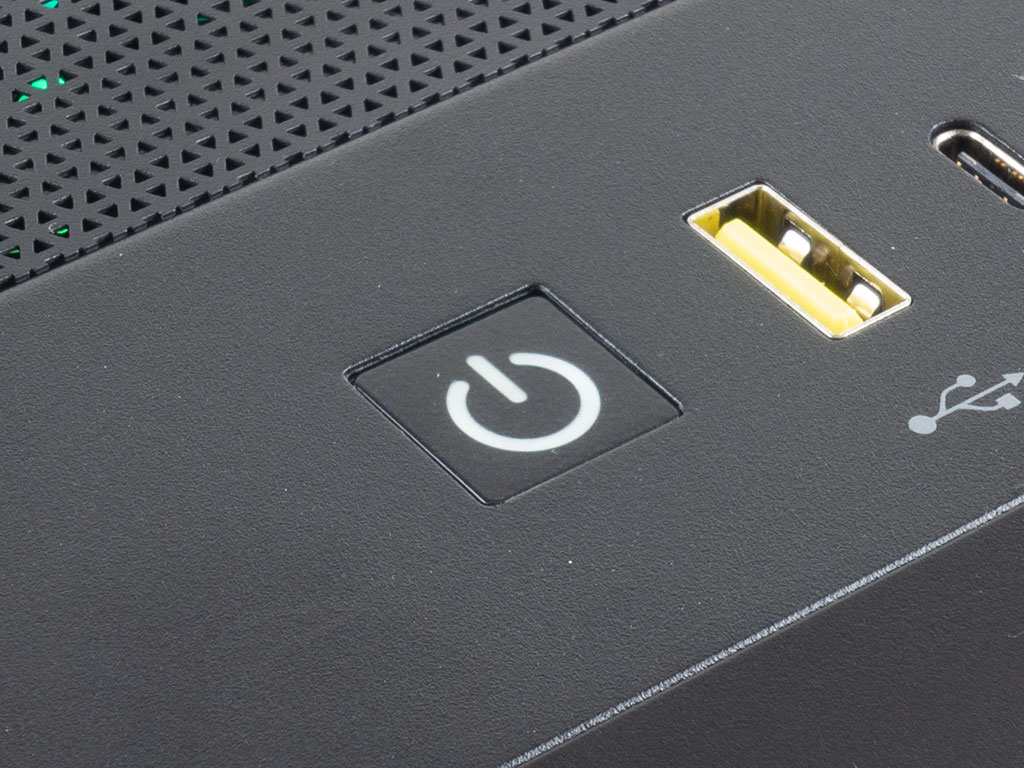
With the system turned on, there is really not much to see besides the subtle glow of the RGB components that manage to shine through the fairly heavy tint in the glass window. A clean, white power LED also lights up right underneath the button to let you know that the system is up and running. Naturally, if you opt for the RGB variant of the chassis, you will have slightly more to play around with visually.
Apr 29th, 2024 05:59 EDT
change timezone
Latest GPU Drivers
New Forum Posts
- What's your latest tech purchase? (20377)
- Does charging protection matter? (28)
- Why MS buying all of these Studios is bad for Gaming (21)
- Z790 ACE MAX? (2)
- Anyone know if Rufus gets around the SSE4.2 issue with Windows 11 24H2? (46)
- The Official Linux/Unix Desktop Screenshots Megathread (707)
- Is it better for zero RPM PSUs to place the fan on top? (3)
- Old high quality PSU, or semi-old mid-quality PSU? (6)
- Looking for recommendations to upgrade the GPU (29)
- Dialing in the overlock on my new 12600kf, matured silicon process showing great results... (5)
Popular Reviews
- Ugreen NASync DXP4800 Plus Review
- HYTE THICC Q60 240 mm AIO Review
- MOONDROP x Crinacle DUSK In-Ear Monitors Review - The Last 5%
- Upcoming Hardware Launches 2023 (Updated Feb 2024)
- FiiO K19 Desktop DAC/Headphone Amplifier Review
- AMD Ryzen 7 7800X3D Review - The Best Gaming CPU
- Thermalright Phantom Spirit 120 EVO Review
- ASUS Radeon RX 7900 GRE TUF OC Review
- ASUS GeForce RTX 4070 Ti Super TUF Review
- Logitech G Pro X Superlight 2 Review - Updated with 4000 Hz Tested
Controversial News Posts
- Windows 11 Now Officially Adware as Microsoft Embeds Ads in the Start Menu (145)
- Sony PlayStation 5 Pro Specifications Confirmed, Console Arrives Before Holidays (117)
- NVIDIA Points Intel Raptor Lake CPU Users to Get Help from Intel Amid System Instability Issues (106)
- AMD "Strix Halo" Zen 5 Mobile Processor Pictured: Chiplet-based, Uses 256-bit LPDDR5X (103)
- US Government Wants Nuclear Plants to Offload AI Data Center Expansion (98)
- AMD's RDNA 4 GPUs Could Stick with 18 Gbps GDDR6 Memory (95)
- TechPowerUp Hiring: Reviewers Wanted for Motherboards, Laptops, Gaming Handhelds and Prebuilt Desktops (84)
- Windows 10 Security Updates to Cost $61 After 2025, $427 by 2028 (84)