 2
2
CORSAIR Hydro X Series XC7 RGB CPU Water Block Review
Liquid Flow Restriction »Installation


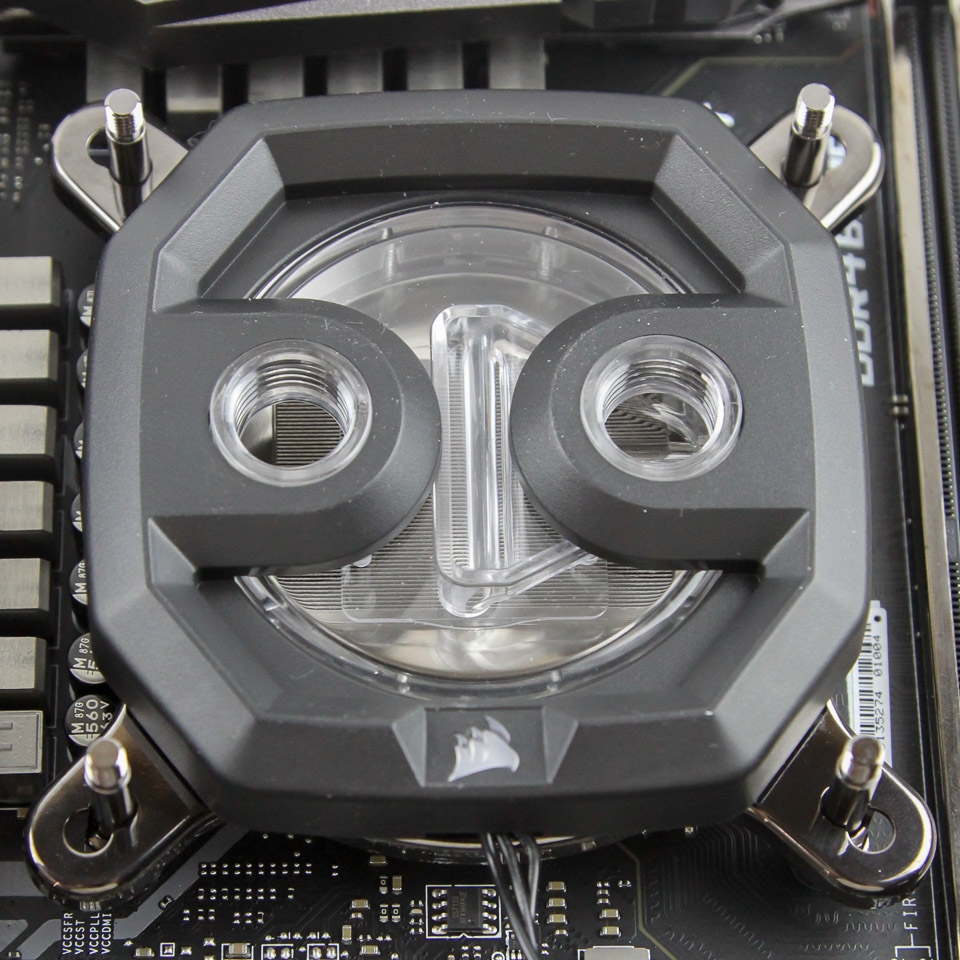


Installation of the CORSAIR XC7 CPU block is on the easier side of things on Intel's mainstream LGA 115x platform, even compared to competing products. You will have to separate out the pre-configured installation hardware as discussed on page two, but things are very straightforward after you have. The included manual does a good job detailing the process for first-time users as well. Begin with the placement of the backplate on the underside of the motherboard, and screw the mounting post in through the provided plastic washers and the motherboard from the other side. This provides the base for the block itself. With the pre-applied TIM negating the need to apply any, maneuver the block over the mounting posts. Place the spring washers and springs over each post and tighten the locking nuts in diagonal sets of two, alternating between them until you run out of thread. The locking nuts and mounting posts both have inward-curved indents for a comfortable grip to tighten or loosen them without any additional tools, and be sure to connect the cable to a CORSAIR Commander PRO or Lighting Node PRO if you wish to use the integrated RGB lighting, which would in turn take an internal USB 2.0 header and SATA connection for power and control. Seen above is also what the block looks like with two of CORSAIR's Hydro XF compression fittings for soft tubing.
I also appreciate that CORSAIR has a series of installation videos on their YouTube channel to further facilitate the installation process, especially for newcomers. The company also told me that they plan to add in an addressable RGB LED adapter to further revisions of their Hydro X components, thus allowing users to use an onboard 5 V LED header on motherboards, which will enable people to not have to buy a CORSAIR LED controller in the future.
Lighting
Speaking of which, here's the light show that greets you when the cable is connected and powered on. It is a rainbow wave lighting effect that does a good job of showcasing the individually addressable nature of the 16 RGB LEDs, and we can see how and where the light comes through the block from the top and sides alike.


I will go over iCUE as it pertains to the Hydro X series in the final build article, but it works as expected provided you let the driver know what exactly is connected to the device. I used a Lighting Node PRO here, which has two channels, and a drop-down list allows for the Hydro X CPU block to be chosen. Both the XC9 and XC7 share identical lighting support, and an on-screen render helps visualize the various lighting effects that are immediately reflected in the block.
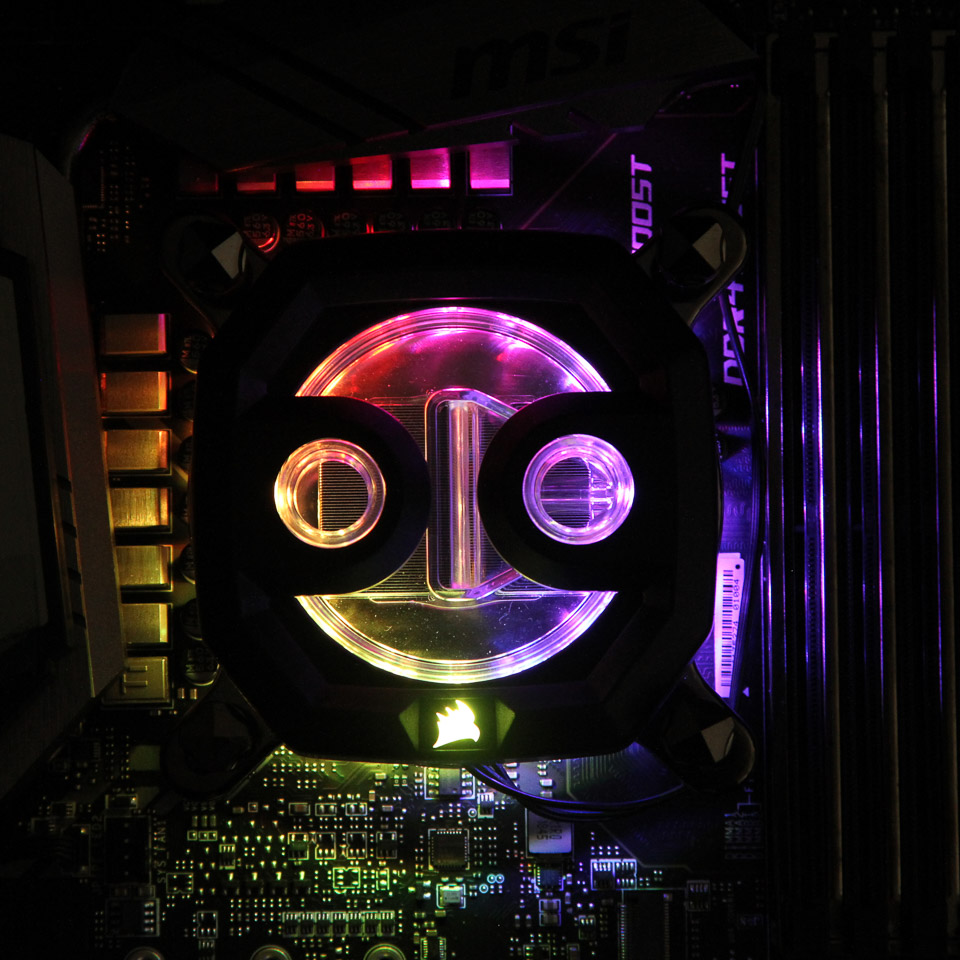


Here is a look at some of the various lighting options, be it static or dynamic. I was impressed with the fairly-true-to-color white these LEDs were able to reproduce, and the inward-facing LEDs with the light diffusion from the nylon make for smooth lighting without harsh, discrete light sources visible when seen straight through or even at most angles inside a case. As with anything compatible with iCUE, the lighting can be configured to match with other products collectively.
May 5th, 2024 04:29 EDT
change timezone
Latest GPU Drivers
New Forum Posts
- Post your Speedometer 3.0 Score (38)
- Only some humans can see refresh rates faster than others, I am one of those humans. (114)
- What's your latest tech purchase? (20439)
- Is updating BIOS to beta versions a good idea if you have the most recent version installed but still face issues? (4)
- Strange system crashes out of nowhere, help (25)
- My Laptop is having issues with PL2 and EDP OTHER (10)
- Alphacool CORE 1 CPU block - bulging with danger of splitting? (95)
- Apparently Valve is giving refunds on Helldivers 2 regardless of hour count. Details inside. (37)
- PNY RTX 4070 Ti XLR8 OC - New worse BIOS/version? (107)
- Change GPU or PSU ? Games looks bad with microsuttering (16)
Popular Reviews
- Finalmouse UltralightX Review
- Meze Audio LIRIC 2nd Generation Closed-Back Headphones Review
- ASRock NUC BOX-155H (Intel Core Ultra 7 155H) Review
- Montech Sky Two GX Review
- Cougar Hotrod Royal Gaming Chair Review
- Upcoming Hardware Launches 2023 (Updated Feb 2024)
- Alienware Pro Wireless Gaming Keyboard Review
- HYTE THICC Q60 240 mm AIO Review
- AMD Ryzen 7 7800X3D Review - The Best Gaming CPU
- Logitech G Pro X Superlight 2 Review - Updated with 4000 Hz Tested
Controversial News Posts
- Intel Statement on Stability Issues: "Motherboard Makers to Blame" (240)
- Windows 11 Now Officially Adware as Microsoft Embeds Ads in the Start Menu (167)
- AMD to Redesign Ray Tracing Hardware on RDNA 4 (134)
- Sony PlayStation 5 Pro Specifications Confirmed, Console Arrives Before Holidays (117)
- AMD's RDNA 4 GPUs Could Stick with 18 Gbps GDDR6 Memory (114)
- NVIDIA Points Intel Raptor Lake CPU Users to Get Help from Intel Amid System Instability Issues (106)
- AMD Ryzen 9 7900X3D Now at a Mouth-watering $329 (104)
- AMD "Strix Halo" Zen 5 Mobile Processor Pictured: Chiplet-based, Uses 256-bit LPDDR5X (103)