 10
10
CORSAIR Hydro X Series XG7 RGB 30-Series Reference GPU Water Block Review
Liquid Flow Restriction »Installation
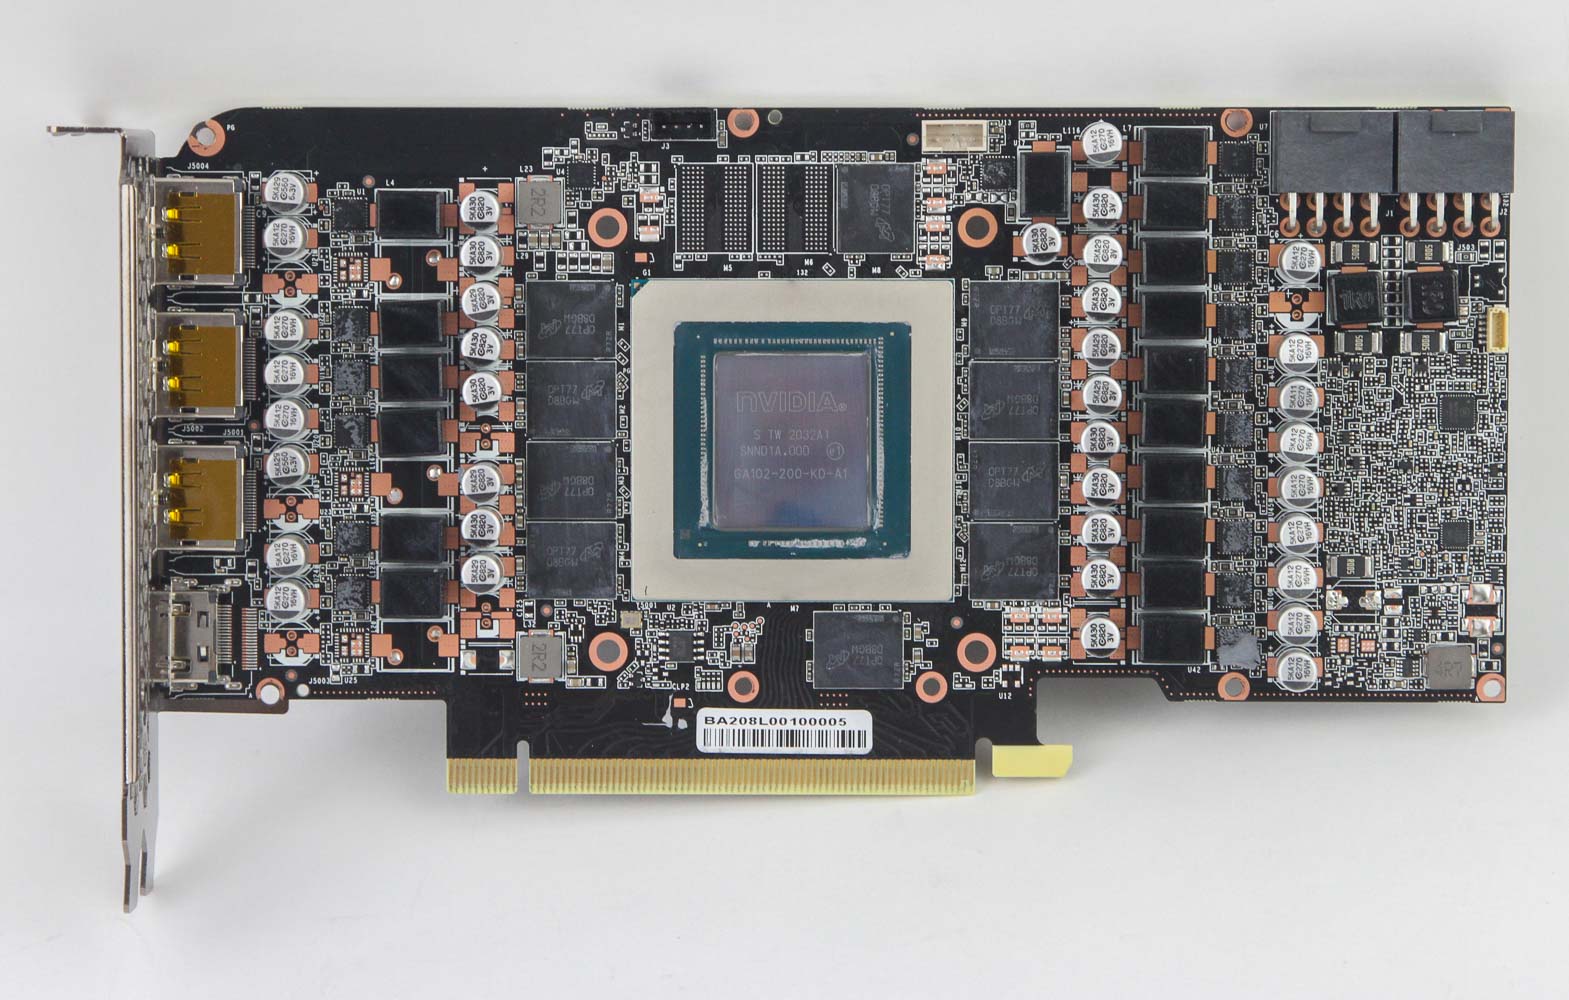
Behold the unicorn that is the working RTX 3080 PCB! I was originally conflicted on whether to go with the Founders Edition, which has led to some clever and different GPU blocks because of the unique PCB design, or the reference PCB used by several NVIDIA AICs and for which there is more support from block makers. In the end, the latter logically won out, so here we are.


Installation of the CORSAIR XG7 GPU water block is a piece of cake as long as you have a compatible GPU. CORSAIR has made use of the modular GPU core section in having different RTX 3080/3090 PCBs covered, and mine is the Hydro XG7 block for the reference PCB. Several AIC offerings use this PCB, and you can use the CORSAIR compatibility page to verify which one to get.
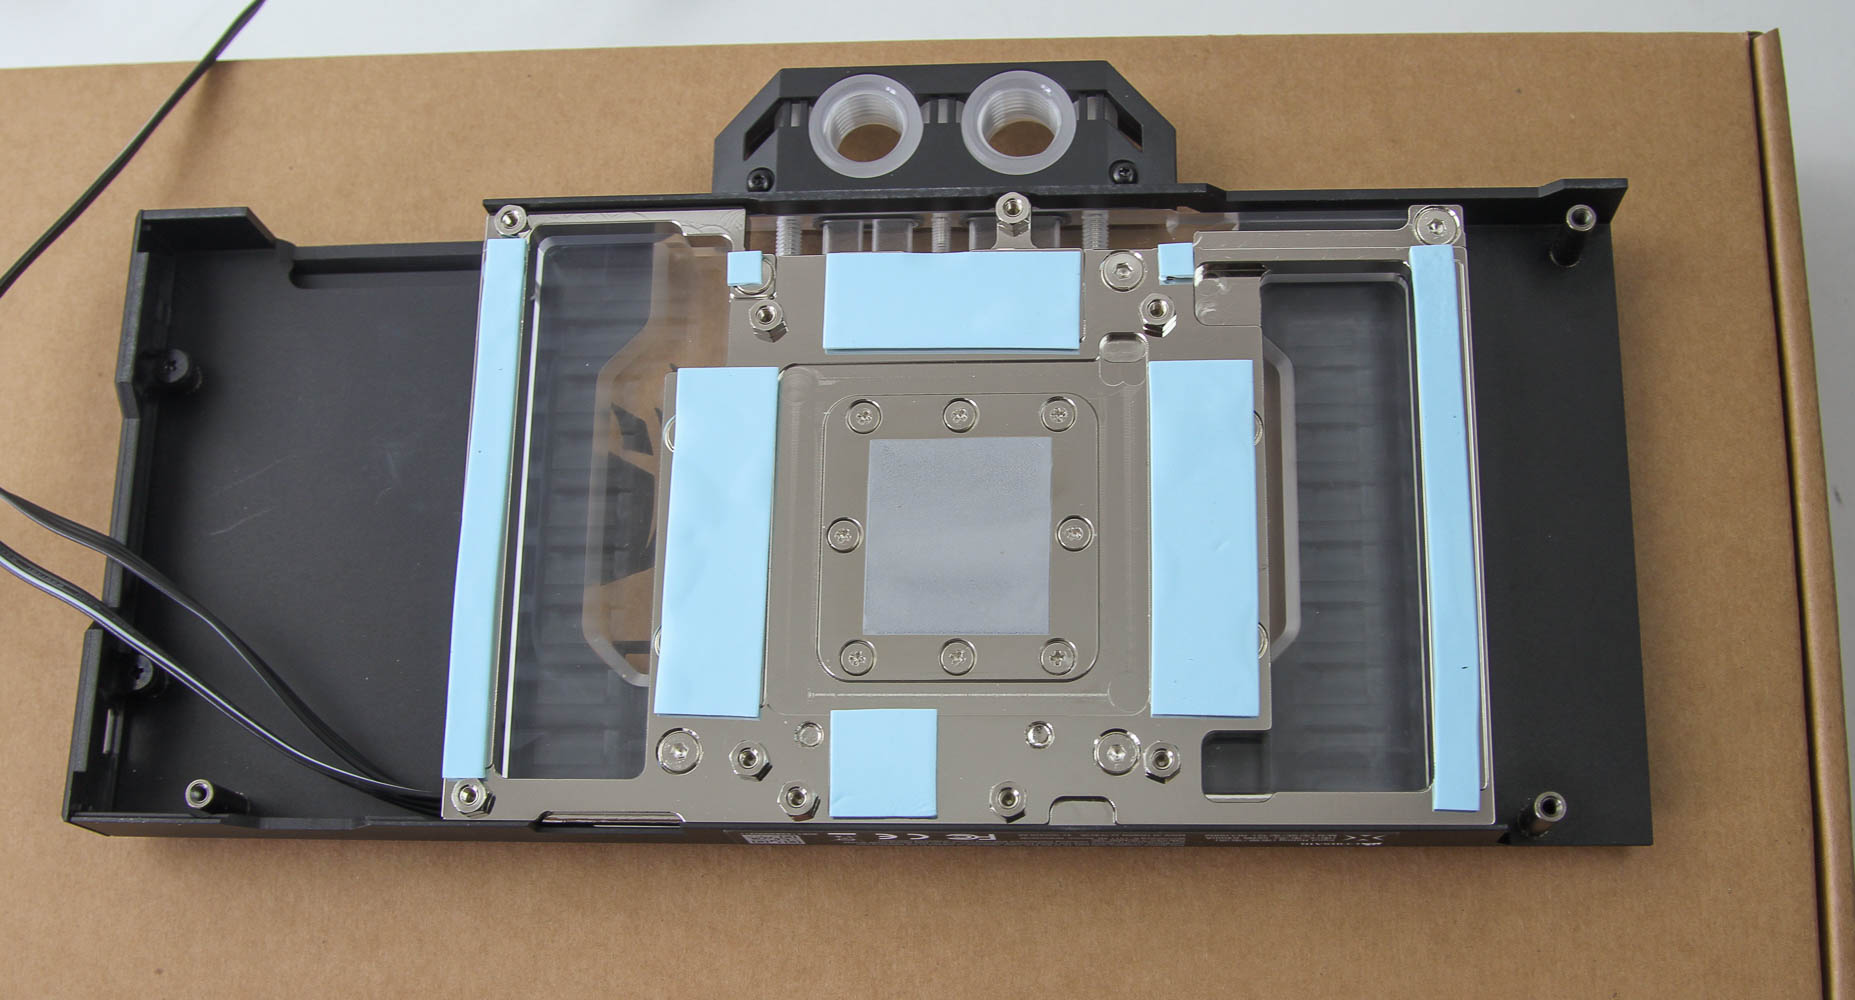
The pre-applied thermal pads and thermal paste go a long way in making the process easy on even the first-time enthusiast. Begin with the removal of the stock cooler, which is outside of the purview of this article, and place the block over the card. Flip the assembly over carefully on a box, such that the card's own I/O section hangs past the edge and does not prevent the block from mating with the card. We see now that the block is longer than the PCB, with a small cutout for the cables to come out the side. Place the backplate over and align it with the holes in the PCB that in turn match the standoffs in the block. Now, simply screw in this block-card-backplate sandwich, beginning loosely around the GPU core and moving outwards before coming back around to tighten them all.
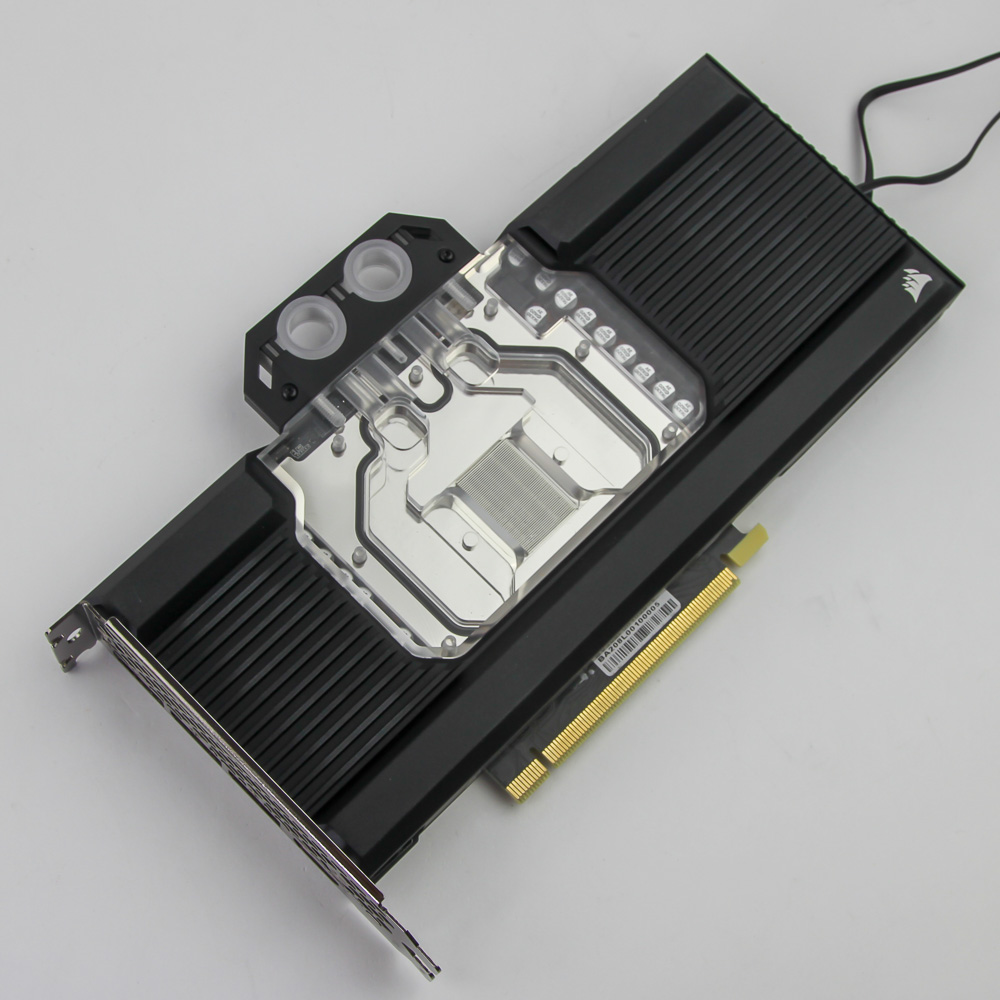
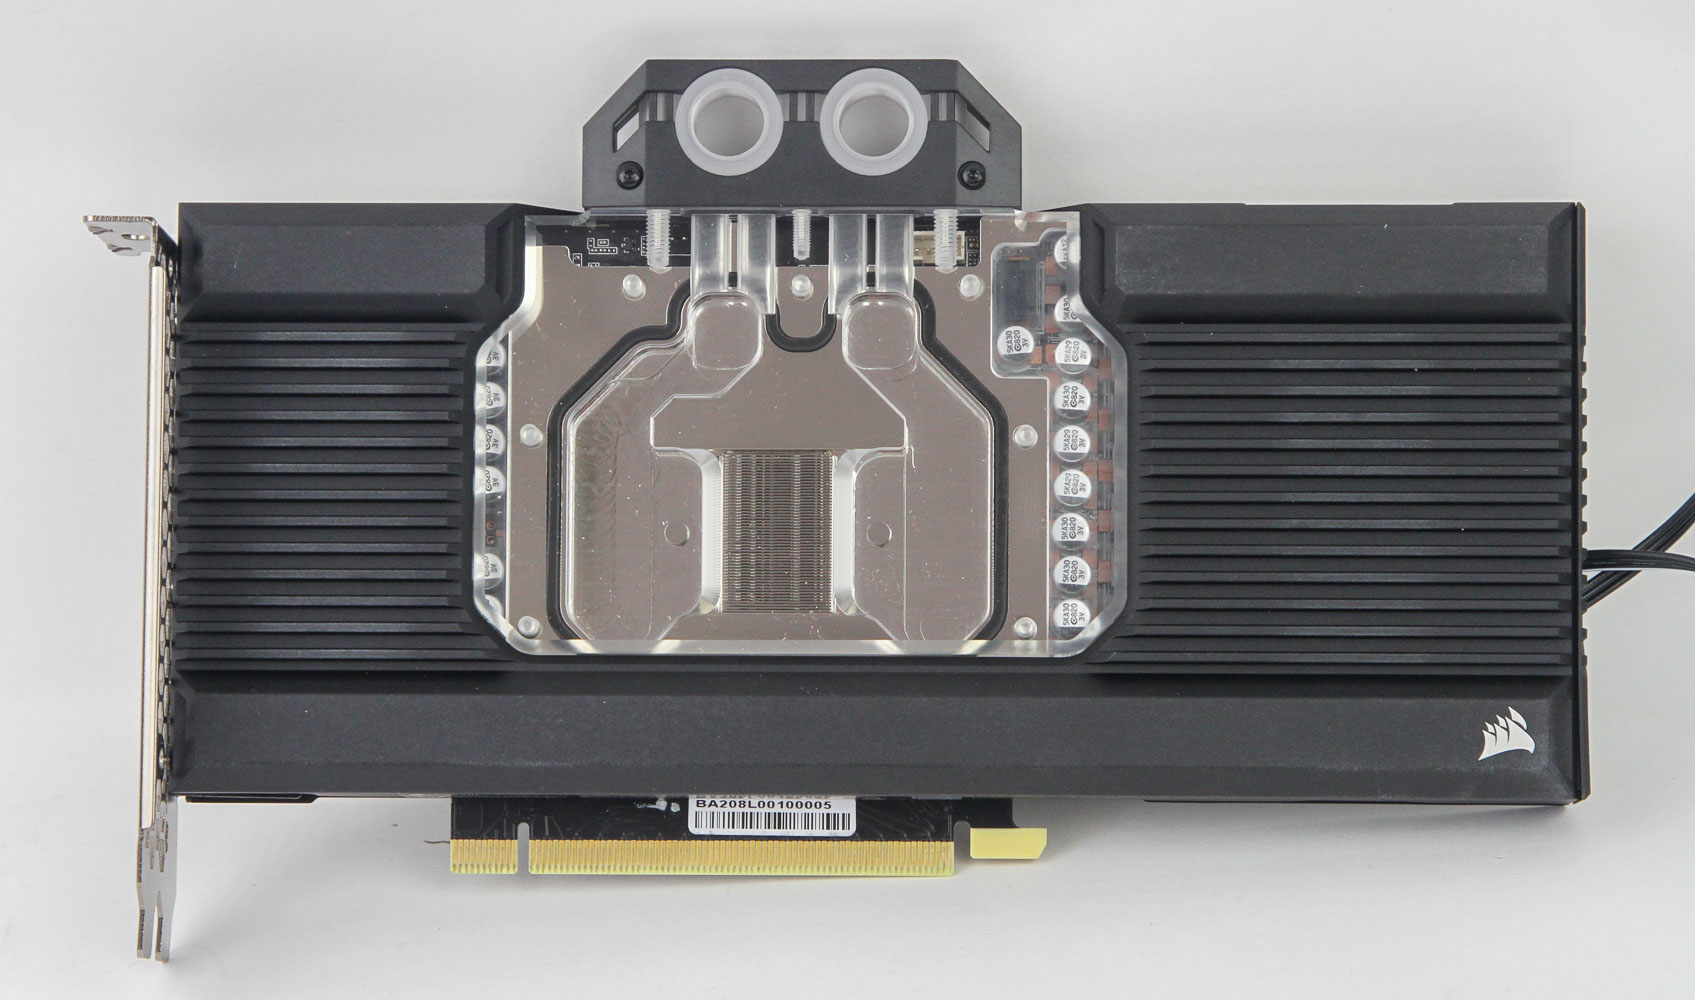
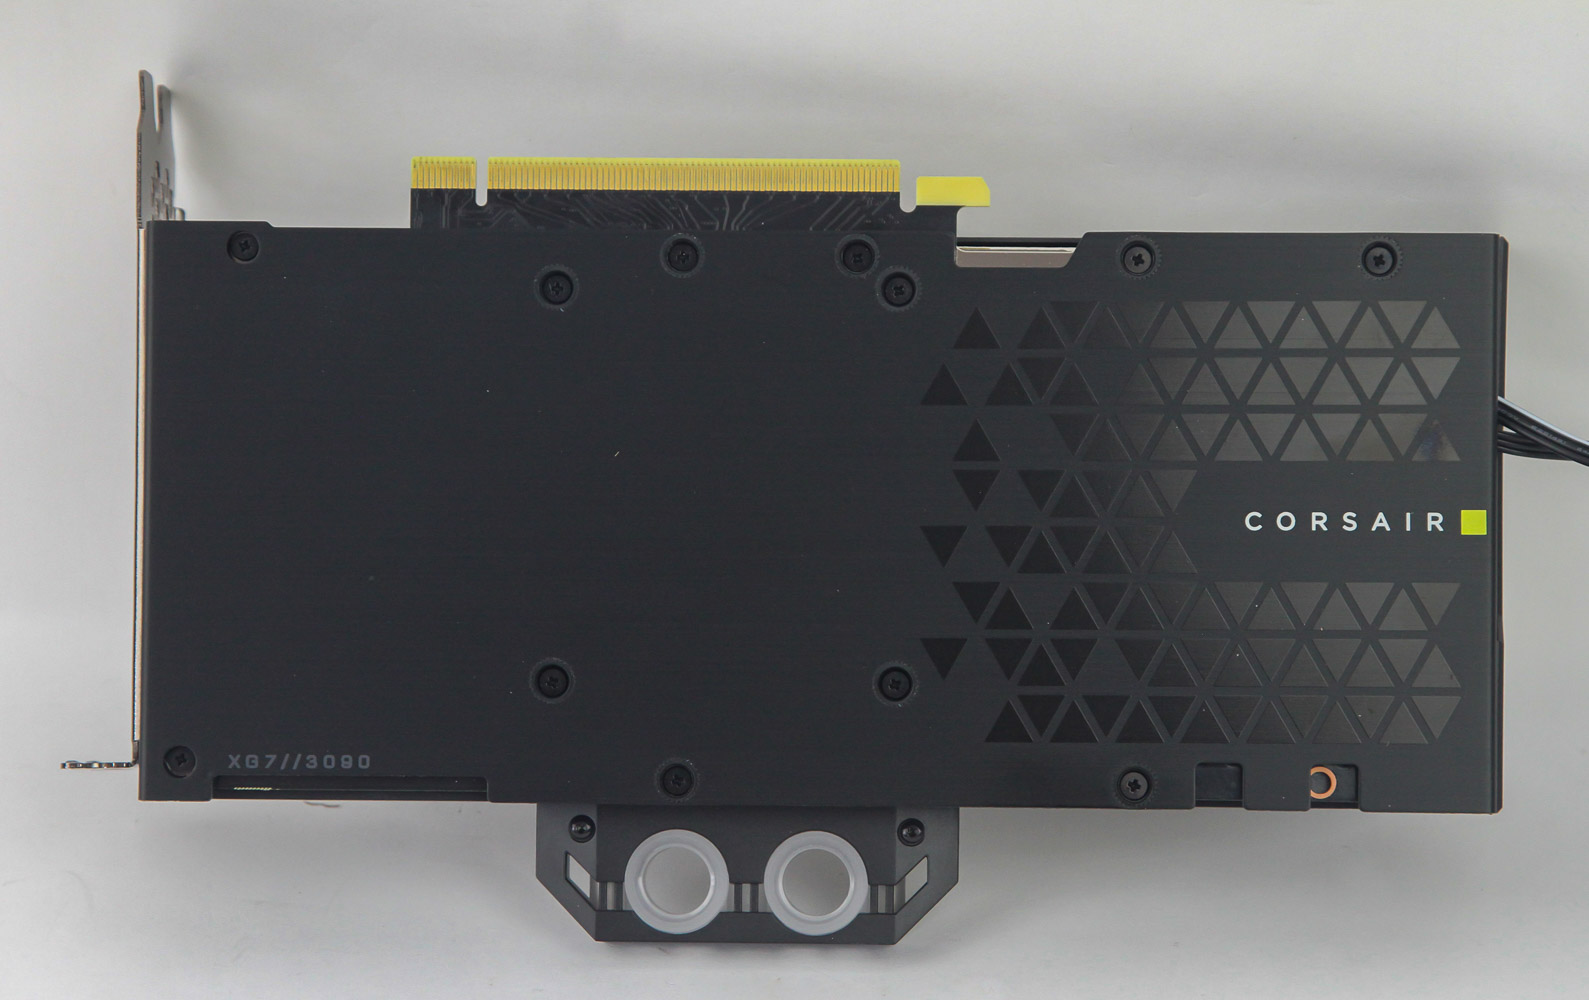
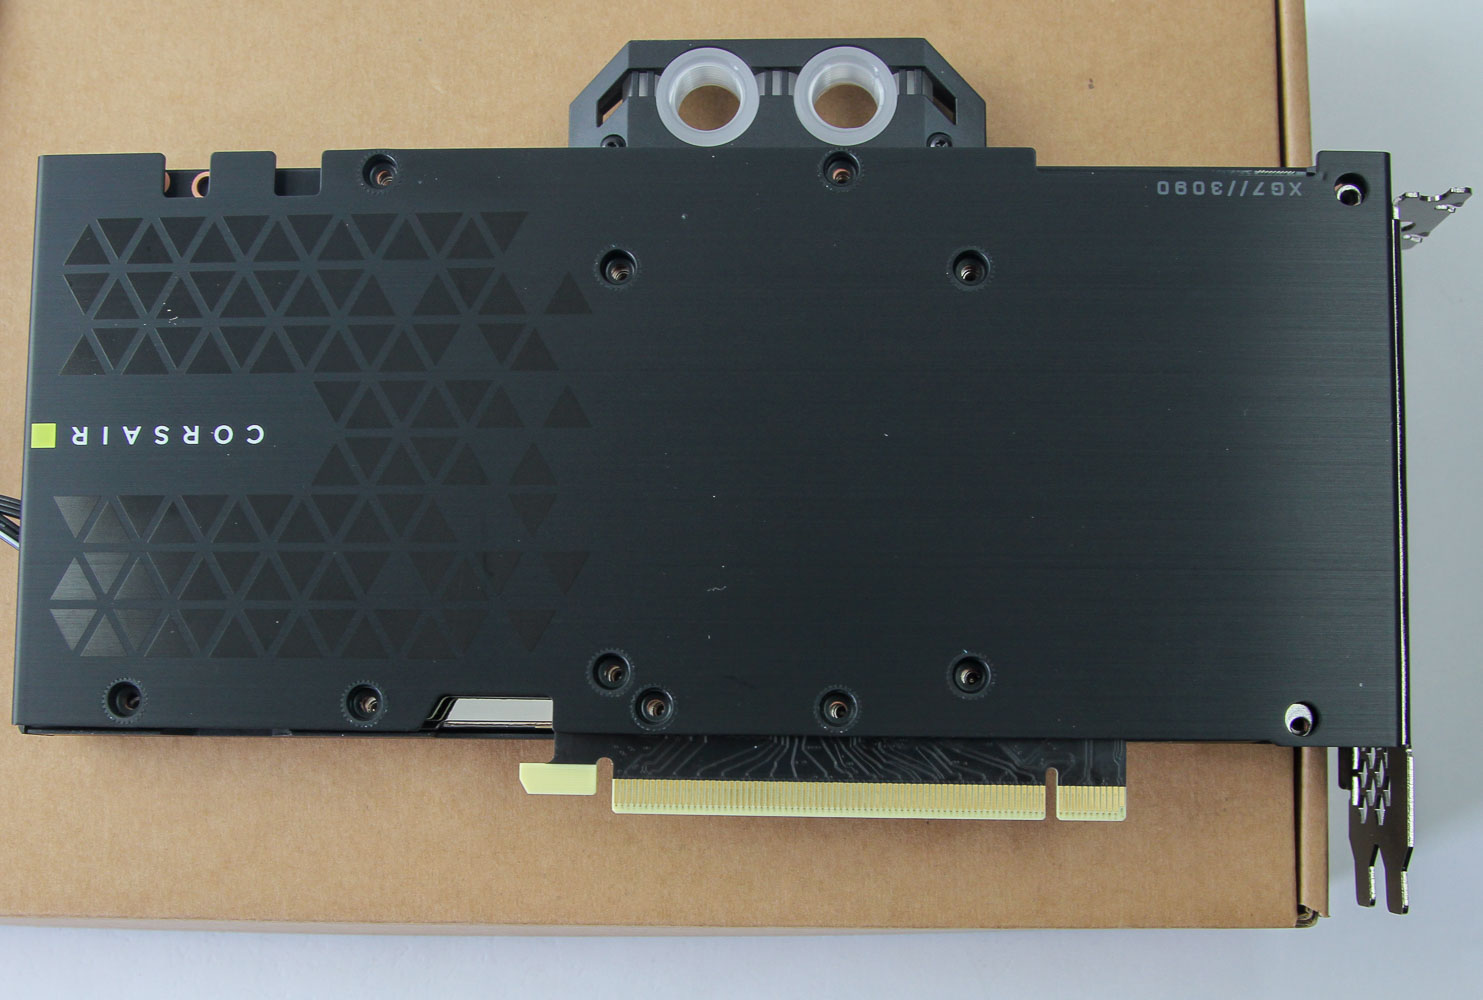
When doing so, take care to also have the requisite cable(s) out of the way so they don't block any of the screws or get squished by PCB components. Now, simply connect the cable to a compatible LED controller and plug it into your system to then plumb into the loop of your design. The finished looks are seen above, and do be aware of the slightly longer block compared to the PCB itself which CORSAIR says is for increased GPU compatibility. This is still a single-slot cooling solution, and a view from the side shows the gap between the backplate and PCB to where RTX 3080 owners may want to get thicker thermal pads.
Lighting
Here's the light show that greets you when the cable is connected and powered on. It is a rainbow wave lighting effect that does a good job of showcasing the individually addressable nature of the 16 RGB LEDs, and we can also see how and where the light comes through the block.
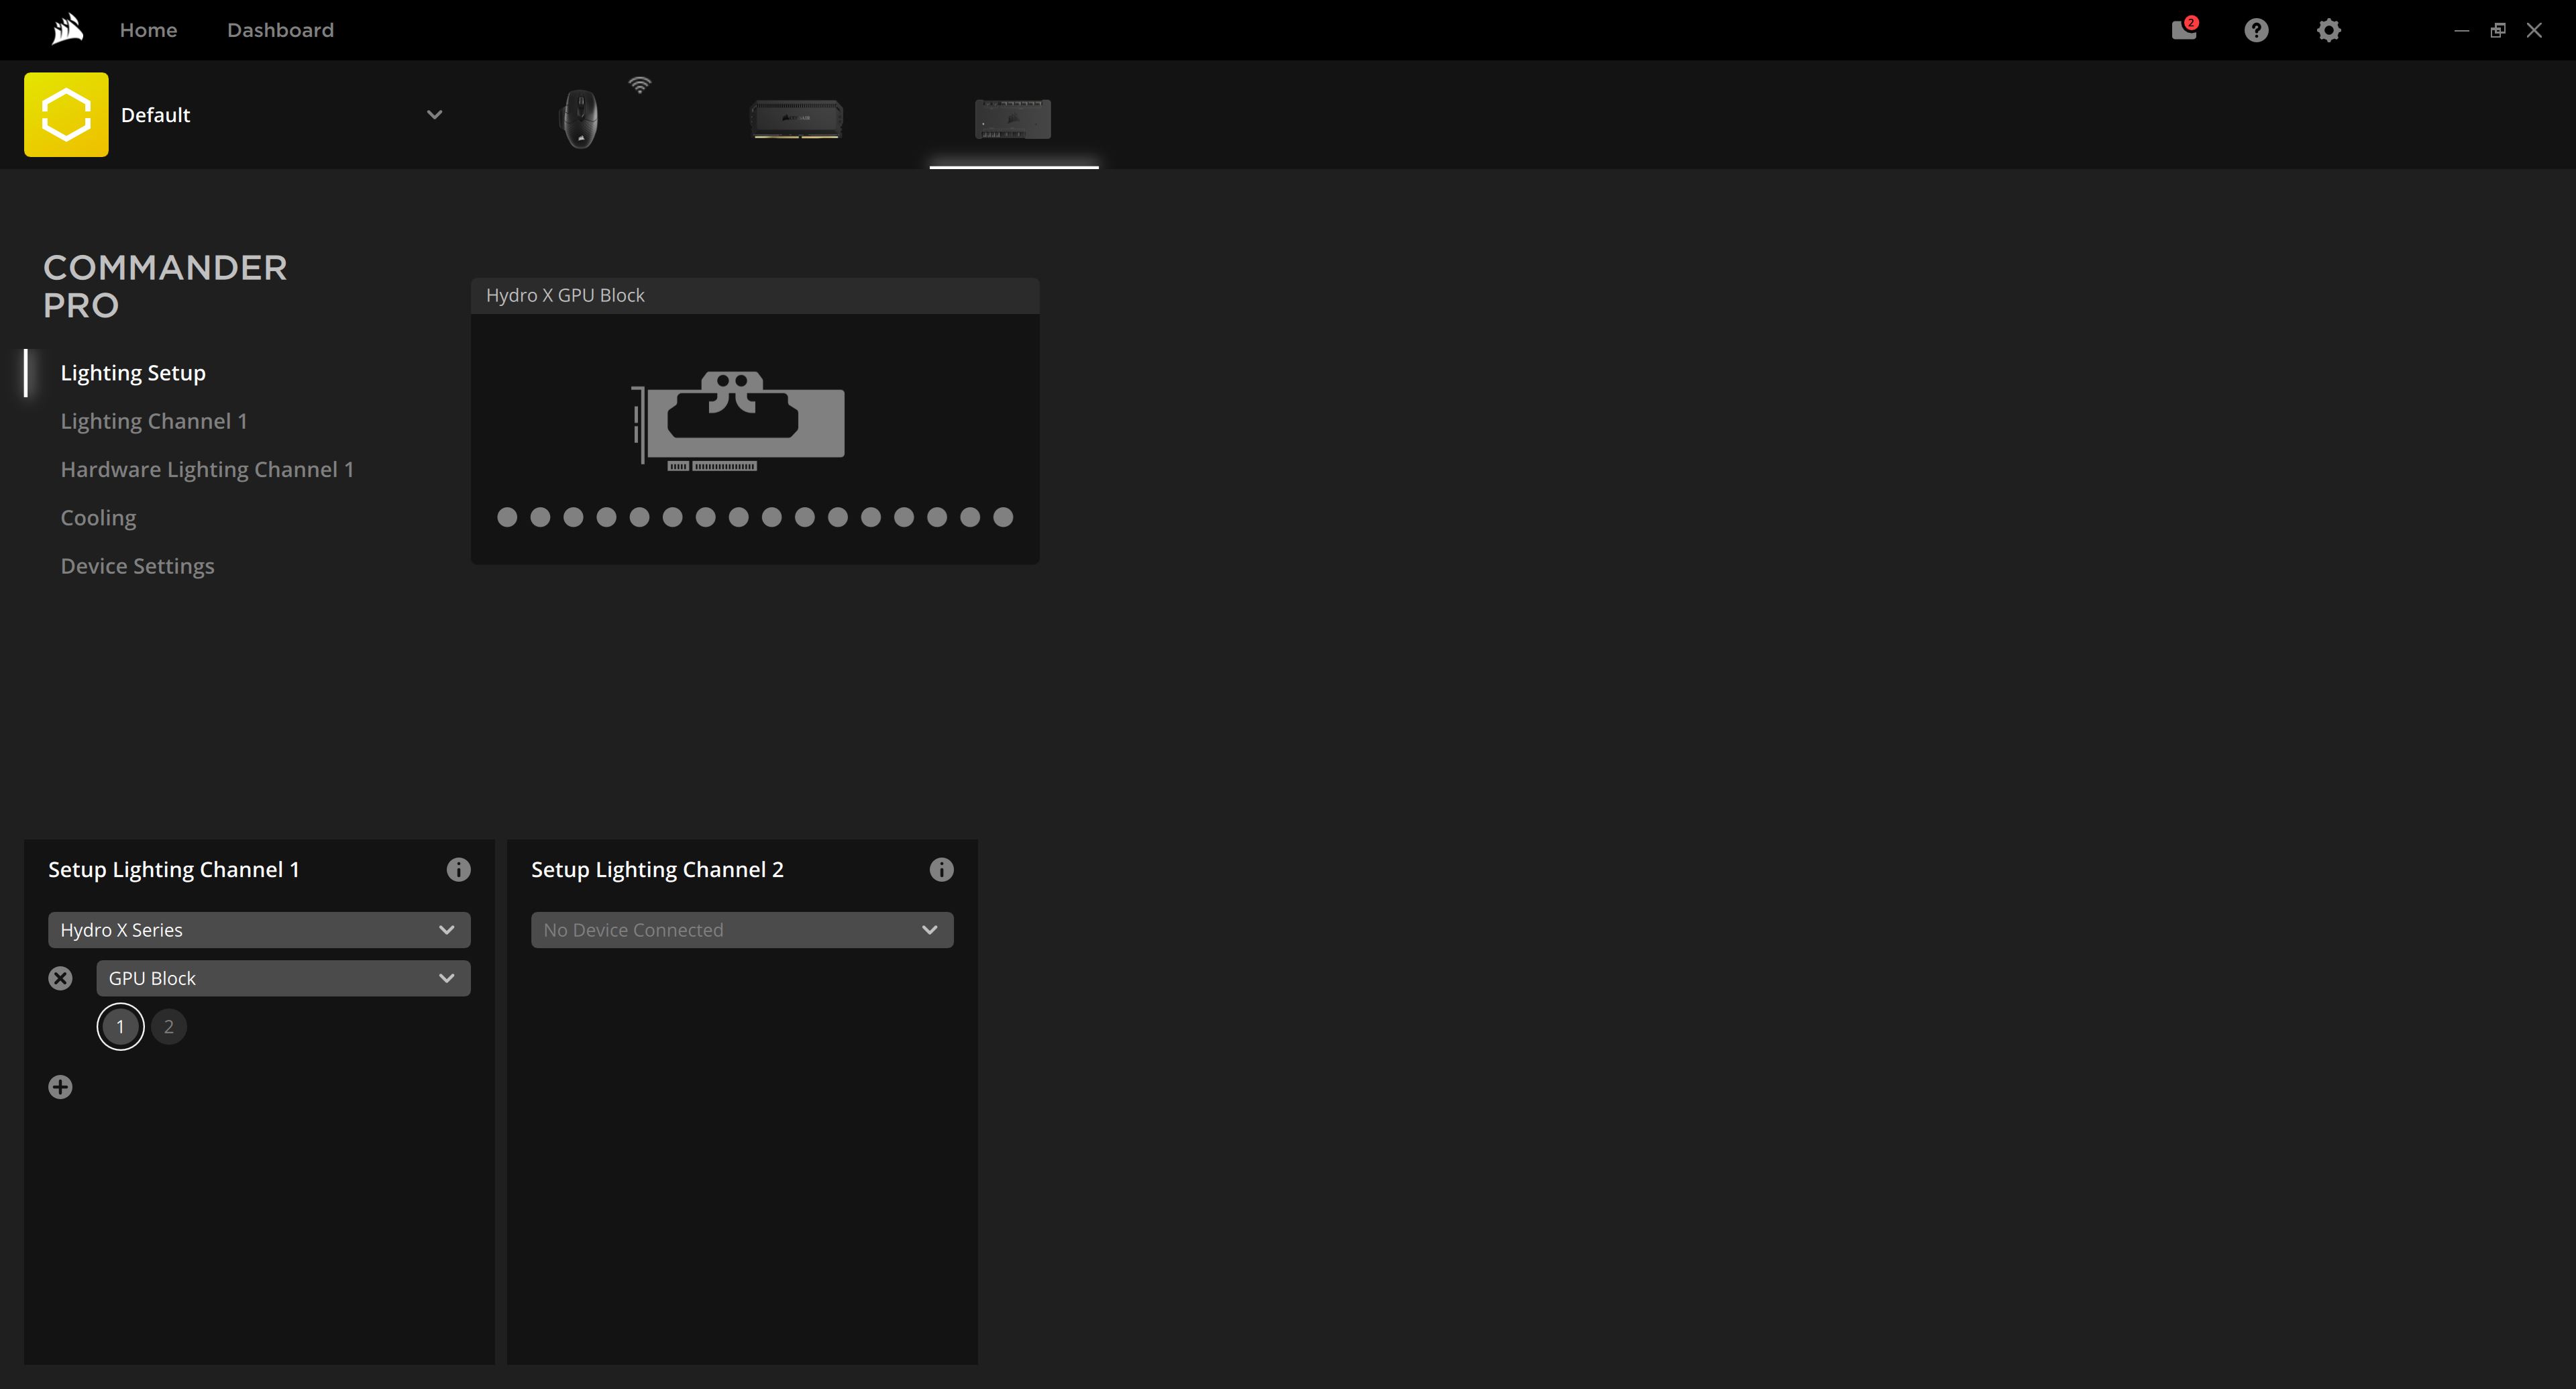
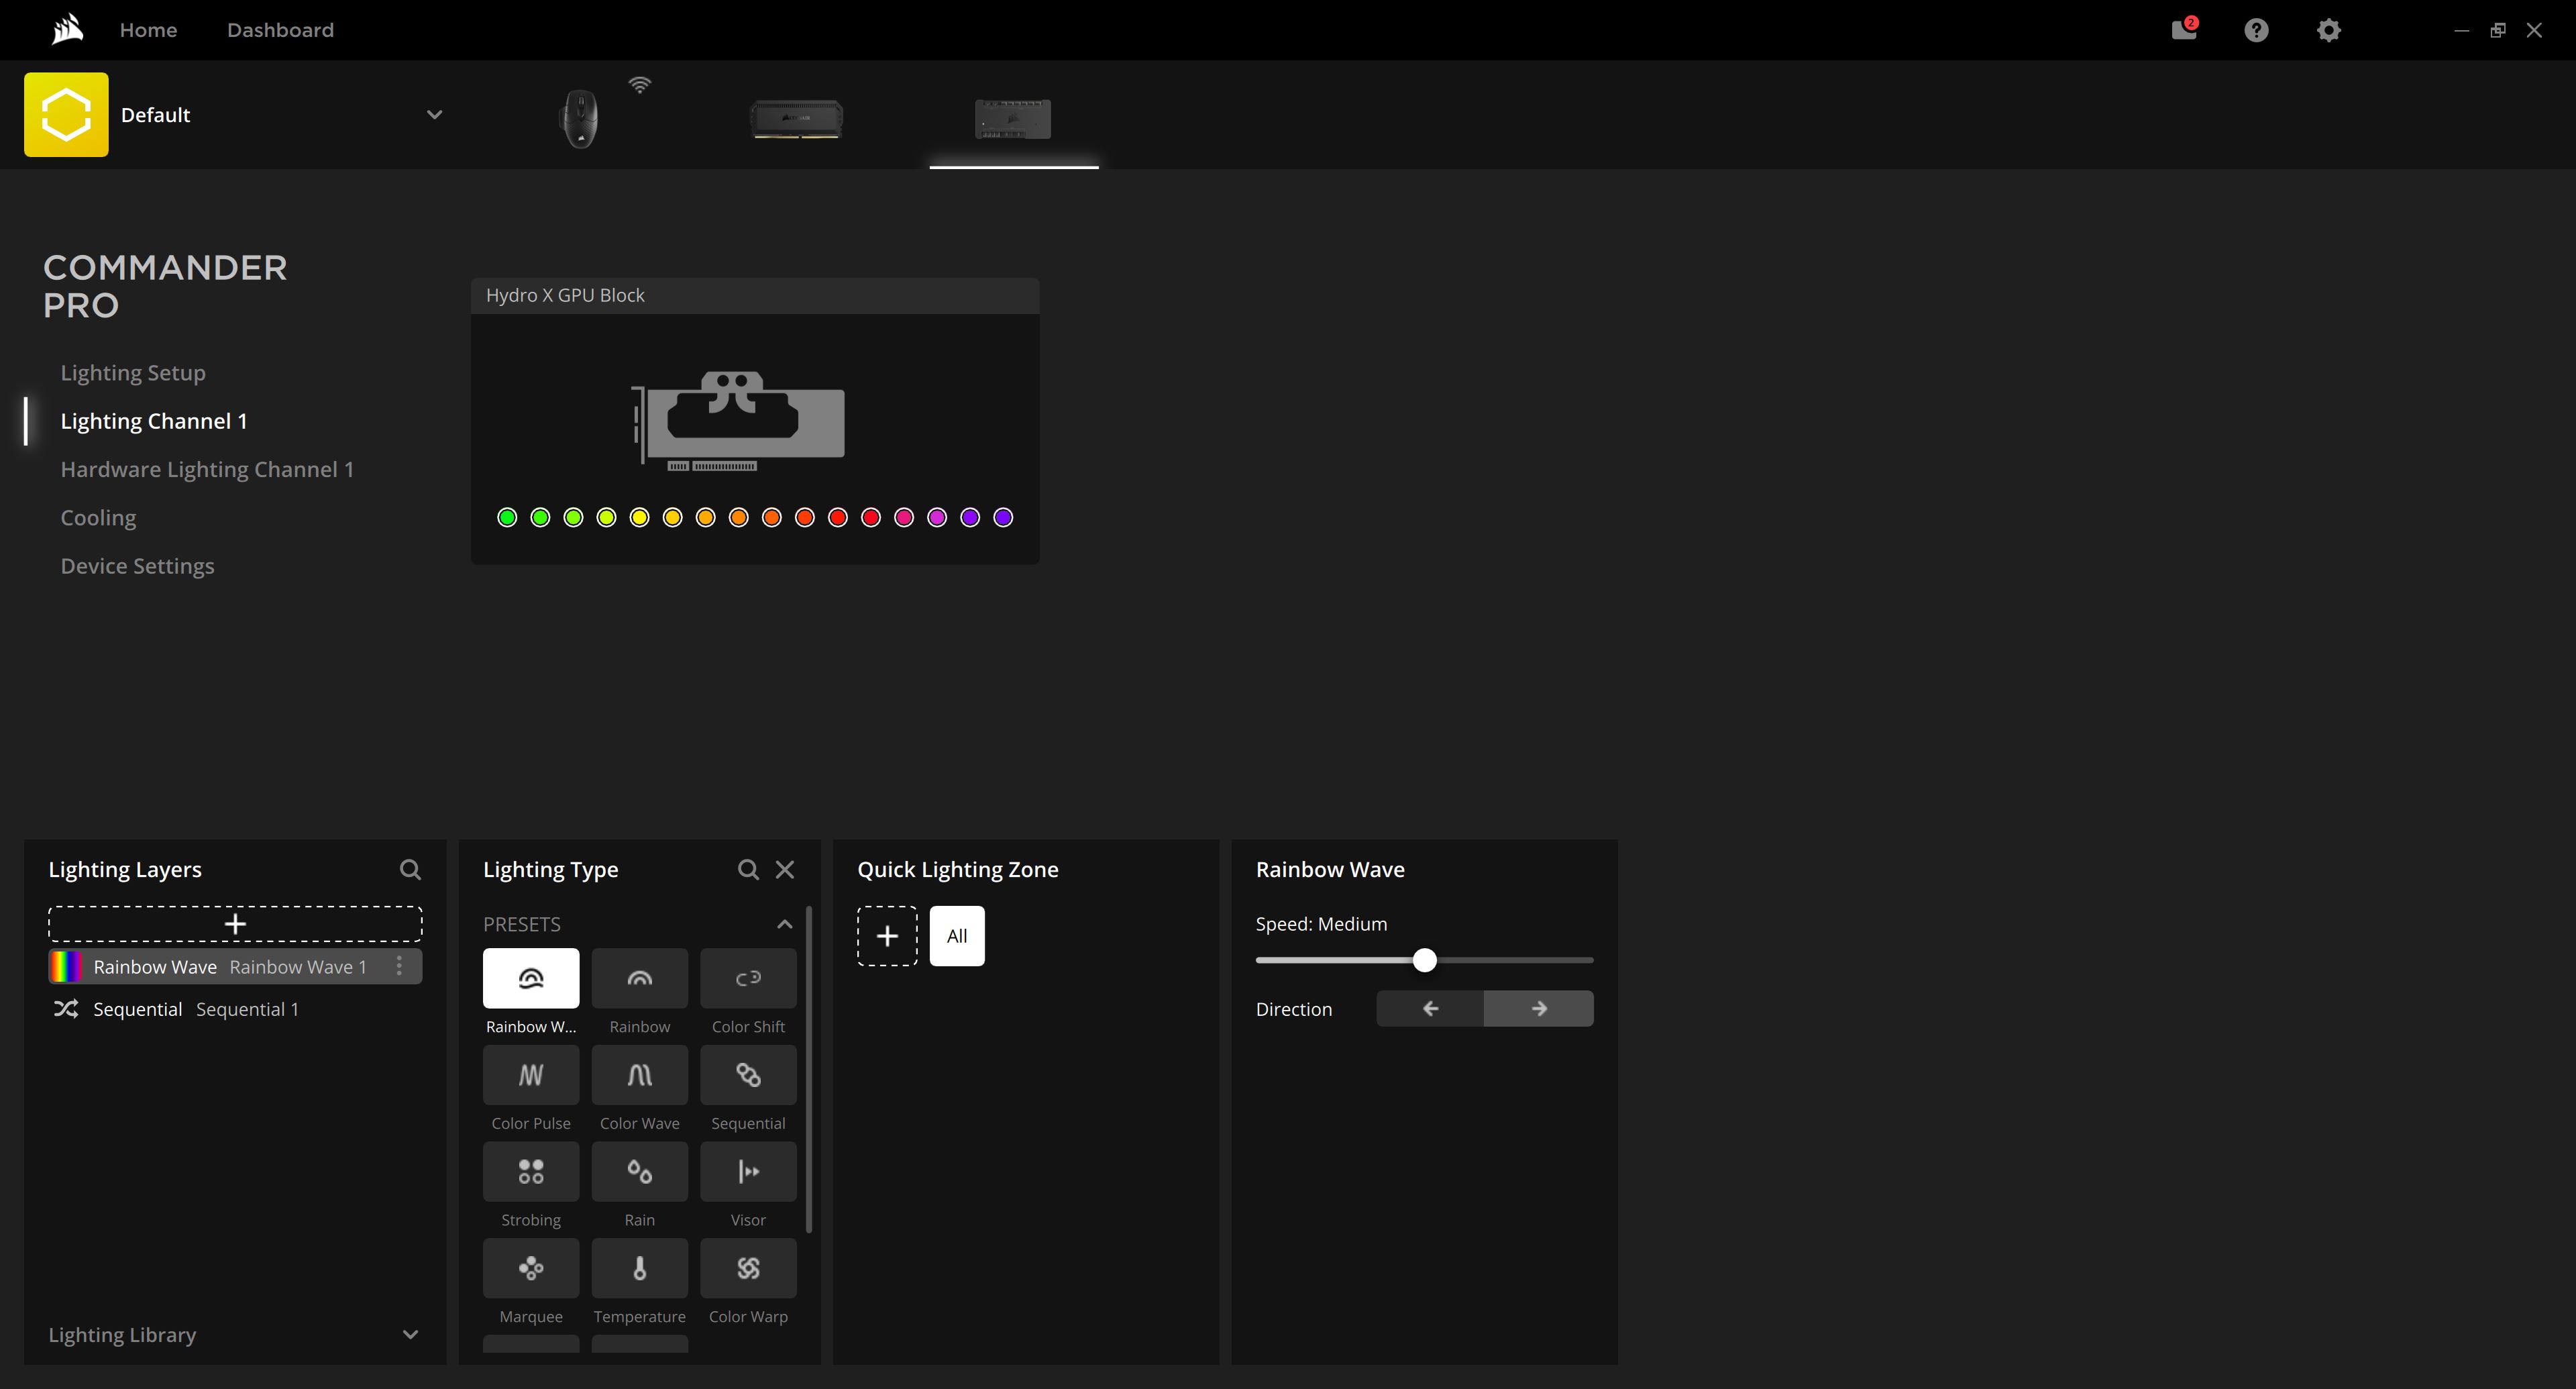
With the provided adapter cable, you can use a compatible motherboard utility for lighting control. Seen above is the CORSAIR first-party solution with iCUE, for which I had a spare CORSAIR Commander Pro. It has two channels, and a drop-down list allows for the Hydro X GPU block to be chosen. I did not have anything connected to the pass-through cable, which was thus left blank, and an on-screen render helps visualize the various lighting effects that are immediately reflected on the block.
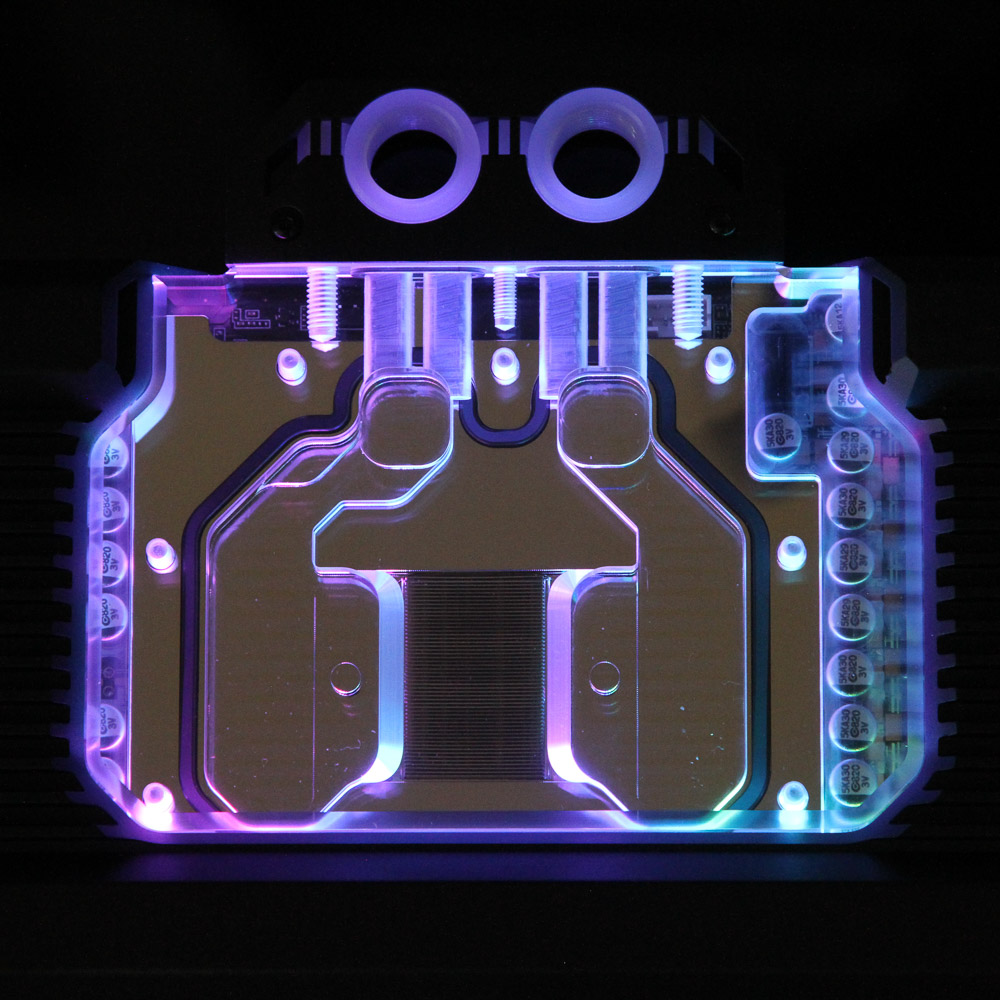
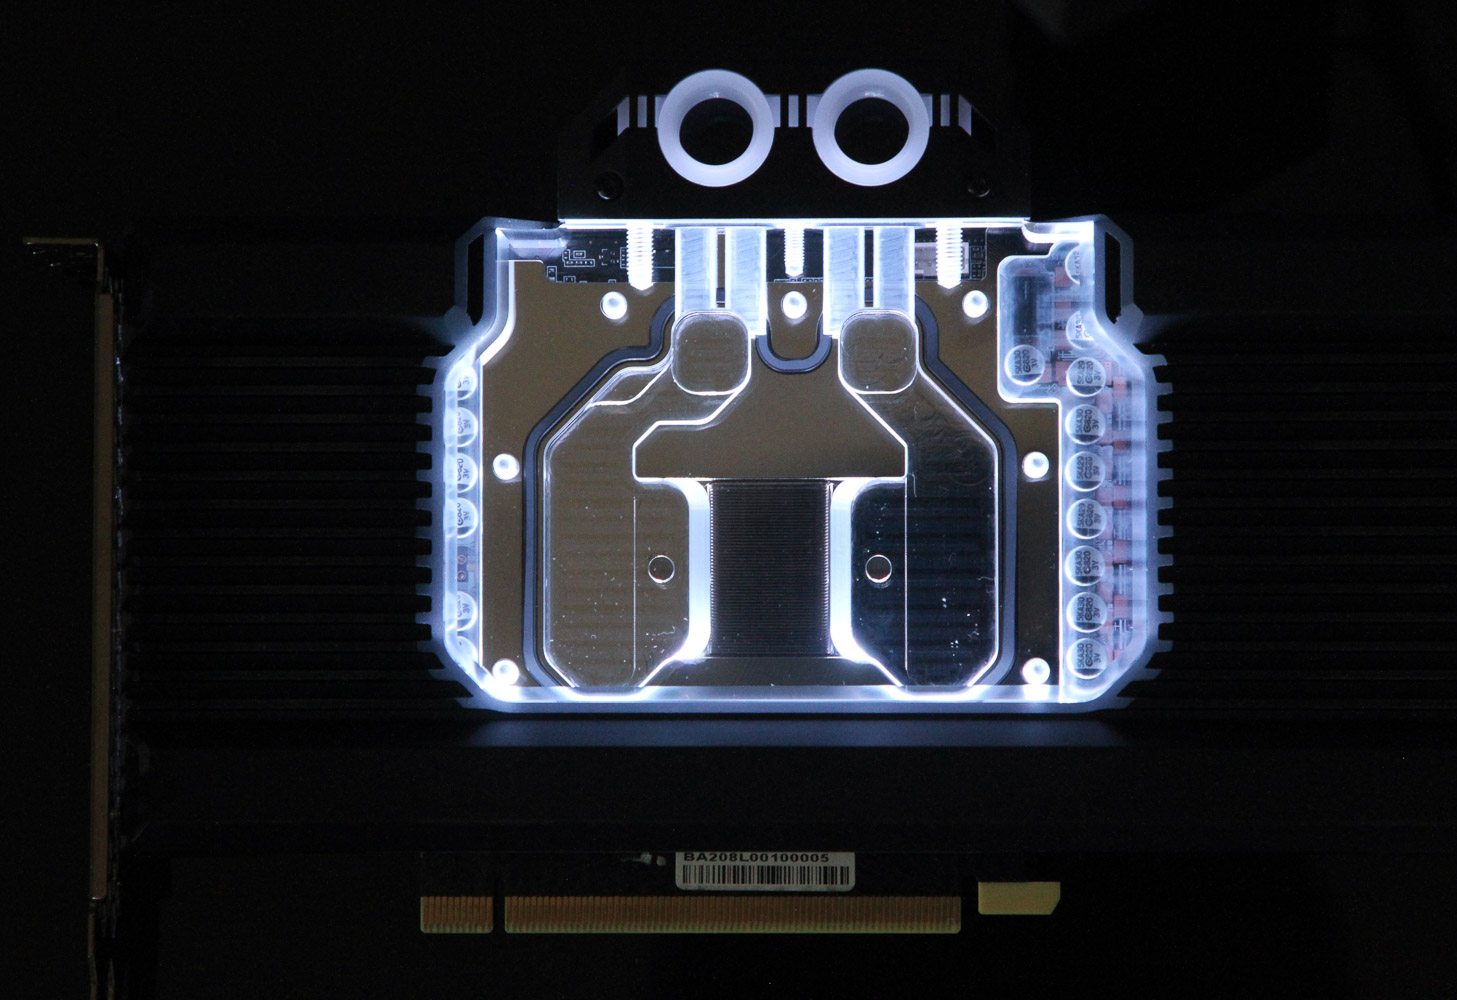
Here is a look at some of the various lighting options, be it static or dynamic. I was impressed with the fairly true to color white these LEDs were able to reproduce, and the upward-facing LEDs with the light diffusion from the acrylic and redirection from the aluminium make for smooth lighting without harsh, discrete light sources visible when seen straight through or even at most angles inside a case. As with anything compatible with iCUE, lighting can be configured to match with other products collectively. Note the I/O terminal lighting up as well because of the acrylic base. The 16 LEDs are a big improvement over the 5 LEDs in the EK offerings and allow for a more uniform lighting than the other tested GPU blocks thus far.
May 23rd, 2024 11:51 EDT
change timezone
Latest GPU Drivers
New Forum Posts
- Can anyone ID this fan? (prop only, no markings - super challenge!) (21)
- What phone you use as your daily driver? And, a discussion of them. (1522)
- Post your cooling. (30)
- TPU's Nostalgic Hardware Club (18536)
- A multi-boot adventure - Windows 10 x64 Enterprise IoT LTSC 21H2 (26)
- Free Games Thread (3834)
- Finally a lithium starting battery (15)
- Been away from PC gaming, a bit lost... (78)
- 2022-X58/1366 PIN Motherboards NVME M.2 SSD BIOS MOD Collection (661)
- Overclock AMD Ryzen 9 5900X On ROG STRIX B550-A GAMING After New Bios Update. (16)
Popular Reviews
- Ghost of Tsushima Performance Benchmark Review - 35 GPUs Tested
- Senua's Saga: Hellblade II Performance Benchmark Review
- Ghost of Tsushima: DLSS vs. FSR vs. XeSS Comparison Review
- CHERRY XTRFY M68 Pro Review
- PNY XLR8 Gaming EPIC-X RGB DDR5-6400 CL32 32 GB Review
- PMG Audio Apx In-Ear Monitors Review - $6500 Flagship!
- Upcoming Hardware Launches 2023 (Updated Feb 2024)
- TerraMaster D8 Hybrid Review
- Homeworld 3 Performance Benchmark Review - 35 GPUs Tested
- Quick Look: Huion Kamvas Pro 24 (4K) Graphics Tablet
Controversial News Posts
- Intel Statement on Stability Issues: "Motherboard Makers to Blame" (272)
- AMD to Redesign Ray Tracing Hardware on RDNA 4 (227)
- Windows 11 Now Officially Adware as Microsoft Embeds Ads in the Start Menu (173)
- NVIDIA to Only Launch the Flagship GeForce RTX 5090 in 2024, Rest of the Series in 2025 (154)
- AMD Hits Highest-Ever x86 CPU Market Share in Q1 2024 Across Desktop and Server (140)
- AMD RDNA 5 a "Clean Sheet" Graphics Architecture, RDNA 4 Merely Corrects a Bug Over RDNA 3 (139)
- AMD's RDNA 4 GPUs Could Stick with 18 Gbps GDDR6 Memory (114)
- AMD Ryzen 9 7900X3D Now at a Mouth-watering $329 (104)