 2
2
Corsair M65 RGB Elite Review
Sensor & Performance »Buttons, Scroll Wheel

Both main buttons had a lot of pre-travel before I tightened the two screws at the bottom of the mouse. This pretty much eliminated any unnecessary play on them as only a small, quite negligible amount of post-travel remained. These buttons feel pretty nice overall; very tactile and with a medium actuation force, these are very spammable and comfortable to use for hours on end. The switches used here are Omron D2FC-F-K models with a nominal lifespan of 50 million clicks.
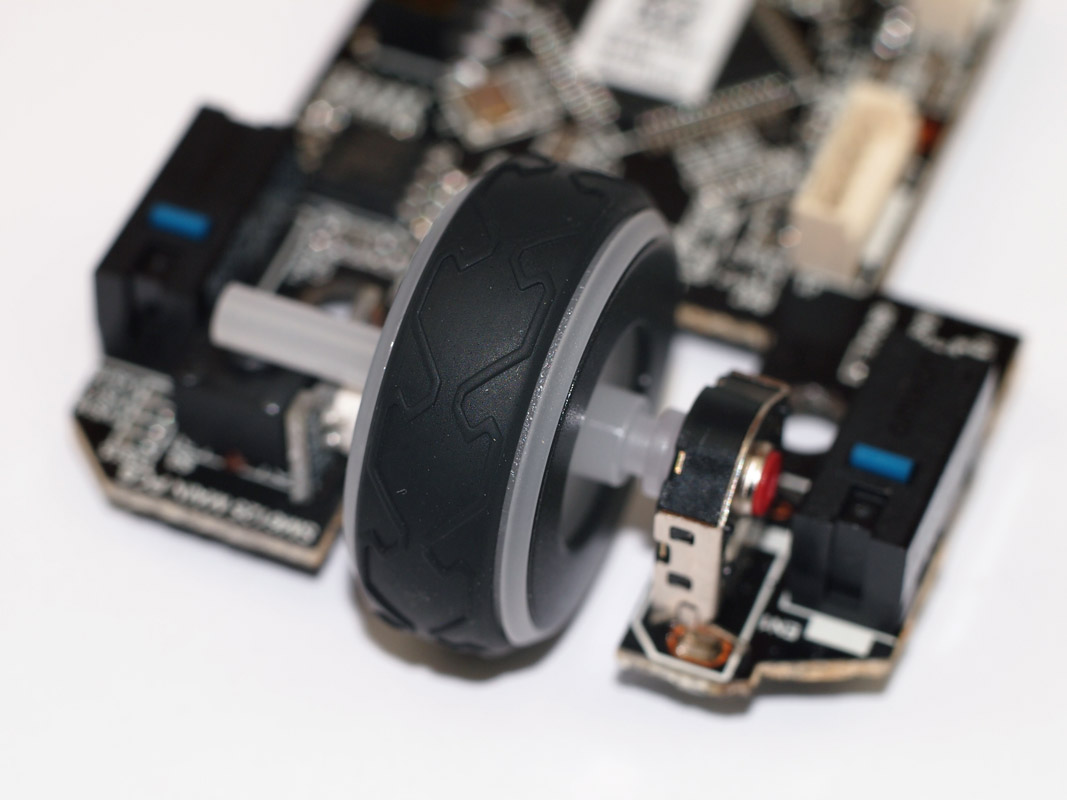
Scrolling is great with the M65 RGB Elite. The scroll wheel itself has a very pleasant touch to it, and the steps are rather light, yet very tactile and well defined. The encoder is a red 7 mm tall core Kailh one.

The middle mouse button has a slightly higher actuation force than the main buttons, but is still comfortable even when used a lot. There is a very small amount of total travel with no play whatsoever. The switch used here is a smaller square switch (it's not a Panasonic EVQP0E07K variant).

There are a total of three side buttons on the mouse, one of which is a dedicated sniper-button; it reduces the CPI value to a set value while being pressed. Of course, this (and all other mouse functions) can be rebound in the software. This button has a rather high actuation force, and I'm pretty sure it is so because you would normally hold the mouse with your thumb resting on it and don't want to accidentally actuate it. The other two side buttons are lighter, and all of them have tactile feedback with next to no unnecessary travel or play. It's rare to have a mouse with such great side buttons. The switches are all made by Kailh; the sniper-button has a blue plunger, while the other two have white plungers.
As for the CPI buttons, there are two beneath the scroll wheel. These require a lot of force to actuate, and their travel is extra short and snappy, but very silent. These buttons have small SMD switches underneath.
I also made a video in order to demonstrate how the buttons sound:
Mouse Feet
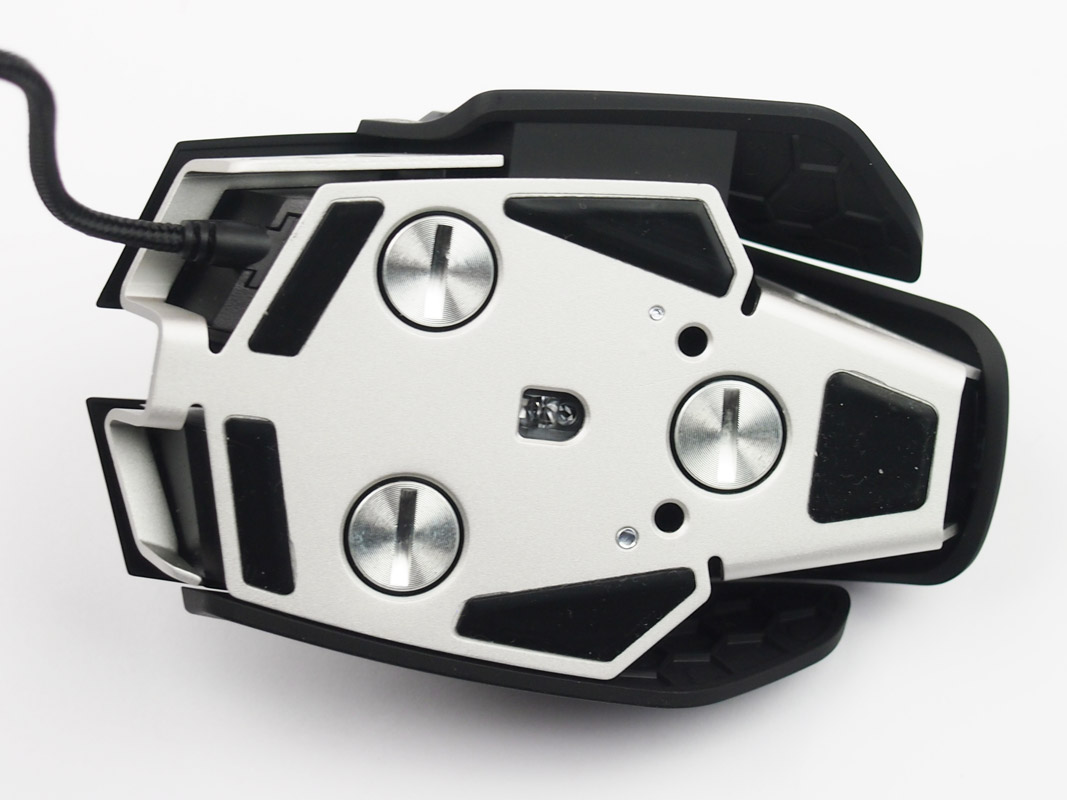
There are a total of five mouse feet on the bottom of the M65, and they are really good for factory stock feet. They offer a smooth and even glide with very low resistance compared to the competition; these feet feel like they are flying across the mouse pad. I'm not sure about their durability, but if they last a long time, they're among the best currently in the market for sure. Unfortunately, there are no extra mouse feet inside the box, but this time, I won't count this as a negative because you can disassemble the mouse without destroying them. More on that a bit later.
Cable

The cable is pretty much the only part of the mouse I can objectively dislike. It is very thick (it barely fit into my Zowie Camade bungee), heavy, and stiff. I guess this part of the mouse is like the aluminium chassis—it's made to last, which comes at a price. I would definitely recommend affixing it somewhere, either with a bungee or some tape to make sure you don't experience too much drag while using the M65.
Disassembling
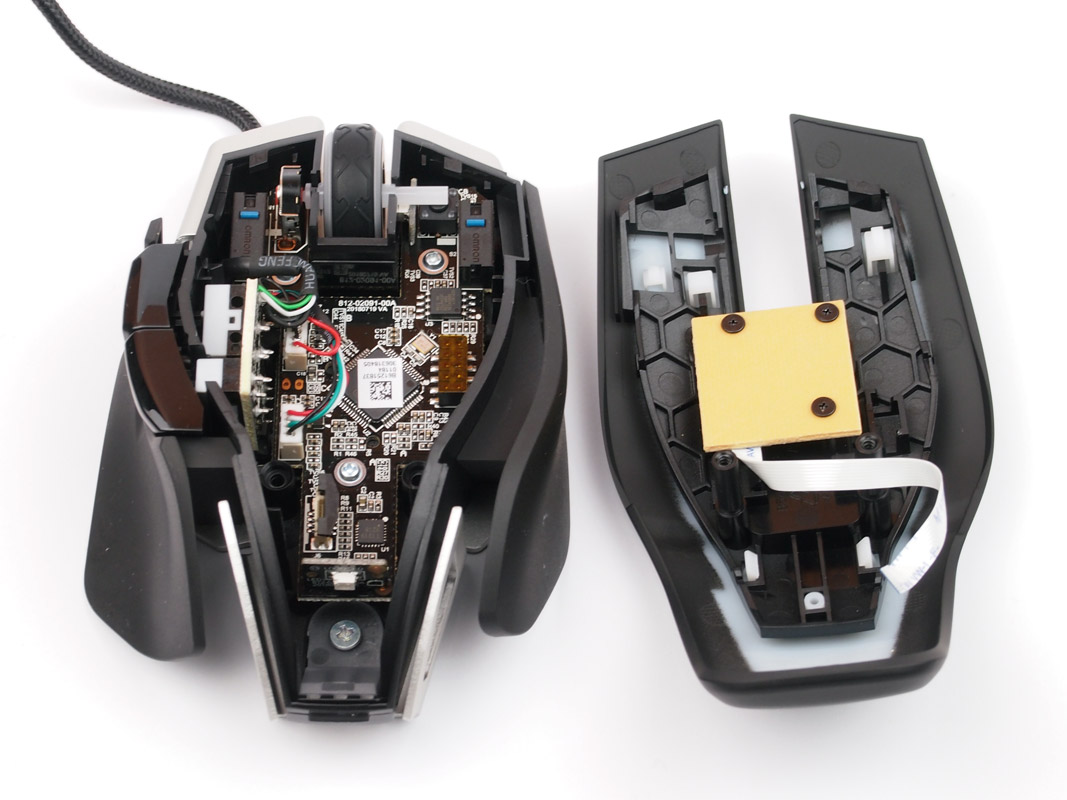
Disassembling the M65 RGB Elite is an easy and very forgiving task. Thankfully, you don't need to remove any mouse feet in order to do so. Just unscrew two screws inside some pretty deep holes next to the bottom weight bin. Once done, simply pop the two main pieces apart. Make sure to tighten these screws as much as possible when you reassemble the mouse because tightening them pretty much eliminates any unnecessary pre travel on the main buttons.
Apr 27th, 2024 00:31 EDT
change timezone
Latest GPU Drivers
New Forum Posts
- RX 580 VBIOS related functionality not supported for Device: 0x67df (9)
- Strange system crashes out of nowhere, help (12)
- Alphacool CORE 1 CPU block - bulging with danger of splitting? (33)
- hacked (78)
- 5800x (and other Zen 3 chips) PBO settings/Temperature fix (937)
- Is this a hardware problem ? Live kernel 193 (0)
- Help me to OC my 5700X (11)
- Realtek Modded Audio Driver for Windows 10/11 - Only for HDAUDIO (5690)
- What's your latest tech purchase? (20355)
- AAF Optimus DCH Audio Modded Driver for Windows 10/11 - For ALL HDAUDIO Enumerator Chips (654)
Popular Reviews
- Ugreen NASync DXP4800 Plus Review
- HYTE THICC Q60 240 mm AIO Review
- MOONDROP x Crinacle DUSK In-Ear Monitors Review - The Last 5%
- Quick Look: MOONDROP CHU 2 Budget In-Ear Monitors
- Upcoming Hardware Launches 2023 (Updated Feb 2024)
- Thermalright Phantom Spirit 120 EVO Review
- FiiO K19 Desktop DAC/Headphone Amplifier Review
- Alienware Pro Wireless Gaming Keyboard Review
- Corsair iCUE Link XC7 RGB Elite CPU Water Block Review
- NVIDIA GeForce RTX 4090 PCI-Express Scaling
Controversial News Posts
- Windows 11 Now Officially Adware as Microsoft Embeds Ads in the Start Menu (135)
- Sony PlayStation 5 Pro Specifications Confirmed, Console Arrives Before Holidays (117)
- NVIDIA Points Intel Raptor Lake CPU Users to Get Help from Intel Amid System Instability Issues (106)
- AMD "Strix Halo" Zen 5 Mobile Processor Pictured: Chiplet-based, Uses 256-bit LPDDR5X (103)
- US Government Wants Nuclear Plants to Offload AI Data Center Expansion (98)
- AMD's RDNA 4 GPUs Could Stick with 18 Gbps GDDR6 Memory (95)
- Developers of Outpost Infinity Siege Recommend Underclocking i9-13900K and i9-14900K for Stability on Machines with RTX 4090 (85)
- Windows 10 Security Updates to Cost $61 After 2025, $427 by 2028 (84)