 14
14
Cougar Conquer Review
Value & Conclusion »Test System
| System Parts for Case Reviews | |
|---|---|
| Processor: | Intel Core i5-7600K |
| Motherboards: | ATX: MSI Z270 Tomahawk mATX: MSI H270M Mortar Arctic mini-ITX: MSI Z270I Gaming Pro Carbon AC Provided by: MSI |
| Graphic Card: | Long: NVIDIA GeForce GTX 280 OEM Short: HIS Radeon 5350 HD |
| Memory: | 16 GB ADATA XPG Dazzle DDR4 2800 MHz CL17-17-17 1.25V 16 GB ADATA XPG Z1 DDR4 3000 MHz CL18-18-18 1.35V 16 GB ADATA XPG Z1 DDR4 2400 MHz CL16-16-16 1.20V Provided by: ADATA |
| HDD: | Western Digital 320 GB 7200 RPM |
| SSD: | ADATA Premier Pro SP920 MLC 256 GB ADATA Ultimate SU800 3D TLC 256 GB ADATA Premier SP550 TLC 240 GB Provided by: ADATA |
| Power Supply: | Fractal Design Integra M 450W Provided by: Fractal Design |
| Cooling: | Air Cooling: be quiet! Pure Rock Provided by: be quiet! |
Assembly

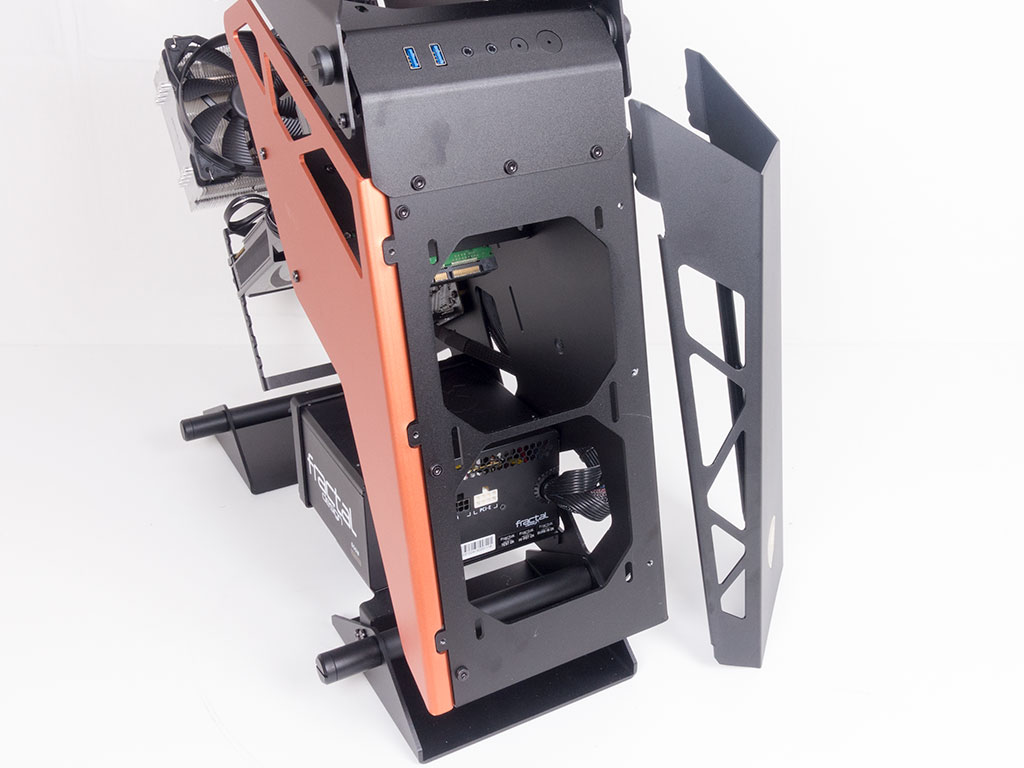
As mentioned, you should really start with the hard drives first. Odds are you will want to show off your SSD, which makes placing it on the rear of the motherboard tray seem best. It is held in place by four screws, which is simple but effective. However, it would have been nice if the holes were of the kind that allow you to mount larger flatheads with rubber rings to then push them in and down onto the surface to lock things down, since it would makes adding or changing drives considerably easier.


The additional bracket, which is also a fairly important structural piece, may hold either two 2.5" or a 3.5" drive. As it is a bit more covered, I chose to place the somewhat ugly, larger drive here. It is also held in place on the mounting plate by screws. That contraption is in turn sandwiched between the side panel and orange piece, and is secured with traditional screws.
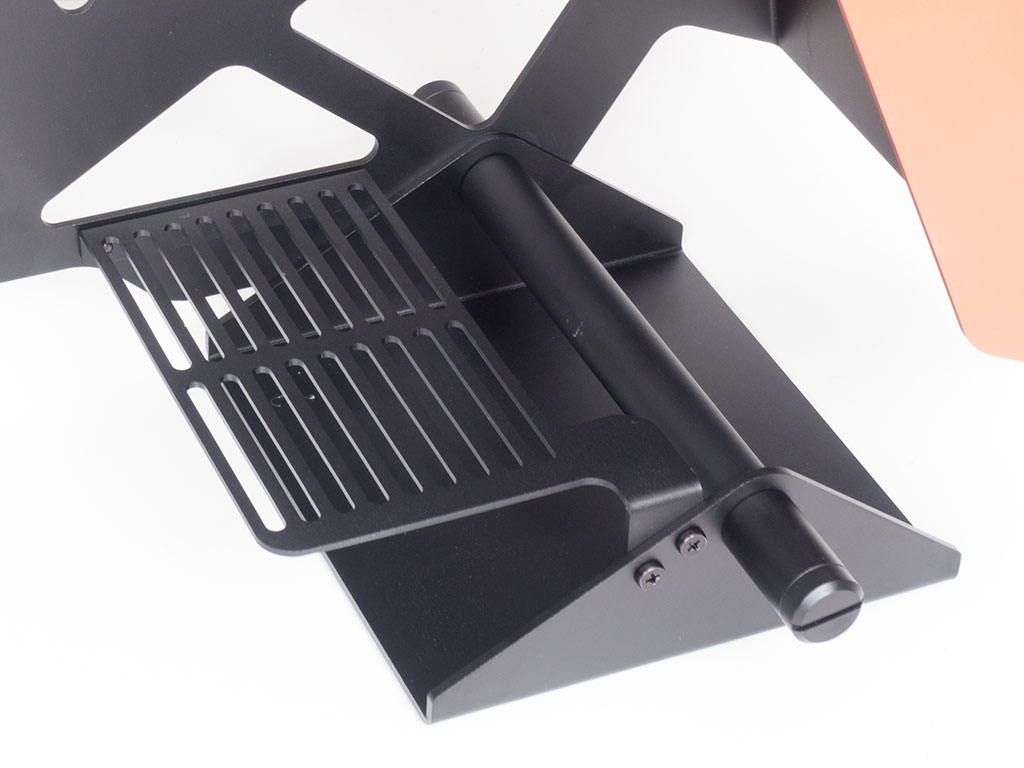
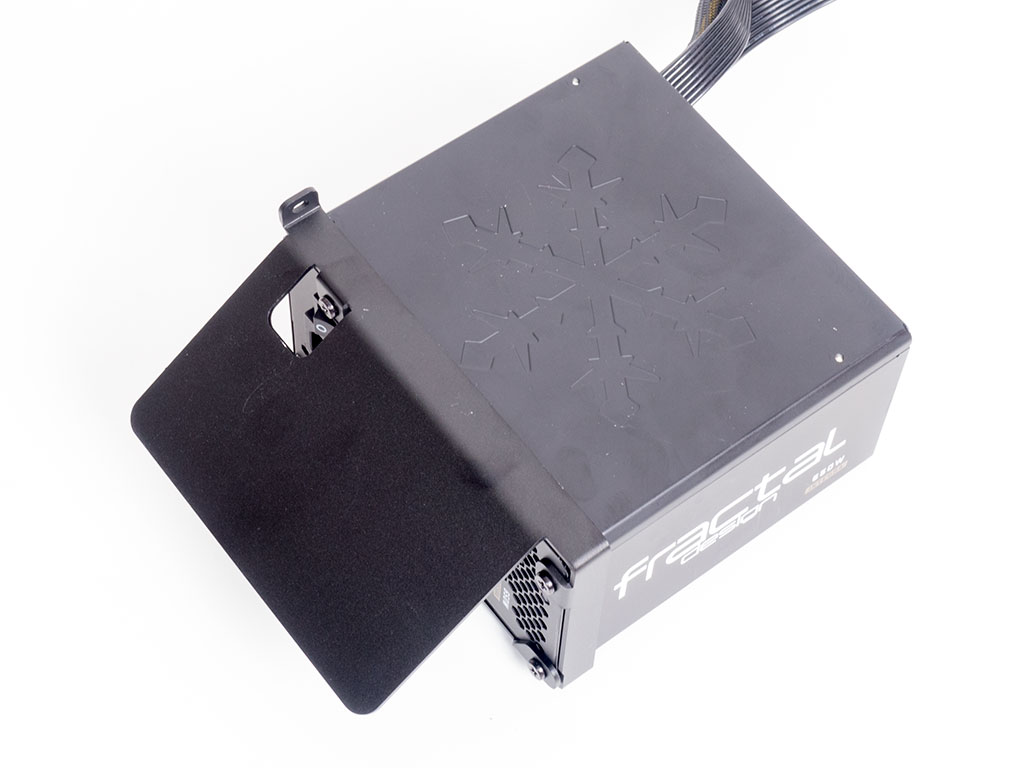

Cougar has chosen to place the PSU bay on the chassis' front foot/stand. While its positioning is a bit unusual, it really helps lower the center of gravity and keeps the motherboard completely unobstructed in the front and top of the case. You will first have to put the grille in place, on top of the foot, to then mount the PSU frame to the PSU before putting it on top of the grille and screwing it down. Interestingly enough, the internal power leads face forward, which is great in terms of keeping these hidden, and their orientation also makes routing the power cable out through the back of the chassis a breeze.

Lastly, installing the motherboard is done by traditional means, with the use of spacers and screws. The open-air design makes accessing everything pretty simple, but you will, as such, need to spend some additional time on routing the cables nicely.


Cougar also includes three orange-bladed, LED-equipped fans with quite the nice grilles. I chose to put two into the front and one into the ceiling of the case.
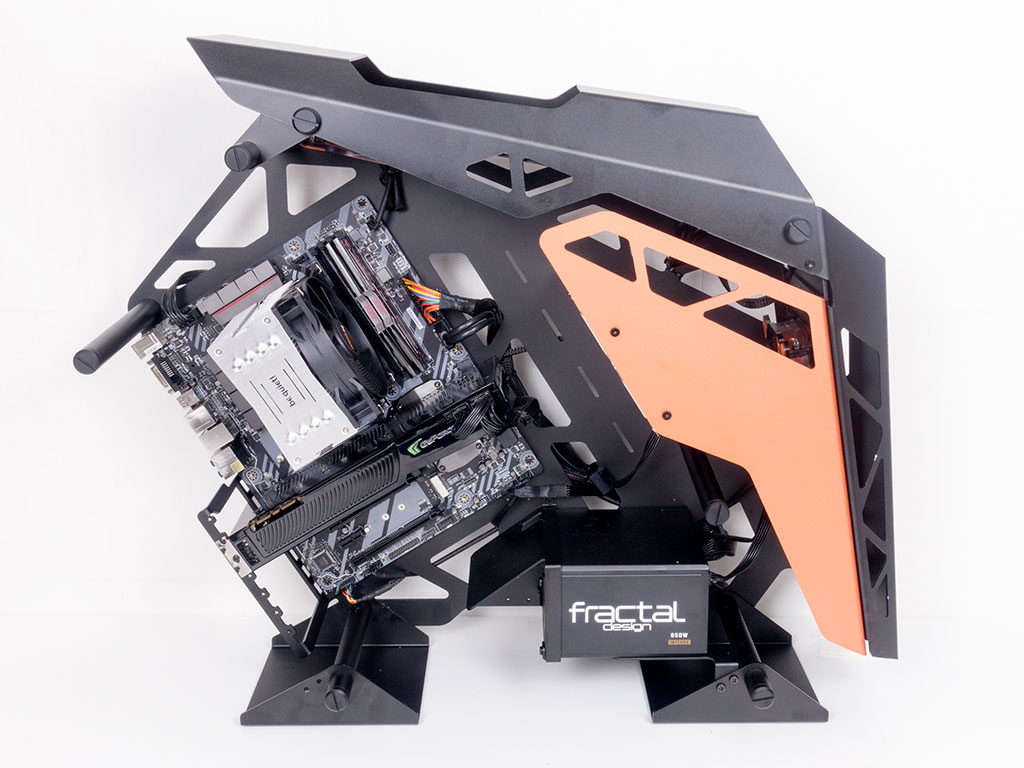
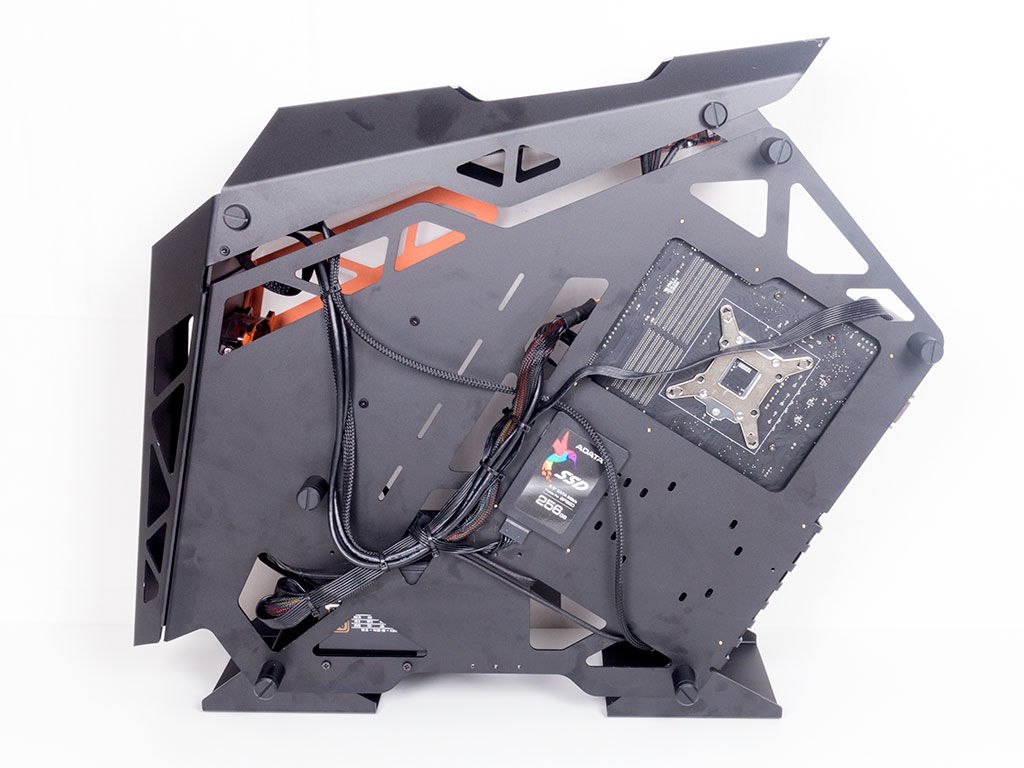
With all the components in place, the only thing left is to attach the remaining rods for the side panels to their appropriate locations. With a bit of creative cable management, things don't even look so bad on the backside of the Cougar Conquer, and the insides are actually quite clean.
Finished Looks
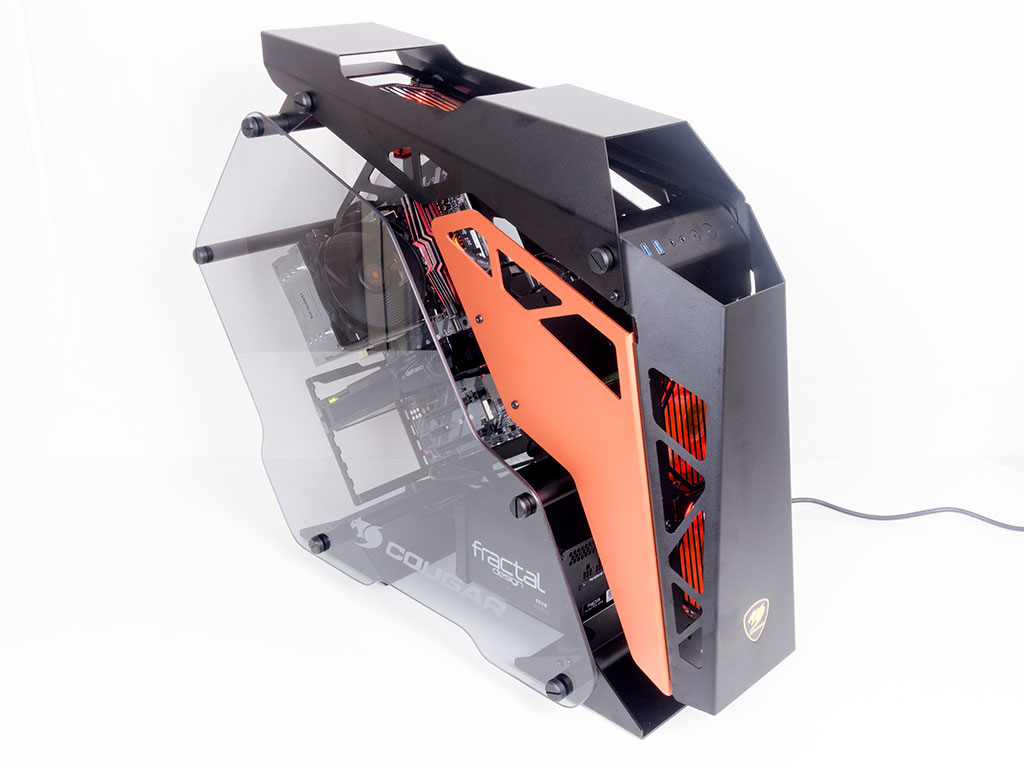

With the glass side panels back in place, the Cougar Conquer makes a really sexy impression. While some may not like the large Cougar logos on the panels, they do suit the look well due to the very light tint. Cougar has done an excellent job of shaping the glass in a way that has it go well with the frame's overall design. A small, white LED lights up when the system is turned on to let you know that things are up and running.


You can clearly see all the hardware within the Cougar Conquer, which is another reason aside from the elaborate design to go for such a case. I can only imagine how cool things could look if you were to opt for an intricate RGB-equipped liquid-cooling setup.
May 20th, 2024 10:20 EDT
change timezone
Latest GPU Drivers
New Forum Posts
- For general use - moving files around and playing games, would you have an Optane boot drive or PCie gen 5? (49)
- What's your latest tech purchase? (20578)
- Overclock AMD Ryzen 9 5900X On ROG STRIX B550-A GAMING After New Bios Update. (9)
- Good travel sim? (0)
- eSIM vs physical SIM? (35)
- My anti budget PC (21)
- Let's Party Like It's 2006 and We Got $999 to Burn: Conroe-XE Rides Again. (31)
- Last game you purchased? (303)
- 5950X - Lowering SOC Voltage at 0.9 (12)
- Homeworld 3 [Official Thread] (49)
Popular Reviews
- Ghost of Tsushima Performance Benchmark Review - 35 GPUs Tested
- TerraMaster D8 Hybrid Review
- Silverstone Shark Force 120 mm Fan Review
- Lofree Edge Ultra-Low Profile Wireless Mechanical Keyboard Review
- Homeworld 3 Performance Benchmark Review - 35 GPUs Tested
- Upcoming Hardware Launches 2023 (Updated Feb 2024)
- Sapphire Radeon RX 7700 XT Pure Review
- AMD Ryzen 7 7800X3D Review - The Best Gaming CPU
- Enermax REVOLUTION D.F. X 1200 W Review
- Sapphire Radeon RX 7900 GRE Pulse Review
Controversial News Posts
- Intel Statement on Stability Issues: "Motherboard Makers to Blame" (269)
- AMD to Redesign Ray Tracing Hardware on RDNA 4 (227)
- Windows 11 Now Officially Adware as Microsoft Embeds Ads in the Start Menu (173)
- NVIDIA to Only Launch the Flagship GeForce RTX 5090 in 2024, Rest of the Series in 2025 (154)
- AMD Hits Highest-Ever x86 CPU Market Share in Q1 2024 Across Desktop and Server (140)
- AMD RDNA 5 a "Clean Sheet" Graphics Architecture, RDNA 4 Merely Corrects a Bug Over RDNA 3 (139)
- AMD's RDNA 4 GPUs Could Stick with 18 Gbps GDDR6 Memory (114)
- AMD Ryzen 9 7900X3D Now at a Mouth-watering $329 (104)