 7
7
DeepCool CK560 Case Review
Thermal Stress Test »Review System
| System Parts for Case Reviews | |
|---|---|
| Processor: | ATX: Intel Core i5-11600K mATX/ITX: Intel Core i5-10600K Provided by: Intel |
| Motherboards: | ATX: Gigabyte Z590 AORUS PRO AX ITX: Gigabyte Z590I Vision D Provided by: Gigabyte mATX: ASRock B560M Steel Legend Provided by: ASRock |
| Graphics Card: | Gigabyte Radeon RX 6600 Eagle Provided by: Gigabyte ZOTAC GAMING GeForce RTX 3060 Ti Twin Edge OC Provided by: Zotac |
| Memory: | 16 GB XPG SPECTRIX D50 3200 MHz 16 GB XPG SPECTRIX D60G DDR4 3000 MHz 16 GB XPG GAMMIX D20 DDR4 3200 MHz Provided by: ADATA |
| HDD: | Toshiba MG08ADA400E 7200 RPM SATA III Provided by: Toshiba |
| SSD: | ATX:XPG SPECTRIX S20G 500 GB mATX: XPG GAMMIX S50 Lite 1 TB ITX: ADATA Falcon 512 GB ADATA Ultimate SU800 512 GB ADATA Ultimate SU720 500 GB Provided by: ADATA |
| Power Supply: | ATX: Fractal Design ION+ 650W 80 Plus Gold SFX: Fractal Design ION SFX-L 650W 80 Plus Gold Provided by: Fractal Design |
| Cooling: | be quiet! Pure Loop 120/240/280/360 Provided by: be quiet! |
Assembly


Installing the motherboard within the CK560 is pretty straightforward—use the two aligning spacers to keep the motherboard in place perfectly and screw it into place. There isn't much room on the bottom and top edge of the case, but that should not be an issue because of well-placed openings. DeepCool does mention that you can install an E-ATX motherboard within the CK560, which is true, but would really restrict you within the chassis. Adding the GPU and utilizing the support bracket, you can clearly see that there is plenty of room for long units of up to 380 mm.


Thanks to the updated SSD mounting method over the simple screws found in the CG560, you may now complete this step at any time during your build process. Simply attach the pin screws to the drive and push it into the rubber rings.


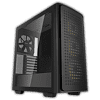
Adding 3.5" storage devices has gotten much easier as well, since you no longer need to remove the whole cage. Instead, using the plastic trays, simply snap such a unit down without using any tools and slide it back into the chassis. It is nice to see that DeepCool has its own design for these, so odds are we will find this mechanism in many other DeepCool cases in the future.

Adding a PSU is straightforward, as you simply slide it underneath the shroud and screw it down with classic case screws. DeepCool mentions a maximum PSU length of 160 mm, which seems very conservative. Even with the HDD placed towards the rear of the case, the 150 mm long Fractal Ion 650 W unit leaves around 40 mm of room in addition to the space needed due to its modular nature.


Installing an AIO within the CK560 is pretty straightforward. We placed the largest-possible one in the ceiling of the chassis; it comes with three fans in the front out of the box. The 280 mm AIO actually fits quite well overall, giving you enough room for high memory clearance. It does overhang the top edge of the motherboard, blocking access to any connectors along that top edge of the board, like the CPU power and fan headers. In addition to that, it collides with the rear I/O cover of the Gigabyte motherboard. Luckily, there is enough flexibility with the elongated mounting holes to adjust for that. So in short, the AIO fits just fine, but you better make sure everything is connected to the board before you add it.


With everything assembled, the DeepCool CK560 makes a clean impression on the interior. We did have to re-route some of the fan cable to make the most of what the case is capable of. In the rear, with all the hooks for zip-ties, the results look excellent, however. Even the grommet-covered openings are still accessible, so future additions to your system should absolutely be doable. If you plan well, you could even swap PSUs without having to disturb the rest of the case and system-related wiring.
Finished Looks


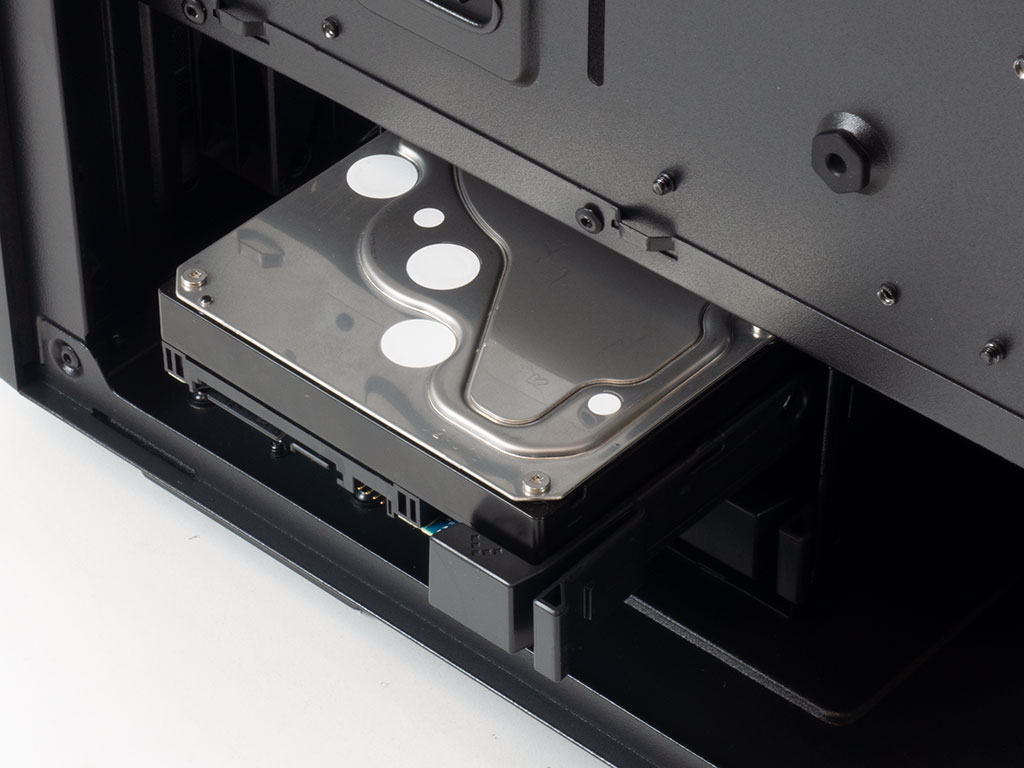
Turning the DeepCool CK560 on, the front fans shine through the uniquely shaped metal panel with the hub-mounted LEDs. A white LED next to the power button also lets you know the system is up and running.
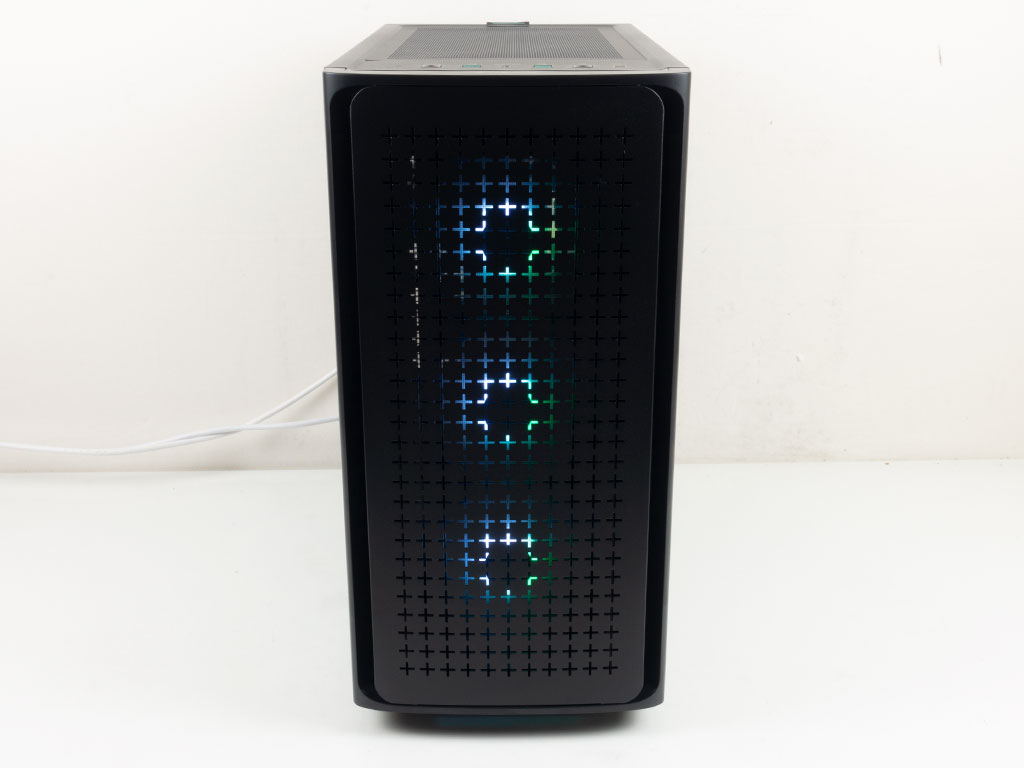

The ARGB fans have that subtle shine, which is a nice touch. That said, the ARGB controller is a bit limited in the number of modes it may trigger compared to other offers out there. Thanks to the clear window, you can easily see all the hardware within even without additional LED strips or rear fan lighting. Lastly, when viewing the chassis from the rear, everything is where you would expect it to be, and one can also see the glow from the front fans through the venting and rear fan blades.
Jun 5th, 2024 02:06 EDT
change timezone
Latest GPU Drivers
New Forum Posts
- Zen5 only 16 core. (51)
- Decent, lightweight alternative to Windows Mail? (25)
- PC Game Retro Reviews (32)
- What's your latest tech purchase? (20735)
- How to check flatness of CPUs and coolers - INK and OPTICAL INTERFERENCE methods (119)
- Insyde software announces AI BIOS! (11)
- Fun times with the NR200P, Dual Rad (no special mods needed) (10)
- All Intel DG1 needs special bios? (28)
- Your PC ATM (34603)
- Windows 7 and Gigabyte 299x wu8 (14)
Popular Reviews
- Intel Lunar Lake Technical Deep Dive - So many Revolutions in One Chip
- Kioxia Exceria Plus G3 2 TB Review
- NZXT H6 Flow RGB Review
- Corsair iCUE XC7 RGB Elite LCD CPU Water Block Review
- SilverStone KL07E Review
- Upcoming Hardware Launches 2024 (Updated May 2024)
- NuPhy Air96 V2 Low Profile Wireless Mechanical Keyboard Review
- AMD Ryzen 7 7800X3D Review - The Best Gaming CPU
- Ghost of Tsushima Performance Benchmark Review - 35 GPUs Tested
- ASUS GeForce RTX 4060 Dual OC Review - The Best RTX 4060
Controversial News Posts
- NVIDIA to Only Launch the Flagship GeForce RTX 5090 in 2024, Rest of the Series in 2025 (154)
- AMD Hits Highest-Ever x86 CPU Market Share in Q1 2024 Across Desktop and Server (140)
- AMD RDNA 5 a "Clean Sheet" Graphics Architecture, RDNA 4 Merely Corrects a Bug Over RDNA 3 (139)
- NVIDIA RTX 5090 "Blackwell" Founders Edition to Implement the "RTX 4090 Ti" Cinderblock Design (118)
- Core Configurations of Intel Core Ultra 200 "Arrow Lake-S" Desktop Processors Surface (101)
- Biden Administration to Revive Trump-Era Tariffs on China-made GPUs and Motherboards (95)
- ASRock Innovates First AMD Radeon RX 7000 Graphics Card with 12V-2x6 Power Connector (89)
- AMD Ryzen 9000 Zen 5 Single Thread Performance at 5.80 GHz Found 19% Over Zen 4 (88)