 5
5
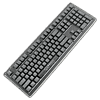
Ducky Shine 6 Keyboard Review
Disassembly »Closer Examination


The Ducky Shine 6 keyboard comes in a wax paper wrap to keep it dust-free and allow for a pristine unboxing experience. Removing the wrap gives us our first good look at the keyboard, and we see a keyboard that is perhaps the furthest away from a template design as ever for Ducky. There is the usual black color scheme keyboard with a, on this sample anyway, modified US ANSI layout with 108 keys, but take a closer look and you will see design implementations that resulted in a userbase divided over the choices made when the keyboard was first released. On the sides are translucent plastic sections that are going to allow light to be transmitted outward, making this a keyboard with lighting not just from the top but the two sides as well. The front also has a fairly aggressive design with plastic fins, if you will, that create an impression of a heatsink more than anything else. These fins are of course completely for looks and have no actual functional purpose.
In terms of branding, there is no company logo or name to be seen on the visible sides, and, rather, Ducky has added a custom-etched ABS plastic space bar keycap instead. Sharing duties with their Year of the Rooster keyboard from last year, there is a rooster etched into the space bar that will also be backlit in use. Notice how the rooster has its head turned backwards? They normally can't do that, but Ducky has a nice reason for it. The creator behind this wants users to know that when they do anything, they should not only look forward but around and backwards as well. Think of it as a mantra to learn from past lessons, and also wanting people to be considerate and thoughtful. Similarly, the Chinese characters alongside are 雞鳴見日升, which translates to "When a rooster crows, the sun is going up". The expression is to remind people that when they see the rooster (on the Shine 6), it's time to work. Regardless of how you feel about this, I personally find it fascinating and appreciate Ducky sharing some of their culture with users around the world.
The bezels here are average in size, with the bent front and finned design adding some flair compared to the standard clamshell case design. A thick plastic case is used here, with an internal stainless steel plate adding further to the structural integrity to where there is no flex anywhere when in use. The stock keycaps are a matte black in color, and there are four extra keys for dedicated volume control and to bring up the calculator program. Single legend keycaps have the writing on their top center, indicating where the LEDs are located under the switches. Secondary legends are present below the primary ones on the Numpad and next to them in the alphanumeric section. It would have been nice to see more of the space used on the keycaps here, but let's hold off judgment until we see the backlighting in action.
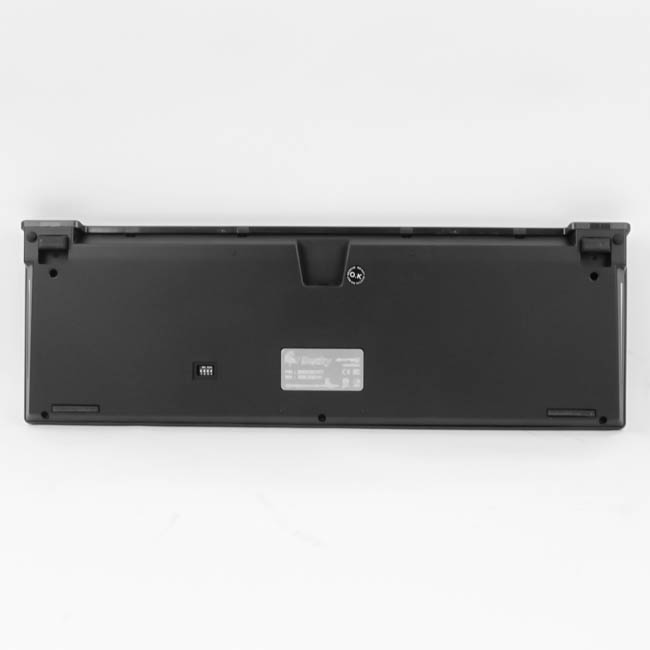


Flipping the keyboard around, we see a metal badge that houses the certification and serial number information instead of a standard sticker. There are four small rubber pads at the corners for some friction against a desk's surface and to prevent scratches. Ducky has also added in keyboard feet at the top; however, these are different from the usual in that they are rubber pieces that are pushed in place as seen above. The keyboard comes with the two feet pre-installed, and you can remove them if you prefer to have no elevation. In fact, notice how the insertion point is not midway along the rubber feet to where you have two options of elevations depending on which way you insert them back in. To the left of the metal badge, as seen from the back, is a set of four dip switches. These allow for some very specific key layout changes we will get to in due time, and they are slightly inset into the case to prevent any changes from happening when you move the keyboard while it rests on a desk.


On the right side, by the volume control keys, as well as on the left side in the same spot, is a set of two holes, and this is where the mouse bungee accessory comes in. The smaller piece has two hook inserts that help secure it in place inside the keyboard, as seen above, and a circular hole at the top mates with the rubber insert such that you can position the latter in one of many rotational options available. Simply choose where you wish to have the mouse cable pointing towards and use the bungee to prevent the mouse cable from tangling, and as a means to give it more freedom in motion. The rubber cutout means it will flex to allow for a large variety of mouse cables, although I am sure Ducky would much rather you use it with their own mice.


There is also an inset female micro-USB port in the middle with no cable-routing options, and the cable itself comes straight off the front in the middle. The provided cable works fine here, is the standard 6' in length and needs a single USB Type-A port on your computer. USB 3.0 is recommended for maximum brightness on the RGB LEDs.


Remember when I said Ducky had made some updates to the Shine 6 since launch? It came out as a special edition with half-height keycaps that gave it a floating keycap look, along with a metal case Year of the Monkey edition. Those half-height keycaps were made out of ABS plastic, and it was around this time that Ducky was also working on their seamless doubleshot injection technology. It didn't work great with the first generation ABS plastic keycaps when backlit, as seen here with the MK Fission keyboard. A 2018 Shine 6 keyboard comes with standard/height PBT keycaps (aside from that special space bar with the rooster), and Ducky is using the tried and tested OEM profile with their keycaps here, which consists of the usual slanted rows and concave surfaces on top.
The provided keycap puller works great and is my favorite puller ever used thus far, with a nice base to hold and wires long enough to allow multiple keycaps to be taken off without removing individual ones each time. The stock keycaps are excellent, with the same thick PBT plastic we saw with the replacement keycaps used throughout (average wall thickness of 1.39 mm), as well as seamless doubleshot injected legends for durability and longevity. Ducky has also managed to develop this enough to where they no longer need the bars on the underside that disrupt backlighting, so I would say this new keycap set is by far their best yet. Should you wanted an all-PBT keycap set, the replacement space bar provided will do the trick.


Ducky has always used Cherry MX switches, and that does not change here either. We see the use of Cherry MX RGB Black switches on this particular sample, which you can also get with Cherry MX RGB Red, Blue, Black, Speed (Silver), or the rarely used Nature White switches. Interestingly, the MX RGB Nature White made its debut in a consumer product in Ducky's own Shine 5 keyboard, but there has not been much love shown for what is ultimately a linear switch that is slightly heavier than the MX Red. Cherry stabilizers are used on the larger keycaps, which helps with their removal for cleaning or even swapping out with the replacement keycap accessories. The thick PBT used does mitigate the mushy feeling associated with these stabilizers, especially with the replacement PBT space bar key since it has a heavier feeling that is great to type on generally.

Here is a look at the replacement keycaps in action, and I have used the replacement space bar keycap as well. You can also use the provided keycaps for WASD if you so desire, as that is Ducky's own little suggestion. The black color scheme with streaks of blue looks great to me, and I am sure the other colors would provide a nice contrast as well.
May 6th, 2024 08:54 EDT
change timezone
Latest GPU Drivers
New Forum Posts
- MSI 5700XT rom flash issue (6)
- Browser Bechmark scores (99)
- What's your latest tech purchase? (20446)
- Apparently Valve is giving refunds on Helldivers 2 regardless of hour count. Details inside. (92)
- AMD Radeon Pro v540 Research Thread (253)
- How to check flatness of CPUs and coolers - INK and OPTICAL INTERFERENCE methods (114)
- Envinda RX 580 2048SP 8GB no image (14)
- reinstalled kingdom come deliverance and getting very poor fps (12)
- is my 2h rtx2080ti oced? (3)
- Only some humans can see refresh rates faster than others, I am one of those humans. (148)
Popular Reviews
- Finalmouse UltralightX Review
- ASRock NUC BOX-155H (Intel Core Ultra 7 155H) Review
- Meze Audio LIRIC 2nd Generation Closed-Back Headphones Review
- Cougar Hotrod Royal Gaming Chair Review
- Upcoming Hardware Launches 2023 (Updated Feb 2024)
- Montech Sky Two GX Review
- AMD Ryzen 7 7800X3D Review - The Best Gaming CPU
- HYTE THICC Q60 240 mm AIO Review
- ASUS Radeon RX 7900 GRE TUF OC Review
- Logitech G Pro X Superlight 2 Review - Updated with 4000 Hz Tested
Controversial News Posts
- Intel Statement on Stability Issues: "Motherboard Makers to Blame" (245)
- Windows 11 Now Officially Adware as Microsoft Embeds Ads in the Start Menu (167)
- AMD to Redesign Ray Tracing Hardware on RDNA 4 (159)
- Sony PlayStation 5 Pro Specifications Confirmed, Console Arrives Before Holidays (117)
- AMD's RDNA 4 GPUs Could Stick with 18 Gbps GDDR6 Memory (114)
- NVIDIA Points Intel Raptor Lake CPU Users to Get Help from Intel Amid System Instability Issues (106)
- AMD Ryzen 9 7900X3D Now at a Mouth-watering $329 (104)
- AMD "Strix Halo" Zen 5 Mobile Processor Pictured: Chiplet-based, Uses 256-bit LPDDR5X (103)