 25
25
FiiO R7 Desktop Network Streamer/DAC/Headphone Amplifier Review
Setup & Customization »Closer Examination
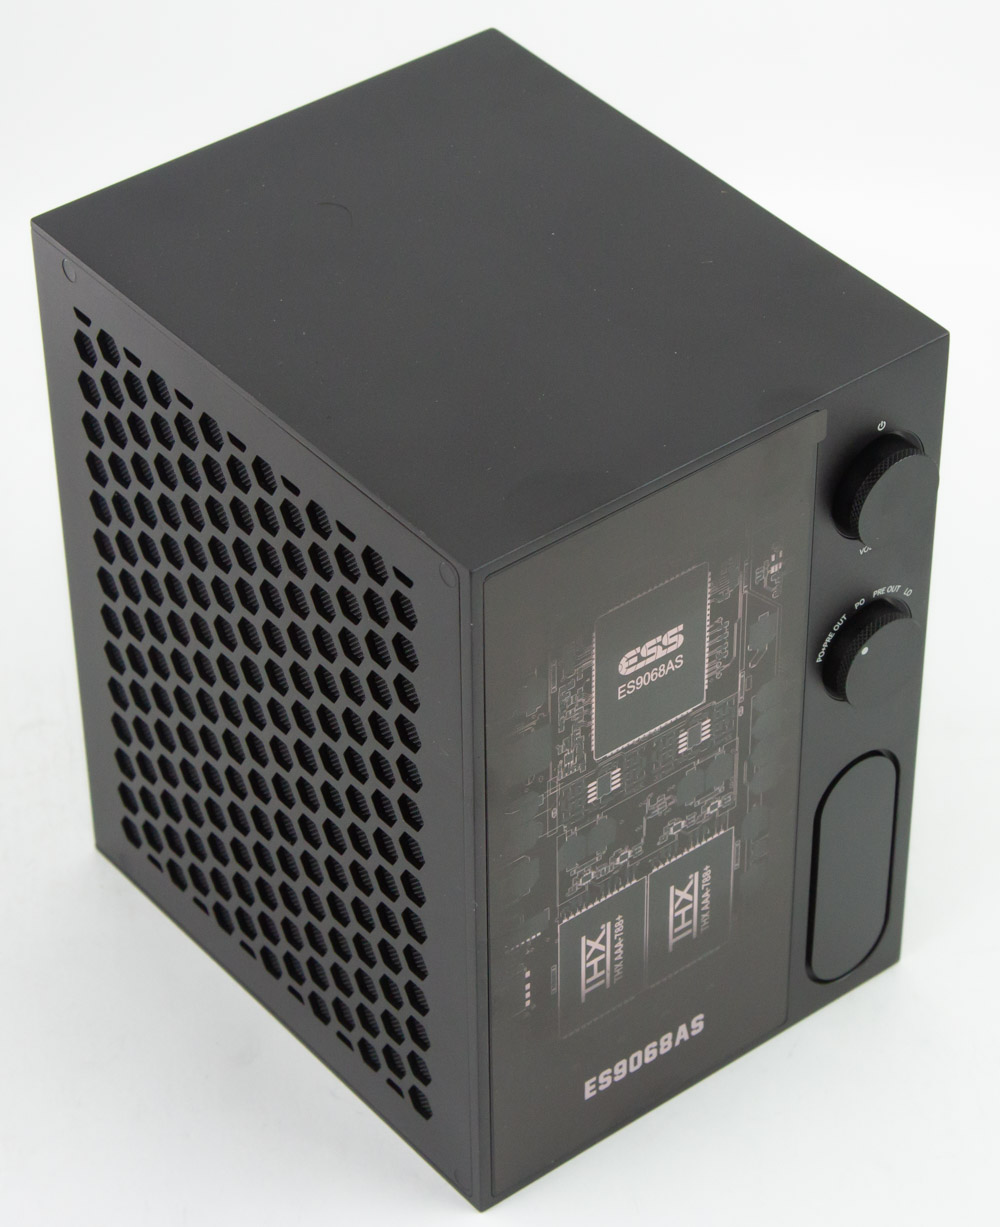
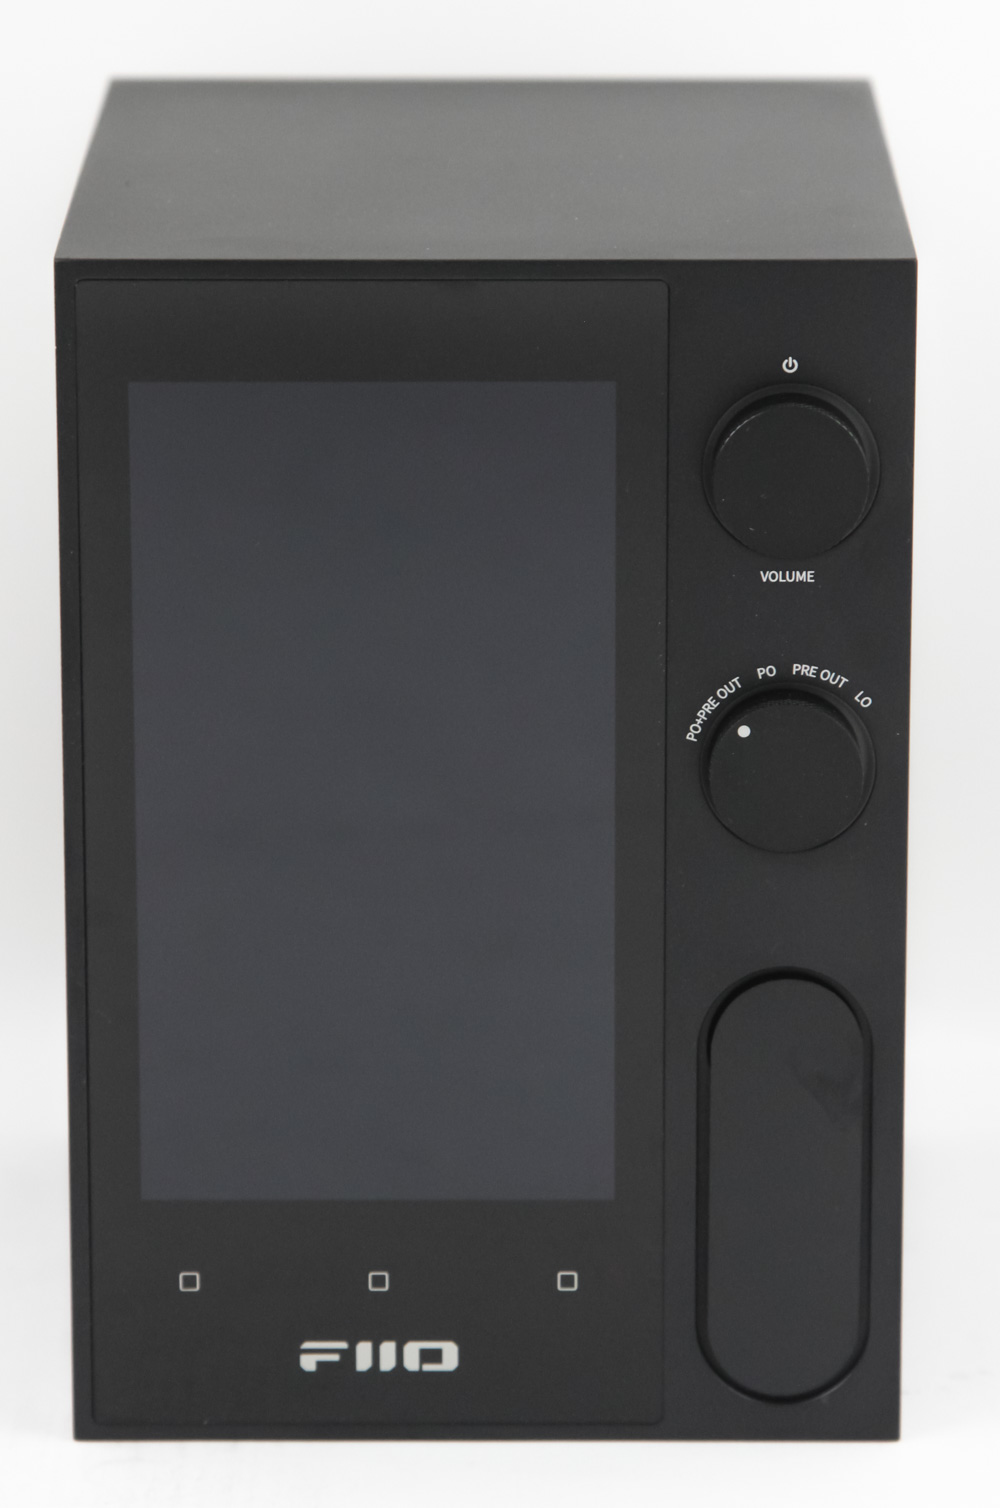


I was immediately taken aback after taking out the FiiO R7 out of the box given all the photos and marketing materials made me think it was larger than it actually was. Indeed, at 11 x13.5 x 16 cm and weighing all of 1.3 kg, the FiiO R7 fit in my hands quite easily to take photos and simply to marvel at this tiny thing that was doing so much. The vertical orientation—effectively portrait mode—also helps distinguish it from pretty much any other source on the market. I've seen people make jokes about the R7 looking like a mini-fridge or, when turned on its side, a tiny microwave oven. These simply add to the novelty of the FiiO R7's form factor and I personally like it quite a lot. Note the protective sticker on the front that shows off the DAC and amplifier chips used inside. Peel it off to reveal a 4.97" 720 x 1280 LCD touch screen display that suddenly looks a lot better in this orientation for productivity. It's also integrated neatly into the aluminium chassis that gets an anodized black color in this version to where you can't really notice the large bezels around the display itself. There is a trio of touch controls underneath the display and branding comes in the form of the new FiiO logo also placed behind the tempered glass panel that goes nearly the entire height of the R7.
To the right are two knurled knobs with the top one being a multi-functional rotary encoder which does, among other things, volume control and power on/off. It also works as a selector tool for the various operating modes on the R7. Underneath is an analog output selector knob that is highly interesting in that we get four options to choose from—headphones + preamp allowing the use of both headphones and active speakers simultaneously, just headphones out, just preamp for volume control, or simply line out if you wish to use the R7 as a DAC paired to a more esoteric amplifier. The first option can be used for, say, headphones or IEMs paired with a sub-woofer to give you that excellent tactile bass response lacking from smaller transducers or even to monitor your content over different devices. Both these knobs have an RGB LED indicator ring around them that light up in different colors for various things as we will see later on. Then we get to the three headphone outputs present one below the other. FiiO provides a long dustproof plug over them already in case you are only using the R7 with the I/O on the back, this makes for a cleaner look as seen above. Removing them shows a full-size 4-pin balanced XLR output as well as balanced 4.4 mm TRRS and single-ended 6.35 mm TRS to cover just about any headphone/earphone needs. The spare plug covers the XLR port if you are not going to use it, and I appreciate FiiO providing this.


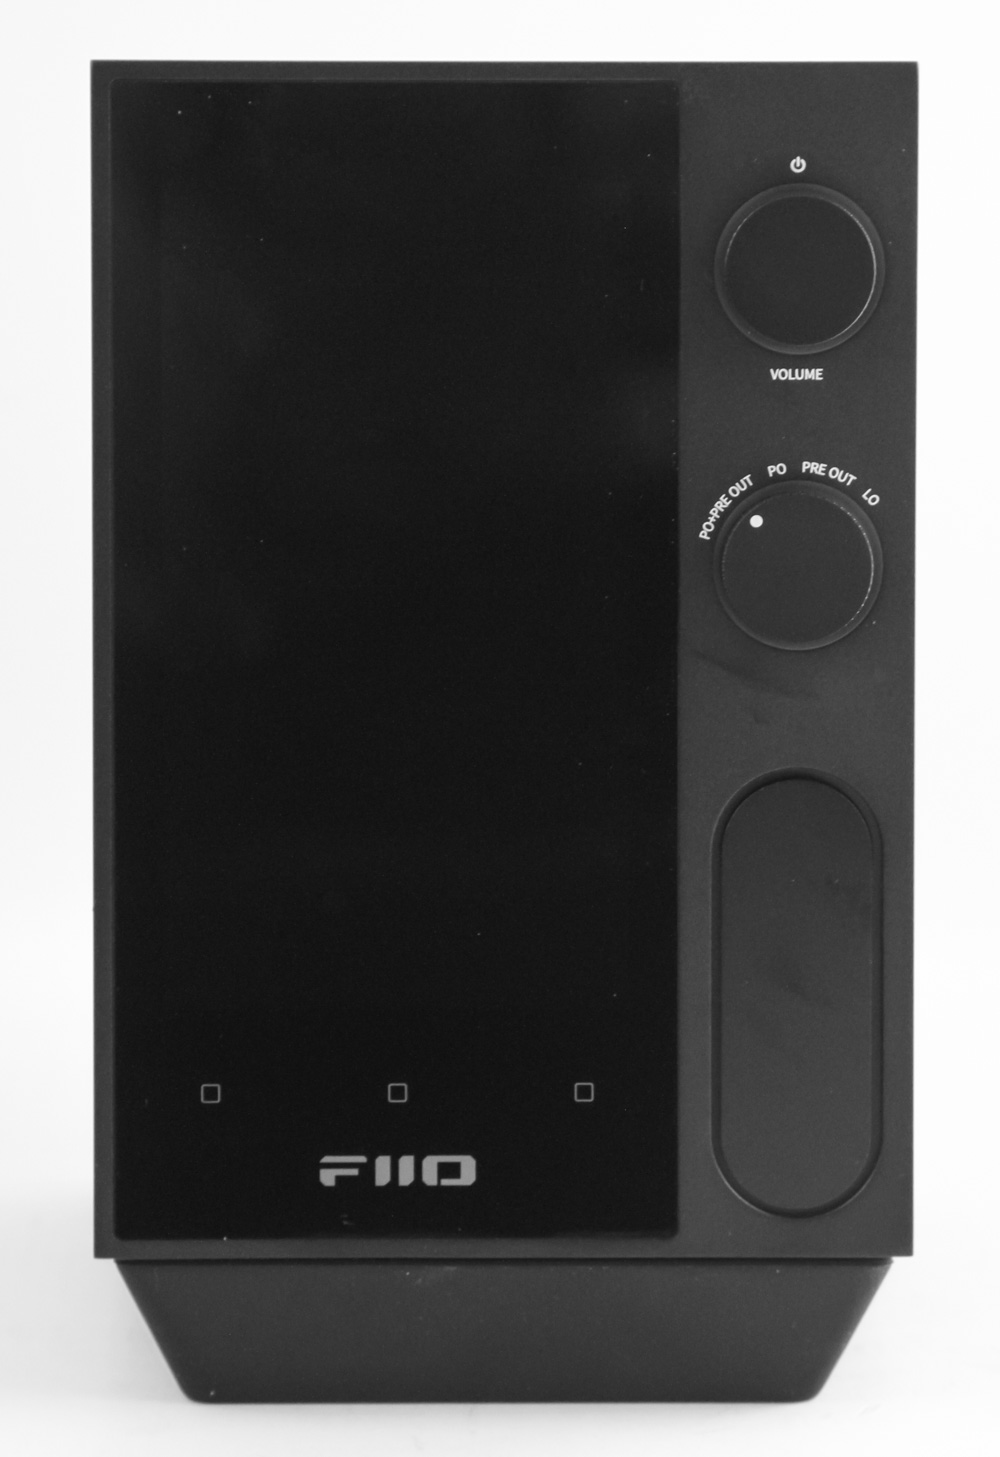

Turning the R7 over to the sides reveals the use of a honeycomb mesh pattern cut into the aluminium panels that are screwed in place. There is a finer metal mesh underneath to where you needn't worry about dust getting in and yet there is enough passive cooling of the hardware inside. You do get a teaser look through the sides but only just! The bottom is completely closed off, which makes sense given you would be placing the R7 on either of the two provided rubber bases that provide either a flat surface or a slightly angled (~5°) base that directs the screen and controls at you should you be using it on your desk—I would have preferred a more angled base though! The flat base makes more sense if it is placed further away as an entertainment hub. FiiO is working on an optional remote control for the R7 for this purpose but there is no word on when this, or the white color version, will be available.


Now we get to the back where things get serious. There are some more vents for airflow here too but then the entire real estate is taken up by I/O. The long solid bar you see is actually a cover that has the WiFi and Bluetooth antennas behind it so it's not a waste of space either. This is also why I have both my own photo as well as a render from FiiO that goes over everything you see here, including a microSD card slot that comes with a microSD to SD card adapter already inserted. The FiiO R7 accepts up to 2 TB capacity memory cards this way to allow for plenty of in-device storage on top of the 64 GB flash storage that you get on the device itself. There are two sets of RCA line out as well as dual 3-pin XLR outputs for use with active speakers or other such devices, and this goes back to the line out mode available to select on the front. There are optical and coax inputs and outputs also present if you wish to use different clients feeding to the R7 or even output to an external decoder. I suspect most people would be using either, or both, of the two USB ports on offer with a USB Type-C and a full-size USB Type-A port too.
The Type-C port is the USB input from a PC but it goes beyond this by also offering display output to an external monitor as well as helping with files transfer between the R7 and your PC/phone too. It also acts as USB host connection to use with an external storage drive or even a mouse/keyboard, and the Type-A port adds to this functionality. In addition to wireless connectivity (2.4/5 GHz WiFi, DLNA, AirPlay, WiFi music transmission, Bluetooth 5.0), FiiO also provides a 100 Mbps Ethernet port for wired network connectivity. You could argue a 1 GigE or faster port would be ideal here but, in addition to cost savings, the 100 Mbps line is already overkill for anything you'd do on the FiiO R7 and it also means that little bit of reduced stress on the power supply and data encoder. Then we get to the power input where FiiO does something neat by offering both AC or DC input. The provided power cable is for AC power directly from your mains connection but you can use the FiiO R7 with a compatible external DC power supply such as the FiiO PL50 linear PSU or anything else capable of providing a max of 3 A over the 12 VDC rail. There is a toggle switch to choose between your selection and the AC mains supply gets its own replaceable fuse and dedicated on/off switch.


I mentioned before how the FiiO R7 has side panels that are simply screwed in place with black tape on top for a cleaner look. After all testing was completed, I figured I might as well take the panels out for a closer examination of the internals given this would void your warranty as a paying customer and I would much rather you do not do this also because it is a safety hazard if not done correctly. I first removed the panel that gave me a teaser of the DAC and amp modules through the mesh and now we get a closer look at the single ESS Sabre ES9068AS DAC that currently leads the ESS 2-channel stereo "audiophile" grade DAC with MQA support in addition to supporting the "audio industry's highest bit-rates and most popular high-resolution and lossless audio formats including MQA, FLAC, ALAC, AIFF and WAV, as well as "compressed legacy formats" as ESS itself says. It's one class lower in the stereo DAC lineup compared to the ESS Sabre Pro series, such as the ES9038PRO we saw in the FiiO K9 Pro, but really is plenty for the end user as we shall discuss more soon enough. The DAC chip is placed underneath a dedicated heatsink and the same applies for the two THX AAA 788+ linear amplifiers we saw put to good use in the FiiO Q7 and K7 before. The two knobs are associated with rotary encoders as suspected and FiiO is using a Gowin GW1NZ 4th gen FPGA high precision, low jitter clock too. FiiO does not mention the encoders used for the various inputs but I hypothesize there is an XMOS XU208 USB controller used here too. Given the rich inputs and outputs on offer, I will just refer to you to this page where you can see the rated measurements for the various connections in the form of output impedance, THD+N, crosstalk, SNR, and more.
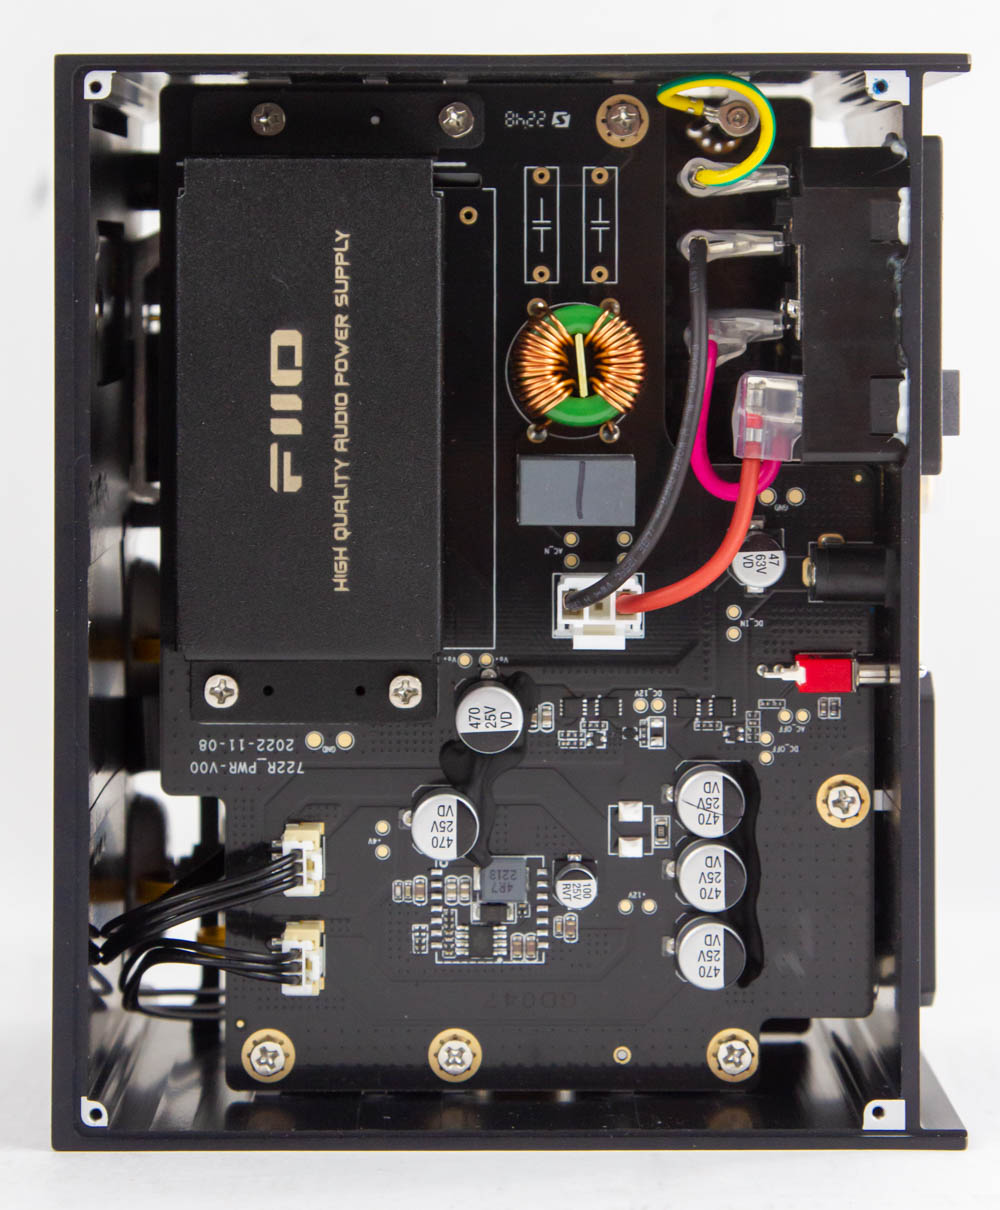


The other side mostly contains the power delivery stages for both AC and DC inputs. The majority of the circuitry is underneath a dedicated shield cover that FiiO says helps lock the transformer in place on the main PCB to reduce any jitter and provide stable power. We then see a few fancy capacitors such as the four Panasonic PPS (polyphenylene sulfide) units, some metallized polypropylene film capacitors, as well as 12 470 µF tantalum capacitors that weirdly get some goop in a move I would have associated with inductors/chokes instead, to reduce coil whine. Note also the wires headed to the screen and the Qualcomm 660 mobile processor between these two PCBs, which unfortunately we don't get to examine easily without further disassembly that I decided to not partake with.
Jun 11th, 2024 08:55 EDT
change timezone
Latest GPU Drivers
New Forum Posts
- Steam Deck Owners Clubhouse (419)
- Is 8gb enough for games in 1440p in 2024 ? (157)
- WebXPRT 4 performance scores (17)
- Benchmarking Unity graphics performance in WebGL (44)
- PC doesn't turn on or instantly turns off. (11)
- What do you mostly use your desktop PC for? (Pick your top 3!) (46)
- What are the missing variables that demonstrate the actual causation between cooling and results? (27)
- Which new games will you be buying? (325)
- Upgrading advice on the new AMD Processors coming out.... (30)
- Any software that can read nvidia core voltage, Pascal and onwards? (11)
Popular Reviews
- Pulsar Xlite V3 Review
- Intel Lunar Lake Technical Deep Dive - So many Revolutions in One Chip
- Upcoming Hardware Launches 2024 (Updated May 2024)
- NZXT H6 Flow RGB Review
- AMD Ryzen 7 7800X3D Review - The Best Gaming CPU
- AQIRYS HYDRA 360 AIO Review
- Quick Look: Final UX2000 Wireless Noise Canceling Headphones
- Thermal Grizzly KryoSheet Review - Tested on RX 7900 XTX with 475 W
- Ghost of Tsushima Performance Benchmark Review - 35 GPUs Tested
- ASUS Radeon RX 7900 GRE TUF OC Review
Controversial News Posts
- AMD RDNA 5 a "Clean Sheet" Graphics Architecture, RDNA 4 Merely Corrects a Bug Over RDNA 3 (148)
- NVIDIA RTX 5090 "Blackwell" Founders Edition to Implement the "RTX 4090 Ti" Cinderblock Design (118)
- AMD Zen 5 Storms into Gaming Desktops with Ryzen 9000 "Granite Ridge" Processors (100)
- Nightmare Fuel for Intel: Arm CEO Predicts Arm will Take Over 50% Windows PC Market-share by 2029 (95)
- Biden Administration to Revive Trump-Era Tariffs on China-made GPUs and Motherboards (95)
- ASRock Innovates First AMD Radeon RX 7000 Graphics Card with 12V-2x6 Power Connector (94)
- AMD Ryzen 9000 Zen 5 Single Thread Performance at 5.80 GHz Found 19% Over Zen 4 (92)
- AMD Ryzen 9000 Zen 5 "Granite Ridge" Desktop Processors Launch Late-July (83)