 27
27
Fractal Design Define R3 Review
Assembly & Finished Looks »A Closer Look - Inside


Another nice surprise awaits on the interior of the case itself. Fractal has lined both side panels with a thin sound insulating material. While just a few milimeters thick, it weighs quite a lot. The opening for a potential side fan has been separately covered, but this time around with a different material. Out of experience I can tell you that the thick one offers better sound insulation as the thin one. Thus, it is good that Fractal Design has placed this on the actual openings of the chassis. The sweet smell of the dampening material is still present but not nearly as strong as before.

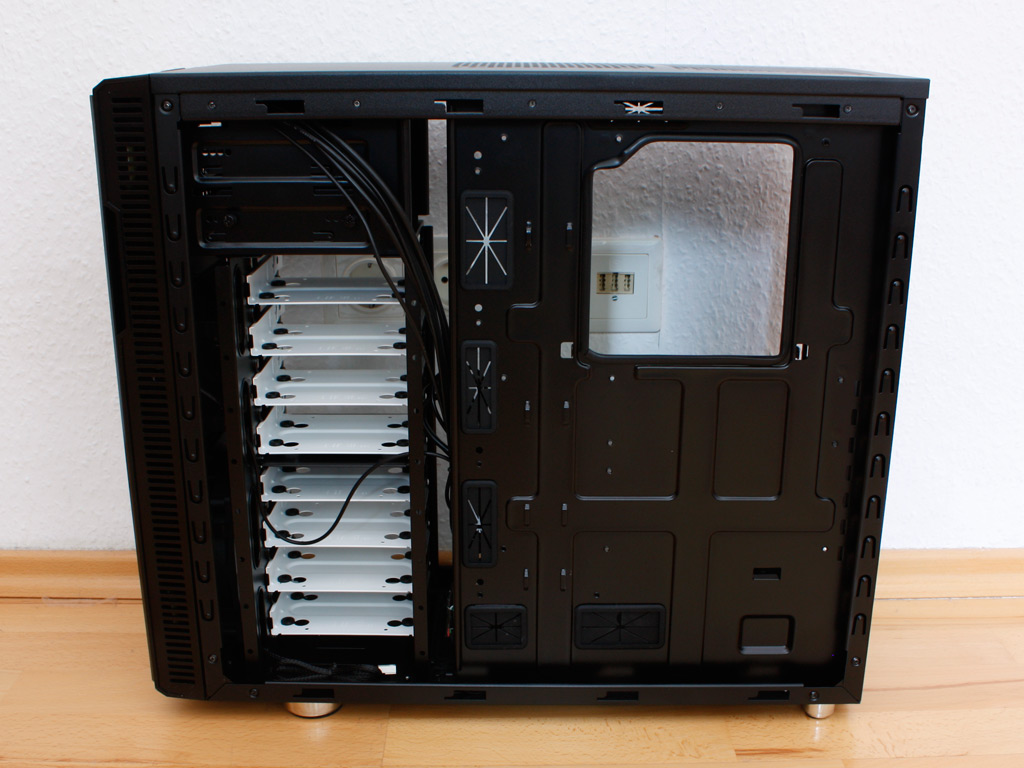
The same black and white theme of the chassis continues on the interior. Eight white hard drive trays are in stark contrast to the rest of the all black chassis. Fractal Design has opted for such a large number of internal bays at the cost of external ones. Considering the fact that most of us never fill more than two 5.25 inch bays, this case is perfect for those wanting to pack it full with hard drives. Turning the case over we have a well designed mainboard tray, with multiple openings to route cables through. A large opening under the CPU area of the mainboard should give you easy access to any backplates of large coolers. The edge of this opening now has a black and - possibly more importantly - powder-less strip on it.


The two external drive bays do not feature a screw-less system, but instead offer thumb screws to hold the drives in place. I am always a fan of traditional means of securing parts within the chassis instead of plastic clips which tend to be too weak for such purposes. The eight hard drive bays have individual trays. They come pre-applied with rubber rings to kill any vibration of drives and also allow you to install 2.5 inch units in each one of them. This is perfect for those wanting to put in some SSD instead of the traditional 3.5 inch units.


Turning our focus to the rear of the case, starting at the bottom, the PSU bay is lined with foam to fight any vibrations here as well. Above are the seven expansion slots, with each cover held in place with thumb screws. In the very top you will find the 120 mm exhaust fan. Fractal Design also mentions that these have been updated with newer models. This makes for a total of two cooling units which ship with the Define R3. Both feature mainboard headers, so that you can connect it straight to the included fan controller or plug them into the mainboard.


You will still find the same opening for another fan on the floor of the chassis, along with the two spots in the ceiling of the case. Instead of the thin sound dampening material these top openings are now covered with the thick foam type.


Turning the case on its side, the air vent with the removable dust filter for the PSU is easily accessed. You should be able to pull out the filter from under the chassis without any problems, so that you can leave you computer up and running. All the cables within the chassis have been sleeved and even the little strip between the two different audio connectors has also been taken care of. This is another improvement over the R2.
May 7th, 2024 04:06 EDT
change timezone
Latest GPU Drivers
New Forum Posts
- What are you playing? (20591)
- Throttle STOP Program Function (0)
- Intel Core "Special Edition" Owners' Club (31)
- What's your latest tech purchase? (20452)
- Only some humans can see refresh rates faster than others, I am one of those humans. (204)
- Overheating/undervolt/setup issues (9)
- Gigabyte Aorus Elite AX V2 rev 1.1 BIOS update "AMD AGESA V2 1.2.0.B" (6)
- The Official Thermal Interface Material thread (1169)
- GPU Hot Spot Temperature 105 Celsius, fans at 3000 RPM, while GPU Temperature is max 70 Celsius (40)
- Cybersecurity - OSINT Software for Linux (3)
Popular Reviews
- Finalmouse UltralightX Review
- Corsair iCUE Link RX120 RGB 120 mm Fan Review
- Cougar Hotrod Royal Gaming Chair Review
- Meze Audio LIRIC 2nd Generation Closed-Back Headphones Review
- Upcoming Hardware Launches 2023 (Updated Feb 2024)
- ASRock NUC BOX-155H (Intel Core Ultra 7 155H) Review
- AMD Ryzen 7 7800X3D Review - The Best Gaming CPU
- ASUS Radeon RX 7900 GRE TUF OC Review
- Montech Sky Two GX Review
- HYTE THICC Q60 240 mm AIO Review
Controversial News Posts
- Intel Statement on Stability Issues: "Motherboard Makers to Blame" (249)
- AMD to Redesign Ray Tracing Hardware on RDNA 4 (171)
- Windows 11 Now Officially Adware as Microsoft Embeds Ads in the Start Menu (167)
- Sony PlayStation 5 Pro Specifications Confirmed, Console Arrives Before Holidays (118)
- AMD's RDNA 4 GPUs Could Stick with 18 Gbps GDDR6 Memory (114)
- NVIDIA to Only Launch the Flagship GeForce RTX 5090 in 2024, Rest of the Series in 2025 (110)
- NVIDIA Points Intel Raptor Lake CPU Users to Get Help from Intel Amid System Instability Issues (106)
- AMD Ryzen 9 7900X3D Now at a Mouth-watering $329 (104)