 4
4
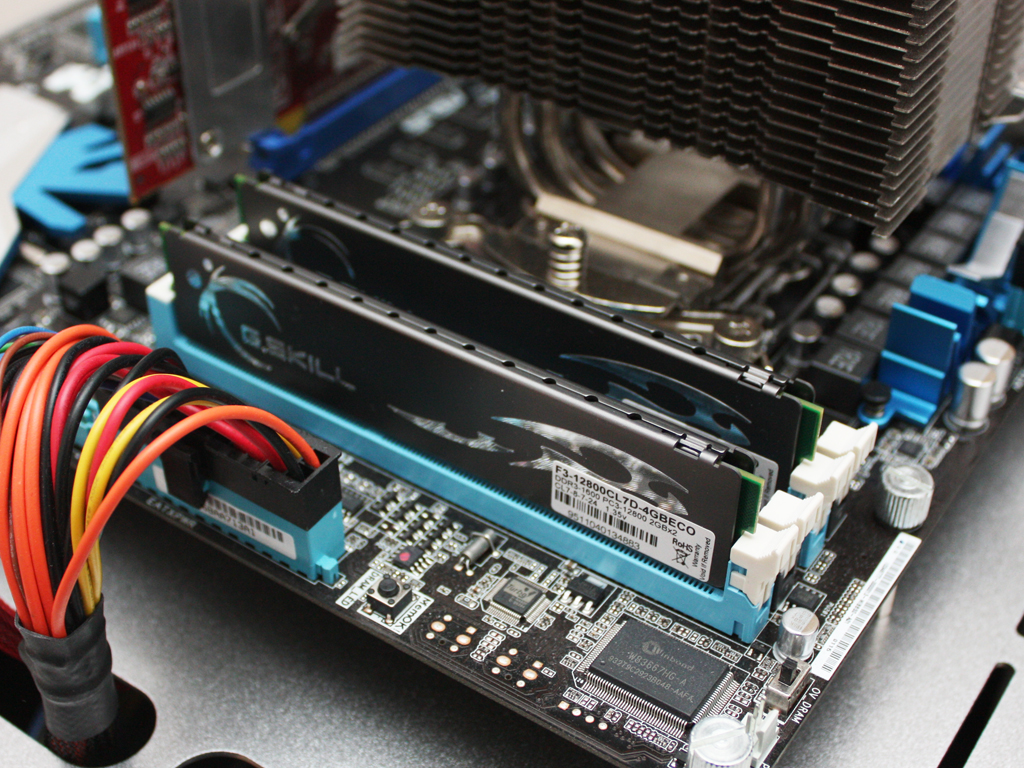
G.Skill ECO Kit 4 GB PC3-12800U CL7-8-7 Review
Value & Conclusion »Test Setup
| Test System | |
|---|---|
| CPU: | Intel Core i7 860 2.8 GHz, 2 MB Cache |
| Cooling: | Noctua U12P with SecuFirm 2 Mounting Kindly supplied by Noctua |
| Motherboard: | ASUS P7P55D-E Pro Kindly supplied by ASUS |
| Video Card: | ASUS Radeon X850 256MB |
| Harddisk: | OCZ SOLID 2 SERIES SATA II 2.5" SSD Kindly supplied by OCZ Technology |
| Power Supply: | Jersey Power 550W Modular Edition Kindly supplied by Jersey Power |
| Case: | DimasTech Bench Table Easy V2.5 Kindly supplied by DimasTech |
| Software: | Windows XP SP3, Catalyst 9.3 |
As you can see above, our testing station for dual channel DDR3 has been completely revamped. While we have received some support on our testing systems from manufacturers in the past, the new station is equipped with some new and exciting stuff. Some time has passed since we last reviewed a dual channel kit and with the new range of low voltage modules along with high performance DIMMs for the new P55 plattform we had to bring our testing station up to speed. Only the Noctua U12P has remained. There os no reason to change anything that is perfectly fine even for the newest Intel CPUs. Noctua was kind enough to send us the new SecurFirm 2 mounting system for the Intel 1156 based mainboard. As far as brand new parts go, let us start with Asus. They were kind enough to send over their P7P55D-E Pro, which is not only a very solid board with a lot of unique features, but will also be used for SATA 3 and USB 3.0 reviews in the future, as it sports both of the new interfaces. Next up, we are using the 30 GB OCZ SOLID 2 SSD in our station. While you may wonder about the capacity, 30 GB is sufficient for a simple Windows install with a few benchmarks and applications. It is capable of up to 170 MB/s read and 70 MB/s write - more than enough for our needs. We will also be using Jersey Power 550W Modular power supplies in both of our testing stations from now on. Being modular, the stations are clutter free, while the PSUs are able to deliver clean power even when running the i7 860 at up to 4.2 GHz. This entire system has been placed on the DimasTech Bench Table V2.5, brand new from the guys in Italy. While we have been using their tables for the last year or so, this upgrade adds USB 2.0 connectivity, new power and reset buttons along with a list of small changes. On top of that, the new stations sport a metallic silver paint job.
Considering all these new components, it should be obvious, that previous DDR3 dual channel reviews cannot be directly compared to the achieved numbers below.
Performance & Overclocking
Performance

Before starting to benchmark the kit, CPU-Z was used to find out what SPD programming comes with these modules. As you can see G.Skill has stored various lower speeds with relaxed timings in the kit. This should help with starting up the system after a failed OC. Nonetheless, there is also a perfectly spec'ed XMP profile present.
This is our first kit aimed at the P55 plattform and also the first to run at 1.35 V with 1600 MHz. This means that we will look at its voltage scaling between 1.35 and 2.0 V. First off, I wanted to check if the memory would boot at anything below 1.35 V, as our board is capable of delivering a mere 1.2 V in the BIOS. The ECO kit did not respond well to that at all, refusing to boot at CL5-5-5-15 and 1333 MHz no matter what voltage was applied and only allowing us to boot at 1.35 V with CL6-6-6-18. At this point it did not manage to run through the entire benchmark without a BSOD, so I was forced to raise it to 1.4 V, at which point the first run was completed successfully. So 1333 MHz, CL6-6-6-18 & 1.4 V is our base to start from.
Working my way up really meant hitting a ceiling at 1.35 V and fighting for every MHz from then on. The memory runs well at this low voltage setting, but no matter how much I increased the voltage, it did not budge by more than a few MHz at most. It becomes abundantly clear that G.Skill is not aiming the kit at the overclocker but at those wanting to create a system with the lowest power requirements possible. At CL6, the end of the line was quickly reached just below 1400 MHz - 1396 MHz to be precise. From here on raising the voltage above 1.5 V did not allow for a higher overclock at all. This entire trend continued with CL7-7-7-21 as well. Even though this CAS latency setting is quite close to the advertised one, it did not manage 1600 MHz - once again regardless of the voltage applied. 1552 MHz was the limit. As soon as I set the memory to 7-8-7-24 1600 MHz was not a problem at all. Seems like G.Skill sets the kit close to its limit. This is understandable, as the company wants to offer you the best at 1.65V.
This brings me to the next point. 1600 MHz is something you cannot achieve without some sort of overclocking. Even if this means setting the base clock to 160, as I have done. The i7 8XX series is the only chip to allow for a 2:12 divider for memory, while the i3 and i5 series max out at 2:10. Thus leaving the CPU at its rated setting of 133 MHz while achieving a 1600 MHz memory speed is only a possibility with the high-end 1156 socket processors.
Anyways, I am getting off track here. At the rated latency of 7-8-7-24 and 1.35 V the G.Skill 1600 MHz ECO kit actually has a healthy amount of headroom. I ended up with 1715 MHz at this "stock setting", which is a very good overclock. Pushing the voltage to 1.5 V, I managed to do a successful run at 1800 MHz, but increasing the voltage beyond that did not yield any improvements once again. Still considering one is using the JEDEC voltage on this DDR3 kit, an OC of 200+ MHz is very respectable. Relaxing the timings a bit to 8-8-8 with a mere 1.35 V, I started out testing at a base clock of 170 and working my way up.
Going straight for that magical 1800 MHz setting yielded a BSOD, while 1780 MHz only froze the system. I ended up with 1774 MHz at just 1.35 V and CL8-8-8 as the highest stable setting. Raising the voltage slightly to 1.4 V also meant that the system ran with 1800 MHz memory, but it was not quite stable. A push to 1.5 V cleared things up. But if we remember correctly, the G.Skill ECO already managed 1800 MHz at CL7-8-7 with that voltage, thus the only interesting aspect is the maximum attainable speed at these settings. That maximum was reached with 1856 MHz. Pushing the voltage beyond 1.5 V once again did not yield any noteworthy improvements.
The last step meant relaxing the latency to 9-9-9-27 and starting out at 1.35 V, 1800 MHz was not a problem at all. In anticipation of high clocks of the memory, I changed the divider from 2:10 to 2:12 for CL9. While this means that the CPU is clocked lower to attain the best possible memory speed and thus the benchmarks are lower, we can focus on the performance of the modules. Another benefit is the good visualisation between a system running slower memory with a better divider, in comparison to a faster memory subsystem in combination with a slower CPU speed. With CL9 the G.Skill 1600 MHz ECO managed an excellent 1960 MHz at 1.35 V. To reach 2000 MHz, it requires only 1.45 V. Pushing the memory further was not possible. While the kit was bench stable at 2000 MHz, pushing it just 12 MHz further (1 MHz base clock higher) the problems started. It even froze at 2000 MHz at times. So there you have it. The G.Skill ECO kit excels at delivering great speeds at low voltage.


As you can see the G.Skill 1600 MHz ECO sample of ours did not scale at all. It worked well at 1.35 V up to around 1.5V, which happens to be JEDEC standard for DDR3 as well. Any push higher than that did not yield any better overclockability. Remember this is just our sample and your mileage may vary! Even though this kit does not market this attribute, the fact that it runs at 1.35 V and manages to deliver 2000 MHz at CL9 make it quite diverse, as other kits tend to have the same characteristics as far as MHz is concerned, but tend to require 1.5 to 1.65 V to deliver it. I should mention at this point that some have managed to achieve 2 GHz at 6-9-6-1T and above with the ECO series, seems like we got a bit of a dud. Just to confirm my suspicions (thanks to fitseries3 for pointing things out), I booted the stick seperately. Sure enough one of the DIMMs managed 2000 MHz at 6-9-6-1T after a quick & dirty overclocking session, while the other either rebooted during initial boot or Windows startup. This shows you how the luck of the draw can get you. Still this kit performs well beyond what its advertised speeds and settings - just not as far as other ECOs out there.
Apr 26th, 2024 03:42 EDT
change timezone
Latest GPU Drivers
New Forum Posts
- Which new games will you be buying? (318)
- TPU's Nostalgic Hardware Club (18466)
- Best SSD for system drive (82)
- What phone you use as your daily driver? And, a discussion of them. (1484)
- What's your latest tech purchase? (20342)
- AMD RX 7000 series GPU Owners' Club (1087)
- im new to throttelstop and i think i messed it up by copying others any hints would be very much aprreciated (3)
- Horizontal black lines popping up on my screen? (4)
- Alphacool CORE 1 CPU block - bulging with danger of splitting? (20)
- Black screen after muting (5)
Popular Reviews
- Fractal Design Terra Review
- Thermalright Phantom Spirit 120 EVO Review
- Corsair 2000D Airflow Review
- ASUS GeForce RTX 4090 STRIX OC Review
- NVIDIA GeForce RTX 4090 Founders Edition Review - Impressive Performance
- ASUS GeForce RTX 4090 Matrix Platinum Review - The RTX 4090 Ti
- MSI GeForce RTX 4090 Suprim X Review
- Gigabyte GeForce RTX 4090 Gaming OC Review
- MSI GeForce RTX 4090 Gaming X Trio Review
- MSI GeForce RTX 4090 Suprim Liquid X Review
Controversial News Posts
- Sony PlayStation 5 Pro Specifications Confirmed, Console Arrives Before Holidays (117)
- Windows 11 Now Officially Adware as Microsoft Embeds Ads in the Start Menu (116)
- NVIDIA Points Intel Raptor Lake CPU Users to Get Help from Intel Amid System Instability Issues (106)
- AMD "Strix Halo" Zen 5 Mobile Processor Pictured: Chiplet-based, Uses 256-bit LPDDR5X (101)
- US Government Wants Nuclear Plants to Offload AI Data Center Expansion (98)
- AMD's RDNA 4 GPUs Could Stick with 18 Gbps GDDR6 Memory (88)
- Developers of Outpost Infinity Siege Recommend Underclocking i9-13900K and i9-14900K for Stability on Machines with RTX 4090 (85)
- Windows 10 Security Updates to Cost $61 After 2025, $427 by 2028 (84)