 52
52
Gigabyte X670E AORUS Master Review
VRM Overview »Board Layout

Gigabyte has continued to use a more neutral tone seen with other AORUS motherboards over this last generation. Anybody who's familiar with a Gigabyte motherboard in the last 10 years will remember the bright orange accents that defined Gigabyte branding. Motherboards, like every other consumer product shifts with current trends. This shift from a "gamer vibe" and RGB galore is to visually to appeal to a wider consumer base. This also has the additional benefit to seamlessly fit with different build themes as well. It is still stylish though, just in a different way.
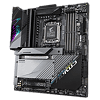
Flipping it around, we can see that the entire back is covered by a backplate designed to relieve stress in a uniform manner, and provide additional cooling using thermal pads sandwiched in between. This isn't just for show, serving a purpose outside of being a hazard guard.
If the Gigabyte X670E AORUS Master looks a bit wider than usual, that's because it is using the E-ATX form factor. While not a requirement to use this larger format, many motherboard vendors are dealing with space being restricted due to the dual X670 chipset taking up precious real estate. The downside of using this E-ATX form factor is it will have an impact when it comes to choosing a computer case. Installation of E-ATX motherboards often come with challenges due to the extended width. Along with a new, paired chipset, the CPU socket has physically changed. Together with firmware and design changes, this also physically prevents previously released Ryzen CPUs (Zen1, Zen2, Zen3) from being installed, which will not be compatible moving forward.


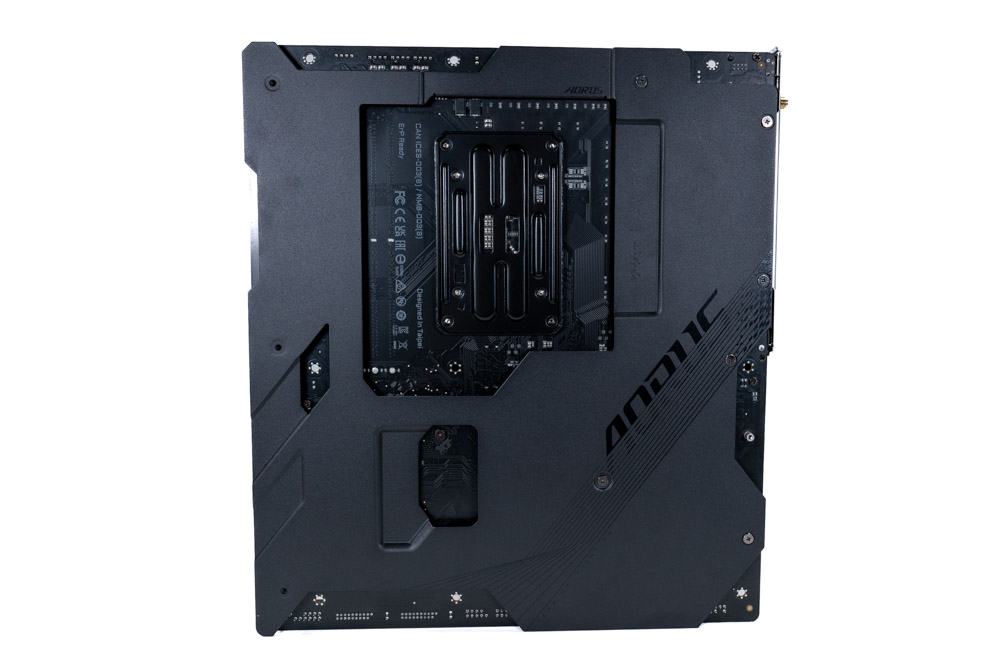
AMD's changes to the socket also comes with some compatibility challenges. Many brands selling CPU coolers have already announced forwards compatibility. What changed is that the backplate was previously removable for the AM4 (PGA) socket, and is now an integral part of this new AM5 (LGA) socket. This means any cooler that has its own backplate as part of the installation will be incompatible unless a an adapter is available from the manufacturer.
On the topics of CPU coolers, the Gigabyte X670E AORUS Master's surrounding heatsinks encroach on the available socket space somewhat. On each side are items that are considered tall enough to be of some concern. Below the socket is the M.2 heatsink. To the left and top is the VRM heatsink, and to the right is the memory. Most All-In-One (AIO) coolers should have no issue with the space available, but large air coolers may conflict, depending on orientation and size.
AMD recommends 240-280 mm AIO (or better) for the Ryzen R9 7950X/7900X to keep the turbo frequency on target. Thermal observations from using the AMD Ryzen 7950X during this review place the CPU at 95°C, which is perfectly normal. The AIO solution isn't a requirement if heavy multi-threaded application performance is a priority, though it will provide the highest boost clocks overall. Undervolting and using PBO is also an option, to circumvent CPU cooler thermal limitations. For more information regarding Ryzen 7000 cooling requirements, TechPowerUp has a great article covering this specific topic. Article Link.
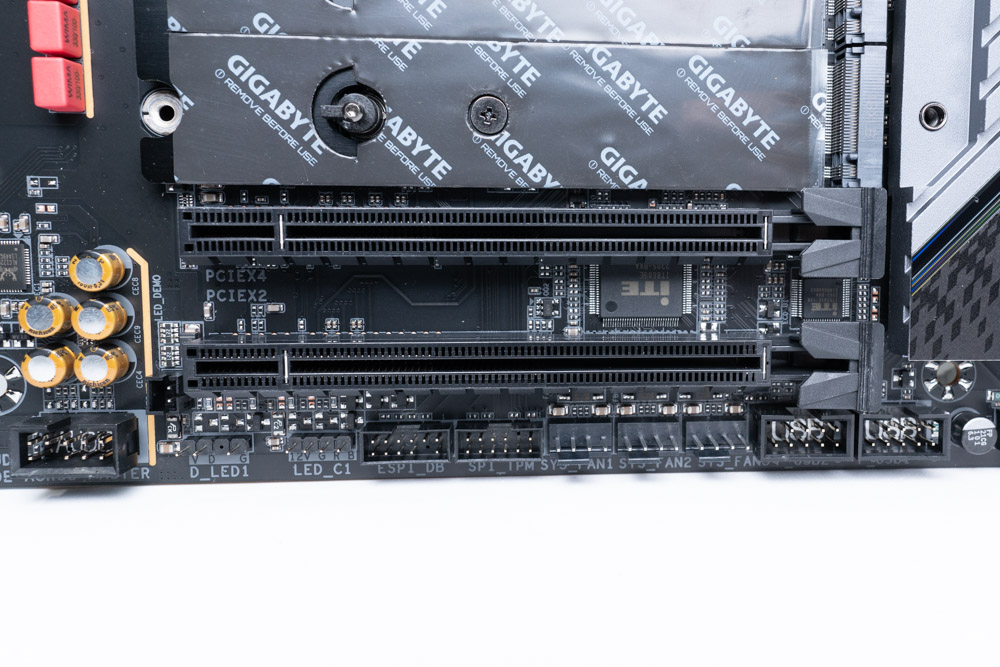
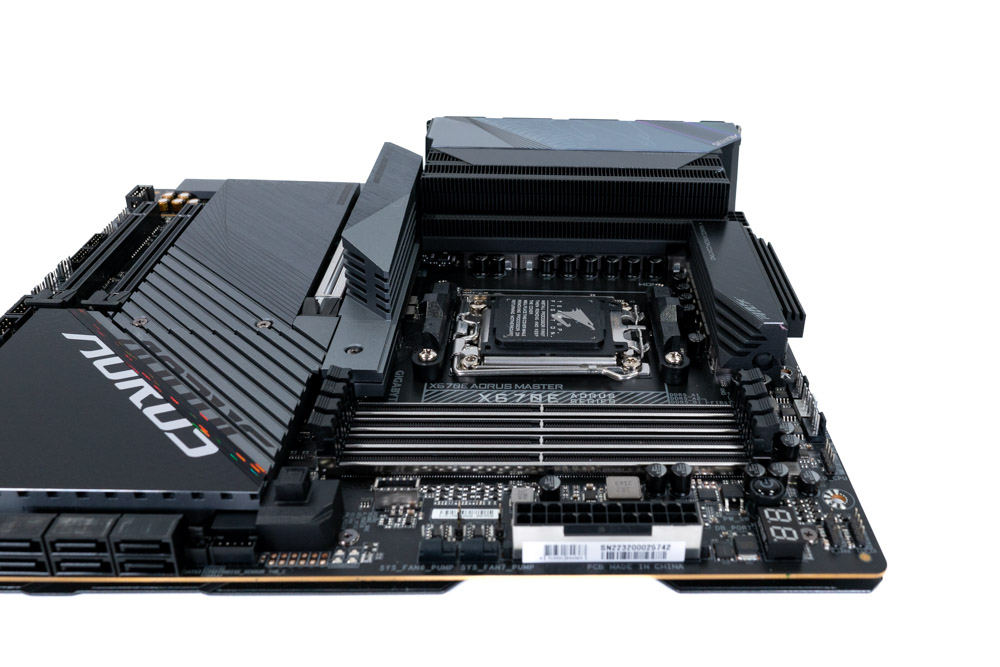
The Gigabyte X670E AORUS Master offers three PCI Express x16 slots, with the first being reinforced for extra stress support. PCIe slot one is PCIe Gen 5 certified with a total of x16 lanes coming from the CPU. It also has spacing for 4-slot graphics cards. PCIe slot two and three are a bit more complicated based on how Gigabyte set these up. Both are physically x16 slots, but internally wired for PCIe x4. Slot two will support Gen 4 x4, while slot three is only setup as PCIe Gen 3 PCIe x2 as specified the manual. This last slot share bandwidth with two SATA ports and cannot be used simultaneously.
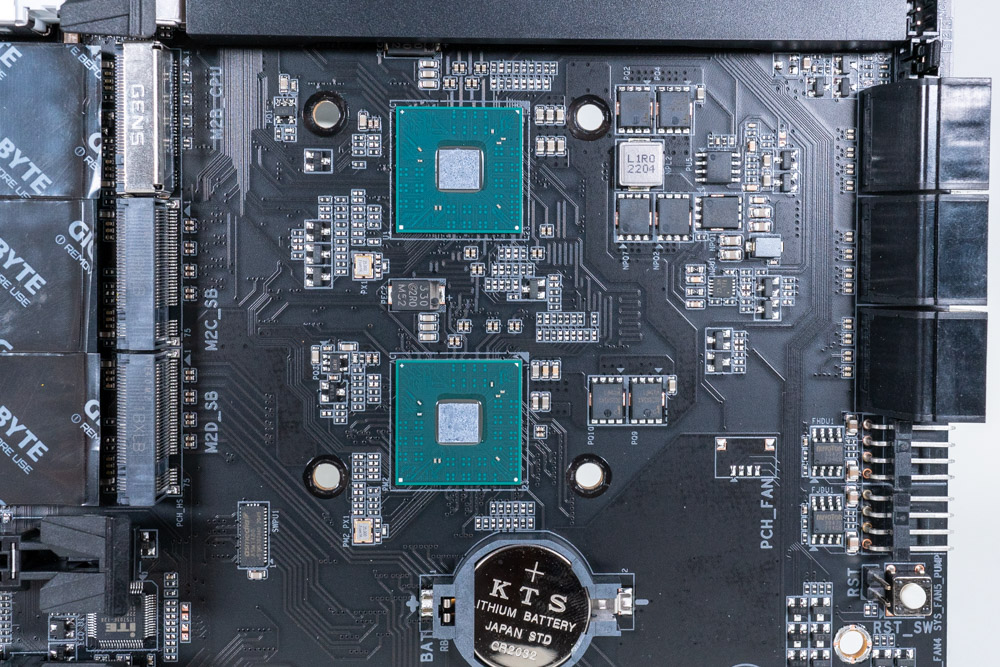
After removing the heatsink, we can get a closer look at the X670E chipsets in tandem (PCH).

In the last few generations of motherboards, because M.2 sockets have become more popular, so has the space around PCIe slots become more restricted. It's not uncommon to have to remove an M.2 heatsink to be able to release video cards, because the PCIe latch is hard to reach with just fingers. Luckily, Gigabyte has devised a plan to solve this, with a button that releases the graphics card with minimal effort.

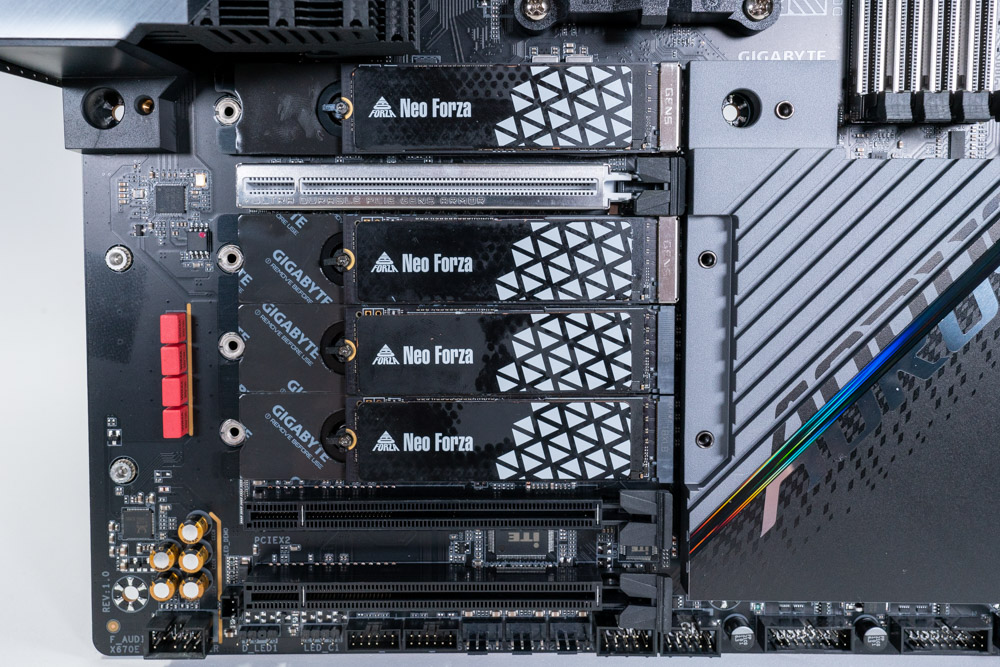

The AMD Ryzen 7000 series of CPUs provides 24 PCIe Gen 5 lanes which are split up as 16+4+4. With x16 designated for PCIe slot(s), x4 dedicated to M.2 Gen 5, and x4 used for general purposes. While it is expected for many B650E or X670E based motherboards to have at least one M.2 Gen 5 socket, Gigabyte has used the general purpose lanes for an additional M.2 Gen 5 socket. Those looking for the full x16 bandwidth of the first slot will be pleased to know that populating the M.2 sockets will not downgrade it to PCIe x8.
In the photo we can also see that the M.2 socket connector looks a little bit different. This is a reinforced socket with "metal shielding to provide higher strength", so Gigabyte says in its marketing material. For a practical use-case, it may provide better signal integrity. However, until M.2 Gen 5 drives are readily available, it will be Impossible to know if these special sockets are any better than their plastic counterparts. Lastly, it should be noted that this top socket also supports the latest M.2 25110 form factor.

The Gigabyte X670E AORUS Master includes a post code debugger and startup LEDS for easier troubleshooting. Considering that the AM5 socket is new to everyone, it is always good to get a readout of what stage the boot process is on, or what it may be stuck on. First boot after clearing the CMOS or installing new memory will take anywhere from two to six minutes, depending on the configuration. The newest BIOS does have an option for "fast-boot" that disables training the memory for every boot. Though enabling may cause memory compatibility problems. Proceed with caution.

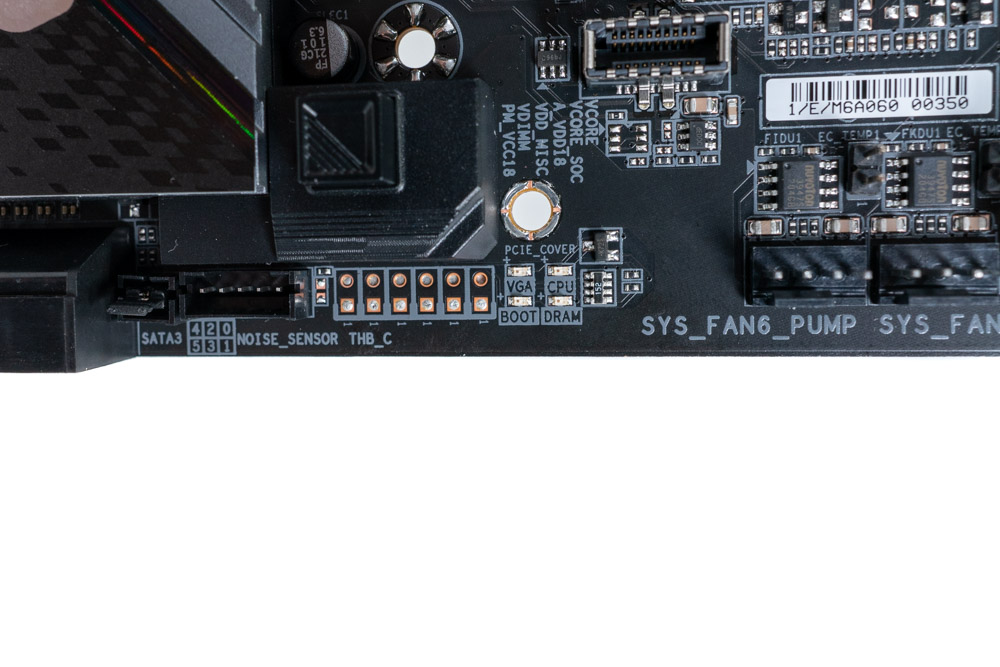
Gigabyte often includes these voltage read points on the Master series. These can be helpful for a quick diagnostics of the voltage for Vcore, SoC and a few others. It is not necessary to have these available when overclocking, but it is appreciated when software is reported something wildly different.
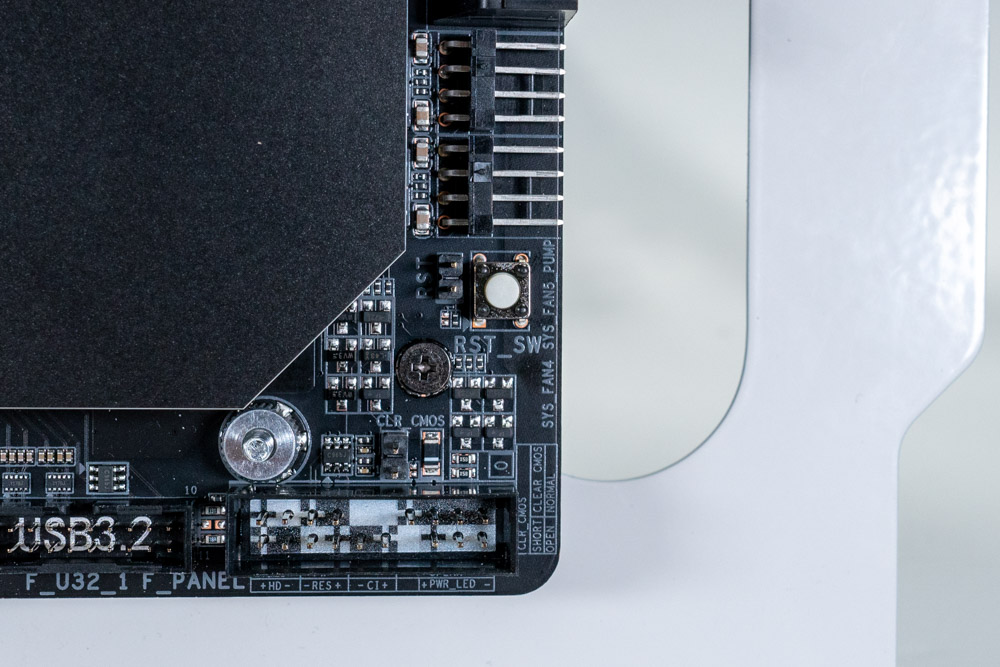
In the bottom right corner is a multi-key button next to the Front Panel Header. This is labeled RST_SW, which stands for Reset Switch. While not an actual switch, this button can be configured in the BIOS to turn off the LEDs, Direct to the BIOS or boot to Safe Mode. By default it is a Reset button, as marked on the motherboard.
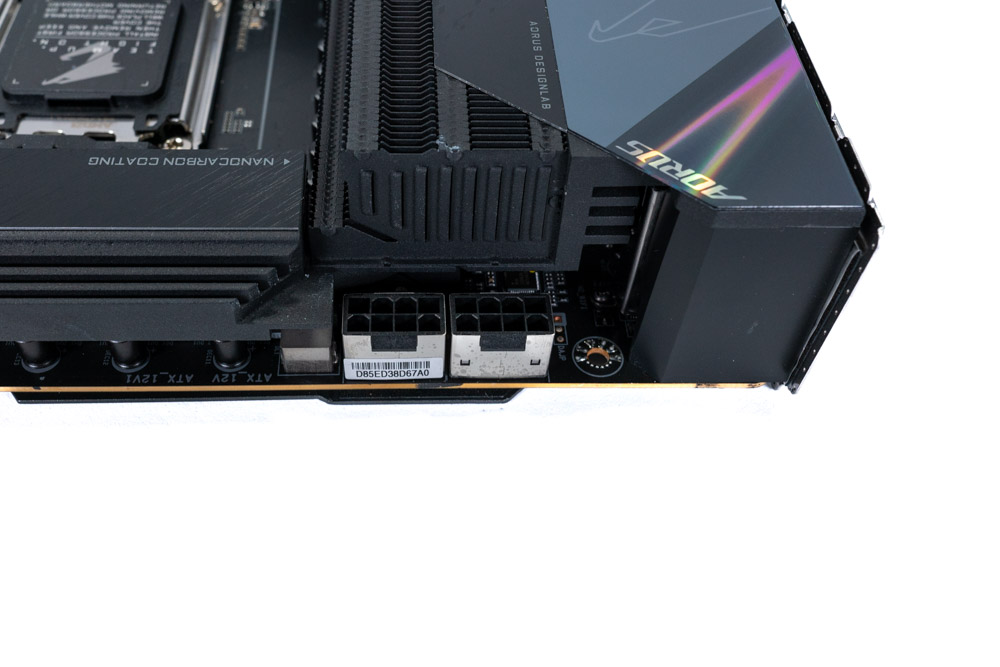
The Gigabyte X670E AORUS Master uses a two 8-Pin EPS connector for higher power management.

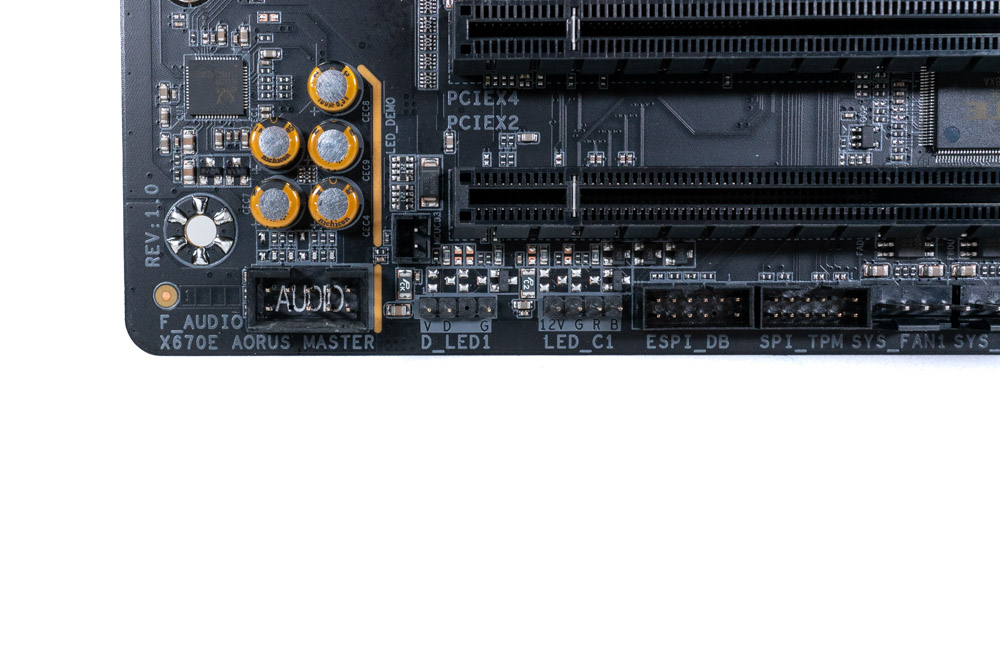
In the top right corner are three RGB headers, along with two in the bottom left corner. The three across the top are a interesting combo, as the one on the left says CPU_LED, which supplies 12 V (4-pins). Next to that is another 12 V (4-pins), while directly below is the ARGB 5 V (3-pins) header. The CPU RGB header doesn't have to be strictly for the CPU cooler, but it will be labeled this in the Gigabyte software. For convenience, on the bottom near the audio section is two more RGB headers. The one on the right is 5 V, with 12 V on the left.
| Connector | RGB LED Header | ARGB LED Header |
|---|---|---|
| Maximum Current | 12V / 2 A | 5V / 5 A |
| Maximum Power | 24W | 25W |

One of the major differences you'll see between the X670 and B650 chipset is the amount of internal USB header and external high-speed connections. This is because the chipset itself has less PCIe lanes available to be allocated towards SATA ports, USB and PCIe slots. With the X670E AORUS Master, we get a extra USB 3.2 Gen 1 (5 Gbps) compared to the B650E AORUS Master internally and more USB ports for the Rear IO panel.

Each X670 PCH can supply up four 6 Gb/s SATA ports natively. Here we can see Gigabyte has used a 4 + 2 Configuration. These additional two 6 Gb/s SATA ports share bandwidth with the bottom PCIe Gen 3 x2 slot and will become disabled if the PCIe slot is used or vice versa.

Gigabyte has used the Realtek ALC1220-VB2 Codec for it's on-board audio solution.

On the rear IO we can see a number of USB ports in different colors, making it handy to identify quickly which ports are best for high bandwidth devices. While there's plenty of USB ports, Gigabyte seems to have taken a step back for its onboard audio solution. The rear panel only includes a Mic-In and a Line-out (Stereo). This will provide stereo audio, though, if you want 5.1 or 7.1, you will be required to connect additional cables to the front panel on the computer case. While 7.1 is supported, is it quite an impractical setup to run cables to both sides.
Since all Ryzen 7000 (X) CPUs (currently) support onboard graphics, HDMI 2.1 and DisplayPort 1.4 has been included. The USB-C port (seen in white) can also output a DisplayPort signal from the onboard graphics. Continuing along, there is a Q-Flash Plus button which allows the motherboard BIOS to be flashed without a processor present. It just needs power to the motherboard. Finally, there is Wi-Fi 6E and 2.5G LAN for networking.
- 1x Q-Flash Plus button
- 1x DisplayPort / USB-C
- 1x HDMI 2.1 port
- 2x SMA antenna connectors (2T2R)
- 1x USB Type-C USB 3.2 Gen 2 (20 Gbps)
- 4x USB 3.2 Gen 2 Type-A ports (RED)
- 4x USB 3.2 Gen 1 ports (BLUE)
- 2x USB 2.0/1.1 ports (Black)
- 1x RJ-45 port
- 1x optical S/PDIF Out connector
- 2x audio jacks
Apr 26th, 2024 20:33 EDT
change timezone
Latest GPU Drivers
New Forum Posts
- looking to build a new system and im considering asrock brand but i have some doubts/concerns. (14)
- Strange system crashes out of nowhere help (9)
- What phone you use as your daily driver? And, a discussion of them. (1494)
- Secure boot already open help (11)
- TechPowerUp Screenshot Thread (MASSIVE 56K WARNING) (4213)
- The Official Linux/Unix Desktop Screenshots Megathread (705)
- Alphacool CORE 1 CPU block - bulging with danger of splitting? (32)
- Your PC ATM (34508)
- Black screens leading to restarts (Event ID 18) on AMD platform since changing graphics card (42)
- Best SSD for system drive (104)
Popular Reviews
- Ugreen NASync DXP4800 Plus Review
- MOONDROP x Crinacle DUSK In-Ear Monitors Review - The Last 5%
- HYTE THICC Q60 240 mm AIO Review
- CeBIT 2008: Cyber E Sport Review
- CeBIT 2008: Akasa Review
- Thermalright Phantom Spirit 120 EVO Review
- Cougar GX-F Series 750W Review
- Corsair iCUE Link XC7 RGB Elite CPU Water Block Review
- NVIDIA GeForce RTX 3080 PCI-Express Scaling
- Upcoming Hardware Launches 2023 (Updated Feb 2024)
Controversial News Posts
- Windows 11 Now Officially Adware as Microsoft Embeds Ads in the Start Menu (135)
- Sony PlayStation 5 Pro Specifications Confirmed, Console Arrives Before Holidays (117)
- NVIDIA Points Intel Raptor Lake CPU Users to Get Help from Intel Amid System Instability Issues (106)
- AMD "Strix Halo" Zen 5 Mobile Processor Pictured: Chiplet-based, Uses 256-bit LPDDR5X (103)
- US Government Wants Nuclear Plants to Offload AI Data Center Expansion (98)
- AMD's RDNA 4 GPUs Could Stick with 18 Gbps GDDR6 Memory (95)
- Developers of Outpost Infinity Siege Recommend Underclocking i9-13900K and i9-14900K for Stability on Machines with RTX 4090 (85)
- Windows 10 Security Updates to Cost $61 After 2025, $427 by 2028 (84)